
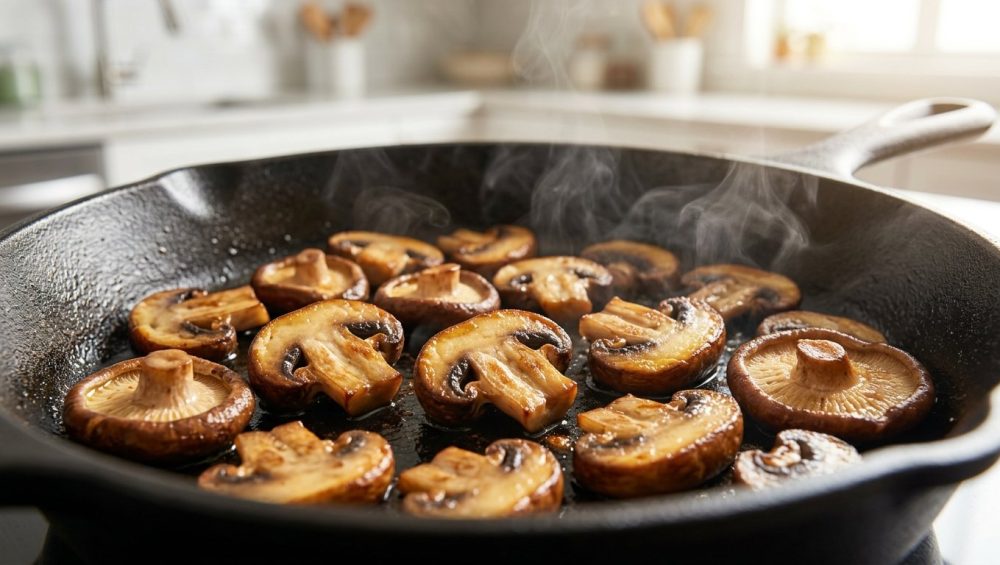
Listen up, weekend culinary warriors. We need to have a serious, intervention-style chat about what you are currently doing to your mushrooms.
We have all experienced the exact same kitchen tragedy. You buy a beautiful, earthy, ridiculously expensive pint of cremini, shiitake, or wild chanterelle mushrooms. You meticulously slice them up. You heat a generous glug of expensive extra-virgin olive oil in your favorite skillet. You toss the mushrooms in, expecting a glorious, restaurant-quality sizzle.
Instead, the oil instantly vanishes. The pan goes bone dry. The mushrooms start squeaking against the metal like tiny, rubbery dog toys. Panicking, you pour in more oil. The mushrooms swallow that, too. Then, just when you think they are finally going to sear, they release a biblical flood of murky, gray liquid. Now, instead of sautéing, you are sadly boiling your expensive fungi in a greasy, watery soup. When you finally serve them, they are rubbery, oil-logged, and aggressively mediocre.
I have zero patience for pretentious chef-speak, but I do have a lot of patience for food science that actually makes our lives easier. If you want to achieve deeply browned, meaty, intensely savory mushrooms on a chaotic Tuesday night without losing your mind, you have to unlearn everything culinary school dropouts have been preaching for decades.
The secret to perfectly caramelized, non-greasy mushrooms doesn’t involve more fat, a hotter pan, or a magical chef’s touch. The secret is water.
Yes, water.
Welcome to the definitive masterclass on the “water start” method. Grab a glass of wine, pull up a cutting board, and let’s fundamentally change the way you cook.
The Great Culinary School Lie: Why Your Traditional Sauté is Failing
Before we get into the brilliant mechanics of the water start, we have to address the culinary gaslighting you’ve endured for years. For decades, old-school chefs and outdated cookbooks pounded two strict rules into the heads of home cooks:
- Never, ever wash your mushrooms with water. You must lovingly wipe each individual cap with a damp paper towel or a specialized mushroom brush.
- Cook them in a screaming hot, dry pan, or with a massive amount of fat, and never crowd the pan.
Let’s dissect this nonsense. First of all, who on earth has the time to individually bathe forty button mushrooms with a tiny brush on a Wednesday evening? Time is money, and my weekday dinner schedule does not accommodate a spa day for fungi. Second, the idea that mushrooms will “soak up too much water” if you rinse them under the tap is biologically hilarious. Mushrooms are already 80 to 90 percent water. A quick rinse in a colander is going to add, at most, a minuscule fraction of surface moisture that will evaporate in seconds once it hits the heat.
But the real tragedy is the traditional cooking method. To understand why your mushrooms act like greasy little sponges, you have to understand their physical anatomy.
A mushroom is not a vegetable. It does not behave like a potato, a carrot, or a floret of broccoli. Biologically, a mushroom is a network of microscopic air pockets surrounded by rigid cell walls. Structurally, it is quite literally a sponge.
When you place a dry sponge into a pan of hot fat, what does it do? It absorbs it instantly. The air pockets inside the raw mushroom greedily suck up every drop of butter or oil you put in the pan. This is the exact moment your dish is ruined. Once the oil is trapped inside those air pockets, it is incredibly difficult to render it back out. If you want to fix this textural nightmare, you have to stop adding the oil first. You are just feeding the sponge.
Meet Chitin: The Indestructible Superhero of the Fungi World
To truly master the kitchen, you don’t need a culinary degree, but you do need to understand the chemistry of what is happening in your skillet. The reason mushrooms behave so strangely under heat comes down to a structural polymer called chitin (pronounced KAI-tin).
Chitin is the primary building block of fungal cell walls. If that word sounds vaguely familiar, it’s because chitin is the exact same tough, fibrous carbohydrate polymer that makes up the exoskeletons of crabs, lobsters, shrimp, and insects. It is nature’s armor, and it is the reason mushrooms are the most forgiving ingredient in your kitchen.
When you cook standard vegetables, you are breaking down pectin and hemicellulose. If you expose a zucchini to high heat for too long, those cellular glues dissolve completely, and the vegetable turns into a sad, watery mush. When you cook meat, you are applying heat to protein fibers. If you leave a steak in a pan for too long, those proteins aggressively contract, squeeze out all their moisture, and turn into dry, unchewable shoe leather.
Fungal chitin plays by entirely different rules. Chitin is virtually indestructible in a standard home kitchen. In fact, scientific studies examining the thermal degradation of chitin have proven that fungal cell walls remain completely intact and undegraded at temperatures well over 200°C (392°F), with the polymer only beginning to break down at a staggering 380°C (716°F).
What does this mean for your weeknight dinner? It means you literally cannot overcook a mushroom.
No matter how long you simmer, sear, or sauté a mushroom, it will never turn to mush, and it will never turn tough. As it cooks, it simply expels its internal water, shrinks in size, and becomes denser, meatier, and more intensely concentrated in flavor. This biological superpower is the entire foundation of the water start method.
The “Water Start” Masterclass: The Counter-Intuitive Science
So, how do we defeat the sponge effect? We collapse the air pockets before we introduce the fat. And we do that by intentionally simmering our mushrooms in water.
I know it sounds like culinary heresy. Boiling a food to help it sear better? But the science, heavily popularized by the brilliant minds at America’s Test Kitchen, is absolutely foolproof. This is exactly why you should start them in water every single time.
Here is the step-by-step breakdown of the thermal dynamics happening in your pan:
Phase 1: The Steam Collapse
When you place raw mushrooms in a skillet with a splash of water and turn on the heat, the water rapidly comes to a boil. This generates a massive amount of steam. The steam easily permeates the porous, sponge-like structure of the fungi. The heat causes the chitinous cell walls to soften slightly and contract, while the internal air pockets completely collapse.
Phase 2: The Great Weep
As the air pockets collapse, the mushroom is forced to release its own internal moisture. You’ve likely wondered why your sautéed mushrooms turn watery right when you are trying to sear them—this is that exact biological response! But because we haven’t added any oil yet, we aren’t creating a disastrous, greasy emulsion. We are simply letting the mushrooms stew in their own savory juices.
Phase 3: The Evaporation
As the pan continues to simmer, the water (both the water you added and the water the mushrooms released) begins to evaporate. The mushrooms shrink down to about half their original size, becoming incredibly dense and meaty.
Phase 4: The Maillard Reaction
Once every last drop of water has boiled away, the pan will go dry. The sound will change from a wet, rolling bubble to a sharp, dry sizzle. The cellular structure of the mushroom is now fully condensed and sealed off. The sponge has been destroyed.
NOW, you add your fat.
Because the air pockets are gone, the mushroom physically cannot absorb the butter or oil. The fat stays exactly where you want it: on the exterior surface of the mushroom and on the hot metal of the pan. This allows the heat to skyrocket, triggering the Maillard reaction—the complex chemical reaction between amino acids and reducing sugars that creates that deep, golden-brown, caramelized crust we all crave.
The result? Mushrooms that are perfectly browned on the outside, juicy and meaty on the inside, and completely free of that heavy, oil-logged greasiness.
Step-by-Step: Executing the Perfect Wet Sauté
Now that you understand the molecular biology, let’s talk about how to execute this flawlessly in your own kitchen. I am a firm believer that professional-level results are achievable by anyone, provided you use the right techniques and ditch the bad habits.
Step 1: Prep Without Pretension
Take your mushrooms and dump them in a colander. Run them under cold water and toss them around to knock off the dirt. Do not waste your life with a damp paper towel. Once they are clean, shake off the excess water. Slice them uniformly. When transferring massive piles of sliced veggies from your cutting board to the stove, you absolutely need a bench scraper. Stop using the blade of your expensive chef’s knife to scrape the board; you are rolling the edge and ruining your tools.
Step 2: Choose Your Weapon (The Pan Rant)
We need to have a very serious conversation about your cookware. You cannot achieve a beautiful, hard sear in a cheap, scratched, warped non-stick skillet. I am fiercely passionate about banishing toxic kitchen gear from the home. Teflon and other mystery-metal non-stick coatings are not designed for the high-heat searing required at the end of this mushroom method.
You need a heavy-bottomed stainless steel skillet, a well-seasoned carbon steel pan, or a cast-iron skillet. These materials hold thermal mass and provide the conductive heat necessary for the Maillard reaction. If you are terrified of your food sticking to stainless steel, you just need to learn proper temperature control. You can easily test if your pan is ready by utilizing the water drop test (where a drop of water acts like a bead of mercury and glides across the pan). And please, for the love of all things culinary, remember that aerosol cooking spray is the enemy. The propellants in those cans polymerize onto your pans, creating a sticky, permanent residue that ruins your cookware. Use real butter, real olive oil, or real animal fats.
Step 3: The Initial Simmer
Place your sliced mushrooms into your cold or slightly warm skillet. Add water. The golden ratio is roughly 1/4 cup of water for every 8 to 16 ounces of mushrooms. You don’t need to submerge them; you just need enough water to generate a steady cloud of steam. Turn the heat up to medium-high.
Step 4: The Waiting Game
Let the water come to a boil. Stir the mushrooms occasionally. You will watch them dramatically shrink and darken as they release their own moisture into the pan. This process usually takes about 4 to 6 minutes, depending on the heat of your stove and the water content of the specific mushrooms you bought.
Step 5: The Sear
Listen to the pan. When the water is completely evaporated, the sound will change to a sharp sizzle. The pan will look dry. Now, push the mushrooms to the side and drop in your fat—a generous knob of butter, a glug of olive oil, or a spoonful of saved bacon grease. Toss the condensed mushrooms in the fat. Spread them out into a single layer and leave them alone. Let them sear undisturbed for 2 to 3 minutes until a deep, mahogany crust forms on the bottom. Flip and repeat.
Troubleshooting Your Funky Fungi
Even with a foolproof method, kitchen anxiety can creep in. Let’s address the most common panic-inducing scenarios home cooks face when dealing with mushrooms.
The Crowding Conundrum
Every recipe ever written tells you “never crowd the pan.” If you crowd a pan with raw meat or raw veggies, the temperature drops, the moisture gets trapped, and your food steams instead of searing.
But here is the beautiful irony of the water start method: because we want the mushrooms to steam initially, you can absolutely crowd the pan! In fact, you can pile those raw mushrooms high. Because they are going to shrink by 50 percent during the boiling phase, a crowded pan of raw mushrooms will naturally reduce down to a perfectly spaced single layer by the time the water evaporates and the searing phase begins. This is a massive time-saver for weekday batch cooking.
The Salting Debate
When should you salt your mushrooms? If you salt them at the very beginning while they are raw, the salt will draw out their internal moisture faster through osmosis. This speeds up the boiling phase. However, because the mushrooms shrink so drastically, it is very easy to over-salt them if you season them while they are raw and massive.
My advice? Add a tiny pinch of salt during the water phase to help break them down, but save the heavy seasoning for the very end, right after they have seared. This allows you to taste the final, concentrated product and season it accurately.
The Aromatic Trap
We all love garlic, shallots, and fresh herbs. But timing is everything. If you add minced garlic to the pan at the beginning of the water start, it will boil, turn mushy, and then violently burn the second the water evaporates and the oil hits the pan. You must avoid the trap of adding it first.
Instead, wait until the mushrooms are beautifully browned and seared. In the last 60 seconds of cooking, lower the heat slightly, toss in your minced garlic and shallots, and let them gently cook in the residual fat.
The Weekday Hustle vs. The Weekend Elevation
One of my core philosophies as a home cook is that your culinary approach must adapt to your schedule. Time is money. On a chaotic Wednesday night, your priority is getting a delicious, healthy dinner on the table without having a mental breakdown. On a lazy Saturday afternoon, your priority is craftsmanship and sensory pleasure. The water start method adapts perfectly to both.
The Weekday Shortcut
When you are exhausted after work, efficiency is key. Buy pre-sliced mushrooms if you have to (I won’t judge). Throw them in a skillet with a splash of water and turn the heat to high. While the mushrooms are boiling down, you have exactly 5 minutes of hands-off time to chop a quick salad, whisk a vinaigrette, or pour a very necessary glass of wine. Once the pan is dry, toss in a splash of olive oil, let them sear for two minutes, and hit them with a splash of soy sauce or tamari. The umami compounds in the soy sauce will amplify the natural glutamates in the mushrooms, creating a deeply savory side dish in under 10 minutes.
The Weekend Masterpiece
When the weekend rolls around, we elevate. Skip the standard white button mushrooms and hunt down some wild varieties at your local farmer’s market—chanterelles, maitake (hen of the woods), or oyster mushrooms.
Execute the water start method precisely. Once the water has evaporated and you add your fat, throw in some dry spices. By adding spices directly into the hot fat before any other liquids, you are utilizing the magic of blooming in oil, which awakens and extracts the fat-soluble flavor compounds in the spices.
Let the wild mushrooms develop a heavy, dark crust. Next, toss in some finely minced shallots and a sprig of fresh thyme. Once the aromatics are fragrant, deglaze the hot pan with a generous splash of dry white wine or dry sherry. The alcohol will instantly vaporize, lifting all the caramelized, deeply savory fond (the browned bits) off the bottom of the skillet.
Let the wine reduce until the pan is almost dry again. Finally, pull the skillet completely off the heat. Drop in a tablespoon of fridge-cold butter and swirl the pan continuously. The residual heat will melt the butter slowly, emulsifying it with the reduced wine and mushroom juices to create a thick, glossy, luxurious pan sauce. This technique relies entirely on the power of cold butter—if the butter is too warm or the pan is too hot, the sauce will break and turn into a greasy slick.
Finish with a squeeze of fresh lemon juice. The acid will cut through the earthy richness of the fungi and the heavy fat of the butter, balancing the dish perfectly. Serve these over a perfectly cooked steak, spoon them onto a slice of thick, toasted sourdough bread smeared with ricotta, or fold them into a creamy parmesan risotto.
The Science of Flavor: Why This Works So Well
Let’s take a quick victory lap and appreciate exactly why this counter-intuitive method produces such vastly superior results.
When you cook mushrooms in oil from the start, the oil acts as an insulator inside the air pockets. The mushroom cooks unevenly, and the temperature struggles to rise above the boiling point of water (212°F / 100°C) because the mushroom is constantly fighting to expel its moisture through a barrier of fat. The Maillard reaction—the holy grail of flavor—doesn’t even begin to occur until surface temperatures reach around 285°F to 330°F (140°C to 165°C).
By using the water start, we are isolating the cooking phases. We use the water phase to do the heavy lifting of structural breakdown and moisture expulsion. We get all the watery mess out of the way early. By the time we introduce the fat, the mushroom is a condensed, dry, solid mass of chitin and flavor. The fat coats the exterior perfectly, the temperature immediately skyrockets past 300°F, and the Maillard reaction occurs rapidly and evenly.
You use less oil. You get a better sear. You save time because you aren’t standing over the stove waiting for an oil-logged sponge to finally give up its moisture. It is a win on every single culinary front.
Final Thoughts from the Sassy Sous-Chef
Cooking is not magic, and it is not an exclusive club reserved for people who spent $40,000 at Le Cordon Bleu. Cooking is just applied physics and chemistry, seasoned with a little bit of intuition and a lot of butter.
When you understand the ingredients you are working with—when you realize that a mushroom is just a chitinous sponge waiting to be collapsed—you take the guesswork out of your weeknight dinners. You stop fighting your food and start working with it.
So, the next time you bring home a beautiful punnet of mushrooms, do not reach for the olive oil first. Turn on the tap. Add a splash of water. Let them boil, let them weep, and let them condense. Trust the process, trust the science, and watch as you effortlessly produce the most incredible, deeply browned, restaurant-quality mushrooms of your life.
Now get out of here, go clean out your cookware cabinet, throw away that peeling non-stick pan, and go cook something amazing. You’ve got this.






