
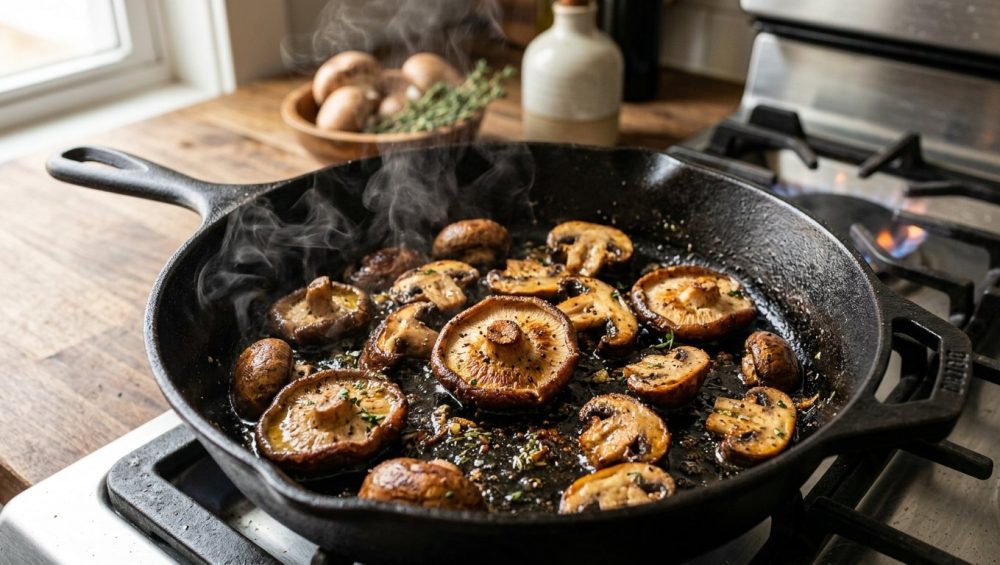
We need to talk about the sad, gray, rubbery situation happening in your skillet. You know exactly what I’m talking about. You buy a beautiful, earthy pint of cremini mushrooms at the farmer’s market with grand visions of a rustic, steakhouse-quality side dish. You slice them up, toss them into a hot pan with a glug of olive oil, and then… tragedy strikes. Within minutes, the pan temperature plummets, a murky puddle of gray liquid seeps out, and your mushrooms begin to boil in their own sad juices.
You stir them frantically, hoping the water will evaporate, but by the time the pan is finally dry, you’re left with shriveled, squeaky erasers that taste like a damp forest floor.
I see this all the time with weekend culinary hobbyists. You have the passion, you have the appetite, but you are treating mushrooms like vegetables. That is your first, and most fatal, mistake. Mushrooms are fungi. They have an entirely different cellular structure, a completely different moisture profile, and they demand a radically different cooking technique. If you want to transform rubbery fungi into deeply caramelized, savory, meaty bites of perfection, you need to understand the food science behind what is actually happening in your skillet.
Grab your coffee (or your wine, I’m not judging), because we are about to dive deep into the thermodynamics, the biology, and the counterintuitive kitchen hacks that will change your weeknight dinners forever. I have zero patience for pretentious chef-speak, so we are going to break this down with brutal honesty and actionable science.
The Anatomy of a Kitchen Disaster: Why Your Mushrooms Turn into Gray Sponges
To understand why your sautéing technique is failing, you have to understand the biological makeup of the ingredient. A mushroom is not a carrot. It is not an onion. It is a completely unique organism with a cellular matrix that is actively working against your attempts to brown it.
The 92 Percent Problem: Extreme Water Content
Here is the cold, hard, scientific truth: raw mushrooms are composed of roughly 92 percent water by weight. Let that sink in. When you toss a pound of sliced mushrooms into a skillet, you are essentially tossing in nearly a pint of water disguised as solid food.
When that massive volume of water hits the heat of your pan, the cellular walls begin to contract and squeeze that moisture out. The water floods the pan. Because water boils at 212°F (100°C), the temperature of your cooking surface instantly drops from a searing 400°F (204°C) down to the boiling point of water.
Why does this matter? Because the Maillard reaction—the complex chemical reaction between amino acids and reducing sugars that gives browned food its distinct, savory, caramelized flavor—does not kick into high gear until you reach temperatures of around 285°F to 330°F (140°C to 165°C). As long as there is liquid water in that pan, the temperature cannot exceed 212°F. Your mushrooms are physically incapable of browning. They are trapped in a purgatory of steam.
The Chitin Factor: Why Fungi Aren’t Vegetables
If you boiled a carrot or a potato for twenty minutes, it would turn into a mushy puree. So why do mushrooms stay intact, merely turning into chewy, rubbery little tires? The answer lies in a structural polymer called chitin.
Plant cell walls are made of cellulose, which breaks down and turns to mush when exposed to prolonged heat. Fungi, on the other hand, have cell walls made of chitin. This is the exact same tough, nitrogen-containing polysaccharide that makes up the exoskeletons of insects, crabs, and lobsters.
Chitin is extraordinarily heat-stable. In fact, scientific studies have shown that the chitinous cell walls of fungal cells can withstand hydrothermal treatments and temperatures up to a staggering 716°F (380°C) before they begin to thermally degrade. This means that no matter how long you cook a mushroom on your stovetop, it is never going to break down into mush. It will simply expel its water and become denser and chewier. This heat resistance is a superpower if you know how to leverage it, but it’s a curse if you are stuck boiling them in their own juices.
The Flawed Traditional Method (And Why You Keep Failing)
Let’s dissect the traditional—and entirely wrong—way most home cooks attempt to sauté mushrooms, so you can understand exactly why it results in a culinary disaster.
The Oil Sponge Effect
The standard playbook usually goes like this: heat a pan, add a generous glug of expensive olive oil or a knob of butter, and toss in the raw mushrooms.
Here is what happens on a microscopic level. A raw mushroom is full of tiny air pockets. Its structure is literally that of a highly porous sponge. The second those dry, porous air pockets make contact with the hot oil, they absorb it instantly. Within seconds, the pan is bone dry, and the mushrooms have greedily swallowed all your cooking fat.
Panicking, you might add more oil. Don’t do it. Because a few minutes later, the heat finally penetrates the chitin walls, and the mushrooms begin to release their 92 percent water payload. Now, that water floods the pan, mixing with the oil you just added, creating a greasy, boiling soup. The mushrooms shrink, the water slowly evaporates, and eventually, the oil that was trapped inside the mushrooms seeps back out. You are left with a greasy, un-browned, rubbery mess.
The Crowding Catastrophe and the Vapor Barrier
To make matters worse, most home cooks overcrowd the pan. When you pile a mountain of sliced mushrooms into a standard 10-inch skillet, you are creating a massive vapor barrier. The moisture escaping from the mushrooms at the bottom of the pan turns into steam, which then rises and steams the mushrooms at the top of the pile. The sheer volume of water being released overwhelms the thermal mass of the pan. The burner simply cannot output enough BTUs to evaporate the water fast enough, prolonging the boiling phase and entirely ruining any chance of achieving a perfect sear.
The Science of the “Water-Sauté” Method (Yes, Add Water to Fix Water)
If you want to stop fighting the biology of the mushroom and start working with it, you need to embrace a counterintuitive technique popularized by food scientists and test kitchens.
The secret to perfectly caramelized, deeply savory mushrooms is to completely eliminate the oil from the beginning of the cooking process. Instead, you really need to boil them first. Yes, you read that right. You are going to add water to fix the water problem.
Collapsing the Cellular Structure
By adding a small amount of water (about a quarter cup for a pound of mushrooms) to a hot skillet containing your raw mushrooms, you create an immediate, aggressive steaming and boiling environment.
This rapid heat transfer does something miraculous: it forces the porous, sponge-like cellular structure of the mushrooms to collapse almost instantly. As the air pockets collapse, the mushrooms rapidly release their own internal water into the pan. More importantly, because those air pockets are now crushed and structurally compromised, the mushroom loses its ability to act like a sponge.
The Evaporation Phase
As the mushrooms boil in this shallow pool of water, they are cooking through. Remember that indestructible chitin? It ensures the mushrooms stay perfectly meaty and intact during this boiling phase; they will not turn to mush.
You let the water rapidly boil away. Because you forced all the internal moisture out of the mushrooms right at the beginning, once the pan boils dry, the mushrooms are truly dry on the outside. There is no more hidden water waiting to leach out and ruin your sear.
Entering the Searing Zone: The Maillard Reaction
Once the water has completely evaporated and the pan is dry, that is the exact moment you introduce your cooking fat. Because the mushrooms’ sponge-like structure has already collapsed, they will not absorb the oil. The fat stays in the pan, coating the exterior of the mushrooms and conducting the high heat directly to their surface.
Without any water left to hold the temperature down at 212°F, the surface of the pan quickly rockets up past 300°F. The Maillard reaction triggers immediately. The amino acids and sugars on the surface of the mushrooms undergo a cascade of chemical reactions, creating hundreds of new flavor compounds and a gorgeous, deeply browned, caramelized crust.
The Sassy Sous-Chef’s Foolproof Masterclass: Sautéing Mushrooms Step-by-Step
Alright, enough theory. Let’s get into the kitchen and actually execute this. This is my exact, no-nonsense, time-saving weekend method for flawless mushrooms.
Phase 1: The Prep (To Wash or Not to Wash?)
Let’s kill a pervasive culinary myth right now: the idea that you should never wash mushrooms and only gently brush them with a damp towel. Who has the time for that on a Tuesday night? Not me.
Food science legends debunked this decades ago. When weighed, soaked in water for five minutes, and weighed again, mushrooms absorbed a completely negligible amount of water—barely a fraction of an ounce. They are already 92 percent water; a quick rinse under the faucet is not going to turn them into water balloons.
Toss your mushrooms in a colander, rinse the dirt off under cold running water, and give them a vigorous shake. That’s it.
Next, slice them uniformly. I recommend quartering standard button or cremini mushrooms, or cutting them into thick, meaty half-inch slices. Do not slice them paper-thin, or they will shrivel into nothingness. And while we are talking about prep, please stop using those bamboo cutting boards that are notoriously hard on blade edges. If you constantly wonder why your kitchen knives get dull so rapidly, that rock-hard bamboo surface is the prime suspect. Use a quality end-grain wood or a soft rubber board.
Phase 2: The Boil (The Counterintuitive Secret)
Place your favorite heavy-bottomed skillet on the stove over medium-high heat. Add your sliced mushrooms to the dry pan. Pour in about 1/4 cup of water for every 8 to 16 ounces of mushrooms. Do not add oil. Do not add butter. Do not add salt yet (we will get to that).
Let the water come to a rapid, bubbling boil. You will hear it hissing and steaming. You can even cover the pan with a lid for the first two minutes to trap the steam and accelerate the collapsing of the mushroom cells.
Remove the lid and let the water boil away. You will notice the mushrooms shrinking significantly as they release their own internal moisture into the pool. This is exactly what you want. Stir occasionally to ensure they are cooking evenly.
Phase 3: The Sear (Where the Magic Happens)
Listen closely to the pan. The sound will change from a wet, bubbling boil to a sharp, aggressive sizzle. That is the sound of the water disappearing and the pan temperature spiking.
The moment the pan is entirely dry, add your fat. I highly recommend a combination of a high-smoke-point oil (like avocado or grapeseed) and a knob of unsalted butter for flavor. Toss the mushrooms so they are coated in the fat.
Now, step back. Stop touching them. Spread them out into a single layer and let them sear. If you constantly stir them, they will never develop a crust. Let them sit undisturbed for 2 to 3 minutes until the bottoms are deeply browned and crusty. Then, give them a toss and sear the other side.
Phase 4: The Flavor Bomb (Deglazing and Seasoning)
Once the mushrooms have achieved a gorgeous, mahogany-brown sear, it is time to build the flavor profile. Lower the heat to medium-low.
Now is the time to add your aromatics. Toss in a minced shallot and a clove of minced garlic. If you have ever been frustrated by why your garlic always burns and turns acrid, it is because you are adding it at the beginning of the cooking process when the pan is screaming hot. Garlic contains delicate sugars that scorch in seconds. Adding it at the very end, off the intense heat, allows it to gently soften and release its aromatic oils without turning bitter.
If you are adding dried herbs or ground spices, add them now. You can exponentially increase the depth of their flavor by blooming them in oil for thirty seconds before adding any liquid.
Finally, deglaze the pan. Pour in a splash of dry white wine, dry sherry, or even just a splash of chicken broth. Scrape up all those beautiful, caramelized brown bits (the fond) stuck to the bottom of the pan. Finish with a heavy pinch of coarse kosher salt, a crack of fresh black pepper, and a sprinkle of fresh thyme or parsley.
A Brutally Honest Word on Cookware (Because Gear Matters)
I cannot teach a masterclass on searing without addressing the elephant in the kitchen: your cookware. The pan you use dictates the thermal dynamics of your sear.
Why Your Toxic Non-Stick is Ruining Your Sear
If you are trying to execute a high-heat sear in a flimsy, scratched-up Teflon pan you bought for fifteen dollars five years ago, you are setting yourself up for failure. First of all, you should never heat traditional PTFE non-stick pans over high heat empty or with minimal liquid, as the coating can degrade and release toxic fumes. Second, aluminum non-stick pans lack the thermal mass required to hold a steady, high temperature when a pound of cold, wet mushrooms hits the surface.
Do yourself a favor and throw that peeling hazard into the trash. It is time to graduate and ditch the toxic kitchen gear that is holding your cooking back. Furthermore, if you are relying on aerosol sprays to grease your pans, you are ruining your nonstick pans anyway, as the emulsifiers in the spray bake onto the surface and create a sticky, impossible-to-remove residue.
The Champions of the Maillard Reaction: Carbon Steel and Cast Iron
For the ultimate sear, you need a pan with massive thermal retention. Cast iron and carbon steel are the undisputed champions of the Maillard reaction. When you add the cold mushrooms and the water, the temperature of a heavy cast iron skillet won’t drop nearly as drastically as a thin aluminum pan. It powers through the boiling phase and rockets back up to searing temperatures with ease.
The Stainless Steel Learning Curve
A high-quality, multi-clad stainless steel pan is also a fantastic choice, particularly because the bright silver surface allows you to easily monitor the browning of the fond (the caramelized bits on the bottom of the pan) so it doesn’t burn.
However, stainless steel requires proper temperature management. To prevent delicate proteins from fusing to the metal, mastering the water drop test (the Leidenfrost effect) is essential. Fortunately, because our mushroom method starts with a water-boil, sticking is rarely an issue. By the time the water evaporates and the fat is added, the pan is perfectly primed for a stick-free sear.
Troubleshooting the Final Hurdles
Even with the perfect science-backed method, things can occasionally go sideways. Here are the three most common rookie mistakes to avoid when mastering the water-sauté technique.
“I Salted Too Early!”
Salt is a hygroscopic mineral; it draws moisture out of cellular structures through osmosis. If you salt your mushrooms at the very beginning of the cooking process, you are accelerating the release of water. While we do want the water to release during the boiling phase, salting too early can negatively impact the final texture, making the mushrooms slightly tougher and excessively concentrated in sodium as they shrink. Always reserve your salt for the final stages of cooking, after the sear has been achieved.
“I Kept Stirring Them!”
I know it is tempting. You are standing at the stove, tongs in hand, and you feel the uncontrollable urge to do something. Stop it. Searing requires uninterrupted, direct contact with a highly conductive, hot metal surface. Every time you toss the pan or stir the mushrooms, you are breaking that thermal contact and cooling the surface of the food. Let them sit. Embrace the sizzle. Only stir when it is time to flip them to the other side.
“I Used Low Heat!”
The water-sauté method requires aggressive heat. If your burner is set to medium-low, the water will take twenty minutes to evaporate, and your mushrooms will slowly stew into a rubbery oblivion. You need medium-high to high heat to rapidly boil off the moisture and instantly transition into the searing phase. Don’t be afraid of the heat; remember, that chitin structure can withstand temperatures far hotter than your stove can produce.
Conclusion: Your New Weekend Culinary Flex
Cooking is not magic; it is applied physics and chemistry. Once you understand that a mushroom is a 92 percent water balloon wrapped in an indestructible chitin shell, the idea of throwing it into a hot pool of oil makes absolutely no sense.
By utilizing the water-sauté method, you are taking control of the moisture. You are forcing the cells to collapse, boiling away the enemy of the Maillard reaction, and setting the stage for a flawless, steak-like sear.
The next time you are hosting a dinner party or just treating yourself to a beautiful weeknight meal, ditch the old, flawed methods. Boil your mushrooms. Sear them hard. Deglaze with something delicious. You will never look at a gray, soggy mushroom the same way again, and your guests will wonder when you secretly went to culinary school. Now get out of here, go buy some creminis, and put this masterclass to work. Happy cooking.






