
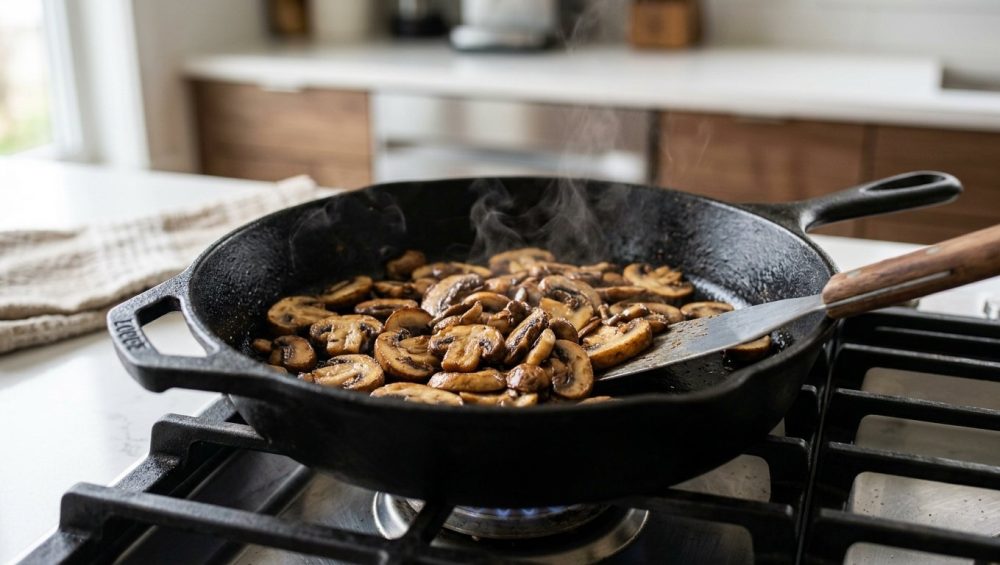
The Soggy Mushroom Epidemic
Picture this: It is a random Tuesday night. You are exhausted from a long day of pretending to care about spreadsheets, and you just want a decent, comforting meal without ordering takeout for the third time this week. You bought a beautiful, pristine punnet of cremini mushrooms. You have visions of steakhouse-quality sides dancing in your head—deeply caramelized, golden-brown, savory bites of umami perfection.
You place your skillet on the stove, turn up the heat, and generously pour in two tablespoons of your best, most expensive extra-virgin olive oil. You slice the mushrooms, toss them into the hot fat, and wait for that satisfying sizzle.
But what actually happens? The pan goes dead quiet. The mushrooms instantly drink every single drop of that oil like they’ve been wandering the Sahara Desert for a decade. You panic. The pan looks bone-dry, so you add another glug of oil. They drink that, too.
Then, the true tragedy strikes. The mushrooms begin to furiously sweat. Your once-hot skillet fills with a murky, gray, bubbling liquid. You are no longer sautéing; you are aggressively boiling your expensive produce in a sad puddle of its own juices. As the minutes tick by, they turn rubbery, gray, and completely unappetizing. You chew on one, and it feels like you are eating a greasy pencil eraser.
I know exactly how this feels. I have been there. My smoke detector and I have had many loud, expletive-filled arguments over ruined dinners. But as your resident snarky sous-chef, I am here to tell you that you can achieve absolute culinary perfection in a standard home kitchen without a fancy culinary degree. The trick to getting that mind-blowing, deeply browned crust on your fungi? You never add oil first.
Put the olive oil bottle down. We need to talk about the actual science of what is happening in your skillet.
Welcome to Mushroom Science 101: The Anatomy of a Fungal Sponge
Let’s strip away the pretentious chef-speak and look at the biological reality of the food you are cooking. Whether you are dealing with standard white button mushrooms, brown creminis, or giant portobellos, you are generally cooking the exact same species of fungus: Agaricus bisporus.
To understand why your mushrooms are ruining your weeknight dinners, you have to understand two fundamental structural facts about them. First, fresh mushrooms are essentially little water balloons. They are composed of roughly 90% water by weight. Second, their cell walls are constructed from a tough, fibrous polymer called chitin.
If the word “chitin” sounds familiar, it should. It is the exact same biological material that makes up the rigid exoskeletons of crabs, lobsters, and insects. In the fungal world, chitin forms an incredibly heat-stable meshwork (making up roughly 43% of the mycelial wall in Agaricus bisporus). This structural resilience is why you practically cannot overcook a mushroom. You can simmer them in a stew for four hours, and they will stubbornly refuse to turn to mush.
However, inside that rigid chitin framework, raw mushrooms are packed with microscopic air pockets. When you drop raw, porous mushrooms directly into hot fat, the heat causes the air inside those pockets to rapidly expand and escape. This creates a vacuum effect. The cellular structure acts like a literal, physical sponge, and it will soak up all the oil in your pan within seconds.
Once the oil is trapped deep inside the mushroom’s cellular matrix, the heat finally begins to penetrate the tough chitin walls. The mushroom starts to break down and releases its massive 90% water payload into the pan. Because oil and water vehemently refuse to mix, the oil gets violently pushed back out along with the water, creating that greasy, boiling swamp in your skillet. Your mushrooms end up oil-logged, water-logged, and incapable of browning.
The Splash of Water Hack That Changes Everything
So, how do we bypass the dreaded sponge effect? The answer is brilliantly simple: we must collapse the air pockets and break down the cellular structure before we introduce a single drop of fat.
Enter the “wet method,” a technique rigorously tested and popularized by culinary scientists like Dan Souza at America’s Test Kitchen. Yes, I am telling you that if you want a crispy, perfectly seared mushroom, you should actually boil them first.
It sounds completely counterintuitive. I thought I was losing my mind the first time I tried it. Boiling to get a sear? It defies everything traditional French cooking taught us. But the science is flawless.
Here is what happens: You place your sliced mushrooms in a skillet and add a few tablespoons of water. As the water comes to a boil, it steams and gently cooks the mushrooms. The heat causes the tough chitin structure to relax and those pesky, oil-absorbing air pockets to collapse entirely. The mushroom shrinks significantly, releasing its own internal water into the pan to join the party.
You let all of that water boil and evaporate. Once the pan is bone-dry, the mushrooms are fully cooked, their cellular structure is densely condensed, and they physically cannot absorb oil anymore. Their sponge-like properties have been completely neutralized.
Then, and only then, do you add your butter, olive oil, or bacon fat. Because the mushroom is no longer a sponge, the fat stays exactly where it belongs: on the outside of the mushroom, frying the exterior to a gorgeous, golden-brown crisp.
The Dry-Pan Searing Method for the Impatient Cook
Now, if you are a weeknight warrior who refuses to add water to a pan just to boil it away, you can achieve a very similar result using the dry-pan method. This is my personal go-to when I am rushing to get dinner on the table, because in my kitchen, time is money.
Instead of starting with a splash of water, you heat a bare skillet over medium-high heat. No oil, no butter, no water. Just hot metal.
You toss the sliced mushrooms directly into the dry, screaming-hot pan. The intense, direct heat will rapidly shock the mushrooms, forcing them to release their internal moisture almost immediately. They will screech, squeal, and hiss at you. That is perfectly fine. If they turn watery and flood the pan with their own juices, just step back and let the liquid vigorously cook off.
Once the natural moisture evaporates and the pan is completely dry again, the air pockets will have collapsed. At this exact moment, you drop in your cooking fat.
This method is slightly faster than the water hack, but it requires a bit more babysitting. You have to toss them frequently in the beginning to ensure they don’t scorch on the dry metal before they have a chance to release their protective water layer.
Chasing the Maillard Reaction: Why Temperature is Everything
To truly understand why the water must completely evaporate before browning can occur, we need to talk about the holy grail of cooking: The Maillard reaction.
Named after French chemist Louis-Camille Maillard, who first described the phenomenon in 1912, the Maillard reaction is the complex chemical romance between amino acids and reducing sugars. When subjected to high heat, these compounds rearrange themselves into hundreds of new, highly flavorful molecules (melanoidins) that give browned food its complex, savory, nutty, and irresistible flavor. It is the reason a seared steak tastes infinitely better than a boiled one, and the reason toast tastes better than raw bread.
However, the Maillard reaction is incredibly picky about its working conditions. It does not happen in a meaningful way until the surface of your food reaches a temperature range of roughly 285°F to 330°F (140°C to 165°C).
Here is the thermodynamic reality check: Water boils and evaporates at 212°F (100°C). As long as there is liquid water in your pan, the surface temperature of your food physically cannot exceed 212°F. The evaporating water continuously cools the surface of the food, acting as a thermal ceiling.
You cannot argue with physics. If your mushrooms are sitting in a puddle of their own sweat, they will never, ever brown. The water must be gone before the temperature of the pan can spike into the 300°F+ range required for caramelization. Understanding this strict temperature threshold is the secret to a perfect sear. This is why patience is your most valuable kitchen tool. You must wait for the evaporation phase to finish.
Throw Away Your Toxic Non-Stick Pans
We need to take a brief intermission to have a brutally honest conversation about your cookware. If you are trying to get a hard, aggressive sear on a batch of mushrooms using a cheap, scratched-up, lightweight non-stick pan you bought for ten dollars five years ago, I am personally coming over to stage an intervention.
I have a strict “No-Go” rule on toxic kitchen gear. I absolutely despise cheap, peeling non-stick coatings, and you should too.
Traditional non-stick pans are coated with a synthetic fluoropolymer called Polytetrafluoroethylene (PTFE), most commonly known by the brand name Teflon. PTFE is fantastic for sliding scrambled eggs around on a lazy Sunday morning over low heat. But it is an absolute chemical disaster for high-heat searing.
When PTFE is heated above 500°F (260°C)—a temperature that is incredibly easy to reach when you are preheating a dry pan, or the moment the water fully boils off and the pan temperature rapidly spikes—the chemical coating begins to rapidly degrade. As it breaks down, it off-gasses microscopic particles and toxic fumes that cause a very real, documented medical condition in humans known as “polymer fume fever” (often dubbed the “Teflon flu”), which includes symptoms like chills, fever, and coughing. These fumes are so highly toxic that they can literally kill pet birds kept in the same house.
Furthermore, you should never, ever use aerosol cooking sprays on non-stick surfaces. The soy lecithin and propellants in those cans burn at low temperatures, baking into the microscopic pores of the PTFE and permanently ruining the non-stick properties of the pan.
For high-heat searing, you need to rely on real, durable metal. You need a heavy carbon steel skillet, a well-seasoned cast iron pan, or a high-quality multi-clad stainless steel skillet. These materials can handle screaming high heat without breaking a sweat, and they possess the thermal mass required to maintain that heat when you drop a pound of cold, wet mushrooms into them.
Are you worried about your mushrooms permanently gluing themselves to a stainless steel pan? Don’t be. If you preheat a stainless steel pan properly using the water drop test—where a drop of water glides around the pan like a bead of mercury due to the Leidenfrost effect—your food will not stick.
Masterclass: The Water-First Searing Technique
Now that you understand the science, the thermodynamics, and the required hardware, let’s put it all together into a foolproof, step-by-step masterclass. We will start with the water method.
Step 1: The Preparation
First, let’s bust a massive culinary myth: Yes, you can wash your mushrooms. For decades, pretentious chefs claimed that washing mushrooms would cause them to absorb ounces of water, ruining them. Food scientists have weighed mushrooms before and after washing, and the amount of water they absorb is mathematically negligible. Give them a quick shower in a colander to remove the dirt, pat them dry with a towel, and slice them evenly.
Step 2: The Pan
Grab your heavy-bottomed stainless steel, cast iron, or carbon steel skillet. Place it over medium-high heat. Do not add any fat.
Step 3: The Cook
Toss your sliced mushrooms into the bare pan. Immediately pour in about 1/4 cup of water (this is the perfect amount for a standard 8-ounce punnet of mushrooms).
Step 4: The Evaporation
Let the water come to a rapid, rolling boil. Stir the mushrooms occasionally. As you watch, the mushrooms will shrink dramatically, darken in color, and release their own liquid into the pool. Keep the heat medium-high and let it boil.
Step 5: The Sear
Listen to the pan. The sound will change from a bubbling, boiling sound to a sharp, aggressive sizzle. This means the water is completely gone. If you are terrified that your food sticks to your stainless steel, relax—the mushrooms are fully cooked and their structure is tight. Now, push the mushrooms to the side of the pan. Drop in a tablespoon or two of high-quality butter, ghee, or avocado oil. Toss the mushrooms in the fat, spread them into a single, even layer, and leave them alone. Step away from the stove. Let the Maillard reaction do its magic for 2 to 3 minutes until a deep, golden crust forms.
Masterclass: The Dry-Pan Searing Technique
If you prefer the slightly faster, more aggressive dry-pan method, follow these steps.
Step 1: The Preparation
Clean and slice your mushrooms just as you did above. Ensure they are relatively uniform in thickness so they cook at the same rate.
Step 2: The Pan
Heat your bare skillet over medium-high heat until it is screaming hot. Again, no oil, no butter.
Step 3: The Drop
Add the mushrooms to the dry pan. Do not crowd the pan. If you pile them three inches high, they will trap steam and take an eternity to release their moisture. You want a single layer.
Step 4: The Sweat
Let them sit for about 60 seconds. They will start to squeak and hiss. Give them a toss. You will see them start to sweat and release their internal water. Keep tossing them every 30 seconds to prevent burning, and wait for that water to completely evaporate.
Step 5: The Fat
Once the pan is bone-dry and the mushrooms have shrunk by half, add your cooking fat. Toss them vigorously to coat them in the oil or butter, spread them back into a single layer, and let them sit undisturbed to develop that glorious steakhouse crust.
Elevating Your Fungi: Flavor Layering
Now that you have perfectly browned, deeply savory, non-greasy mushrooms, your technique is flawless. But a great home cook knows that technique is only half the battle; the other half is flavor layering.
Here is how you take those perfectly seared mushrooms and turn them into a dish that will make your dinner guests weep with joy.
The Rule of Salt
Never, ever salt your mushrooms at the beginning of the cooking process. Salt draws out moisture from plant and fungal cell walls via a process called osmosis. If you salt your mushrooms while they are raw, you rapidly accelerate the weeping process, flooding the pan with water prematurely and severely delaying the browning phase. Salt them at the very end, right after they have achieved their crust.
The Aromatic Trap
You might be tempted to throw minced garlic or shallots into the pan at the exact same time you add your cooking fat. Do not do this. Garlic burns at high heat in a matter of seconds, turning acrid and ruining the entire dish. You must stop adding garlic first. Instead, add your minced garlic and shallots during the final 60 seconds of cooking. This is just enough time to bloom their essential oils in the hot fat without scorching them.
The Acid Wash
Mushrooms are incredibly earthy, heavy, and rich in umami. Because of this dense flavor profile, they desperately need a hit of acid to balance them out and wake up your palate. Once your mushrooms are browned and your garlic is fragrant, deglaze the pan with a generous splash of dry white wine, a few drops of sherry vinegar, or a fresh squeeze of lemon juice. The acid will cut through the richness and help you scrape up all those beautiful, caramelized bits (the fond) stuck to the bottom of the pan.
The Fresh Finish
Take the pan off the heat entirely. The residual heat is more than enough for this final step. Toss in a handful of finely chopped fresh herbs—thyme, flat-leaf parsley, or chives work beautifully. The delicate volatile oils in fresh herbs are destroyed by prolonged heat, so adding them off the heat preserves their bright, grassy flavor. Give it one final toss, taste for seasoning, and serve immediately.
You Are Now a Mushroom Master
Cooking is not magic; it is applied physics, chemistry, and thermodynamics. Once you understand exactly how a mushroom’s cellular structure reacts to heat, water, and fat, you take back absolute control of your kitchen.
You do not need a Michelin star, a pristine white chef’s coat, or a pretentious culinary vocabulary to make mind-blowing food. You just need a little bit of patience, a steadfast refusal to accept mediocre, toxic cookware, and the willingness to break old, bad habits that you learned from outdated recipes.
So, the next time you are standing in front of your stove on a frantic weeknight, staring down a carton of cremini mushrooms, remember the science. Put down the olive oil bottle. Start with a dry pan or a splash of water. Let the water evaporate. Respect the strict rules of the Maillard reaction.
Your tastebuds—and your smoke detector—will thank you.






