
Let’s set the scene. It is 6:30 PM on a Tuesday. You are exhausted from a long day of pretending to care about spreadsheets, and you just want a healthy, comforting dinner that does not involve handing your credit card to a delivery driver. You chop up some broccoli, toss it on a pan, throw it in a 350°F oven, and wait. Thirty minutes later, you pull out a tray of sad, limp, olive-drab mush sitting in a puddle of its own despair.
If this sounds familiar, take a deep breath and pour yourself a glass of wine. You are not a bad cook. You just do not understand the physics of your oven yet.
As a home cook who has set off the smoke detector more times than I care to admit, I have zero patience for pretentious culinary jargon. But I do have a deep, abiding love for kitchen science when it actually saves my weeknight dinners. Getting restaurant-quality, blistered, caramelized, shatteringly crisp vegetables at home does not require a culinary degree. It requires a basic understanding of thermodynamics, a refusal to use garbage equipment, and a few strategic tweaks to your prep routine. If you are tired of chewing on waterlogged carrots and want to fix the rookie kitchen mistakes that are sabotaging your side dishes, pull up a stool. We are going to completely reconstruct how you roast vegetables, from the pan you use to the exact moment you apply your salt.
The Thermodynamics of a Mushy Carrot: Why Your Veggies Are Steaming, Not Roasting
To understand why your vegetables are turning to mush, we have to look at what vegetables actually are. From a culinary physics standpoint, a vegetable is essentially a rigid sponge filled with water.
Let us look at the cold, hard data. Zucchini and cucumbers consist of roughly 95% to 96% water by weight. Bell peppers sit around 92% water, broccoli is roughly 91% water, and even seemingly dense carrots are about 87% water. When you place these water balloons into a hot environment, that moisture immediately begins to heat up and expand. Eventually, it breaches the cell walls and evaporates.
Here is where the science of phase change ruins your dinner. Water boils and turns to steam at exactly 212°F (100°C). As long as liquid water is actively evaporating on the surface of your food, the temperature of that surface cannot exceed 212°F. It is a thermodynamic ceiling. If you want to stop eating mushy veggies, you have to understand that roasting is a race against evaporation.
If your oven is not hot enough, or if your pan is too crowded, that escaping water vapor creates a micro-climate of steam directly above your food. Instead of roasting in dry heat, your broccoli is literally taking a hot bath. The vegetable breaks down, the pectin turns to mush, and you are left with a soggy, unappetizing mess. To achieve crunch, we have to evaporate that surface water violently and rapidly, allowing the surface temperature of the vegetable to skyrocket past the boiling point.
The 212°F Steam Trap
Think of the 212°F steam trap as a bouncer at the club of flavor. Until the water is gone, the high heat cannot get in. This is why boiling or steaming vegetables never results in browning. When you toss wet, crowded vegetables into a lukewarm oven, you are essentially creating a makeshift steamer basket. We need to banish the moisture to unlock the holy grail of cooking: the Maillard reaction.
The Maillard Reaction: The Holy Grail of Flavor and Crunch
Chefs love to throw the term “Maillard reaction” around like it is a magic spell, but it is just a chemical reaction between amino acids and reducing sugars that gives browned food its distinctive, savory flavor. It is the reason a seared steak tastes infinitely better than a boiled one, and it is the exact same reason golden-brown, blistered cauliflower tastes like a revelation while steamed cauliflower tastes like punishment.
The catch? The Maillard reaction generally requires temperatures above 285°F (140°C) to occur rapidly. Remember our steam trap? Because the surface of your vegetable is stuck at 212°F while water is evaporating, the Maillard reaction physically cannot happen until the surface dries out.
Why 400°F is Your Absolute Minimum
This brings us to the biggest mistake home cooks make: roasting at 350°F. If you are baking a cake, 350°F is great. If you are trying to roast vegetables, 350°F is a joke.
At 350°F, the ambient heat is not aggressive enough to quickly flash off the water escaping from your vegetables. The water slowly bleeds out, pooling in the pan, and simmering your food. By the time the water finally evaporates, the internal structure of the vegetable has completely collapsed into mush. You will never get them crispy at this temperature.
To win the race against evaporation, your oven needs to be set to a minimum of 400°F. For high-water vegetables like zucchini, bell peppers, and broccoli, I strongly recommend 425°F or even 450°F. You want a blast of intense, dry heat that immediately vaporizes surface moisture, allowing the exterior temperature of the vegetable to climb into the 300°F+ range where the Maillard reaction thrives, all while the interior remains perfectly tender.
Ditch the Toxic Trash: Why Your Baking Sheet is Sabotaging You
We need to have a serious talk about your equipment. I am a firm believer that you do not need a kitchen full of expensive gadgets to be a great cook, but I draw a hard line at cheap, toxic, poorly made cookware. If you are roasting on a flimsy, dark-coated, non-stick baking sheet that you bought for five dollars at a discount store ten years ago, you are actively sabotaging your meals.
First of all, non-stick coatings (like PTFE/Teflon) are fundamentally incompatible with high-heat roasting. Most traditional non-stick coatings begin to degrade and release toxic fumes when heated past 450°F or 500°F. Since we just established that perfect roasted vegetables require an oven temperature of 425°F to 450°F, using a non-stick pan is pushing the absolute limits of safety. I am aggressively passionate about banishing toxic kitchen gear, and peeling non-stick bakeware is public enemy number one.
Furthermore, non-stick coatings act as thermal insulators. They actually inhibit the transfer of heat from the metal pan to your food, which is the exact opposite of what we want when we are trying to achieve a hard sear. Dark non-stick pans also absorb radiant heat unevenly, often leading to bottoms that burn to a bitter crisp before the tops even begin to brown.
The Superiority of Heavy-Gauge Bare Aluminum
If you want to cook like a pro, you need to use what the pros use: a heavy-gauge, uncoated, bare aluminum sheet pan.
Aluminum is an exceptional conductor of heat. It heats up rapidly and transfers that heat violently and efficiently directly into your food. When a piece of oiled broccoli hits a hot aluminum pan, the thermal transfer is immediate. The water flashes to steam, the oil sizzles, and the Maillard reaction begins almost instantly.
You also need to ensure the pan is heavy-gauge (usually 18-gauge or 13-gauge). Flimsy, thin pans cannot handle the thermal shock of a 425°F oven. When thin metal heats up, it expands unevenly, which is exactly why your baking sheets keep warping and violently popping in the oven, sending your perfectly arranged asparagus flying into the corners. A thick aluminum half-sheet pan will stay perfectly flat, ensuring that the oil remains evenly distributed and your vegetables maintain maximum contact with the hot metal.
The Mortal Sin of Overcrowding the Pan
Let us assume you have your beautiful bare aluminum pan and your oven is cranked to 425°F. You chop up two massive heads of broccoli, three bell peppers, and a red onion. You pile them all onto a single sheet pan. They are overlapping, piled on top of each other, touching shoulder-to-shoulder.
Congratulations, you have just ruined dinner.
Overcrowding the pan is the single most common mistake home cooks make when roasting. Remember the water content we discussed earlier? When vegetables are packed tightly together, the water evaporating from them has nowhere to go. The air circulation is completely choked off. Instead of the steam dissipating into the cavernous, dry heat of the oven, it gets trapped in the tiny crevices between the overlapping vegetables.
The Golden Ratio of Space to Veggie
For vegetables to roast, they need personal space. The hot, dry air of the oven needs to be able to circulate freely around every single piece of food to carry away the evaporating moisture.
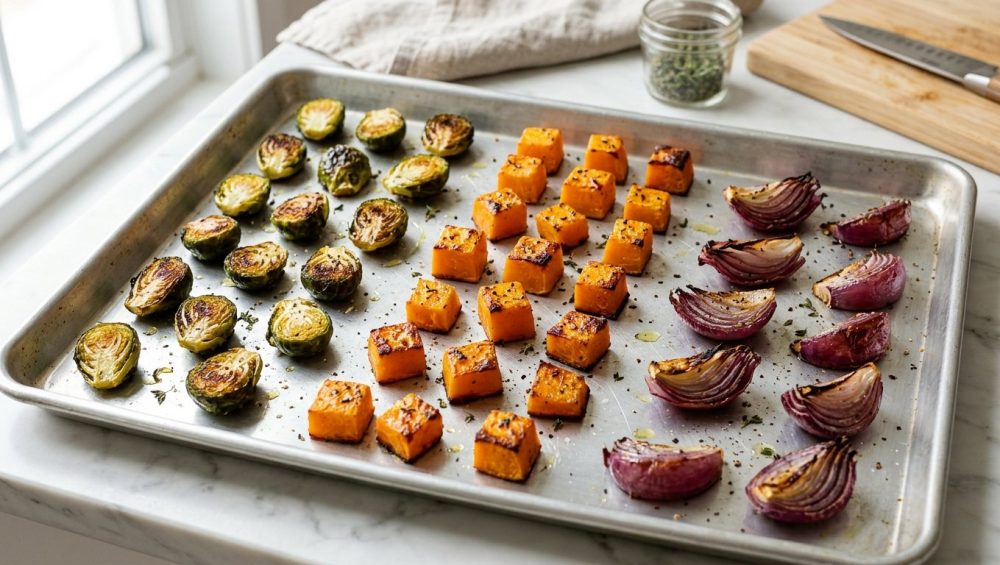
As a strict rule of thumb, at least 25% to 30% of your baking sheet should be visible bare metal. Your vegetables must be in a single, un-stacked layer, and they should ideally not be touching each other. If you have to play Tetris to get your vegetables to fit on the pan, you need a second pan. It is always better to wash two sheet pans that produced mind-blowing, crispy vegetables than to wash one pan that produced a soggy, depressing pile of mush.
The “Hot Pan” Hack: Preheating for Instant Sizzle
Now that we have the right equipment and the right spatial awareness, let us talk about a restaurant technique that will change your weeknight dinners forever: preheating the baking sheet.
When you put cold vegetables on a cold pan and put it in a hot oven, the pan has to absorb heat from the oven before it can transfer heat to the food. This warming-up period can take 5 to 10 minutes. During this time, the vegetables are slowly warming up, their cell walls are breaking down, and they are gently bleeding water into the cold oil. By the time the pan is hot enough to sear, the vegetables are already simmering in their own juices.
Using Thermal Shock to Seal in Texture
We want to bypass that warm-up phase entirely. The moment your food touches the metal, it should sound like a frying pan.
To achieve this, place your empty, bare aluminum baking sheet into the oven while it preheats. Let it sit in that 425°F oven for at least 10 to 15 minutes. While the pan is heating, toss your chopped vegetables in a bowl with your oil and seasonings.
When you pull that screaming hot pan out of the oven, work quickly. Do not waste time. The moment you drop your oiled vegetables onto the metal, you will hear a violent, aggressive sizzle. That sound is the sound of victory. That is the surface moisture instantly vaporizing upon contact with the thermal mass of the aluminum. Because you are no longer using a cold baking sheet, the underside of your vegetables begins caramelizing on minute one, not minute ten. I promise you, preheating the pan changes everything about your final texture.
Oil, Salt, and the Chemistry of Crunch
You cannot roast without fat, and you cannot build flavor without salt. But the type of fat you use, and exactly when you apply your salt, plays a massive role in the thermodynamics of your roasting pan.
The Right Oil for High-Heat Roasting
Because we are roasting at high temperatures (400°F to 450°F), you must use a fat with a high smoke point. Extra-virgin olive oil is delicious, but its smoke point generally hovers around 375°F to 400°F. If you use it in a 450°F oven on a preheated aluminum pan, it will break down, smoke out your kitchen, and impart a bitter, acrid flavor to your food.
Instead, opt for avocado oil (smoke point ~500°F), light/refined olive oil (smoke point ~465°F), or grapeseed oil (smoke point ~420°F). You want to generously coat the vegetables. The oil acts as a conductive medium, filling the microscopic gaps between the uneven surface of the vegetable and the flat surface of the pan, facilitating rapid heat transfer.
And please, for the love of all things culinary, do not use aerosol cooking sprays. Not only do they contain propellants and emulsifiers (like soy lecithin) that leave a sticky, polymerized, impossible-to-clean residue on your pans, but they also do not provide the sheer volume of liquid fat required to actually fry the surface of the vegetable in the oven. Toss your vegetables in a bowl with real, liquid oil.
Why Salting Too Early Ruins Everything
Salt is a magical mineral, but it is also a desiccant. Through the process of osmosis, salt draws water out of plant cells and brings it to the surface.
If you salt your high-water vegetables (like zucchini, mushrooms, or eggplant) and let them sit in a bowl on the counter for 15 minutes while you prep other ingredients, you are giving the salt time to extract a massive amount of moisture. When you finally dump them onto your baking sheet, you are dumping a puddle of vegetable juice along with them.
To prevent this, you must control the timing. You should only season your vegetables immediately before they hit the hot pan. Toss them in oil, add your salt and spices, give them a quick shake, and get them straight into the oven. Do not give the salt time to pull out the water. If you have been struggling with soggy dinners, salting too early is likely one of your biggest undetected culprits.
The Secret Weapon: Why You Need Cornstarch
If you have implemented the hot aluminum pan, the 425°F oven, the proper spacing, and the correct oil, you are already making vegetables that are in the top 5% of home-cooked meals. But because I am a perfectionist who demands absolute crunch, I am going to give you a restaurant cheat code: Cornstarch.
Wait, cornstarch? The chalky powder you use to thicken gravy? Yes.
Cornstarch is a carbohydrate extracted from the endosperm of corn, and it is uniquely high in a starch molecule called amylose. When you coat a moist vegetable in a microscopic layer of cornstarch, something incredible happens in the oven. As the vegetable cooks and releases its internal moisture, the cornstarch absorbs that water. When exposed to the high heat of the oil and the oven, the starch granules swell, burst, and gelatinize, eventually drying out and hardening into a rigid, glass-like, shatteringly crisp matrix.
It is the exact same food science principle used in Asian takeout to achieve ultra-crispy fried tofu or velveted chicken, applied to your weeknight broccoli.
How to Apply the Cornstarch Hack
This is not a breading station; you are not deep-frying. The goal is an invisible, micro-thin coating.
After you have chopped your vegetables and patted them completely dry with a paper towel (crucial step—if they are dripping wet, the starch will clump into glue), place them in a large mixing bowl. Toss them with your high-smoke-point oil until they are evenly coated.
Next, sprinkle cornstarch over the oiled vegetables. The golden ratio is roughly 1 tablespoon of cornstarch per 1 pound of vegetables. Toss vigorously. The oil helps the cornstarch adhere evenly without forming pasty white clumps. Finally, add your salt and spices, toss one last time, and immediately transfer them to your preheated baking sheet.
The result? The exterior of the vegetable essentially fries in its own starchy jacket, creating an audible crunch that will make you forget you are eating vegetables at all. (If you do not have cornstarch, potato starch or rice flour are excellent substitutes, as they are also high in amylose).
Strategic Cutting: Surface Area is Your Best Friend
You can have a screaming hot pan and a perfect cornstarch coating, but if you cut your vegetables into giant, awkward spheres, you are fighting a losing battle.
Browning requires physical contact with the hot metal of the pan. Radiant heat from the oven air will cook the vegetable, but conduction (direct contact with the metal) is what creates the deep, caramelized crust. Therefore, your goal when wielding a chef’s knife is to maximize the flat surface area of every single piece.
Do not cut carrots into little chunky coins; slice them on a sharp bias (a steep diagonal) to create long, flat ovals. Do not chop potatoes into jagged cubes; cut them into flat, uniform planks. When prepping broccoli or cauliflower, slice the florets straight down the middle so each piece has a heavy, flat side.
When you place these vegetables onto your preheated pan, take the extra 60 seconds to flip them so the largest flat side is facing down, making direct contact with the aluminum. That flat side is going to develop a blistered, dark brown, intensely savory crust that will anchor the entire dish.
Putting It All Together: Your New Weeknight Roasting Routine
Cooking is not about blindly following recipes; it is about mastering techniques. Now that you understand the thermodynamics of evaporation, the chemistry of the Maillard reaction, and the physical properties of aluminum and amylose, you are fully equipped to roast any vegetable in the produce aisle.
Let us review your new, unbreakable weeknight roasting protocol:
- Preheat the Oven and the Pan: Set your oven to 425°F (or 450°F for high-water veggies like zucchini and broccoli). Place a heavy-gauge, bare aluminum half-sheet pan inside the oven while it preheats. Let it get screaming hot.
- Prep and Dry: Chop your vegetables, maximizing flat surface area. Pat them thoroughly dry with paper towels. Water is the enemy of crunch.
- The Oil and Starch Coat: Place the dry vegetables in a large bowl. Toss generously with a high-smoke-point oil (avocado or light olive oil). Sprinkle 1 tablespoon of cornstarch per pound of vegetables over the top and toss until an invisible, even coating forms.
- Season at the Last Second: Add your salt, pepper, and spices right before cooking so the salt does not have time to extract moisture.
- The Sizzle: Carefully remove the hot pan from the oven. Pour the vegetables onto the pan. You should hear a loud sizzle.
- Give Them Space: Arrange the vegetables in a single layer with the flat sides facing down. Ensure at least 25% of the pan is bare metal to allow steam to escape. If they do not fit, use two pans.
- Roast and Flip: Roast undisturbed for 15 to 20 minutes to allow the bottom crust to form. Toss or flip them once, then roast for another 10 to 15 minutes until tender inside and shatteringly crisp outside.
You no longer have to settle for sad, steamed, waterlogged side dishes. By respecting the science of heat and moisture, you can transform the humblest root vegetables and basic greens into the highlight of your dinner. Now, pour that glass of wine, turn your oven up to 425°F, and go show that broccoli who is boss.






