Listen up, folks. If you are reading this, you have probably stared blankly into your refrigerator at 6:30 PM on a Tuesday, wondering if a block of sharp cheddar, half a jar of olives, and a sleeve of slightly stale crackers counts as dinner. (Spoiler alert: It absolutely does, but we can do better). I am here to tell you that cooking is not rocket science, even though my smoke detector might argue otherwise based on my early twenties. Over the years, I have burned the garlic, undercooked the chicken, and scraped more ruined, scorched dinners into the trash than I care to admit. But I survived, and more importantly, I learned.
You do not need a culinary degree from a pretentious institute to make mind-blowing, restaurant-quality food. You just need a few solid techniques, a foundational understanding of flavor, a zero-tolerance policy for toxic kitchen gear, and the willingness to try. This is not a fluffy, soft-focus memoir about my grandmother’s farm or how the smell of basil transports me to the Tuscan countryside. We do not have time for that. This is a definitive, exhaustive masterclass in getting your act together in the kitchen. We are going to prioritize weekday efficiency, master weekend perfection, and throw out the garbage pans that are actively poisoning you. Grab a glass of wine, pull up a stool, and let’s get to work.
The Weekday Warrior’s Arsenal: Time-Saving Techniques That Actually Work
Time is money, and on a Wednesday evening after a soul-crushing commute, time is actually more valuable than money. The biggest hurdle to home cooking isn’t a lack of talent; it is a lack of planning. If you are chopping onions while your garlic is already burning in the pan, you have already lost the battle.
Prep Like a Pro (Mise en Place for the Rest of Us)
Chefs love to throw around the term “mise en place,” which is just a fancy French way of saying “put everything in its place.” But you do not need fifteen tiny glass bowls to achieve this. You just need to stop flying by the seat of your pants.
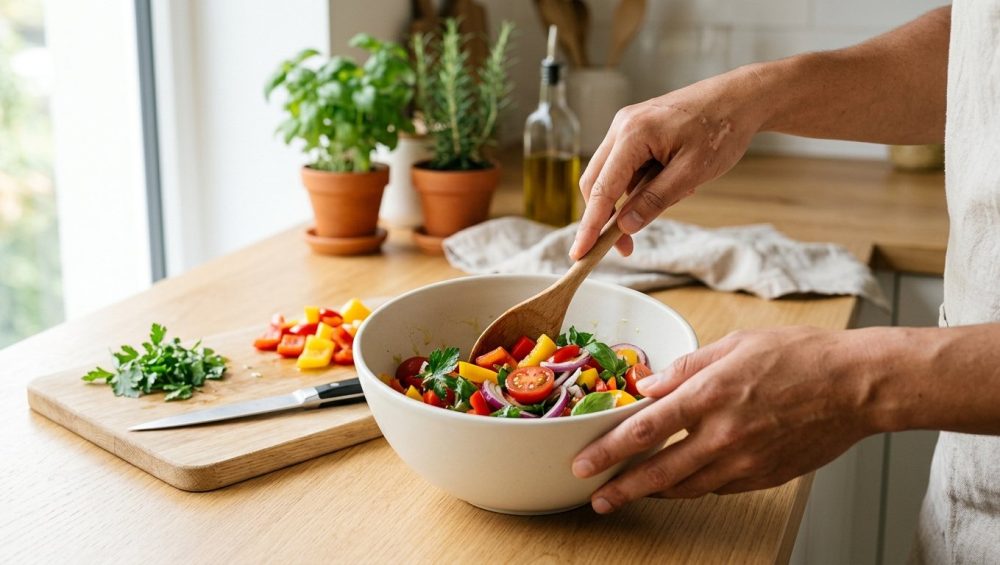
Before you even think about turning on the stove, read the entire recipe. All of it. Yes, even the bottom notes. Then, chop all your vegetables, measure out your liquids, and have your spices ready. Why? Because cooking is a series of chemical reactions, and heat waits for no one. If a recipe calls for you to sauté onions for five minutes and then add minced garlic, and you wait until the onions are done to start peeling the garlic, your onions will burn. It is that simple.
A practical weekday approach to mise en place means doing the heavy lifting on Sunday. Wash your greens, chop your hearty vegetables (carrots, celery, onions), and store them in airtight glass containers. When Tuesday rolls around, you are assembling, not starting from scratch. You will shave twenty minutes off your cooking time and significantly reduce your urge to order takeout.
The Freezer is Your Best Friend (Batch Cooking Demystified)
Most people use their freezer as a graveyard for good intentions—a place where half-eaten casseroles go to develop freezer burn. Let’s change that. The secret to weekday survival is not freezing entire meals; it is freezing components.
Whenever you make a sauce, a stock, or a soup, double the recipe. It takes the exact same amount of time to simmer four quarts of marinara sauce as it does to simmer two. Freeze the excess in flat, resealable silicone bags. They stack perfectly, take up zero space, and thaw in a fraction of the time it takes to defrost a massive, ice-block brick of chili.
Furthermore, freeze your aromatics. If you buy a knob of ginger, grate the whole thing and freeze it in half-teaspoon mounds on a parchment-lined tray, then toss them in a container. Do the same with leftover tomato paste or chipotles in adobo. You will never have to throw away a fuzzy, moldy half-onion again.
One-Pan Wonders and Sheet Pan Sorcery
I despise doing dishes. If a recipe requires me to use three different skillets, a blender, and a food processor on a weeknight, I am not making it. Enter the sheet pan.
High-heat roasting is the ultimate cheat code for flavor. Toss some chicken thighs, broccoli florets, and cubed sweet potatoes in olive oil, salt, pepper, and smoked paprika. Spread them evenly on a heavy-duty sheet pan (do not overcrowd them, or they will steam instead of roast), and blast them in a 400°F oven. In thirty minutes, you have a complete, deeply flavorful meal with exactly one pan to wash. The oven does the work while you decompress.
The Flavor Equation: Pantry Staples That Do the Heavy Lifting
If your food tastes boring, bland, or “just missing something,” you probably blame your lack of skill. Stop that. You aren’t lacking skill; you are lacking a fundamental understanding of how to balance flavor. Salt is only one piece of the puzzle.
Acid Trip: Why Your Food Tastes Flat (and How to Fix It)
This is the single most important discovery you will ever make in the kitchen: Acid is the great brightener. If you taste a soup, a stew, or a sauce and think, “This needs more salt,” but you have already salted it heavily, what it actually needs is acid.
A squeeze of fresh lemon juice, a splash of apple cider vinegar, or a few drops of sherry vinegar added right at the end of cooking will wake up all the other flavors in the dish. It cuts through richness and fat, elevating heavy meals from “heavy and dull” to “complex and vibrant.” Keep lemons, limes, and a small arsenal of vinegars (balsamic, red wine, rice, and apple cider) on hand at all times. And please, for the love of all that is holy, use fresh citrus juice. That plastic squeeze bottle shaped like a lemon is an abomination.
The Umami Bomb: MSG, Anchovies, and Soy Sauce
Umami is the fifth taste—the deep, savory, meaty flavor that makes things taste undeniably delicious. If you want your food to taste like it came from a restaurant, you need to sneak umami into everything.
First, let’s clear the air about MSG (Monosodium Glutamate). The fearmongering surrounding MSG is rooted in outdated, debunked 1960s junk science. MSG is naturally occurring in tomatoes, parmesan cheese, and mushrooms. Keeping a small shaker of MSG in your pantry and adding a pinch to savory dishes is a game-changer.
If you are still skittish, use natural umami bombs. Anchovy paste is your secret weapon. Melt a teaspoon of it into the onions and garlic when you are making a beef stew or a tomato sauce. I promise it will not taste like fish; it will just taste incredibly rich and savory. A splash of soy sauce or a dash of Worcestershire sauce in a shepherd’s pie or a chili accomplishes the same thing.
Spices: Stop Using Pre-Ground Dust from 2019
Go to your spice cabinet right now. If you have a jar of pre-ground cumin that you bought before the last presidential election, throw it away. It tastes like sawdust. Spices contain volatile oils that degrade over time, especially once they are ground.
To instantly elevate your cooking, start buying whole spices (cumin seeds, coriander seeds, black peppercorns) and grind them yourself using a cheap coffee grinder dedicated solely to spices, or a mortar and pestle. Furthermore, spices need heat to release their oils. Stop sprinkling raw spices into a watery soup. Instead, “bloom” your spices by cooking them in oil or butter for thirty seconds until they are fragrant, then add your liquids. This technique, standard in Indian and Mexican cuisines, fundamentally changes the depth of flavor.
Technique Over Talent: Simple Shifts for Restaurant-Quality Results
You do not need to know how to perfectly brunoise a carrot to be a great cook. You just need to understand the basic physics of heat and meat.
The Maillard Reaction: Stop Crowding the Pan
Ever wonder why the steak you cook at home looks gray and sad, while the steak at a high-end steakhouse has a gorgeous, crusty, deeply browned exterior? The secret is the Maillard reaction.
The Maillard reaction is a chemical process between amino acids and reducing sugars that occurs under high heat, creating that irresistible golden-brown crust and complex, savory flavor. But here is the catch: it requires specific temperatures to work. The reaction only begins at around 285°F (140°C), and it reaches its peak efficiency between 330°F and 390°F (165–200°C). If your pan is too cold, you get nothing. If it exceeds 390°F (200°C), you bypass browning and go straight to burning, creating bitter, acrid compounds.
The absolute enemy of the Maillard reaction is moisture. If you take a wet piece of meat out of its packaging and throw it into a pan, the surface temperature will never exceed the boiling point of water (212°F / 100°C) until all that surface moisture has evaporated. By the time the water is gone and the pan gets hot enough to start browning, the inside of your meat is overcooked and ruined.
The fix? Pat your meat aggressively dry with paper towels before cooking. Better yet, salt it and leave it uncovered in the fridge overnight. The salt will draw out moisture, which then evaporates, leaving you with a perfectly dry surface ready for a hard sear. And stop crowding the pan! If you put too much food in a skillet, the temperature of the pan plummets, and the food releases moisture, causing it to steam in its own juices rather than sear. Cook in batches if you have to.
Resting Meat: Patience is a Virtue (and a Scientific Necessity)
If you take a steak off the grill and immediately slice into it, watching a flood of delicious juices run all over your cutting board, I am judging you. You have just ruined a perfectly good piece of meat. Resting meat is not a suggestion; it is a fundamental law of food physics.
When meat cooks, the heat causes the muscle fibers (primarily myosin and actin) to contract and shrink, literally squeezing the water out of the fibers and forcing the juices toward the center of the cut. At 140°F (60°C), myosin coagulates; by 155°F (68°C), actin denatures, creating high intramuscular pressure. If you cut into the meat while it is still piping hot, that pressure has only one escape route. Slicing immediately is like puncturing a highly pressurized water balloon—the juice is forcefully ejected. In clinical trials, steaks sliced immediately at 160°F lost a staggering 18.7% of their pre-cooked weight in juices within 90 seconds.
However, if you remove the meat from the heat and let it rest, the temperature equalizes. The muscle fibers relax, widen, and reabsorb the liquid, thickening the juices so they stay inside the meat where they belong. A pork loin rested for just 10 minutes can reduce moisture loss by an incredible 60% compared to one sliced immediately.
You must also account for “carryover cooking.” When you take a piece of meat off the stove, its internal temperature will continue to rise by anywhere from 5°F to 25°F as the residual heat travels inward. If you want a medium-rare steak (135°F), you need to pull it off the heat at around 125°F and let it rest. Give small cuts like steaks and chicken breasts 5 to 10 minutes; give massive roasts and briskets 30 to 45 minutes. Your patience will be rewarded with a juicy, tender masterpiece.
Emulsification: Pan Sauces Made Simple
Those brown, sticky bits left in the bottom of the pan after you sear a piece of meat? That is called the “fond,” and it is liquid gold. Do not wash that pan. Instead, make a pan sauce.
While the pan is still hot, pour in a splash of liquid—wine, broth, or even water. As the liquid bubbles, use a wooden spoon to scrape up all those caramelized bits. This is called deglazing. Let the liquid reduce by half to concentrate the flavors. Then, take the pan off the heat entirely and vigorously whisk in a tablespoon of freezing cold butter. The cold butter melts slowly, creating an emulsion—a smooth, glossy sauce that binds the fat and liquid together without separating. Pour that over your perfectly rested meat, and you will look like a culinary genius.
The Gear Reality Check: Ditch the Toxic Trash and Invest in Quality
We need to have a serious talk about your kitchen equipment. I have zero patience for cheap, peeling, flimsy cookware. Not only does it cook your food poorly, but it is also actively leaching toxic chemicals into your dinner. I am looking directly at your scratched-up $15 non-stick frying pan.
The Non-Stick Nightmare: PFAS and the Death of Cheap Pans
If you take only one piece of advice from this entire masterclass, let it be this: throw away your traditional non-stick pans. Traditional non-stick coatings, like PTFE (commonly known by brand names like Teflon), are manufactured using PFAS (per- and polyfluoroalkyl substances). These are known as “forever chemicals” because they do not break down in the environment or in the human body. They have been linked to liver damage, thyroid disease, weakened immune responses, and kidney cancer.
When you heat a cheap non-stick pan over high heat, the coating begins to degrade, releasing toxic fumes. If your pan has a scratch in it, those chemicals are flaking directly into your eggs.
The global regulatory landscape is finally waking up to this nightmare. In 2025 and 2026, we have seen a massive, unprecedented crackdown on PFAS. France implemented a stringent ban on PFAS in cosmetics and textiles effective January 1, 2026, paving the way for cookware restrictions. The European Union is currently evaluating a universal PFAS restriction that covers over 10,000 chemical compounds, which explicitly targets the PTFE coatings used in non-stick frying pans. In the United States, the EPA’s TSCA reporting rule requires manufacturers to disclose PFAS usage starting in April 2026. States like Maine and Minnesota have already passed blanket bans on intentionally added PFAS, while California law now demands strict disclosure of toxic chemicals in cookware handles and food-contact surfaces.
The era of cheap, disposable, toxic non-stick cookware is over. It is a high-risk, dangerous product. Do not wait for the government to rip it out of your hands; throw it in the trash today.
The Holy Trinity of Safe Cookware: Cast Iron, Carbon Steel, Stainless
If we are ditching the toxic non-stick, what do we use? You only need three types of pans to accomplish absolutely everything in the kitchen. They are safe, they are durable, and if treated right, they will outlive you.
- Stainless Steel: This is your workhorse. A high-quality, fully clad stainless steel pan (where the aluminum core goes all the way up the sides, not just on the bottom) is perfect for searing, sautéing, and making acidic pan sauces (which can strip the seasoning off cast iron). People complain that food sticks to stainless steel. That is because they do not know how to use it. You must preheat the pan before adding oil. Use the “water drop test” (the Leidenfrost effect): flick a drop of water into the pan. If it sizzles and evaporates, the pan is too cold. If it splits into tiny beads, it is too hot. If it forms a single, cohesive bead that glides around the pan like a mercury marble, it is perfectly preheated. Add your oil, wait ten seconds, add your food, and it will not stick.
- Cast Iron: The heavyweight champion of heat retention. Cast iron takes a while to heat up, but once it is hot, it stays hot. This makes it the ultimate tool for searing steaks, frying chicken, or baking cornbread. Yes, it requires a little maintenance (wash it, dry it immediately on the stove, and rub it with a tiny drop of oil), but it is virtually indestructible.
- Carbon Steel: This is the professional kitchen’s best-kept secret. It has the heat retention and natural non-stick properties of cast iron, but it is much lighter and more responsive to temperature changes. Once a carbon steel pan is properly seasoned, you can fry an egg in it and it will slide around like it is on ice—zero toxic PFAS required.
Knives: You Only Need One Good Chef’s Knife (Seriously)
Stop buying those massive, twenty-piece wooden knife blocks. They are a scam. They are filled with cheap, flimsy, serrated blades you will never use, and the steel is usually so soft it won’t hold an edge for more than a week.
You only need three knives to conquer the culinary world:
- An 8-inch Chef’s Knife: This will do 90% of your work. Chop onions, slice meat, mince garlic. Invest in a high-quality forged steel knife. Hold it by the “pinch grip”—pinch the base of the blade between your thumb and index finger, wrapping your remaining fingers around the handle. It gives you ultimate control and prevents you from chopping off a digit.
- A Paring Knife: A small, 3-to-4-inch blade for delicate, off-the-board work, like peeling apples, hulling strawberries, or mincing a shallot.
- A Serrated Bread Knife: Essential for slicing crusty sourdough without crushing it, and surprisingly excellent for slicing delicate tomatoes.
Keep your chef’s knife razor-sharp. A dull knife is the most dangerous tool in the kitchen because it requires you to use excessive force, which inevitably leads to the blade slipping and sending you to the emergency room. Get a honing rod to align the blade between uses, and have it professionally sharpened once a year.
Demystifying the “Intimidating” Ingredients and Methods
A lot of home cooks get stuck in a rut of ground beef and chicken breasts because they are terrified of messing up more “delicate” or complex foods. It is time to face your fears.
Fearless Fish Cooking
People are terrified of cooking fish at home. They think it will stink up the house, fall apart in the pan, or end up dry and rubbery. The truth is, fish is the ultimate fast food. It cooks in minutes and requires very little manipulation.
The biggest mistake people make with fish is fussing with it. If you are pan-searing a filet of salmon or sea bass, pat the skin aggressively dry (remember the Maillard reaction!). Get a stainless steel or carbon steel pan hot, add a high-smoke-point oil, and lay the fish down skin-side down. Press it gently with a spatula for the first ten seconds so the skin doesn’t curl up.
Then, walk away. Do not poke it. Do not try to lift it. Do not peek. The fish will naturally release from the pan when the skin is perfectly crispy. If you try to flip it and it resists, it is not ready. Let it cook 80% of the way through on the skin side, flip it for the last 30 seconds just to “kiss” the flesh side, and take it off the heat. Squeeze a lemon over it, and you are done.
Baking Without the Panic Attacks
Cooking is an art; baking is a science. You can improvise a soup, but if you improvise a cake batter, you will end up with a dense, inedible brick. The reason people fail at baking is that they treat it like cooking.
If you want to bake successfully, you must buy a digital kitchen scale. Measuring cups are wildly inaccurate. A cup of all-purpose flour can weigh anywhere from 120 grams to 150 grams depending on how densely you pack it into the cup. If a recipe calls for two cups of flour and you over-pack them, you have just added an extra half-cup of flour to your dough. No wonder your cookies are dry.
Weigh your ingredients in grams. It is faster, it dirties fewer dishes (you can just tare the scale and add everything to one bowl), and it guarantees perfect, replicable results every single time. Respect the chemistry. If a recipe calls for room-temperature butter and eggs, do not use cold ones. Cold ingredients will not emulsify properly, and your cake will be dense and flat. Baking rewards precision and patience.
Your Kitchen, Your Rules
At the end of the day, cooking should not be a source of stress; it should be a source of empowerment. You are taking raw, disparate ingredients and transforming them into sustenance and joy. Yes, you will make mistakes. You will occasionally over-salt a sauce, burn a piece of toast, or set off the smoke alarm. I still do it, and I write about food for a living.
The difference between a novice and an expert is simply a willingness to learn from the burned garlic and the dry chicken. By implementing these techniques—prepping smartly, understanding the science of heat and resting, balancing your flavors with acid, and investing in safe, durable gear—you are setting yourself up for a lifetime of incredible meals.
You do not need a white chef’s coat to command your kitchen. You just need a sharp knife, a heavy pan, and a little bit of audacity. Now go make yourself something delicious. You have earned it.


