
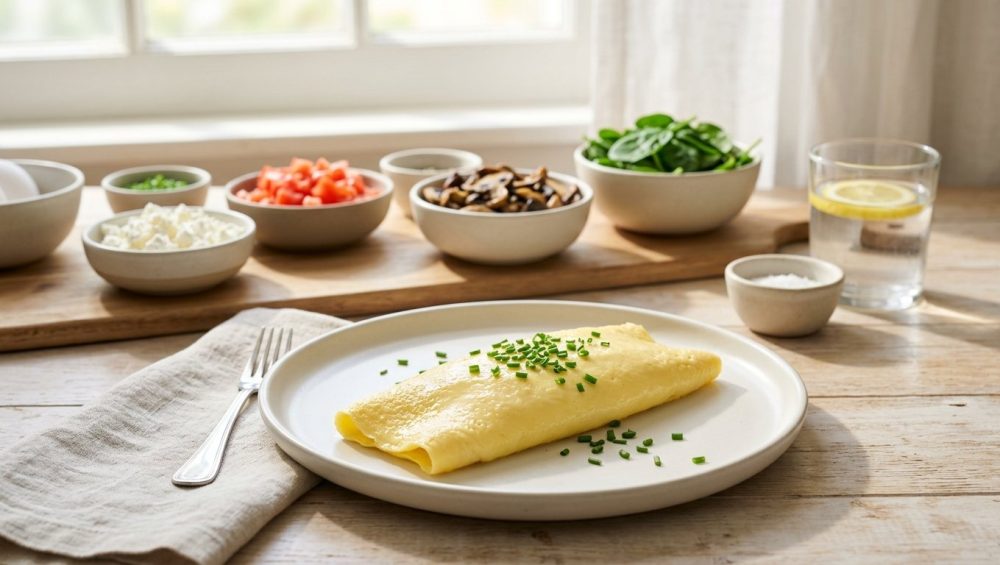
You’ve invited friends over for a Sunday brunch, and in a moment of sheer, caffeine-fueled ambition, you promised them made-to-order omelets. But as you stand over the stove, frantically hacking at a yellow disc that looks and tastes like a repurposed flip-flop, the panic sets in. Why is it that the simplest ingredient in the culinary world—the humble egg—can so easily transform from a luxurious, custardy dream into a dry, rubbery nightmare?
Listen up, weekend warriors. Making a flawless omelet doesn’t require a master’s degree in French gastronomy, and you certainly don’t need a pretentious chef’s coat to impress your guests. It simply requires a basic understanding of thermal dynamics, a refusal to settle for mediocre cookware, and a solid game plan. Today, we are tearing down the culinary myths, diving deep into the food science of protein coagulation, and building a foolproof blueprint for hosting a mindful, stress-free omelet bar that will have your friends thinking you secretly moonlight at a Michelin-starred bistro. Grab your whisk, and let’s get to work.
The Cold, Hard Science of Coagulation: Why Your Eggs Turn into Pencil Erasers
If we are going to fix your breakfast, we need to head into the laboratory for a minute. Eggs are biological marvels. They are essentially a highly complex suspension of water and tightly folded protein bundles. To understand why your eggs turn rubbery, you need to understand exactly what happens when you introduce those delicate proteins to the harsh environment of a hot skillet.
The Biological Blueprint of an Egg
An egg is divided into two primary components: the albumen (the egg white) and the yolk. The albumen is predominantly water and protein, designed by nature to protect the yolk. The yolk, on the other hand, is a rich emulsion of fats, proteins, and essential nutrients. Because their chemical makeups are entirely different, they react to heat in entirely different ways. When you whisk an egg for an omelet, you are forcing these two distinct environments to blend into one unified liquid, which means you now have to cook them in a way that respects both of their thermal thresholds.
The Thermodynamics of Protein Denaturation
When raw, the proteins in an egg are tightly curled up like tiny balls of yarn floating in water. As you apply heat, these protein bundles gain thermal energy and begin to bump into each other. Eventually, the weak bonds holding them in their folded shape break apart—a process called denaturation. Once they unfold, these long protein strands begin to tangle and bond with one another, forming a three-dimensional mesh that traps the surrounding water. This process, known as coagulation, is what turns your liquid egg into a solid gel.
Here is where the science gets incredibly specific. Egg whites begin to set and turn opaque around 140°F (60°C) and become totally firm at 149°F (65°C). Yolks, buffered by their high fat content, require a slightly higher temperature; they begin to thicken around 149°F (65°C) and set fully by 158°F (70°C).
Syneresis: The Squeeze That Ruins Your Breakfast
So, what happens when your pan is ripping hot and you blast those eggs past 160°F? You force those delicate protein bonds to tighten rapidly and aggressively. This violent contraction acts exactly like a microscopic sponge being wrung out by a bodybuilder. It literally squeezes the trapped water right out of the protein network.
This scientific phenomenon is known as syneresis. If you’ve ever wondered why your scrambled eggs leak water onto your plate, leaving behind a dry, weeping mass, this is exactly why. The excessive heat has squeezed out all the moisture, leaving you with a tight, rubbery matrix of overcooked proteins.
The Sassy Sous-Chef’s Golden Rules for Tender, Custardy Eggs
Now that you know why your eggs are turning into bouncy balls, let’s talk about how to stop it. As an everyday home cook, you have total control over the environment in your pan.
Rule Number One: Master Your Thermal Control
Heat is not a race; it is a tool. The biggest rookie mistake you can make is cranking your burner to medium-high and walking away. For a tender omelet, you want a medium-low to medium heat. You need the pan warm enough to immediately start setting the bottom layer of the egg (so it doesn’t stick), but gentle enough that the proteins coagulate slowly and evenly. If your butter instantly browns and smokes the second it hits the pan, your pan is too hot. Take it off the heat, let it cool, and try again.
Furthermore, you must account for carryover cooking. Eggs retain heat and will continue to cook even after you slide them onto a plate. If your omelet looks 100% perfectly cooked in the pan, it will be overcooked by the time you sit down to eat it. You must pull it off the heat when the center still looks slightly glossy and just barely underdone.
Rule Number Two: The Liquid Buffer Strategy
If you struggle with rubbery eggs, give yourself a culinary insurance policy. Adding a small splash of liquid to your beaten eggs—about one tablespoon of water, whole milk, or heavy cream per two eggs—works miracles.
When you whisk a liquid into the eggs, you are physically increasing the distance between the protein strands. When the eggs hit the heat, the proteins have to work harder and take longer to find each other and bond. The extra liquid acts as a thermal buffer, creating steam as it cooks and ensuring that even if you leave the eggs in the pan a few seconds too long, they retain enough moisture to stay soft and fluffy.
Rule Number Three: The Great Salt Debate Settled
There is an old, persistent kitchen myth that salting your eggs before you cook them will draw out the moisture and make them tough. I am here to tell you that this is absolute nonsense. In fact, the exact opposite is true.
When it comes to seasoning, the secret to salting them early is that the sodium ions actually act as a buffer. The salt breaks down the electrical charges holding the proteins together, preventing them from bonding too tightly when exposed to heat. If you salt your eggs 10 to 15 minutes before cooking, they will actually cook up more tender and retain more moisture than if you salt them at the very end.
Ditch the Toxic Trash: The Great Cookware Purge
We need to have a serious talk about your equipment. If you are still cooking your eggs on a scratched-up, peeling non-stick pan from 2012, take it off the stove and throw it directly into the garbage. I mean it. I am fiercely dedicated to banishing toxic kitchen gear from your home, and the traditional non-stick pan is public enemy number one.
The 2026 Reckoning Against “Forever Chemicals”
For decades, the standard non-stick pan has been coated with PTFE (polytetrafluoroethylene), commonly known by the brand name Teflon. PTFE belongs to a massive family of synthetic compounds called PFAS (per- and polyfluoroalkyl substances), notoriously known as “forever chemicals” because they do not break down in the environment or in the human body.
The health risks associated with PFAS exposure are terrifying, ranging from kidney and liver damage to thyroid disease and weakened immune systems. The situation is so dire that in 2025 and 2026, states like Minnesota, California, and Vermont began enacting strict legislation and bans against PFAS in cookware.
When a PTFE pan is heated above 500°F (260°C)—which is alarmingly easy to do if you preheat an empty pan on a gas burner—the coating physically degrades, releasing invisible, toxic fumes and shedding thousands of microplastic particles straight into your food.
The “PFOA-Free” Marketing Scam
Do not let clever marketing lull you into a false sense of security. You will see countless cheap pans in the supermarket proudly labeled “PFOA-Free.” PFOA is just one specific, highly toxic chemical in the massive PFAS family, and it was largely phased out of US manufacturing years ago. Cookware companies simply swapped PFOA for other, less-studied PFAS chemicals (like GenX or standard PTFE) to maintain that slick coating. A pan labeled “PFOA-Free” is almost certainly not PFAS-free.
What You Should Actually Be Cooking With
You do not need toxic plastics to cook a beautiful omelet. You have three incredibly safe, durable options:
- Carbon Steel: This is the darling of professional kitchens. It is lightweight, heats incredibly fast, and when properly seasoned with polymerized oil, it develops a naturally non-stick surface that will easily release a delicate egg.
- High-Quality Stainless Steel: If you are intimidated by stainless steel sticking, don’t be. You just need to master the water drop test to ensure perfect thermal control before your fat and eggs ever touch the metal.
- True Ceramic: If you absolutely must have a modern non-stick convenience, invest in a high-quality, 100% verified PFAS-free ceramic pan.
Whichever safe pan you choose, always remember that cooking spray is the enemy when it comes to maintaining a pristine cooking surface. The soy lecithin and chemical propellants in aerosol sprays will bake onto your pan, polymerizing into a sticky, impossible-to-clean residue that ruins the pan’s natural release properties. Use real butter, ghee, or a high-quality cooking oil instead.
The Anatomy of a Perfect Omelet: French vs. American
Before you start taking orders from your brunch guests, you need to decide which style of omelet you are going to serve. There are two primary schools of thought, and they require slightly different techniques.
The Classic French Roll: Elegance in a Pan
The French omelet is the ultimate test of a cook’s finesse. It is characterized by a smooth, pale yellow exterior with absolutely zero browning. The inside is soft, custardy, and slightly runny (baveuse).
To achieve this, you pour your beaten eggs into a moderately warm pan with plenty of melted butter. You immediately begin shaking the pan back and forth while vigorously stirring the eggs in tiny circles with a silicone spatula. This rapid agitation breaks up the curds as they form, creating a microscopic, creamy texture. Once the eggs are mostly set but still wet on top, you smooth them out, add your fillings in a tight line, and carefully roll the omelet over itself into a tight cylinder, tipping it out onto the plate seam-side down.
The American Diner Fold: Hearty and Nostalgic
The American-style omelet is what you typically find at a bustling Sunday diner. It is cooked over slightly higher heat, allowing the exterior to develop a golden-brown, slightly textured crust. The curds are larger and fluffier.
Instead of constant, vigorous stirring, you gently push the edges of the setting egg toward the center of the pan, tilting the skillet to let the raw liquid egg run underneath to the hot surface. Once the egg is set like a sturdy pancake, you load up one half with a generous amount of fillings, and fold the other half over to create a half-moon shape.
Regardless of the style you choose, executing the fold can be tricky. A rigid plastic spatula will clumsily tear the delicate egg blanket. For the perfect, graceful fold, this is exactly why you need a slotted fish turner. Its thin, flexible, angled metal edge slides effortlessly under the egg, giving you the precision required for a seamless maneuver.
Entertaining Without the Meltdown: Building the Mindful Omelet Bar
Hosting a weekend brunch does not mean you have to wake up at 5:00 AM, sweat over a hot stove, and isolate yourself in the kitchen while your guests sip mimosas in the living room. The true art of effortless hosting is entirely about intentional staging, smart prep work, and turning the meal into an interactive experience.
Why the Omelet Station is the Ultimate Hosting Hack
An omelet bar is the perfect solution for modern entertaining. It inherently accommodates every dietary restriction imaginable—vegetarians, gluten-free guests, and keto dieters can all curate their own plates without you having to cook four different distinct meals. It gets people out of their seats, mingling, and participating in the creation of their food.
FDA Food Safety: Serving Without the Side of Salmonella
When you are dealing with raw eggs and a buffet setup, food safety is paramount. You cannot just leave a giant bowl of raw, cracked eggs sitting on the counter for two hours. Fresh shell eggs can harbor Salmonella Enteritidis, which multiplies rapidly at room temperature.
Follow the FDA’s strict temperature guidelines to keep your guests safe. Raw eggs must be received and held at an ambient temperature of 40°F (4°C) or below. To achieve this at a buffet, nestle your pitcher of beaten eggs deep inside a larger bowl filled with crushed ice. Better yet, keep the main batch of eggs in the refrigerator and only bring out small portions at a time, replenishing as needed.
For your hot, pre-cooked fillings (like sausage or sautéed vegetables), the FDA requires they be held at an internal temperature of 140°F (60°C) or warmer to keep bacteria at bay. Use a chafing dish, a slow cooker set to warm, or an induction warming tray, and use a digital food thermometer to verify the temperature. Lastly, never add fresh food to an already partially empty serving dish on the buffet; always swap it out for a clean, freshly filled dish to prevent cross-contamination.
The Mise en Place: Setting the Stage
Mise en place (everything in its place) is what separates the chaotic home cook from the relaxed host. Set up your station in a logical, linear flow.
- The Starting Line: Plates, napkins, and forks.
- The Egg Station: The iced pitcher of beaten eggs, a ladle, and a bowl of fresh whisked butter.
- The Ingredient Matrix: Small, beautiful bowls of prepped fillings with individual serving spoons.
- The Cooking Zone: Your portable induction burner (or stovetop) where you, the host, will stand and cook the eggs to order.
- The Finishing Zone: Hot sauce, fresh herbs, flaky sea salt, and black pepper.
The Ingredient Matrix: Curating a Foolproof Filling Spread
The success of an omelet bar relies heavily on the quality and preparation of the fillings. You want a diverse spread of textures and flavors, but you must prep them intelligently.
The Cardinal Rule of Veggies: Control the Moisture
If you take one single piece of advice from this entire masterclass, let it be this: you must pre-cook your watery vegetables. Raw spinach, diced tomatoes, bell peppers, and fresh mushrooms are essentially tiny, delicious water balloons. If you allow your guests to toss them raw into the center of a cooking omelet, they will rapidly steam from the inside out. They will ruin the internal temperature of the egg, turn the center into a soggy swamp, and bleed water all over the plate.
Take the time to sauté your vegetables beforehand. Sauté the spinach until wilted and squeeze it dry. Roast the bell peppers. Caramelize the onions. And thoroughly brown your fungi in a dry pan first to draw out their moisture, unless you want to find out why your mushrooms turn rubbery and your eggs get completely waterlogged. Place these beautifully pre-cooked, flavor-concentrated veggies in your warming trays.
The Cheese Board: Quality Over Convenience
Cheese is the glue that holds a great omelet together. However, for the love of culinary sanity, stop buying pre-shredded cheese for your fillings. Those convenient plastic bags from the supermarket are heavily coated in cellulose, potato starch, and anti-caking agents to prevent the shreds from sticking together in transit. Those same powders prevent the cheese from melting smoothly, resulting in a gritty, oily texture inside your delicate eggs.
Buy high-quality blocks of cheese and grate them yourself the night before. Offer a sharp, aged cheddar for the traditionalists, a nutty Gruyère for the French omelet fans, and a soft, crumbly goat cheese or feta for a bright, acidic punch.
Proteins That Actually Make Sense
Keep your proteins bite-sized and fully cooked.
- Crisp up some thick-cut bacon and crumble it finely.
- Brown and crumble a high-quality breakfast sausage.
- Offer delicate ribbons of smoked salmon (keep this chilled on ice alongside the raw eggs).
- For a plant-based option, finely diced, pan-fried tempeh or seasoned black beans work beautifully.
Execution: Playing Short-Order Cook Without Losing Your Mind
When the guests arrive and the coffee is poured, it is time for you to take your place at the stove. Because you have already prepped your fillings, set up your safe holding stations, and whisked your eggs, the actual cooking process will be a breeze.
The Multi-Pan Workflow
If you are cooking for a crowd, do not try to make one giant omelet in a massive 12-inch skillet and cut it into slices. It will cook unevenly and look terrible. Instead, use two 8-inch skillets. This allows you to cook two individual, customized omelets simultaneously.
Drop a pat of butter into the pan. Wait for it to foam, indicating the water is cooking out of the butter and the temperature is right. Ladle in your beaten eggs. Ask your guest what fillings they want, and while the bottom of the egg sets, sprinkle the cheese and hot fillings over the top.
Remember, just as with oven roasting, preheating the pan is a non-negotiable step before the butter even goes in. If you pour cold eggs and cold butter into cold metal, the proteins will bond directly to the microscopic pores in the pan, and you will be scraping scrambled eggs off the bottom for days.
The Art of the Flip and Fold
Keep the fillings concentrated in the center or slightly off to one side. Once the edges are set, use your flexible slotted turner to gently lift the edge of the egg. If it releases easily, you are ready to fold. Gently roll or fold the egg over the fillings. Let it sit for just five more seconds to allow the residual heat to melt the cheese, and then elegantly slide it directly onto your guest’s waiting plate.
Troubleshooting Kitchen Disasters on the Fly
Even with the best preparation, the kitchen can throw you a curveball. Here is how to handle it with grace.
When the Egg Sticks to the Pan
If you go to fold the omelet and realize the bottom is fiercely stuck to the pan, do not panic and do not aggressively scrape. Remove the pan from the heat immediately. The sudden drop in temperature will often cause the metal to contract slightly, releasing its grip on the proteins. Wait ten seconds, slide a sliver of butter down the edge of the pan so it melts underneath the egg, and gently try again.
When the Omelet Tears
You got a little too ambitious with the fillings, or your spatula caught an edge, and a massive tear rips through the center of your beautiful French fold. Pivot instantly. Smile at your guest, grab your spatula, and aggressively chop the egg up in the pan, tossing the fillings throughout. Congratulations, you are no longer making a failed omelet; you are serving a rustic, artisanal, soft-scrambled egg hash. It will taste exactly the same, and confidence is the ultimate garnish.
When the Pan is Running Too Hot
If you are cooking your fourth omelet in a row and you notice the butter is instantly turning dark brown and smoking the second it hits the pan, your skillet has accumulated too much thermal mass. Do not pour the eggs in; they will instantly turn rubbery and brown. Pull the pan off the burner, wipe it out with a dry paper towel, and let it sit empty for 60 seconds to bleed off the excess heat before starting the next order.
Your Weekend Awaits
You now possess the scientific knowledge, the equipment standards, and the logistical blueprint to conquer the weekend brunch. You understand the delicate thermal dance of protein coagulation, you’ve banished toxic chemicals from your stovetop, and you know exactly how to prep an interactive buffet that keeps both you and your guests happy, safe, and well-fed.
Cooking is not about perfection; it’s about understanding the ingredients in front of you and having the confidence to manipulate them. So pour yourself a mimosa, heat up that pan, and go make some spectacular eggs. You’ve got this.






