
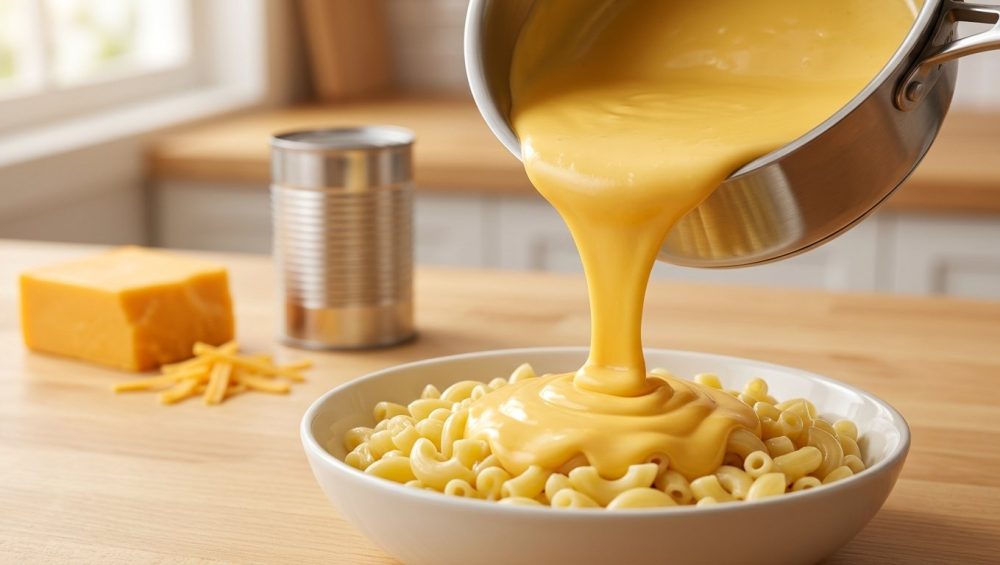
Picture this: It is a Friday night after a relentlessly long week. You are exhausted, your patience is entirely depleted, and all you want in the world is a massive, comforting bowl of homemade macaroni and cheese. You boldly decide to skip the blue cardboard box and make it from scratch. You stand over the stove, you melt down a beautiful, expensive block of sharp cheddar, and you stir it into your pasta.
And then, tragedy strikes.
Instead of a velvety, luxurious coating of liquid gold, your dinner suddenly separates. A slick, unappetizing pool of yellow grease floats to the surface, while the actual dairy solids seize up into tight, gritty little clumps that cling stubbornly to the bottom of the pot. It is incredibly frustrating when your cheese sauce gets grainy right before you serve it. You stare into the pan, defeated, wondering if you should just order a pizza and pretend this culinary disaster never happened.
But here is the absolute truth, my friends: you did not fail because you are a bad cook. You failed because you were unknowingly fighting a losing battle against molecular chemistry.
Making a perfectly smooth, stable cheese sauce is not about culinary magic; it is about respecting the laws of thermodynamics and understanding the delicate nature of dairy proteins. Today, we are going to completely revolutionize your comfort food game. We are going to ditch the fussy, time-consuming traditional methods and embrace a scientifically proven, foolproof shortcut that relies on a humble pantry staple: evaporated milk. Grab a glass of wine, take a deep breath, and let’s dive into the fascinating, snarky, and highly practical science of why your mac and cheese breaks—and exactly how to fix it forever.
The Molecular Anatomy of a Broken Cheese Sauce
To understand why your dinner turned into a gritty oil slick, we first have to understand what cheese actually is. It is not a single, uniform solid block of flavor. It is, in fact, a highly unstable emulsion.
An emulsion is a delicate, temporary peace treaty between two substances that naturally despise each other: fat and water. In a block of cheese, microscopic droplets of dairy fat and little pools of moisture are suspended together, held tightly in place by a complex, tightly woven matrix of dairy proteins—specifically, a protein called casein. When the cheese is sitting cold in your refrigerator, this protein net is solid, secure, and perfectly stable.
But when you introduce heat, the thermodynamics of the kitchen take over. As the temperature in your saucepan rises, that rigid protein matrix begins to relax, soften, and melt. The fat droplets liquefy, and the water begins to loosen up. If you keep the heat gentle, the cheese turns into a beautiful, flowing liquid.
However, if you push that heat just a little too far, those casein proteins undergo a violent and irreversible transformation. They denature, uncoil, and then aggressively snap back together, coagulating into tight, rubbery, microscopic clumps. When they tighten up, they literally wring themselves out like a wet sponge, violently expelling all of the fat and water they were previously holding.
The result? The fat pools on top as a greasy slick, the water evaporates or separates, and those tightly bound protein curds become the gritty, sandy texture you feel on your tongue. Failing to respect this delicate emulsion is one of the seven rookie kitchen mistakes that I see home cooks make on a weekly basis. Once those proteins seize and separate, no amount of frantic whisking or swearing at your stove will bring them back together. The emulsion is broken.
The Old Guard: Why the Traditional Roux Is Failing You
For centuries, classical French culinary doctrine has dictated that the only proper way to stabilize a cheese sauce is to build a béchamel—one of the traditional “mother sauces.”
To do this, you melt a knob of butter in a saucepan, whisk in an equal amount of all-purpose flour to create a paste (the roux), cook it for a few minutes to eliminate the raw flour taste, and then slowly stream in cold milk while whisking aggressively until you have a thickened, bubbling white sauce. Only then do you remove the pan from the heat and gently fold in your grated cheese to create a Mornay sauce.
Why does this archaic method actually work? It comes down to the physical properties of starch. When the flour is cooked in the butter and milk, the complex starch granules swell up, absorb liquid, and eventually burst, releasing long chains of starch molecules into the sauce. These swollen starches physically get in the way of the cheese proteins. They act like microscopic traffic cones, creating a physical barrier that prevents the casein proteins from finding each other, linking up, and coagulating into gritty clumps.
But let me be brutally honest with you: I absolutely despise making a traditional roux on a busy weeknight.
Time is money, and standing over a hot stove aggressively whisking flour while praying it doesn’t turn into a lumpy, paste-like disaster is nobody’s idea of a relaxing evening. You do not need a culinary degree to make dinner, and there are simple steps to culinary artistry that completely bypass this tedious process.
Furthermore, flour is a flavor-muting blanket. It significantly dilutes the sharp, tangy, complex punch of a high-quality aged cheddar. It makes the resulting cheese sauce taste heavy, pasty, and slightly dull. And worst of all, a flour-thickened cheese sauce is notorious for breaking and turning into a solid, unappetizing brick when you try to reheat the leftovers the next day in the microwave. We can do better. We must do better.
Enter the Hero: The Science of Evaporated Milk
This brings us to the ultimate weeknight culinary hack. A scientifically proven, absolutely foolproof shortcut that yields a velvet-smooth, impossibly rich macaroni and cheese in under fifteen minutes, with zero flour required.
The secret is sitting quietly in the baking aisle of your local grocery store, packaged in a humble little aluminum can: evaporated milk.
First, a crucial disclaimer: do not confuse evaporated milk with sweetened condensed milk, unless you actively want your pasta to taste like a cloyingly sweet caramel latte. Evaporated milk is simply regular, homogenized cow’s milk that has been gently heated in a vacuum chamber until approximately 60% of its natural water content has evaporated into thin air.
What is left behind in that can is a highly concentrated, ultra-dense liquid packed with natural dairy sugars, butterfat, and—most importantly—an absolute army of milk proteins. By removing the water, the concentration of both casein and whey proteins skyrockets. You do not need to invest in any expensive aesthetic kitchen upgrades or fancy modernist pantry powders to cook like a professional; you just need to leverage the natural chemistry found inside this cheap, everyday ingredient.
The History of the Perfect Melt (And Why You Don’t Need Processed Cheese)
To fully appreciate why evaporated milk works, we have to take a quick detour into the fascinating history of processed cheese. Back in 1916, an entrepreneur named James L. Kraft patented a revolutionary method for processing cheese to make it shelf-stable and infinitely meltable. His secret weapon was a chemical compound called sodium citrate (a naturally occurring salt derived from citric acid).
When sodium citrate is added to melting cheese, it performs a molecular magic trick. It swaps out the calcium ions that naturally hold the casein protein matrix together, replacing them with sodium ions. This fundamental structural change makes the casein incredibly soluble and transforms it into a wildly powerful emulsifier. This is exactly why processed American cheese and Velveeta melt into a flawless, glossy puddle without ever separating or turning greasy.
In modern, high-end kitchens, chefs actually buy pure sodium citrate powder to make flawlessly smooth cheese sauces out of aged, stubborn cheeses. But for the everyday home cook who just wants a quick dinner without ordering specialty chemicals on the internet, evaporated milk provides a natural, accessible alternative. By flooding your saucepan with the highly concentrated proteins found in evaporated milk, you are providing your sauce with a massive dose of natural emulsifiers that mimic the exact same stabilizing effect as processed cheese—but with the superior flavor of real, high-quality cheddar.
Casein Micelles: The Microscopic Bouncers of Your Cheese Sauce
Let’s get a little nerdy for a moment, because understanding the “why” is exactly how you become a fearless, intuitive cook.
Milk proteins, particularly casein, naturally arrange themselves into microscopic, spherical structures known as micelles. These casein micelles are nature’s perfect little emulsifiers. Remember how we defined an emulsifier earlier? It is a molecule with a split personality. One end of the molecule is hydrophilic (meaning it loves water and seeks it out), while the other end is hydrophobic (meaning it absolutely hates water, but loves to bind with fat).
When you pour a splash of evaporated milk into a pan of melting cheese, these highly concentrated casein micelles rush into the chaotic, separating mixture like microscopic bouncers breaking up a bar fight. Their fat-loving ends immediately grab onto the escaping droplets of butterfat, while their water-loving ends grab onto the ambient moisture in the pan. They act as molecular bridges, holding the fat and water together in a stable, harmonious, unbreakable suspension.
Because evaporated milk is so heavily concentrated—having lost 60% of its water—it provides more than enough emulsifying power to keep the cheese perfectly smooth, glossy, and stable without the need for a single grain of flour.
The “No-Go” Rule: Stop Cooking in Toxic Waste
Before we get into the exact, step-by-step technique for making this glorious meal, we need to have a very serious, brutally honest conversation about your kitchen equipment. I have zero patience for pretentious chef-speak, but I have even less patience for cheap, toxic kitchenware.
If you are trying to make a delicate, temperature-sensitive cheese sauce in a scratched, peeling, ten-dollar non-stick pan that you bought at a discount store five years ago, you are setting yourself up for catastrophic failure. Worse, you are potentially serving your family a side of synthetic forever chemicals. I am fully committed to banishing toxic kitchen gear from my home, and you should be too.
The cheap PTFE (Teflon) and PFAS coatings on those bargain-bin pans degrade rapidly under high heat. Not only do they flake off directly into your food, but these incredibly cheap aluminum pans have absolutely abysmal thermal conductivity. They create massive, unpredictable hot spots across the cooking surface. When you are working with concentrated dairy proteins, a hot spot will scorch your evaporated milk in a matter of seconds, ruining the entire dish and filling your kitchen with the acrid smell of burnt lactose.
Furthermore, if your cheap frying pans keep warping and spinning around on your glass stovetop like a top, they are not making even contact with the heating element, which guarantees that your sauce will break from uneven temperature fluctuations.
You need cookware that actually respects your food. A high-quality, fully clad stainless steel saucier (which has curved edges for easy whisking) or a heavy-bottomed enameled cast iron pot is absolutely non-negotiable here. These materials offer superior, even heat distribution, ensuring that your delicate dairy proteins warm up gently and uniformly without ever scorching. Invest in good metal, and it will reward you with perfect sauces for the rest of your life.
The Magic Ratio: The One-Pot, Three-Ingredient Miracle
Now that we understand the science and have the right pan, let’s talk about the technique. This brilliant method—popularized in modern culinary circles by food science writer J. Kenji López-Alt—is a masterclass in efficiency. It requires exactly three primary ingredients, one single pot, and about ten minutes of your time.
The golden ratio is incredibly simple to remember: equal parts (by weight) of dry macaroni, evaporated milk, and grated cheese. That is it. Six ounces of pasta, six ounces of evaporated milk, and six ounces of cheese will yield two incredibly generous, wildly rich portions.
The Starch Synergy: Why We Start with Cold Water
The true genius of this method is that it completely eliminates the need to boil your pasta in a massive, heavy cauldron of water. Traditional Italian culinary dogma dictates that you must cook pasta in a rolling boil of heavily salted water that resembles the sea. For a delicate marinara, sure. But for this specific technique, that is the worst thing you can do.
Instead of drowning your macaroni, you are going to place the dry pasta directly into your cold skillet or wide pot. You will then add just enough cold water to barely cover the noodles, along with a healthy pinch of salt. You turn the heat to high and cook the pasta aggressively, stirring frequently so it doesn’t stick to the bottom of the pan.
Why do we do this? As the pasta cooks, it releases its surface starches into the water. Because you used such a remarkably small amount of water, it doesn’t just drain away down the sink; it reduces and concentrates into a thick, cloudy, intensely starchy syrup. Never underestimate the secret power of starchy water in your pan.
When the pasta reaches a perfect al dente texture and the water has almost entirely evaporated, you are left with noodles coated in a powerful starch gel. When you finally pour in your evaporated milk and your grated cheese, you are creating a two-pronged defense system against sauce breakage. The concentrated casein proteins from the milk chemically bind the fat and water together, while the concentrated liquid starch from the pasta physically blocks the cheese proteins from clumping. Together, they create an impenetrable fortress of emulsification.
Cheese Selection: The Good, The Bad, and The Waxy
You can have all the evaporated milk and starchy pasta water in the world, but if you sabotage yourself at the cheese drawer, your sauce will still suffer a terrible fate.
First and foremost, we need to talk about the hidden trap of pre-shredded cheese. I know you are tired after work. I know the bags are convenient. But you must resist the urge. Those convenient little bags of shredded cheese at the grocery store are heavily coated in industrial anti-caking agents—usually powdered cellulose (wood pulp) or potato starch—to keep the shreds from clumping together during transit and storage.
When you subject those chemically coated shreds to heat, they stubbornly refuse to melt properly. Instead of turning into a liquid, they turn into a gritty, sandy, unappetizing sludge. Those anti-caking agents will absolutely ruin a perfect melt. You must buy a solid block of real, high-quality cheese and grate it yourself using a standard box grater. It takes exactly sixty seconds, it is cheaper by the ounce, and it is entirely non-negotiable if you want a silky sauce.
Building the Perfect Flavor Profile
For the best flavor and texture, you should use a blend of cheeses. A high-quality, sharp cheddar is the undisputed king of macaroni and cheese flavor, providing that classic, punchy, acidic bite. However, aged cheddar has a very low moisture content and a tightly packed protein structure, which makes it notoriously stubborn and prone to breaking when melted.
To balance this out, you need to pair your sharp cheddar with a superior melting cheese. Look for younger, higher-moisture cheeses like Gruyère, Fontina, Monterey Jack, or even a young Gouda. These cheeses have a much looser protein structure that melts like an absolute dream, providing the gooey, elastic, luxurious stretch that makes macaroni and cheese so incredibly satisfying to eat. A 50/50 split of sharp cheddar and Gruyère is, in my professional opinion, the pinnacle of home-cooked comfort.
Executing the Masterclass: Step-by-Step Instructions
Let’s put all of this glorious science into practice. Here is exactly how you execute the perfect, unbreakable mac and cheese on a random Tuesday night.
- The Cold Start: Place 6 ounces of high-quality elbow macaroni (or cavatappi, if you want to be fancy) into a wide, heavy-bottomed stainless steel skillet or enameled cast iron pot. Add just enough cold water to barely cover the pasta. Add a generous pinch of kosher salt.
- The Starch Extraction: Turn the heat to medium-high. Bring the water to a vigorous boil. Cook the pasta, stirring frequently with a wooden spoon or silicone spatula to prevent sticking. Continue boiling until the water is almost completely absorbed and reduced to a thick, cloudy syrup, and the pasta is just shy of al dente (usually about 6 to 8 minutes).
- The Emulsion Phase: Immediately reduce your burner heat to the lowest possible setting. Pour in 6 ounces of evaporated milk (shake the can well before opening!). Stir to combine it with the starchy pasta water.
- The Cheese Integration: Add 6 ounces of freshly grated cheese (your beautiful blend of sharp cheddar and Gruyère).
- The Final Stir: Stir continuously and gently over the low heat. Watch in absolute awe as the concentrated casein micelles and the pasta starches go to work. Within about two minutes, the cheese will completely melt, the liquids will emulsify, and you will be left with a thick, glossy, impossibly creamy sauce that clings perfectly to every single noodle.
- The Seasoning: Remove the pan from the heat immediately. Taste it. It will likely need a bit more salt, a generous grinding of fresh black pepper, and—if you want to elevate it—a tiny pinch of dry mustard powder or a dash of hot sauce to cut through the richness and amplify the cheesy flavor.
Troubleshooting Your Liquid Gold
Even with bulletproof science and perfect technique, the variables of a home kitchen can occasionally require a slight adjustment. Do not panic; you are in total control of this emulsion.
If the sauce is too thick and gloppy:
As the pasta cools, the starches will continue to swell and absorb liquid, which can make the sauce thicken up rapidly. If it looks a little too tight, simply splash in a tiny bit of regular milk, a spoonful of hot water, or a little extra evaporated milk if you have some left in the can. Stir it vigorously over low heat until it loosens back up into a silky, flowing ribbon.
If the sauce is too thin and soupy:
You likely didn’t boil off quite enough of the initial pasta water, or your cheese had a very high moisture content. Keep the heat on low and let the pan simmer gently for another minute or two while stirring continuously. The excess water will naturally evaporate, and the starches will continue to gelatinize and thicken the sauce.
If the sauce tastes bitter or burnt:
You blasted the heat too high when adding the milk. Dairy sugars (lactose) are highly sensitive to heat and will scorch rapidly if they make contact with a pan that is too hot. If you’ve mastered the water drop test for your stainless pan, you know exactly how to manage your heat control. Always, always drop your burner to the lowest possible setting before adding the evaporated milk and cheese. Remember the golden rule of dairy: low and slow.
Reheating Leftovers:
Unlike a traditional roux-based mac and cheese, which turns into a solid, greasy brick in the fridge, this evaporated milk version reheats beautifully. The concentrated emulsifiers keep the sauce stable even when chilled. To reheat, place a portion in a bowl, add a small splash of regular milk or water, and microwave it in short, 30-second bursts, stirring in between, until it is hot and creamy again.
Final Thoughts from the Sassy Sous-Chef
Cooking incredible, mind-blowing food at home is not about possessing some rare, innate culinary talent that you were born with. It is entirely about understanding the basic rules of engagement, respecting the ingredients, and knowing how to manipulate the science of the kitchen to your advantage.
By ditching the fussy, outdated roux and leaning heavily on the incredible, natural emulsifying power of evaporated milk, you are taking absolute control of your kitchen. You are working significantly smarter, not harder. You are saving precious time on a busy weekday night, avoiding unnecessary stress, and still producing a phenomenal meal that tastes like an elaborate weekend culinary project.
So the next time you find yourself craving comfort food, leave the boxed stuff on the supermarket shelf. Grab a can of evaporated milk, grate your own cheese, and watch the molecular magic happen right before your eyes. You’ve got this.






