
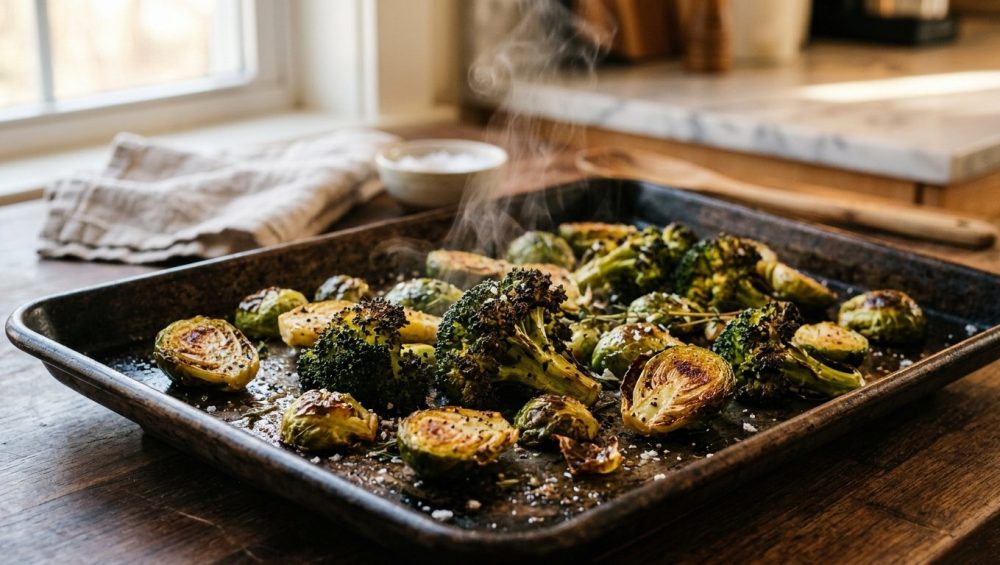
We need to have a serious conversation about the side dishes you have been serving your family. I know you have the best of intentions. You march into the grocery store, you buy beautiful, vibrant, organic produce, and you tell yourself that tonight is the night you are going to eat healthy. You chop up those gorgeous bell peppers, zucchini, and broccoli florets, toss them onto a cold metal sheet, shove them into the oven, and wait.
Forty-five minutes later, you pull out a tragedy.
Instead of the deeply charred, crispy, restaurant-quality roasted vegetables you envisioned, you are staring at a puddle of sad, limp, watery mush. The broccoli is gray. The zucchini has the structural integrity of wet tissue paper. The bell peppers look like they have given up on life entirely. You force yourself to eat them because they are “healthy,” but deep down, you know it tastes like wet despair.
Listen to me closely: you do not have to live like this. If you want to fix your food and actually look forward to eating your greens, you have to fundamentally change the way you approach your oven. You do not need a culinary degree to make mind-blowing, perfectly caramelized vegetables. You do not need expensive truffle oil or complex glazes. You only need to understand one basic, undeniable law of kitchen thermodynamics: the magic of the preheated pan.
Today, we are going to tear down everything you thought you knew about roasting vegetables. We are going to dive deep into the science of heat transfer, the absolute necessity of thermal mass, the chemical miracles of the Maillard reaction, and why tossing cold food onto a cold baking sheet is the ultimate culinary sin. Grab a glass of wine, take notes, and prepare to never eat a soggy Brussels sprout again.
The Anatomy of a Mushy Vegetable: Why You Are Failing
To understand the solution, you first have to understand the crime you are committing against your produce. Most home cooks treat roasting like a passive activity. You put food in a hot box, the hot box makes the food hot, and eventually, it is cooked. This is a fundamental misunderstanding of what is actually happening at a cellular level.
Vegetables are, chemically speaking, essentially delicious water balloons. Zucchini, bell peppers, mushrooms, and onions are composed of anywhere from 85% to 95% water. When you expose these water-logged plant cells to heat, the cell walls begin to break down, and they release that internal moisture.
Here is where the disaster happens. When you place room-temperature (or worse, fridge-cold) vegetables onto a cold baking sheet and put that sheet into the oven, everything warms up together. The oven ambient temperature rises, the metal pan slowly absorbs that heat, and the vegetables slowly begin to sweat. Because the pan is not yet hot enough to instantly evaporate that expelled moisture, the water pools on the surface of the metal.
By the time your oven reaches its target temperature of 400°F or 425°F, your vegetables are already sitting in a shallow, simmering bath of their own expelled juices. You are not roasting your vegetables, honey. You are boiling them. You are slowly steaming them on a flat piece of metal.
Steam is the ultimate enemy of crispness. Steam is wet heat. As long as your vegetables are sitting in liquid water, the surface temperature of that food cannot exceed 212°F (100°C), which is the boiling point of water. It does not matter if your oven is set to 450°F; if the food is wet, it is stuck at 212°F until every last drop of that water evaporates. By the time that water finally cooks off, the internal structure of the vegetable has completely collapsed, resulting in the mushy, unappetizing texture you have come to dread.
Thermal Mass: Your Kitchen’s Secret Weapon
The foolproof, science-backed technique to completely eliminate soggy side dishes relies on a concept called thermal mass. In layman’s terms, thermal mass is the ability of a heavy object to absorb, store, and release heat energy.
When you preheat a heavy baking sheet in the oven before you put your food on it, that piece of metal becomes a massive battery of stored thermal energy. When your cold, wet vegetables hit that screaming hot metal, the stored heat is immediately transferred to the food. Instead of pooling and simmering, the surface moisture of the vegetable flash-evaporates on contact.
This instant evaporation is crucial. By violently driving off the surface moisture the millisecond the food touches the pan, you bypass the dreaded steaming phase entirely. The surface of the vegetable can immediately begin to climb past the 212°F boiling point and enter the temperature zone where the real magic happens.
However, thermal mass requires actual mass. If you are using a flimsy, paper-thin baking sheet you bought at the grocery store for four dollars, you are going to fail. When you drop a pound of cold vegetables onto a thin sheet of metal, the temperature of that metal plummets instantly. It does not have enough stored energy to recover quickly, and you are right back to steaming. This rapid temperature fluctuation is exactly why your cheap baking sheets keep warping and popping loudly in the oven.
You need heavy-duty gear. A commercial-grade, 18-gauge bare aluminum half-sheet pan, a thick carbon steel roasting pan, or a massive cast iron griddle. These materials have the density and thermal mass required to maintain their heat when bombarded with cold produce.
The Maillard Reaction Explained (Without the Pretentious Chef-Speak)
Why do we care so much about getting the surface temperature of the vegetable past 212°F? Because we are chasing the holy grail of culinary flavor: the Maillard reaction.
Named after the French chemist Louis-Camille Maillard who first described it in 1912, the Maillard reaction is a complex chemical process that occurs between amino acids (the building blocks of proteins) and reducing sugars when they are exposed to high heat. This reaction is responsible for almost everything that tastes good in the world. It is what makes bread crust golden, what makes a seared steak savory, what makes roasted coffee complex, and what transforms a bitter, raw Brussels sprout into a sweet, nutty, charred delicacy.
Here is the catch: the Maillard reaction does not even begin to kick into high gear until the surface temperature of the food reaches about 280°F to 330°F (140°C to 165°C).
Remember our lesson on steam? If your vegetables are sitting in a puddle of their own water on a cold pan, they are trapped at 212°F. The Maillard reaction is chemically impossible under those conditions. Your food will remain pale, bland, and boiled.
By utilizing a preheated, high-thermal-mass pan, we eliminate the water barrier. The surface temperature of the vegetable skyrockets into the 300°F+ range within minutes, triggering a cascade of hundreds of new flavor compounds. The sugars caramelize, the proteins brown, and you develop those deeply savory, crispy, blackened edges that make restaurant vegetables taste so intoxicatingly good. Just like you rely on the water drop test to ensure your stainless steel skillet is hot enough to sear a chicken breast, you must rely on a preheated baking sheet to sear your vegetables.
The Gear: Ditch the Toxic Trash (And What to Use Instead)
Before we get to the step-by-step masterclass, we need to have a brutally honest intervention about the equipment in your kitchen. As a home cook who prioritizes both efficiency and health, I have an absolute “no-go” rule when it comes to cheap, toxic kitchenware.
If you are currently roasting your vegetables on a dark, scratched, peeling non-stick baking sheet, I need you to walk into your kitchen and throw it in the garbage. Right now. I am not being dramatic; I am looking out for your health and your food.
The Danger of PFAS and PTFE in the Oven
Traditional non-stick coatings are made from PTFE (polytetrafluoroethylene), which belongs to a broader class of thousands of synthetic chemicals known as PFAS (per- and polyfluoroalkyl substances), often referred to as “forever chemicals” because they do not break down in the environment or the human body.
While the cookware industry loves to claim these pans are safe under “normal” cooking conditions, the reality of a home kitchen tells a different story. PTFE coatings begin to rapidly degrade and off-gas toxic fluorinated compounds when they reach temperatures above 500°F (260°C). When you are roasting vegetables in a 425°F or 450°F oven, the ambient air might be 425°F, but the dark metal pan absorbing radiant heat from the lower heating element can easily exceed 500°F.
When these coatings overheat, they release fumes that cause a condition known as polymer fume fever, or “Teflon flu,” characterized by severe fever, chills, and headaches. In 2023, the US saw one of the highest annual totals on record for suspected cases of polymer fume fever, and it is vastly underreported because most people do not connect their flu-like symptoms to their dinner prep. These fumes are so toxic that they are famously fatal to pet birds located rooms away from the kitchen.
Furthermore, as these pans age and scratch, the coating flakes directly into your food. Regulatory bodies are finally catching up to this nightmare. Entering 2025 and 2026, several US states, including California, Colorado, and Minnesota, have implemented strict bans and restrictions on intentionally added PFAS in cookware.
Do not wait for a federal mandate to protect your family. You are actively ruining your nonstick pans and risking your health by blasting them in a high-heat oven.
The Safe, High-Performance Alternatives
You do not need toxic chemicals to prevent vegetables from sticking. You need proper technique and high-quality, durable materials. These are the essential kitchen tools you should be investing in:
- Bare Aluminum Commercial Half-Sheet Pans: These are the undisputed workhorses of the professional kitchen. They are thick (look for 18-gauge or 13-gauge), they conduct heat beautifully, and they have no coatings to peel or off-gas. They will naturally darken and stain over time—this is a badge of honor, not a defect.
- Carbon Steel Roasting Pans: Carbon steel is lighter than cast iron but boasts incredible thermal mass and heat conductivity. Once seasoned, it develops a naturally non-toxic, non-stick patina that gets better every time you use it.
- Cast Iron: A large cast iron griddle or skillet is phenomenal for roasting. It holds heat better than almost anything else in your kitchen, guaranteeing a vicious sear on your vegetables. And please, do not be intimidated by the cleanup; a simple chainmail scrubber makes cleaning cast iron an absolute breeze.
The Step-by-Step Masterclass to Perfect Roasted Vegetables
We have covered the science, and we have purged the toxic gear. Now, it is time to execute. This is my foolproof, step-by-step masterclass for achieving perfectly charred, crispy, tender roasted vegetables every single time.
Step 1: The Preheat and the Calibration
Before you even look at a vegetable, place your heavy bare aluminum sheet pan or carbon steel pan into the cold oven. Set the oven to 425°F (220°C). For particularly dense root vegetables, you can push this to 450°F (230°C).
Let the pan preheat with the oven. By the time the oven dings to let you know it has reached the target temperature, that pan will be a screaming hot battery of thermal mass.
A quick note on ovens: Most home ovens are filthy liars. When the machine beeps to say it is at 425°F, it is often off by 25 to 50 degrees. You must stop trusting your oven display implicitly. Buy a cheap, $10 analog oven thermometer, hang it on the center rack, and wait until that dial actually hits 425°F before you proceed.
Step 2: The Chop and the Dry
While the oven and pan are preheating, prep your vegetables. Consistency is key here. If you cut one potato into a massive wedge and another into a tiny cube, the small one will burn to ash before the large one is even tender. Aim for uniform, bite-sized pieces.
When chopping, try to maximize surface area. A vegetable cut on a bias (an angle) or sliced with a flat edge will have more physical contact with the hot pan, resulting in more Maillard browning. Ensure your knife is razor-sharp; crushing your produce with a dull blade damages the cell walls prematurely and is exactly why your wooden cutting board cracks under the immense, unnecessary pressure you are applying.
Once chopped, you must dry the vegetables obsessively. If you just washed your broccoli, spin it in a salad spinner. Pat your zucchini dry with a clean kitchen towel. Remember: surface moisture is the enemy of the Maillard reaction. We want these vegetables bone dry before we introduce fat.
Step 3: The Oil and the Seasoning
Never oil your vegetables directly on the baking sheet. You will end up with dry spots that burn and oily spots that turn soggy.
Place your perfectly dried, uniformly chopped vegetables into a large mixing bowl. Drizzle them with a high-smoke-point fat. Extra virgin olive oil is fine for 425°F, but avocado oil or melted ghee provides even better insurance against smoking. Do not skimp on the oil, but do not drown them either. You want a light, even gloss over every single piece. The oil acts as a conductive medium, transferring the heat from the hot pan directly into the uneven surface of the vegetable.
Toss the vegetables with your hands to ensure even coating. Add your spices now—garlic powder, smoked paprika, black pepper—but hold off on the salt if you are cooking high-moisture vegetables like zucchini or mushrooms. Salt draws water out of plant cells through osmosis. If you salt them too early, they will weep moisture into the bowl, defeating all your drying efforts. Salt them right before they hit the pan, or immediately after they come out of the oven.
Step 4: The Sizzle (The Moment of Truth)
Put on your heavy-duty oven mitts. Carefully remove the screaming hot, preheated pan from the oven and place it on a heat-safe surface (like your stovetop).
Immediately dump your oiled vegetables onto the hot pan.
Listen closely. You should hear an aggressive, loud SSSSSSSSS the exact millisecond the vegetables make contact with the metal. That sound is the symphony of success. That is the sound of surface moisture flash-evaporating. That is the sound of the Maillard reaction initiating immediately. If you dump your vegetables onto the pan and hear silence, you have failed. Your pan was not hot enough, and you are about to steam your dinner.
Step 5: The Social Distancing of Vegetables
Quickly use a pair of tongs or a spatula to spread the vegetables out into a single, even layer.
This is the most critical step that home cooks mess up: Do not crowd the pan.
Even with a preheated pan, vegetables are going to release internal steam as they cook. If the pieces of food are touching shoulder-to-shoulder, that steam gets trapped between them, creating a humid microclimate that ruins your crispness. Your vegetables need space to breathe. There should be at least a half-inch of visible metal between every single piece of food.
If you have too many vegetables to fit comfortably on one pan, do not force them. Use two pans, or roast them in batches. Yes, it means washing an extra dish, but ruining ten dollars worth of organic produce because you were too lazy to wash a second sheet pan is a terrible trade-off.
Put the pan back into the oven. Let them roast undisturbed for at least 15 to 20 minutes before you even think about opening that oven door. Every time you open the door, you lose massive amounts of heat. Let the hot metal do its job. Flip them once they have developed a deep, dark crust on the bottom side, then roast for another 10 to 15 minutes until tender.
Vegetable-Specific Troubleshooting (Because All Veggies Are Not Created Equal)
The masterclass technique applies to everything, but different categories of vegetables require slight tweaks to achieve absolute perfection. Here is how to handle the specific quirks of your produce drawer.
The Root Vegetables (Potatoes, Carrots, Beets, Parsnips)
Root vegetables are dense, starchy, and relatively low in moisture compared to summer squashes. They can take a serious beating when it comes to heat.
- The Fix: You can push the oven temperature to 450°F for these. Because they take longer to cook through to the center, ensure your pieces are cut relatively small (about 1/2-inch cubes) so the outside doesn’t burn before the inside becomes tender.
The Cruciferous Crew (Broccoli, Cauliflower, Brussels Sprouts)
These are the kings of the roasted vegetable world, but their complex physical structures (lots of tiny buds and tightly packed leaves) make them incredibly prone to trapping water.
- The Fix: You must dry these obsessively. After washing broccoli or cauliflower, leave them sitting out on a clean towel for an hour if you have to. When prepping Brussels sprouts, always cut them in half and place them flat side down on the preheated pan. That flat surface area making direct contact with the searing hot metal will result in a caramelized crust that tastes practically like candy.
The Water Logs (Zucchini, Bell Peppers, Mushrooms, Eggplant)
These vegetables are your biggest liability. They hold massive amounts of water and will turn to mush if you look at them wrong.
- The Fix: Preheating the pan is absolutely non-negotiable here. Furthermore, do not salt these until they are completely finished cooking. Just like caramelized onions take forever if you constantly stir them and trap their moisture, mushrooms and zucchini will never brown if you crowd them. Give these high-moisture vegetables double the space on the pan that you think they need.
Weeknight Efficiency Hacks for the Exhausted Cook
I know what you are thinking: “This sounds great for a lazy Sunday, but I am a busy parent. I get home from work at 5:30 PM, the kids are screaming, and I do not have time to obsessively dry broccoli and calibrate my oven.”
I hear you. Time is money, and weeknight cooking is about survival. But utilizing the preheated pan method actually saves you time because high-heat roasting is significantly faster than low-temp baking. Here is how you execute this flawlessly on a chaotic Tuesday:
- The Sunday Prep: Do all your washing and chopping on Sunday afternoon. Store the chopped vegetables in airtight glass containers in the fridge, lined with a dry paper towel. The paper towel absorbs ambient moisture, meaning by Tuesday, your vegetables are already bone-dry and ready to roast.
- The Immediate Preheat: The literal very first thing you do when you walk in the door—before you take off your coat, before you check the mail—is turn your oven to 425°F and throw your bare aluminum sheet pan inside.
- The Quick Toss: While the oven preheats (which usually takes 15 minutes), take your pre-chopped vegetables out of the fridge. Toss them in a bowl with oil and spices.
- The Hands-Off Cook: Once the oven is hot, dump the veg on the preheated pan, spread them out, and walk away. You now have 25 minutes of completely hands-off time to pan-sear a chicken breast, help with homework, or stare blankly at the wall.
- The Finishing Touch: When the vegetables come out, hit them with a squeeze of fresh lemon juice or a splash of balsamic vinegar. Acid wakes up the flavors and cuts through the richness of the oil. Serve it alongside your protein and a quick side salad. (Pro tip: if your homemade salad dressing always separates, whisk in a half-teaspoon of Dijon mustard before tossing your greens—it acts as a powerful emulsifier).
The Final Word
You do not have to settle for mediocre, mushy vegetables. The difference between a sad, soggy side dish and a vibrant, crispy, caramelized masterpiece does not come down to expensive ingredients or professional culinary training. It comes down to respecting the science of cooking.
Stop throwing cold food onto cold, flimsy, toxic pans. Invest in a heavy-duty baking sheet, let your oven do the heavy lifting of preheating that metal, dry your produce, and give your food the space it needs to breathe.
Mastering the preheated pan will trigger the Maillard reaction, maximize your thermal mass, and completely revolutionize your weeknight dinners. Now go preheat your oven, toss those toxic non-stick pans in the trash, and start roasting like you actually mean it.






