
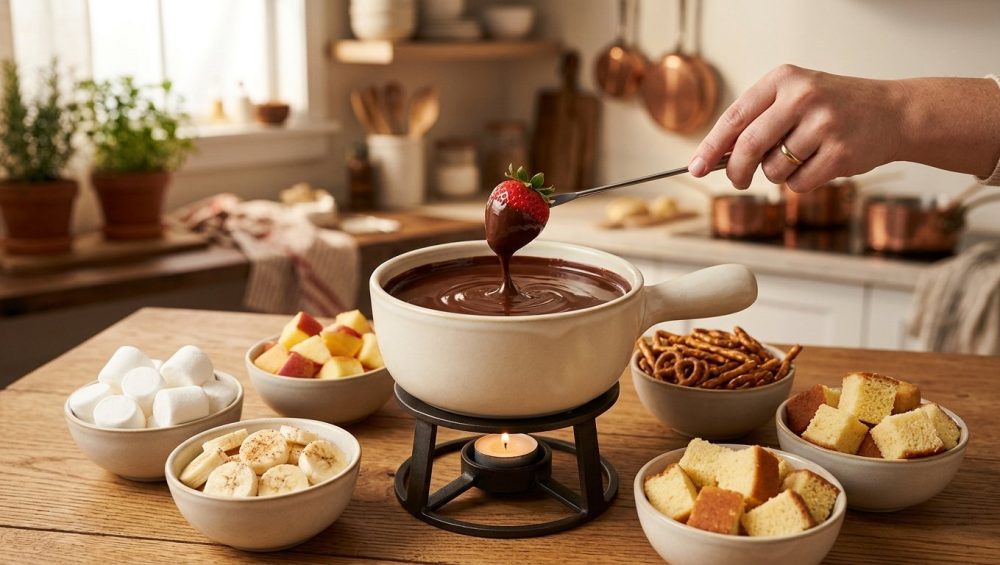
Picture this: It is 7:00 PM on a Saturday. Your friends are arriving in exactly one hour. You have curated the perfect playlist, the wine is breathing, and you are about to execute the grand finale of the evening—a luxurious, velvety chocolate fondue. You confidently dump a bag of expensive chocolate into a pot, crank up the heat, and step away to check your phone. Five minutes later, you return to find that your expensive, glossy chocolate has transformed into a dull, gritty, grainy paste that looks suspiciously like wet potting soil. Panic sets in. You stir frantically, which only makes it worse. You have just experienced the culinary heartbreak known as “seizing.”
Listen to me closely: anyone who tells you that melting chocolate requires a pastry degree is either lying to you or trying to sell you an overpriced culinary course. I am a busy professional who learned to cook through sheer stubbornness, trial, error, and setting off the smoke detector a few too many times. I firmly believe that you can produce mind-blowing, restaurant-quality food in a standard home kitchen without pretentious chef-speak. While I survive my weekdays using ruthless, time-saving cooking hacks, the weekend is when we slow down. The weekend is when we have the luxury of being absolute perfectionists. And when it comes to chocolate, perfection is entirely about respecting the science.
Today, we are leaving absolutely no stone unturned. We are going to break down the exact molecular food science of why chocolate seizes, how to control your temperatures like a seasoned professional, and the definitive guide to setting up a stress-free, interactive fondue spread. More importantly, we are going to talk about the gear you need, and the toxic kitchen junk you need to throw in the trash immediately.
The Food Science of Chocolate: What Are You Actually Melting?
To understand why your dessert turned into a grainy nightmare, you first need to understand what chocolate actually is. We tend to think of chocolate as a single, uniform ingredient, but it is actually a highly delicate, complex emulsion.
At its core, chocolate is composed of cocoa solids (the brown stuff that tastes like chocolate), cocoa butter (the naturally occurring fat from the cacao bean), and sugar. In milk chocolate, you also have milk solids. To keep all of these ingredients playing nicely together, chocolate makers use an emulsifier, usually soy lecithin.
Here is the mind-blowing part that most home cooks do not realize: chocolate is essentially a dry ingredient suspended in fat. The cocoa solids and the sugar are completely dry particles. The cocoa butter coats these dry particles, allowing them to slide past one another smoothly when the fat is melted. This is what gives melted chocolate its glorious, fluid, velvety texture.
When you melt chocolate, you are not changing its chemical structure; you are simply applying enough thermal energy to turn the solid cocoa butter into a liquid. Because the dry particles remain perfectly coated in that liquid fat, the entire mixture flows beautifully. But this delicate emulsion is incredibly fragile. It is constantly teetering on the edge of disaster, waiting for you to make one of two fatal mistakes: introducing moisture, or introducing too much heat.
Villain Number One: The Single Drop of Water
The number one reason why your melted chocolate turns clumpy is moisture. Water is the absolute arch-nemesis of melted chocolate.
Remember how we established that chocolate is a suspension of dry sugar and cocoa particles in fat? Well, sugar is highly hydrophilic, meaning it loves water. Fat, on the other hand, is hydrophobic; it hates water.
If even a single, microscopic drop of water makes its way into your bowl of melting chocolate, chaos ensues. The water acts like a magnet to the sugar. The sugar particles immediately abandon the cocoa butter and rush to bind with the water. Because there is not enough water to actually dissolve the sugar, the sugar and water clump together into a jagged, sticky, rough mass. The cocoa butter is suddenly pushed away, separating from the solids. In a matter of seconds, your smooth emulsion breaks, and the chocolate seizes into a stiff, gritty paste.
Where does this moisture come from? Usually, it is entirely your fault. It comes from using a bowl that you thought was dry but actually had a water droplet hiding in the curve. It comes from using a wooden spoon that retained moisture from being washed yesterday. Most commonly, it comes from steam. When you use a double boiler, boiling water violently releases steam. If your bowl does not fit snugly over the pot, that steam billows up, condenses on the sides of your bowl, and drips right back down into your chocolate. Game over.
Villain Number Two: Scorching the Cocoa Solids
If your chocolate did not turn into a gritty paste, but rather turned into a thick, muddy, dull sludge that smells faintly of a campfire, you did not seize it with water. You scorched it with heat.
Chocolate is incredibly sensitive to temperature. It does not want to be hot; it barely wants to be warm. The cocoa butter in chocolate begins to melt at around body temperature (which is why chocolate melts in your hands). If you push the temperature too high, the delicate cocoa solids will literally burn, and the emulsifiers will fail.
According to professional chocolatiers, dark chocolate should never be heated above 120°F (48°C). Milk chocolate and white chocolate are even more fragile because they contain milk solids and higher sugar contents, which burn even faster. Milk and white chocolate should never exceed 115°F (46°C).
When you blast a bowl of chocolate in the microwave for two straight minutes on high power, you are subjecting the bottom layer of that chocolate to temperatures well over 200°F. The cocoa solids burn, the mixture seizes up, and there is absolutely no saving burnt chocolate. It must go in the trash.
The “No-Go” Rule on Toxic Gear: What to Use and What to Trash
Before we even discuss melting techniques, we need to have a serious conversation about your kitchen equipment. If you are serious about banishing toxic kitchen gear from your home, you need to start with your fondue pot and your spatulas.
I have absolutely zero patience for cheap, peeling, scratched non-stick cookware. The vast majority of inexpensive electric fondue pots on the market are coated in mystery-metal Teflon (PTFE). When these cheap coatings are heated, especially if they are scratched by metal fondue forks, they can flake off directly into your food and off-gas toxic chemicals. We are trying to host a mindful, elegant evening, not serve our guests a side of forever chemicals.
The Ultimate Fondue Vessel
For a safe, durable, and highly effective fondue setup, you have two acceptable choices: enameled cast iron or heavy-bottomed ceramic.
Enameled cast iron is the undisputed king of the fondue table. Cast iron is a dense metal with incredible thermal mass. This means it takes a while to heat up, but once it is warm, it holds onto that heat beautifully and distributes it evenly. The enamel coating is essentially melted glass, making it completely non-toxic, non-reactive, and incredibly easy to clean. When you place an enameled cast iron pot over a small tealight or a low electric burner, it maintains a gentle, ambient warmth that keeps your chocolate perfectly fluid without scorching the bottom.
Heavy ceramic pots are a fantastic runner-up. They also provide gentle, even radiant heat and are completely free of toxic coatings. Do not use thin, unlined stainless steel pots for the actual serving vessel; stainless steel conducts heat too aggressively and will scorch the chocolate sitting directly over the flame.
The Double Boiler Setup
For the actual melting process (which you should do on the stove, not at the table), you need a proper double boiler. You do not need to buy a specialized unit. You simply need a medium-sized stainless steel saucepan and a heat-proof glass or stainless steel mixing bowl that nests snugly on top of the pan. The bowl must be wider than the pan so that it creates a tight seal, preventing any steam from escaping.
The Spatula Mandate
Throw away your wooden spoons. Wood is porous. It absorbs water, holds onto it, and releases it when it gets warm. Stirring chocolate with a wooden spoon is asking for a seizing disaster. Furthermore, nobody wants a dessert where the spatulas taste like soap because they absorbed last night’s garlic and dish detergent.
You must use a high-quality, seamless, food-grade silicone spatula. Seamless silicone has no crevices for water to hide in, it is completely heat-proof, and it wipes perfectly clean.
The Foolproof Melting Masterclass
We have covered the science, and we have covered the gear. Now, let us execute the perfect melt. Time is money during the weekday, but on a weekend, we take our time. Patience is the secret ingredient here.
Step 1: The Preparation
Start by chopping your chocolate. Do not try to melt giant, thick blocks. You absolutely need a bench scraper to transfer the shards of chocolate from your cutting board to your bowl safely without dropping them all over the floor. Ensure your board is completely dry; if your wooden cutting board keeps cracking, it is harboring moisture in those fissures, which will ruin your chocolate. Chop the chocolate uniformly so it melts at the same rate.
Step 2: The Double Boiler Method
Fill your saucepan with exactly one to two inches of water. Place your empty glass or stainless steel bowl on top of the pan. Lift the bowl and check the bottom. The bottom of the bowl must not touch the water. If it touches the water, the heat transfer will be too rapid, and you will scorch the chocolate. The goal is to melt the chocolate using only the gentle, ambient heat of the trapped steam.
Bring the water to a rolling boil, and then immediately turn the heat down to the lowest possible simmer. You do not need a water drop test to know the pan is too hot; if the water is violently bubbling, it is too hot.
Once the water is at a gentle simmer, place the bowl containing your chopped chocolate on top of the pan. Let it sit untouched for two minutes. Let the heat gently penetrate the bowl. Then, using your seamless silicone spatula, begin to stir slowly and constantly. Do not whip air into it. Just gently fold the melting chocolate over the solid pieces.
The moment the chocolate is 90% melted, remove the bowl from the saucepan. The residual heat in the bowl will melt the remaining 10%. Crucial step: The moment you lift the bowl off the pan, aggressively wipe the bottom of the bowl with a dry kitchen towel. You do not want a rogue drop of condensation falling from the bottom of the bowl into your fondue pot when you transfer the liquid.
The Microwave Alternative (If You Must)
If you refuse to use a double boiler, you can use the microwave, but you must respect the rules. Place your chopped chocolate in a microwave-safe bowl. Lower your microwave’s power setting to exactly 50%. Do not skip this step.
Microwave the chocolate in 15-second intervals. After every single 15-second blast, you must remove the bowl and stir it thoroughly with your silicone spatula. At first, it will seem like nothing is happening. Keep going. By the fourth or fifth interval, it will begin to melt. Stop microwaving when there are still a few solid lumps remaining, and stir until the residual heat finishes the job.
The Rescue Protocol: How to Fix Seized Chocolate
Let us say the worst has happened. You turned your back for ten seconds, a drop of condensation fell into the bowl, and your chocolate has seized into a gritty, ugly clump. Do you throw it away? Absolutely not. You can save it, but you have to understand the science of the rescue.
When chocolate seizes from water, the sugar has clumped together. To fix it, we have to do something that sounds completely insane, entirely counterintuitive, and terrifying: we have to add more water.
The Boiling Water Hack
Yes, water caused the problem, but a larger amount of boiling water will fix it. By adding boiling water, you provide enough liquid to fully dissolve the clumped sugar, and enough heat to melt the fat, allowing the emulsion to reform into a smooth liquid.
Here is exactly how to do it: Boil a kettle of water. Add exactly one teaspoon of boiling water to your seized chocolate. Using a whisk, stir vigorously. The chocolate will initially look worse, turning into a slick, oily mess. Do not panic. Add one more teaspoon of boiling water and keep whisking vigorously. Suddenly, like magic, the mixture will relax, smooth out, and become a glossy, flowing syrup again.
The Fat Hack
If you do not want to add water, you can restore the balance of the emulsion by adding more fat. Add one tablespoon of warm, neutral vegetable oil, melted solid shortening, or melted cocoa butter to the seized chocolate. Whisk vigorously. The added fat will coat the clumped sugar particles, separating them and restoring the smooth texture.
The Immersion Blender Hack
If you have added your fat or your water and it is still looking a little stubborn, hit it with an immersion blender. The high-speed mechanical shearing force of the blender’s blades will physically force the fat and liquid back into a tight, glossy emulsion.
The Caveat: Rescued chocolate is permanently altered. Because you have introduced external water or extra oil, it will never temper again. It will never set up into a hard, snappy chocolate bar. However, for a fondue night, rescued chocolate is absolutely perfect. It will remain fluid, glossy, and delicious for dipping.
Setting Up a Mindful Fondue Spread
Now that you have perfectly melted, glossy chocolate sitting in your enameled cast iron pot, it is time to host. Mastering the art of effortless hosting means prepping ahead. You should not be chopping fruit while your guests are standing in your kitchen.
The secret to an interactive dessert is abundance and variety. You want to offer a spectrum of textures: crunchy, soft, salty, sweet, and tart.
The Dippers: A Curated Selection
- The Fresh Fruit: Strawberries, bananas, raspberries, and pineapple are classics for a reason. The acidity of the fruit cuts through the rich, heavy fat of the chocolate. However, there is a strict rule here: the fruit must be bone dry. If you wash your strawberries ten minutes before serving, the residual water on the fruit will seize the chocolate in the communal pot. Wash your fruit hours in advance, dry it thoroughly with paper towels, and let it sit on a wire rack. If you are wondering why your berries get moldy so fast, it is because you are storing them wet. Dry them completely.
- The Baked Goods: Cubes of dense pound cake, marshmallows, graham crackers, and biscotti. Ensure your cake is slightly stale or toasted; fresh, fluffy cake will simply crumble and fall off the fork into the abyss of the chocolate pot.
- The Salty & Savory: This is where you elevate the spread. The human palate craves salt to balance sugar. Offer thick, salted pretzel rods, ruffled potato chips, and even thick-cut, crispy bacon. The combination of salty pork fat and dark chocolate is a revelation.
Managing the Table Dynamics
When you set the table, place the fondue pot in the absolute center. Provide every guest with their own color-coded fondue fork. This is not just a cute aesthetic choice; it prevents the inevitable arguments over whose strawberry is whose.
Provide plenty of small, individual plates. Guests should dip their item in the communal pot, transfer it to their personal plate, and eat it from there. This naturally paces the meal, prevents double-dipping, and keeps the table sanitary.
Temperature Control at the Table
The biggest mistake home cooks make during the actual serving phase is how they manage the heat source. Knowing how to host a cozy dipping party means understanding that the heat source at the table is only meant to maintain temperature, not to cook.
If your enameled cast iron pot sits over a tealight candle, ensure there is at least two inches of clearance between the flame and the bottom of the pot. If the flame directly licks the ceramic or iron, it will create a hot spot, and the chocolate at the bottom will scorch and turn bitter.
If you are using an electric fondue pot, set it to the lowest possible “warm” setting. Stir the communal pot gently every ten minutes with your silicone spatula to distribute the heat and keep the emulsion stable.
If the chocolate begins to thicken too much as the night goes on, do not panic. Simply stir in one tablespoon of warm heavy cream or warm milk. Whisk it directly in the pot, and the chocolate will immediately loosen back into a glorious, fluid curtain.
The Final Word on Mindful Entertaining
Hosting a dessert night should not be an exercise in anxiety. You do not need to hover over the pot, sweating and stressing about temperatures, so your marshmallows always burn when you rush them.
By understanding the basic science of the emulsion—by respecting the devastating power of a single drop of water and the destructive nature of high heat—you take complete control of the ingredient. You are no longer crossing your fingers and hoping for the best; you are executing a proven culinary technique.
Invest in safe, non-toxic, heavy-bottomed gear. Keep your bowls bone dry. Melt low and slow over gentle steam. And if the worst happens, remember that you have the scientific knowledge to rescue it with a splash of boiling water and a whisk.
Now, go dry those strawberries, light that tealight, and pour that wine. You have a spectacular, stress-free, deeply mindful fondue night to host. And as always, stay sassy, stay sharp, and keep cooking.






