
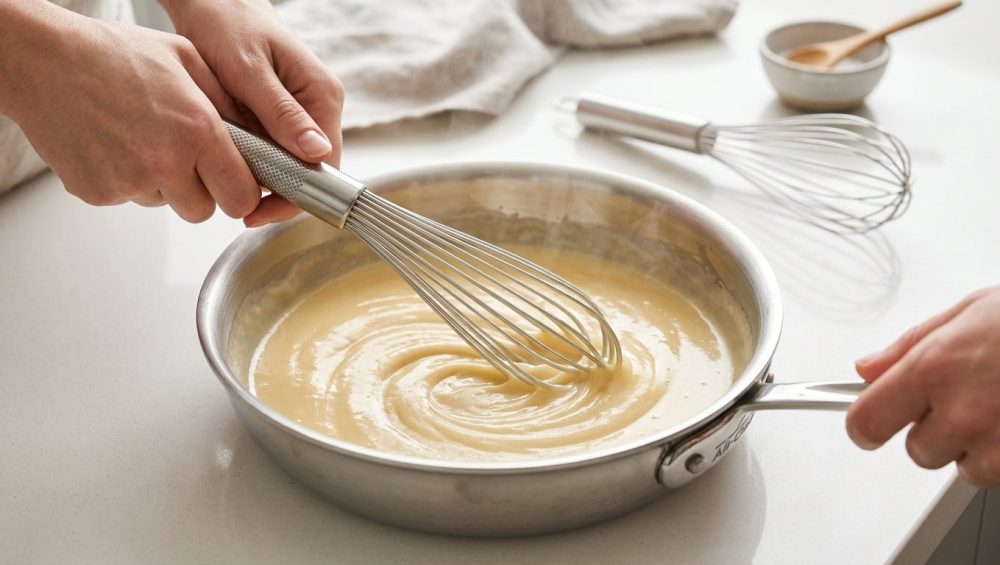
The Great Gravy Betrayal: Why Your Traditional Whisk is Failing You
Listen up, weekend culinary warriors. We need to have a serious, brutally honest conversation about the lumpy, gelatinous wallpaper paste you have been passing off as gravy. You know exactly what I am talking about. You spend hours meticulously roasting a beautiful piece of meat, carefully resting it to preserve the juices, only to ruin the entire plate at the very last minute with a pan sauce that looks like cottage cheese.
You probably blame yourself. You assume you lack the elite culinary pedigree required to achieve that glossy, mirror-like finish you see in high-end restaurants. Let me stop you right there. You do not need a culinary degree, and you certainly do not need to spend your precious time passing a broken sauce through a fine-mesh strainer while your dinner guests wait awkwardly at the table. What you actually need is an understanding of basic kitchen physics and the right tool for the job.
The culprit behind your lumpy gravy is almost certainly the tool you are holding in your hand: the traditional balloon whisk. It is the prom queen of the kitchen—highly popular, aesthetically pleasing, and completely useless when it comes to doing actual, heavy-duty work in a flat skillet. To make matters worse, nothing is more horrifying than when a poorly constructed whisk leaks dishwater straight into your pristine sauce because the handle seal degraded. It is time to banish the balloon whisk back to the mixing bowl where it belongs and embrace a tool actually designed for the geometry of stovetop cooking.
The Physics of the Pan Edge (Where Lumps are Born)
To understand why your gravy is failing, you have to look at the battlefield. When you make a pan sauce, a roux, or a traditional gravy, you are typically working in a wide, shallow vessel—like a stainless steel skillet, a heavy-bottomed sauté pan, or a roasting pan. These pans have broad, flat bottoms that meet the sidewalls at a distinct, sharp angle.
This perimeter corner is the danger zone. It is a trap where unmixed flour, rendered animal fat, and liquid congregate. When you apply heat, the thermal mass of the pan’s edges cooks that trapped flour rapidly. If your whisk cannot physically reach into that exact 90-degree corner to agitate the mixture, the starches will hydrate unevenly, clump together, and instantly form a hardened, cooked shell around a pocket of raw flour. Congratulations, you have just birthed a gravy lump.
While a flat-edged wooden spoon is fantastic for deglazing the center of the pan and scraping up caramelized fond, it simply does not possess the sheer number of tines required to rapidly shear and emulsify fat and liquid. You need a multi-wire tool, but you need one that actually fits the environment.
The Balloon Whisk: A Flawed Design for Shallow Waters
Look at your balloon whisk. It has a bulbous, teardrop shape with wires that bow outward. This design is an absolute masterpiece of engineering—if your goal is to aerate egg whites in a deep, curved mixing bowl. The rounded wires naturally conform to the spherical sloping sides of a bowl, sweeping through the liquid and incorporating massive amounts of air to build volume.
However, drop that same balloon whisk into a flat skillet, and the geometry completely fails. Because of the bulbous shape, only the very tiny, bottom-most tip of the whisk actually makes contact with the flat surface of the pan. You are effectively trying to sweep a massive floor with a toothbrush. The bowed wires physically prevent the whisk from reaching into the sharp corners of the pan. You can aggressively beat the center of the pan all you want, but the edges will remain completely untouched.
Furthermore, balloon whisks are designed to incorporate air. When making a rich, velvety gravy or a glossy pan sauce, incorporating air is the exact opposite of what you want. You want a dense, smooth emulsion. You can even use the water drop test to ensure your stainless skillet is preheated correctly before roasting the meat, but all that perfect searing technique goes out the window if you try to build your sauce with a tool that cannot scrape the fond off the flat metal.
Enter the Flat Roux Whisk: Your New Sauce Savior
If you want to save time on a Tuesday night and achieve absolute perfection on a Sunday afternoon, you need to stop fighting your equipment. It is time to introduce you to the flat roux whisk. If you have never seen one, it looks exactly like a balloon whisk that was run over by a steamroller. It is a highly specialized, task-specific tool that eliminates the mechanical failures of traditional whisks, and it is about to become your new best friend.
What Exactly is a Flat Whisk?
A flat whisk (frequently referred to as a roux whisk or a pan whisk) is constructed with a series of wire loops—usually four to eight—that are arranged in a single, flattened, two-dimensional plane rather than a three-dimensional bulb. Instead of bowing outward, the wires lay flat against each other in a concentric U-shape.
But the real magic lies in the angle. The head of a high-quality flat whisk is slightly angled—usually between 15 and 20 degrees—relative to the handle. This slight bend is an ergonomic masterstroke. It allows you to hold the handle at a natural, comfortable angle while the entire flattened surface of the wire loops rests completely flush against the bottom of the pan. If you are making a massive batch of holiday gravy, a dedicated curved saucier pan will make whisking infinitely easier, but even in a standard hard-angled skillet, the flat whisk dominates.
The Geometry of Maximum Surface Contact
Let’s talk about surface area. When you press a flat whisk into a skillet, you are no longer relying on a single millimeter of contact point. The entire length of those flattened wires drags across the bottom of the pan simultaneously.
Recent 2026 data utilizing high-speed viscometer testing has shown that the specific loop geometry of a flat whisk maximizes surface contact in shallow cookware, reducing unscraped residue by up to 91% compared to a standard balloon whisk. That means every single toasted brown bit of fond, every drop of rendered fat, and every single grain of flour is aggressively swept up and integrated into the sauce.
Because the wires are flat, they easily slide directly under the liquid, acting almost like a flexible, multi-tined spatula. You can push it straight into the sharp corners of your roasting pan, effortlessly dislodging the trapped flour before it has a chance to form a lump. And because you are sweeping the liquid rather than lifting and beating it, you are not incorporating unwanted air bubbles into your beautiful, glossy sauce. After you are done using a bottom-release fat separator to isolate your pure roasting juices, the flat whisk ensures that those juices emulsify perfectly with your roux.
The Science of Emulsification and Starch Gelatinization
I promise not to bore you with pretentious culinary jargon, but if we want to permanently cure your lumpy gravy syndrome, we need to quickly discuss the actual chemistry of what is happening in your pan. Cooking is just applied physics and chemistry, and once you understand the rules, you can manipulate them to your advantage.
How Starches Explode (and Why We Need to Control Them)
Flour is primarily composed of starch granules, specifically amylose and amylopectin. In their raw state, these starches are tightly packed, crystalline structures that do not dissolve in water. In order for flour to thicken a liquid—which is the entire biological purpose of gravy—those starch granules must be heated in the presence of water so they can swell, burst, and form a gelatinous network. This process is called starch gelatinization.
Here is the critical scientific failure point: starch gelatinization happens incredibly fast, with the onset temperature occurring around 140°F to 145°F (60°C to 63°C), and peaking rapidly near 160°F (71°C). If you dump dry flour directly into hot turkey drippings, the flour particles on the absolute exterior of the clump hit that 140°F gelatinization threshold instantly. They immediately swell and form a sticky, waterproof, hydrophobic gel barrier. This barrier completely prevents the hot liquid from reaching the dry flour trapped in the center of the clump.
No amount of frantic, wrist-destroying whisking with a balloon whisk is going to break through those gelatinized armor shells once they form. The lumps are permanent. To prevent this, we have to control the rate of hydration, and we do that through the magic of a roux.
Fat, Flour, and Friction: The Trinity of a Perfect Roux
A roux is simply a mixture of fat and flour, cooked together before any liquid is added. By thoroughly coating every single microscopic particle of flour in liquid fat (like butter or animal drippings), you are waterproofing the starches. Fat does not cause starch to gelatinize.
When you eventually pour your stock into the pan, the fat coating acts as a temporary buffer. It slows down the hydration process just enough to allow the flour particles to disperse evenly throughout the liquid before they hit the critical 140°F explosion temperature.
This is where the flat whisk earns its keep. To properly coat the flour in fat, you need friction and constant movement. The flat whisk acts as a squeegee, constantly scraping the flour across the hot metal, ensuring every granule is individually toasted and coated in fat. If you are using spatulas to help move things around, make sure they are made from high-quality, odor-free silicone so your gravy doesn’t taste like last night’s garlic stir-fry. The flat whisk provides the exact mechanical shear force required to keep the starch granules separated while they safely hydrate.
Ditching the Toxic Gear: Why Material Matters for Your Whisk and Pan
As your resident Sassy Sous-Chef, I have a strict, non-negotiable “No-Go” rule in my kitchen. I absolutely despise cheap, toxic kitchenware. Time is money, yes, but your long-term health is priceless. If you are attempting to make a pan sauce by aggressively scraping a metal flat whisk against a cheap, peeling non-stick skillet, we need to have a serious intervention right now.
The Danger of Peeling Non-Stick and Mystery Metals
Traditional non-stick coatings are made from PTFE (Polytetrafluoroethylene), which belongs to a family of synthetic chemicals known as PFAS, widely referred to as “forever chemicals.” While the industry claims these coatings are inert at room temperature, applying high stovetop heat while simultaneously scraping the surface with a metal whisk is a recipe for disaster.
When you scratch a non-stick pan, you are actively releasing microscopic particles of PFAS directly into your food. Furthermore, overheating these pans causes the chemical bonds to break down, releasing toxic fumes that can literally cause a condition known as polymer fume fever. The global regulatory landscape is finally waking up to this; in fact, as of mid-2025, countries like Australia have outright banned the import and use of several highly toxic PFAS compounds.
Please stop using aerosol cooking spray, which inevitably ruins nonstick pans because the chemical propellants bake into the surface and degrade the coating permanently. And do not be fooled by the aggressive greenwashing of modern “ceramic” pans dominating your social media feeds. Recent 2025 investigations have revealed that many of these highly marketed, pastel-colored pans are actually “quasi-ceramics” that rely on sol-gel coatings, which can still degrade rapidly and may contain undisclosed nanoparticles like titanium dioxide or siloxanes.
Safe, Durable Pairings for Your Flat Whisk
If you are going to use a stainless steel flat whisk—which you absolutely should, because silicone-coated whisks are too thick and clumsy to properly shear a sauce—you must pair it with professional-grade, non-toxic cookware.
You want to cook in tri-ply stainless steel, enameled cast iron, or carbon steel. These materials are virtually indestructible. You can aggressively scrape a metal flat whisk across a stainless steel skillet all day long to build your roux and deglaze your fond, and the pan will not care. You don’t want to deal with cheap pans losing their slip after just a few months of heavy use. Invest in heirloom-quality metals, pair them with a rigid, stainless steel flat whisk, and your kitchen will be a safe, toxin-free zone capable of producing restaurant-quality sauces for decades.
Masterclass: Step-by-Step to Flawless Gravies and Pan Sauces
Alright, enough theory. Let’s put this into practice. Weekday cooking is about survival and efficiency, but that does not mean we sacrifice quality. With a flat whisk and a safe pan, you can execute a flawless, lump-free gravy in under ten minutes. Follow these exact steps, and leave the stress behind.
Step 1: The Fat and Flour Ratio (Keep It Simple)
The foundation of a perfect gravy is a standard roux, which relies on a simple mathematical ratio: equal parts fat and flour by weight. If you do not have a kitchen scale handy, equal parts by volume (e.g., 2 tablespoons of fat to 2 tablespoons of all-purpose flour) will get you close enough for a standard weeknight dinner.
For the fat, you can use butter, rendered bacon grease, or the skimmed drippings from your roast chicken or turkey. Heat the fat in your stainless steel skillet over medium heat until it is shimmering. Sprinkle the flour evenly over the fat. Do not dump it in a single massive mound.
Step 2: The Toasted Blonde (Cooking the Roux)
Immediately take your flat whisk and press it flat against the bottom of the pan. Begin sweeping it back and forth. You will instantly feel the difference compared to a balloon whisk. The flat wires act like a rake, instantly pulling the flour and fat together into a smooth, bubbling paste.
You must cook this paste for at least two to three minutes. Raw flour tastes exactly like what it is—raw paste. By cooking the roux, you toast the starch granules, developing a nutty, complex flavor profile. For a standard turkey or chicken gravy, you want a “blonde” roux, which should smell faintly of pie crust and take on a light golden color. You also want to avoid ruining your cast iron by letting acidic liquids sit in it for too long, but for a quick roux, well-seasoned iron or stainless steel is perfect. Keep the flat whisk moving in sweeping, figure-8 motions, ensuring you drag it directly through the sharp corners of the pan.
Step 3: The Liquid Integration (Cold or Hot?)
Here is where most home cooks panic. You have your hot roux bubbling away. It is time to add the liquid (chicken stock, beef broth, or pan drippings). There is a massive culinary debate about whether the liquid should be hot or cold.
Science dictates that adding cold or room-temperature liquid to a hot roux is actually the safest method for preventing lumps. Why? Because the cold liquid drops the temperature of the pan instantly, delaying the starch gelatinization process. This buys you precious seconds to mechanically disperse the fat-coated flour particles throughout the liquid before the mixture heats back up to the 140°F explosion point.
Pour the liquid in slowly, in a steady stream, while whisking vigorously.
Step 4: The Flat Whisk Sweep
As you pour the liquid, use your flat whisk to sweep the bottom of the pan aggressively. Do not whisk in circles. Whisk in a rapid side-to-side and figure-8 motion. Because the flat whisk maintains massive surface contact with the pan, it creates incredible shear force, instantly ripping apart any potential clumps and forcing the flour to disperse evenly into the broth.
Once all the liquid is added, bring the mixture up to a gentle simmer. Do not boil it violently. As the temperature crosses that 140°F to 160°F threshold, you will literally see the magic happen. The opaque liquid will suddenly turn glossy, and the viscosity will thicken into a luxurious, velvet-smooth gravy. Turn the heat down, let it simmer for five minutes to reach its maximum thickening potential, season with salt, pepper, and a splash of acid (like apple cider vinegar or lemon juice) to brighten it up, and you are done. Absolute perfection, zero lumps, and zero stress.
Beyond Gravy: Other Brilliant Uses for Your Flat Whisk
I despise unitaskers. Kitchen real estate is highly valuable, and I refuse to recommend a tool that only does one job once a year on Thanksgiving. Your new flat whisk is going to become your daily driver for almost every stovetop liquid application.
Béchamel, Mornay, and Cheese Sauces
A classic Béchamel is just a roux whisked with milk. It is the mother sauce of comfort food. If you want to make the greatest macaroni and cheese of your life, you start with a Béchamel, and then you melt in your cheese to create a Mornay sauce. There is nothing more tragic than when a beautiful cheese sauce turns grainy right before you serve it. This graininess is often caused by localized overheating at the bottom of the pan, which causes the cheese proteins to curdle and separate from the fat. The flat whisk prevents this by constantly sweeping the bottom of the pan, regulating the temperature and keeping the emulsion perfectly stable.
Pan Sauces and Deglazing
When you sear a steak, pork chop, or chicken thigh, you leave behind a layer of caramelized, browned proteins stuck to the bottom of the skillet. This is called the fond, and it is pure culinary gold. When you deglaze the pan with a splash of wine or broth, the flat whisk acts as a gentle, non-abrasive scraper, lifting every single microscopic bit of flavor off the metal and incorporating it into a rapid pan sauce. You can then mount the sauce with cold butter, using the flat whisk to rapidly emulsify the butterfat into the liquid before it can break and turn greasy.
Custards and Curds
If you dabble in weekend baking, you know the terror of making lemon curd, pastry cream, or stovetop custard. These egg-based mixtures are incredibly delicate. If the egg proteins sitting at the very bottom of the saucepan get just a few degrees too hot, they scramble, leaving you with sweet, lemon-flavored scrambled eggs. A traditional balloon whisk cannot sweep the bottom of the saucepan efficiently enough to prevent this localized cooking. The flat whisk, however, maintains constant, flush contact with the heat source, keeping the delicate egg proteins moving and ensuring a silky, perfectly smooth custard every single time.
The Sassy Sous-Chef’s Final Verdict
Cooking should not be a source of anxiety. You do not need to fear the gravy boat, and you do not need to rely on those depressing, sodium-packed powdered gravy packets from the supermarket. The difference between a stressful, chaotic kitchen disaster and a smooth, effortless culinary victory usually comes down to understanding the basic physics of your ingredients and utilizing the proper equipment.
Throw away your peeling, toxic non-stick pans. Put your balloon whisk back in the drawer until you actually need to whip some cream. Invest ten dollars in a high-quality, stainless steel flat roux whisk, and take control of your stovetop. You have the science, you have the technique, and now you have the tool. Go make a pan sauce that will make your dinner guests weep with joy. You’ve got this.






