The Tragedy of the Grainy Cheese Sauce
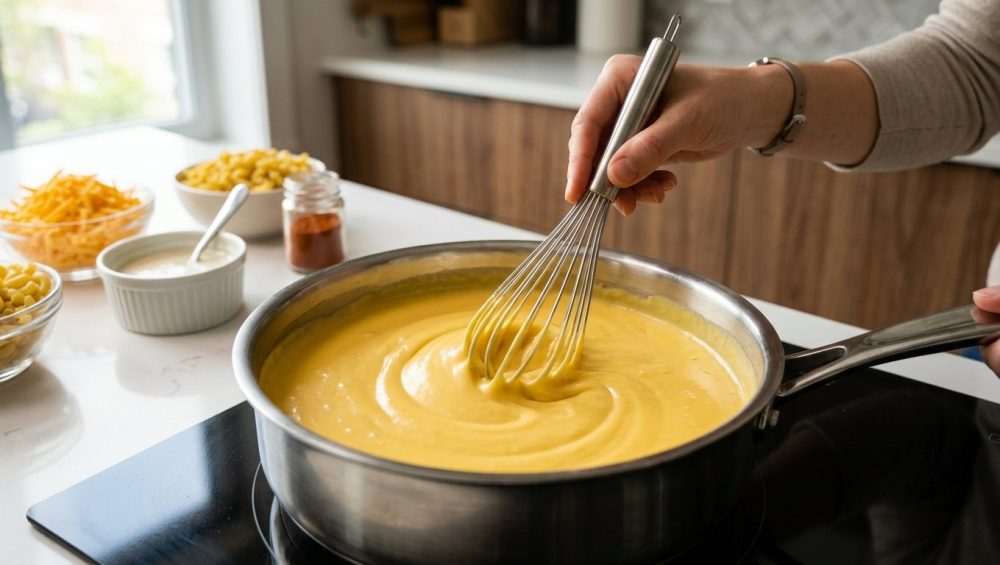
Look, I get it. You had a brutally long week. You navigated endless meetings, survived the treacherous commute, and wanted nothing more than to reward yourself by drowning your sorrows in a velvety, luxurious pool of homemade macaroni and cheese. You did everything you thought you were supposed to do. You bought the expensive, cave-aged Gruyère. You stood over the stove, whisking diligently. You envisioned a cascading waterfall of liquid gold that would make a food stylist weep with joy.
But then, the unthinkable happened.
Right before your eyes, your beautiful sauce betrayed you. Instead of a smooth, glossy emulsion, you are now staring down into a saucepan that looks like a tragic science experiment. A greasy, yellow oil slick has pooled at the surface, while sad, rubbery, gritty little clumps of protein have sunk to the bottom. Your sauce has “broken.” It is grainy, it is greasy, and it feels like a personal insult from the culinary gods.
Take a deep breath and step away from the stove. Pour yourself a glass of wine. I am here to tell you that this is not a reflection of your worth as a human being, nor is it a sign that you are destined to eat boxed mac and cheese for the rest of your life. Ruining a cheese emulsion is one of the most common rookie kitchen mistakes that plagues even the most enthusiastic home cooks. It is not a failure of talent; it is a simple failure of chemistry.
As a fiercely protective advocate for the weekend culinary hobbyist, I firmly believe that you do not need a culinary degree to cook like an absolute expert. You just need to understand the basic mechanics of what is happening in your pan. Today, we are going to strip away the mystery, banish the fear, and dive deep into the fascinating science of cheese sauces. We will explore exactly why your sauce turned into a gritty nightmare, how to prevent it from ever happening again, and—most importantly—how to perform a miraculous rescue mission if your dinner is currently separating on the stove.
Grab your whisk. We have a sauce to save.
What is Cheese, Anyway? (The Culinary Chemistry)
Before we can fix a broken sauce, we have to understand what we are actually melting. To do that, we need to briefly decode pretentious recipe jargon and talk about the molecular structure of dairy. Do not panic; I promise to keep the science strictly relevant to getting perfect queso into your mouth.
At its core, cheese is a highly delicate, wobbly emulsion. An emulsion is simply a mixture of two things that desperately do not want to be mixed—in this case, fat and water.
Milk is mostly water, with microscopic balloons of milk fat floating around in it. These fat droplets are kept suspended by complex proteins called caseins. Casein proteins group together in tiny, fuzzy clusters known as micelles. Think of them as little microscopic tumbleweeds. Floating around in the milk alongside these tumbleweeds are calcium ions. Calcium acts as the ultimate molecular superglue.
When a cheesemaker adds rennet (an enzyme) and bacterial cultures to milk, the rennet shaves the fuzzy outer layer off the casein tumbleweeds. Suddenly, the caseins become sticky. The calcium superglue locks them together, forming a tight, three-dimensional web. This protein web acts like a net, trapping the fat globules and the water inside of it. Congratulations, you have just made a cheese curd! As the cheese is pressed and aged, more water evaporates, and that protein net pulls tighter and tighter.
When you apply heat to a block of cheese in your kitchen, you are essentially trying to reverse-engineer this process. As the temperature rises, the bonds holding the casein net together begin to relax. The protein matrix loosens up, allowing the trapped fat and water to flow and mingle. This is the magical “melt.”
However, this relaxed state is incredibly fragile. The fat and water are only staying together because the protein net is gently holding them in place. If you upset that delicate balance—by applying too much heat, changing the acidity, or using the wrong type of cheese—the protein net will violently snap shut. When the proteins aggressively clump back together, they wring themselves out like a wet sponge, expelling all the fat and water they were holding.
The result? The proteins form those awful, gritty, grainy clumps, and the expelled fat rises to the top as a greasy oil slick. The emulsion has shattered.
The Usual Suspects: Why Your Sauce Split
If you are staring at a broken sauce, one of four things went horribly wrong. Let’s interrogate the suspects so you can stop self-sabotaging your weekend comfort food.
Culprit 1: Heat Abuse (You Boiled It, Didn’t You?)
This is the number one killer of cheese sauces. Cheese absolutely despises high heat. It is a diva that demands a gentle, spa-like environment.
Different cheeses have different melting points. A high-moisture, young cheese like Mozzarella begins to melt beautifully around 130°F (54°C). Classic melting cheeses like Cheddar, Gruyère, and Fontina hit their sweet spot around 150°F (65°C). Hard, aged cheeses like Parmesan require about 180°F (82°C) to melt.
Notice a pattern here? None of those temperatures are anywhere near 212°F (100°C), which is the boiling point of water.
If you have a pot of milk or a roux bubbling away at a rolling boil, and you dump a mountain of grated cheddar into it, you are throwing that cheese into a thermal shock nightmare. The intense, aggressive heat causes the casein proteins to panic. Instead of relaxing into a smooth flow, they instantly coagulate and seize up. Proper temperature control is the only way to successfully prevent protein adhesion and clumping in your dairy. If you see bubbles actively breaking the surface of your sauce when you add the cheese, you have already lost the battle.
Culprit 2: Pre-Shredded Cheese (The Enemy of Smoothness)
I am going to say this as clearly as possible: Step away from the bags of pre-shredded cheese.
Yes, I know it saves you three minutes of grating on a busy Tuesday night, but it is entirely ruining your food. When cheese is commercially shredded and packaged in those convenient little plastic bags, the manufacturers toss it with anti-caking agents to stop the shreds from turning into a solid brick during transport. These agents are usually potato starch, cornstarch, or cellulose (which is, quite literally, powdered wood pulp).
While these powders do a fantastic job of keeping the cheese shreds separated in the bag, they do the exact same thing in your saucepan. The cellulose coating acts as a physical barrier that prevents the cheese from melting together smoothly. Instead of a glossy sauce, you get a chalky, grainy paste that feels like you are eating wet sand. Buy a block of real cheese and grate it yourself. Your palate will thank you.
Culprit 3: Choosing the Wrong Cheese
Not all cheeses are created equal, and not all of them are destined to become a sauce. The meltability of a cheese is directly tied to its moisture content and its age.
Young cheeses (like Jack, young Cheddar, or mild Gouda) have a high moisture content. The abundant water inside the cheese acts as a lubricant, keeping the protein matrix flexible and allowing the cheese to flow smoothly when heated.
Aged cheeses (like extra-sharp Cheddar, aged Provolone, or Parmigiano-Reggiano) have spent months or years losing moisture in a temperature-controlled cave. Their protein structures are incredibly dense, tightly packed, and dotted with crystallized amino acids. Because they lack moisture, they simply do not have the lubrication required to melt into a liquid pool. If you try to make a sauce using only a 3-year aged sharp cheddar, it will almost certainly break and turn greasy.
The secret to a perfect sauce is blending. You use a young, high-moisture cheese (like Gruyère or Fontina) for the smooth, structural melt, and you use a smaller amount of the aged, dry cheese (like sharp cheddar or Parmesan) strictly for the punch of flavor.
Culprit 4: Terrible Cookware
I have zero patience for cheap, garbage kitchen equipment, and this is where I get up on my soapbox. If you are trying to make a delicate emulsion in a paper-thin, warped aluminum pan you bought for ten dollars in college, you are setting yourself up for failure.
Thin pans have terrible thermal conductivity. They develop massive “hot spots” directly over the flame, meaning the sauce in the center of the pan is boiling and breaking, while the sauce at the edges is barely lukewarm. Furthermore, if you are using a cheap, scratched non-stick pan where the Teflon coating is flaking off into your food, you are not just ruining your dinner; you are ingesting toxic chemicals. I am a relentless advocate for banishing toxic kitchen gear from your life entirely.
To make a flawless cheese sauce, you need a heavy-bottomed, multi-clad stainless steel saucepan. The thick core of aluminum or copper sandwiched between the stainless steel will distribute the heat perfectly evenly across the entire base of the pan, eliminating hot spots and giving you the precise temperature control required to coddle those delicate dairy proteins.
The Holy Trinity of Prevention (How to Do It Right)
Now that we know exactly how to ruin a cheese sauce, let’s talk about how to make it invincible. To keep the fat, water, and protein playing nicely together, we need to introduce a stabilizer. There are three foolproof, scientifically backed methods to achieve this. Once you master these techniques, you will eliminate kitchen chaos and approach dairy with total confidence.
Method 1: The Classic Béchamel (The Starch Barrier)
This is the traditional, old-school French method that your grandmother probably used. It relies on starch to keep the peace.
You begin by making a roux—cooking equal parts butter and all-purpose flour in a pan. As the flour cooks in the fat, the starch granules are coated and separated. When you slowly whisk in warm milk, you create a Béchamel sauce. As the milk heats up, those starch granules swell up like tiny sponges and burst, releasing long chains of starch molecules (amylose and amylopectin) into the liquid.
These starch molecules create a thick, viscous web. When you finally take the pan completely off the heat and stir in your grated cheese, the starch web acts as a physical barricade. The starch molecules literally get in between the cheese proteins, physically blocking them from finding each other and clumping together. As long as you remember the golden rule—never let the sauce boil after the cheese is added—a Béchamel-based sauce (known as a Mornay) is incredibly stable and perfect for baked macaroni and cheese.
Method 2: Sodium Citrate (The Magic Dust)
If you want to know the ultimate modernist culinary secret that will transform your daily meals and give you the power to turn any high-quality cheese into a liquid velvet queso, you need to buy a tub of sodium citrate.
Sodium citrate (often labeled as E331) is the sodium salt of citric acid. It looks like standard white table salt, but it is pure culinary magic. Historically, it was used in 1914 as an anticoagulant for blood transfusions. A few years later, James L. Kraft realized that if he added sodium citrate to cheese, he could create a perfectly smooth, shelf-stable processed cheese that melted like a dream (hello, Velveeta).
Here is the brilliant science: Remember how calcium acts as the superglue holding the cheese proteins together? When you dissolve sodium citrate in a liquid (like water, milk, or even beer) and heat it, the citrate actively hunts down the calcium ions in the cheese and binds to them. It essentially swaps out the calcium for sodium.
Without the calcium glue holding them tightly together, the casein proteins completely uncurl. They relax, become highly soluble in water, and act as powerful emulsifiers themselves. The proteins happily grab onto the fat and water, locking them into a flawless, glossy, unbreakable emulsion.
The standard ratio is incredibly simple: You need about 3% to 4% sodium citrate based on the total weight of your liquid and your cheese. For example, if you are using 200 grams of liquid and 200 grams of cheese (400 grams total), you would whisk about 12 to 16 grams of sodium citrate into the simmering liquid before gradually adding the cheese. The result is a sauce that has the exact texture of processed nacho cheese, but tastes like the finest aged sharp cheddar. It is a revelation.
Method 3: Evaporated Milk and Cornstarch (The Weeknight Hack)
If you don’t have time to make a roux, and you don’t have a tub of modernist chemicals in your pantry, you can rely on the brilliant shortcut popularized by J. Kenji López-Alt.
This method involves tossing your freshly grated cheese with a tablespoon of cornstarch, and then melting it into a simmering pot of evaporated milk.
It works on two fronts. First, the cornstarch acts exactly like the flour in a Béchamel, providing a physical starch barrier to prevent protein clumping. Second, evaporated milk is simply regular milk that has had 60% of its water removed. Because the water is gone, the milk proteins (caseins) are highly concentrated. These extra proteins act as natural emulsifiers, helping to hold the melted cheese fat in suspension. It takes five minutes, requires one pot, and yields a fabulously smooth, stable dip for your weeknight nachos.
The Rescue Mission: How to Actually Fix a Broken Cheese Sauce
Alright, let’s face reality. You got distracted, your heat was too high, and your sauce has split into a gritty, oily mess. Do not throw it in the trash! Unless you have literally scorched the bottom of the pan to a blackened crisp, a broken cheese emulsion can almost always be saved. You just need to force the fat and water back together.
Here is your step-by-step emergency rescue protocol:
Step 1: Get It Off the Heat Immediately!
The heat is what caused the proteins to tighten and squeeze out the fat in the first place. Remove the saucepan from the hot burner instantly. If you are using a heavy cast-iron or clad pan, it will be utilizing thermal mass to hold onto a ton of residual heat, so you may even want to transfer the sauce to a cool glass bowl to rapidly drop the temperature.
Step 2: The Cold Shock and Vigor
Add a splash (about one to two tablespoons) of very cold milk, heavy cream, or even just cold tap water to the broken sauce. The cold liquid immediately drops the temperature of the sauce, halting the protein coagulation. Furthermore, you are reintroducing water to the emulsion, giving the fat something to disperse into. Grab your balloon whisk and whisk as if your life depends on it. Often, this violent mechanical shearing combined with the temperature drop is enough to force the emulsion back together.
Step 3: The Acid Trick
If cold milk didn’t work, try adding a tiny splash of acid—a half teaspoon of lemon juice or a splash of dry white wine. The acid alters the pH of the sauce, which adds a positive electrical charge to the proteins. This makes the proteins repel each other, forcing them to un-clump and let the fat back in. (This is exactly why traditional Swiss fondue relies on tartaric acid from white wine to stay smooth).
Step 4: The Immersion Blender Brute Force
If your whisking arm is tired and the sauce is still gritty, it is time to bring in the heavy machinery. Submerge an immersion blender into the sauce and let it rip. The high-speed spinning blades provide intense mechanical shearing, physically shattering the pools of separated fat into microscopic droplets and forcefully dispersing them back into the water phase.
Step 5: The American Cheese Rip-Cord
If all else fails, go to your fridge, unwrap a single slice of processed American cheese (like a Kraft Single), tear it into pieces, and whisk it into your hot, broken sauce. Processed American cheese is absolutely loaded with commercial sodium citrate and phosphates. By melting it into your broken sauce, you are essentially smuggling in a dose of chemical stabilizers that will act as a sacrificial emulsifier, rescuing the rest of the high-quality cheese in the pot. It is the ultimate chef’s cheat code.
The Foolproof Master Recipes
To ensure you never have to execute that rescue mission again, here are my two definitive, bulletproof methods for flawless cheese sauce.
The “Time is Money” Weeknight Queso
When it is a random Tuesday and you need comfort food in under ten minutes.
Ingredients:
- 8 oz (225g) sharp cheddar cheese (block, not pre-shredded)
- 1 tbsp cornstarch
- 1 can (12 oz) evaporated milk
- A pinch of salt and a dash of hot sauce
Method:
- Grate the cheddar on the large holes of a box grater. Use your kitchen’s unsung hero, the bench scraper, to easily scoop up the mountain of cheese and transfer it to a medium bowl.
- Toss the grated cheese thoroughly with the cornstarch until every shred is coated.
- Pour the evaporated milk into a heavy-bottomed saucepan and place it over medium heat until it comes to a gentle simmer (do not let it achieve a rolling boil).
- Reduce the heat to low. Add the cornstarch-coated cheese a handful at a time, whisking gently until completely melted before adding the next handful.
- Stir in the salt and hot sauce. Serve immediately.
The “Weekend Perfectionist” Béchamel Mac & Cheese Base
When you have the time to build deep, complex flavors for a baked Sunday dinner.
Ingredients:
- 3 tbsp unsalted butter
- 3 tbsp all-purpose flour
- 2 cups whole milk (warmed in the microwave for 1 minute)
- 8 oz (225g) Gruyère cheese, freshly grated
- 8 oz (225g) sharp cheddar cheese, freshly grated
- 1/4 tsp mustard powder
- Pinch of freshly grated nutmeg
- Salt and white pepper to taste
Method:
- Melt the butter in a heavy saucepan over medium heat.
- Whisk in the flour and cook, stirring constantly, for 2 minutes until it smells lightly toasted and blond in color.
- Gradually whisk in the warm milk, a splash at a time, whisking vigorously to prevent lumps.
- Bring the mixture to a very gentle bubble, reduce heat to low, and let it simmer for 3-5 minutes until it thickens enough to coat the back of a spoon.
- CRITICAL STEP: Turn the burner completely off and remove the saucepan from the heat source.
- Stir in the mustard powder, nutmeg, salt, and pepper.
- Add the grated Gruyère and Cheddar a handful at a time, stirring gently with a wooden spoon until the residual heat melts it into a glossy, luxurious pool.
Essential Gear for Flawless Emulsions
You cannot build a house with a plastic hammer, and you cannot build a delicate culinary emulsion with garbage tools. If you want to consistently execute perfect sauces, you need to invest in a beautifully organized dream kitchen stocked with equipment that works as hard as you do.
1. The Heavy-Bottomed Clad Saucepan:
Throw your thin, warped, peeling non-stick pots directly into the recycling bin. You need a 3-quart stainless steel saucepan with a fully clad body (meaning the aluminum or copper core runs all the way up the sides, not just on the base). This ensures perfectly even heat distribution, eliminating the hot spots that scorch and break cheese. Brands like All-Clad, Made In, or Tramontina are excellent investments.
2. A Proper Balloon Whisk:
Ditch the flimsy silicone whisks that bend when they hit resistance. You need a sturdy, stainless steel balloon whisk with plenty of tines to provide the aggressive mechanical shearing required to force fat and water together.
3. The Immersion Blender:
Also known as a stick blender. This is your emergency rescue tool. When a sauce splits, the high-velocity blades of an immersion blender will violently force the fat droplets back into the liquid suspension, saving your dinner in seconds.
4. A Heavy-Duty Box Grater:
Since we are permanently boycotting pre-shredded, cellulose-coated cheese, a sharp, sturdy stainless steel box grater is mandatory.
Frequently Asked Questions (FAQ)
Can I make cheese sauce ahead of time and freeze it?
Absolutely not. Do not even think about it. Freezing causes the water in the sauce to expand into sharp ice crystals, which will physically shred the delicate protein matrix you worked so hard to build. When you thaw and reheat it, the emulsion will shatter instantly, leaving you with a grainy, separated mess. Cheese sauce must be stored in the refrigerator.
How do I properly reheat leftover cheese sauce?
When cheese sauce cools in the fridge, it will solidify into a gelatinous brick. This is normal. To reheat it without breaking the emulsion, you must use the “low and slow” method. Place the cold sauce in a saucepan over medium-low heat. Add a splash of fresh milk or cream to loosen it up. Stir constantly and gently until it is warmed through. Never microwave it on high power for three minutes; the intense, uneven radiation will cause the fat to immediately separate.
What are the absolute best cheeses to mix for a sauce?
For the perfect balance of structural stability and punchy flavor, you want a 60/40 split. Use 60% high-moisture, excellent melting cheese (like Gruyère, Fontina, Monterey Jack, or young Gouda) for the smooth, elastic texture. Use 40% low-moisture, highly flavorful cheese (like sharp Cheddar, Parmigiano-Reggiano, or Pecorino) for the taste.
How should I serve it if I’m hosting a dinner party?
Even if you are just serving elevated macaroni and cheese, you can still practice the art of food plating to make your guests feel special. Serve the creamy mac and cheese in individual, pre-warmed ceramic ramekins. Top it with toasted, buttered panko breadcrumbs and a sprinkle of finely minced fresh chives. It elevates the humble cheese sauce from a late-night snack into a sophisticated, mindful dining experience.
Cooking is not magic; it is just edible physics and chemistry. Once you understand that cheese is just a delicate web of proteins holding onto fat and water, you hold the power to manipulate it. Respect the temperature, ditch the pre-shredded bags, embrace the science of starches and citrates, and you will never suffer the heartbreak of a grainy, broken cheese sauce ever again. Now get back in that kitchen and show that dairy who is boss.


