
The Gray Meat Epidemic: Why Your Weeknight Dinners Taste Like Sadness
We have all been there. It is 6:15 PM on a Tuesday. You are exhausted, starving, and staring down a pound of ground beef with the vague intention of making tacos or a quick pasta sauce. You toss the brick of meat into a lukewarm pan, grab a spatula, and start furiously hacking away at it. Within sixty seconds, your kitchen does not smell like a sizzling steakhouse. Instead, it smells like a wet dog, and your pan is filled with a bubbling, murky pool of gray liquid. Your meat isn’t cooking; it is boiling in its own depressing juices. Welcome to the gray meat epidemic.
If this sounds familiar, take a deep breath. You are not a bad cook. You have simply fallen victim to one of the most classic rookie kitchen mistakes that plagues everyday culinary hobbyists. The good news? You do not need a culinary degree from Le Cordon Bleu to fix it. You just need a basic understanding of kitchen thermodynamics and the willingness to change a few deeply ingrained, terrible habits.
Recent industry data shows that a staggering 93% of Americans expect to cook at home as much or more in 2025 and 2026 than they did in previous years, driven by a desire for better health, economic value, and a rejection of hyper-processed restaurant foods. We are spending more time in our kitchens, which means it is high time we stopped settling for mediocre, rubbery ground beef. Ground meat is the unsung hero of the weeknight dinner rotation. It is affordable, versatile, and cooks in minutes. But when you treat it poorly, it rewards you with the texture of pencil erasers and the flavor of lightly salted cardboard. We are going to permanently banish boiled beef from your kitchen by teaching you the simple, uncompromising science of the sear.
The Science of the Sear: Meet the Maillard Reaction
I promise not to bore you with pretentious chef-speak, but if you want to cook like a pro without buying a single piece of fancy equipment, you need to understand the fundamental chemistry of flavor. In the culinary world, flavor has a name, and its name is the Maillard reaction.
What Exactly Is the Maillard Reaction?
First described by French chemist Louis-Camille Maillard in 1912, the Maillard reaction is a complex series of non-enzymatic browning reactions that occur between amino acids (proteins) and reducing sugars when they are subjected to high heat. It is the exact same chemical miracle that turns pale dough into a golden-brown crust of bread, transforms raw coffee beans into rich espresso, and gives a perfectly seared steak its intoxicating, savory crust.
When you brown meat properly, you are not just changing its color; you are fundamentally altering its molecular structure to create hundreds of brand-new, incredibly complex flavor and aroma compounds. These compounds deliver that deep, umami-rich, mouth-watering savoriness that a steamed, gray interior simply can never provide. However, this magical reaction has a strict entry requirement: temperature. The Maillard reaction does not even begin to kick into high gear until the surface temperature of your food reaches between 280°F and 330°F (140°C to 165°C).
Why Steam Is the Ultimate Enemy of Flavor
Here is where the physics of your weeknight dinner completely fall apart. Water boils and turns into steam at exactly 212°F (100°C). This is an inescapable law of thermodynamics. If there is liquid water sitting in the bottom of your frying pan, the temperature of that pan’s cooking surface cannot and will not exceed 212°F until every single drop of that water has evaporated.
Why does this matter for your ground beef? Because raw animal muscle is composed of approximately 75% water. When you throw a pound of cold, wet ground beef into a pan, it immediately begins to release that water. If your pan is not hot enough to instantly evaporate that moisture on contact, the water pools in the skillet. Your meat is now sitting in a 212°F sauna. Because the Maillard reaction requires a minimum of 280°F to occur, browning becomes physically impossible. Your beef will sit there, turning a sad, sickly gray, shrinking into tough little pebbles as it boils in its own extruded liquids. To defeat the steam, you need high heat, dry meat, and the right beginner kitchen tools to get the job done.
The “No-Go” Rule: Ditching Cheap, Toxic Cookware
Before we even talk about cooking techniques, we need to have a brutally honest conversation about the pan you are using. If you are trying to brown ground beef in a flimsy, scratched-up, $15 non-stick Teflon pan that you bought at a big-box store five years ago, you are setting yourself up for spectacular failure—and potentially poisoning yourself in the process.
I have zero patience for toxic kitchenware. Traditional non-stick coatings, primarily made from PTFE (Polytetrafluoroethylene), are part of the PFAS family of “forever chemicals.” These chemicals are so notoriously hazardous that the European Union is currently on track for a universal restriction of over 10,000 PFAS compounds by 2027, and several US states, including Minnesota, Colorado, and Maine, have already enacted strict bans on PFAS-coated cookware taking effect between 2025 and 2026.
Beyond the glaring health and environmental concerns, cheap non-stick pans are fundamentally incapable of executing a proper sear. Because they are incredibly thin, they possess zero thermal mass. The second you drop a pound of cold ground beef into a thin aluminum non-stick pan, the temperature of the pan plummets, immediately triggering the dreaded boiling effect. Furthermore, traditional non-stick coatings begin to break down and release toxic, flu-like fumes when heated past 500°F. You literally cannot get them hot enough to achieve a hard sear without ruining the pan and off-gassing into your kitchen. And let’s not even get started on how aerosol cooking spray ruins nonstick pans by polymerizing onto the surface and destroying whatever limited slip they had left.
If you want professional-level browning, you must use a pan that can safely hold blistering heat. You need a heavy-duty cast iron skillet, a thick carbon steel pan, or a multi-clad stainless steel skillet. These materials hold massive amounts of thermal energy, meaning they won’t cool down when you add cold meat. If you are terrified of your meat permanently fusing to a stainless steel pan, you simply need to learn the water drop test to utilize the Leidenfrost effect, which creates a natural non-stick vapor barrier. Throw the peeling toxic plastic in the trash and invest in cookware that will outlast you.
The Big Three Mistakes Ruining Your Ground Beef
Now that you have a safe, heavy-bottomed pan, we need to address the user errors. Home cooks consistently make three massive mistakes when cooking ground meat. Eliminate these, and your food will instantly improve.
Mistake 1: The Cold, Crowded Pan (The Sauna Effect)
Patience is a virtue that most hungry people lack at 6:00 PM. Dropping ground beef into a cold or lukewarm pan is a guaranteed recipe for gray meat. As the pan slowly heats up, the meat gently warms, acting like a sponge being squeezed. It releases all of its internal moisture long before the pan is hot enough to evaporate it. Additionally, if you try to cook two pounds of beef in a tiny 8-inch skillet, the meat will be piled two inches thick. The bottom layer might get hot, but the top layers will just steam, dripping their juices down and ruining the sear for the entire batch. You must use a large enough pan so the meat can sit in a single, even layer.
Mistake 2: The Non-Stop Stirring Obsession
For some reason, the moment home cooks put ground beef into a pan, they feel a compulsive, unstoppable urge to poke, prod, stir, and obliterate the meat into microscopic granules. Stop touching it! You are not making a delicate French custard; you are searing beef. Every time you stir the meat, you are pulling the browned surface away from the hot pan and exposing a raw, wet surface, drastically lowering the temperature of the skillet. If you constantly agitate the beef, the Maillard reaction never has the uninterrupted time it needs to develop a crust. Put the spatula down, back away from the stove, and let the heat do its job. If things get messy later, you can always clean up with a chainmail scrubber, but for now, leave the meat alone.
Mistake 3: Cooking Straight from the Fridge
When you pull a package of ground beef out of the refrigerator, it is usually sitting in a small pool of purged myoglobin and water. If you dump that wet, fridge-cold brick directly into hot oil, you are instantly introducing a massive amount of surface moisture to the pan. The pan now has to expend all of its stored heat energy boiling off that cold surface water before it can even begin to cook the actual meat.
The Masterclass: Step-by-Step to Perfectly Browned Ground Beef
We have covered the science, banished the toxic cookware, and identified the mistakes. Now, let’s walk through the exact, foolproof, step-by-step masterclass to achieving deeply savory, perfectly caramelized ground beef every single time.
Step 1: Dry the Meat (Yes, Really)
I know it sounds incredibly fussy to dry ground meat, but remember: moisture is the enemy of browning. Open your package of ground beef and gently pat the surface of the meat block dry with a paper towel before it ever goes near the stove. You do not need to squeeze it dry like a sponge, but removing that excess surface liquid gives your pan a massive head start. Furthermore, let the meat sit on the counter for about 15 minutes to take the deep chill off. Dropping 35°F meat into a hot pan causes a violent temperature drop.
Step 2: Choose the Right Weapon
Pull out your largest, heaviest skillet. A 12-inch cast-iron skillet or a heavy-bottomed tri-ply stainless steel pan is ideal. Do not use a saucepan, do not use a wok, and absolutely do not use a non-stick pan. You need a wide, flat surface area to maximize contact between the meat and the heat source. Add a very small amount of high-smoke-point oil (like avocado oil, beef tallow, or clarified butter). Even if your beef is fatty, a tiny slick of oil helps conduct heat instantly to the uneven surface of the meat, jumpstarting the crust.
Step 3: Heat the Pan Until It Screams
Place your skillet over medium-high heat and let it preheat. I do not mean wait thirty seconds; I mean let it get ripping hot. This usually takes 3 to 5 minutes depending on your stove. You want the oil to be shimmering and just barely beginning to let off the faintest wisp of smoke. If you drop a tiny crumb of meat into the pan, it should aggressively sizzle and spit instantly. If it just sits there and bubbles quietly, your pan is not hot enough. Wait. It is better to have a pan that is slightly too hot than one that is too cold. (Side note: if you are using cheap utensils and notice your wooden spoons keep cracking under this kind of high-heat searing, invest in a solid, flat-edged wooden turner or a rigid metal spatula).
Step 4: The “Smash and Wait” Technique
Place the block of ground beef into the center of the scorching hot pan. Using a stiff spatula, forcefully smash the meat down into a single, flat, even layer that covers the entire bottom of the skillet, almost like you are making one giant, pan-sized smash burger.
Now comes the hardest part for most home cooks: Do absolutely nothing.
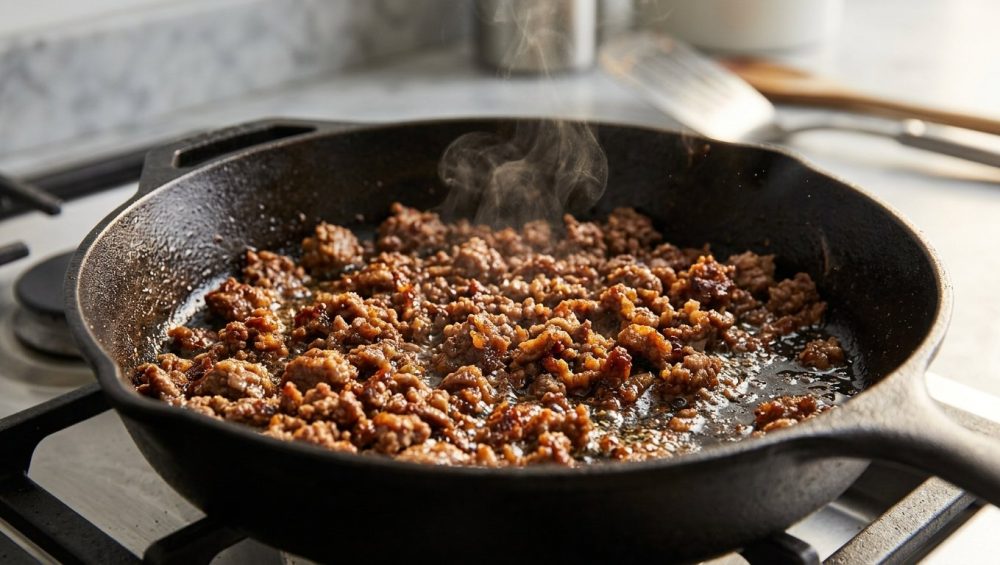
Do not stir it. Do not chop it. Do not salt it yet (salt draws out moisture through osmosis, which will cause the meat to steam). Let that giant patty of beef sit completely undisturbed for at least 3 to 4 uninterrupted minutes. During this time, the bottom of the meat is making direct, forceful contact with the screaming hot metal. The moisture is evaporating instantly, and the proteins and sugars are undergoing the Maillard reaction, building a deeply browned, rugged, flavor-packed crust.
Step 5: The Flip and Crumble
After 3 or 4 minutes, peek under the edge of the meat. You should see a dark, rich, mahogany-brown crust. If it is still gray, give it another minute. Once that glorious crust is established, use your spatula to flip the meat over in large sections. It doesn’t matter if the giant patty breaks into a few large pieces.
Once flipped, now you can finally unleash your inner chaotic chef. Use the edge of your spatula to violently chop and break the beef apart into your desired crumble size. Now is also the time to add your salt, pepper, and dry spices. The raw side of the meat will cook through in just a minute or two, absorbing the seasonings while retaining the incredible texture and flavor of the hard sear you developed on the first side. You will be left with ground beef that is deeply savory, perfectly browned, and completely devoid of that nasty gray puddle.
Advanced Tactics for the Weekend Culinary Hobbyist
If you want to take your weeknight ground beef from “great” to “restaurant-quality,” there are a few advanced scientific tricks you can deploy. These require almost zero extra effort but yield mind-blowing results.
The Baking Soda Trick (Velveting for Ground Meat)
This is the ultimate, undisputed secret weapon for ground meat, and it is rooted in pure kitchen chemistry. In traditional Chinese cooking, a technique called “velveting” is used to keep sliced meats incredibly tender under the intense heat of a wok. We can adapt this science for ground beef using a simple household ingredient: baking soda.
Baking soda is alkaline. When you introduce it to ground beef, it raises the pH level on the surface of the meat. When the pH is elevated, the protein strands in the muscle fibers are physically prevented from binding too tightly to one another when exposed to heat. Normally, as meat cooks, the proteins contract and squeeze out their internal water like a wringing sponge. By altering the pH, the meat stays relaxed, retaining a staggering 25% to 30% more of its natural moisture.
Even better, the Maillard reaction actually occurs much faster and more efficiently in an alkaline environment. This means your beef will brown darker, faster, and stay incredibly juicy on the inside.
To execute this trick: Dissolve exactly 1/4 teaspoon of baking soda in 1 tablespoon of water for every 1 pound of ground beef. Gently mix this solution into your raw ground beef with your hands, and let it sit at room temperature for 15 to 20 minutes before cooking. It sounds like a strange science experiment, but I promise it will completely change your life. The meat will sear beautifully without drying out, making it perfect for dishes where the beef needs to simmer for a long time. Once the meat is browned, you can easily use a stainless steel bench scraper to scoop up your prepped aromatics and slide them right into the pan.
Managing Fat Content: 80/20 vs. Lean Blends
By law in the United States, ground beef can contain a maximum of 30% fat. When shopping, you generally see ratios like 70/30, 80/20, 90/10, or 93/7. For almost all stovetop applications, 80/20 (80% lean muscle, 20% fat) is the undisputed king. It provides enough rendered fat to fry the meat in its own juices, amplifying the crust, but not so much that your pan turns into a deep fryer.
If you use ultra-lean beef (like 93/7), you are going to struggle with browning because there is virtually no fat to conduct the heat. Lean beef also dries out incredibly fast. If you are forced to use lean beef for dietary reasons, you absolutely must use the baking soda trick mentioned above to protect the moisture, and you must add a tablespoon of external fat (like olive oil or butter) to the pan to aid in the sear. If you are trying to make a rich dish but your caramelized onions take forever to cook down, utilizing the rendered beef fat from an 80/20 blend can drastically speed up the browning of your aromatics while injecting them with incredible flavor.
Draining the Fat: When and How to Do It Without Losing Flavor
A few years ago, a horrifying trend went viral on social media where people were literally pouring their cooked ground beef into a colander and washing it under cold sink water to remove the grease. Do not ever do this. Rinsing your meat washes away all the water-soluble flavor compounds, the salt, and the fond (the browned bits stuck to the meat). It is a culinary crime.
If you are using an 80/20 or 70/30 blend and find yourself with too much rendered fat in the pan after browning, simply tilt the skillet to pool the fat on one side. Use a spoon to scoop out the excess liquid fat, leaving about one or two tablespoons in the pan to flavor the rest of your dish. Do not pour hot grease down your sink drain unless you want a massive plumbing bill. And remember, sudden temperature changes are dangerous for your cookware; just as dumping cold water on hot glass is exactly why baking sheets warp, pouring cold water over a screaming hot cast iron or carbon steel skillet can cause the metal to permanently warp or even crack.
Transforming Your Browned Beef into Weeknight Staples
Now that you have a pan full of expertly seared, deeply caramelized, juicy ground beef, how do you utilize it? The beauty of this masterclass technique is that it creates a foundational flavor base that elevates absolutely any weeknight meal.
Taco Tuesday: Elevating the Spice Bloom
If you are making tacos, do not just dump a packet of raw, dusty taco seasoning into the meat along with half a cup of water. Spices contain essential oils that are fat-soluble, meaning their flavors are unlocked and amplified when exposed to hot fat. Once your beef is perfectly browned and you have chopped it up, push the meat to the edges of the pan. Drop your spices directly into the small pool of rendered beef fat in the center of the pan. Let the spices toast (or “bloom”) in the hot fat for 30 to 60 seconds until they become incredibly fragrant. Then, toss the beef in the bloomed spices. This technique will make a cheap packet of seasoning taste like it came from a high-end taqueria.
The Ultimate Weeknight Bolognese Base
A traditional Italian Bolognese takes hours of simmering, but you can fake a deep, complex meat sauce on a Tuesday night if your beef is browned properly. Once the beef is seared, do not wipe out the pan. All those dark brown, sticky bits glued to the bottom of the skillet are called the fond, and they are pure, concentrated flavor. Toss your finely diced onions, carrots, and celery directly into the beef fat. As the vegetables cook, they will release moisture, which will help you scrape up that fond with a wooden spoon, dissolving it into the vegetables. Deglaze with a splash of wine or beef broth, add your crushed tomatoes, and simmer. The robust crust on the beef will stand up to the acidic tomato sauce without turning to mush.
Next-Level Chili Foundations
Great chili is built on layers of flavor. If you start your chili by boiling raw ground beef in a pot of crushed tomatoes and kidney beans, your chili will taste flat and metallic. By taking the time to hard-sear your ground beef in a skillet first, you are injecting roasted, umami notes into the final dish. Transfer the browned beef (and all the scraped-up fond) into your heavy Dutch oven or slow cooker before adding your liquids. The Maillard reaction compounds will permeate the chili as it simmers, giving you a rich, competition-worthy depth of flavor that a boiled meat base could never achieve.
The Final Word: Stop Settling for Mediocre Meat
Cooking at home should never feel like a punishment, and it certainly shouldn’t taste like one. By understanding the simple physics of heat, ditching the toxic non-stick pans that hold you back, and practicing a little bit of patience, you can completely transform the cheapest cut of meat in the grocery store into a culinary masterpiece.
You do not need a culinary degree to make mind-blowing food. You just need to trust the process. Let the pan get hot. Dry your meat. Smash it down, and for the love of all things holy, stop stirring it. Trust your eyes and your nose to tell you when that crust is perfectly formed. Sometimes, your meat thermometer is lying to you when checking the ambient temperature of thin cuts, but the deep, mahogany-brown crust of a perfectly executed Maillard reaction will never lie. Now get into the kitchen, turn on the exhaust fan, and show that ground beef who is boss.






