
The Agony of the Crunchy Bean
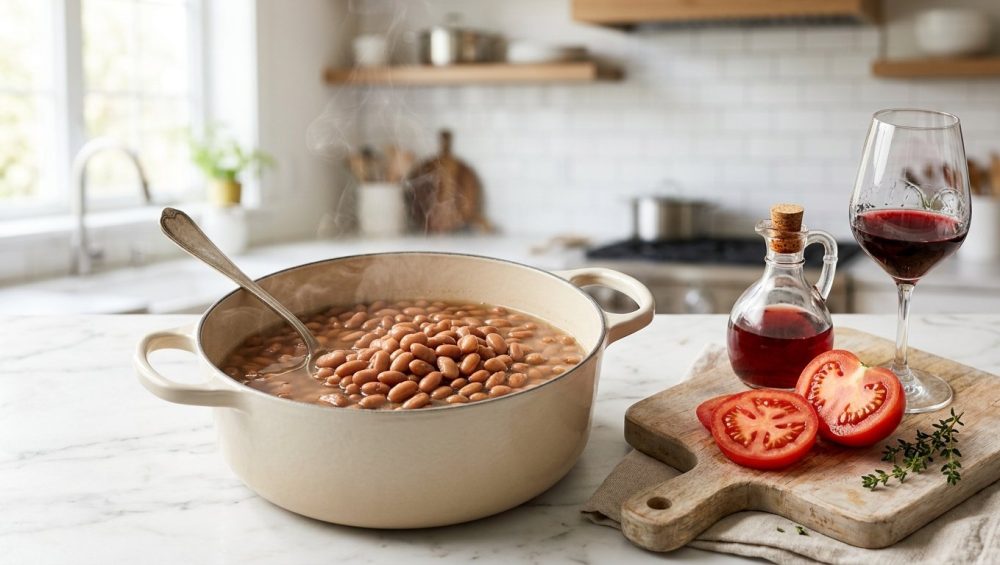
Listen up, weekend culinary warriors. I know exactly why you are here. You are staring into a beautiful, bubbling Dutch oven of what was supposed to be a legendary Sunday chili, but instead of creamy, melt-in-your-mouth perfection, your beans have the texture of driveway gravel. You followed the recipe to the letter. You soaked the legumes overnight. You meticulously sautéed your aromatics until they were perfectly translucent. You dumped in the crushed tomatoes, poured a generous splash of red wine into the broth, and let the whole concoction simmer for four agonizingly long hours. And yet, here you are, risking a chipped molar with every single bite.
Take a deep breath and step away from the stove. It is not your fault. You are simply the latest victim of bad recipe writing and a fundamental misunderstanding of food chemistry. As an advocate for the everyday home cook, I have zero patience for pretentious chef-speak, but I have even less patience for recipes that tell you to “just throw everything in a pot and let the magic happen.” Cooking is not magic; it is applied thermodynamics and chemistry. When you blindly toss highly acidic ingredients into a pot of unsoftened legumes, you are setting yourself up for failure.
In 2026, with grocery prices still making us all wince at the checkout counter, we are relying on pantry staples more than ever. Recent industry data shows that a staggering 93% of consumers expect to cook at home as much or more than they did last year, heavily driven by economic pressures and a desire for healthier meals. Beans are the ultimate budget-friendly superfood, but they are notoriously finicky if you do not understand their structural makeup. I am here to save you from common beginner cooking mistakes like this one. By the end of this definitive masterclass, you will understand exactly why your beans are still crunchy, how the timing of your tomatoes changes everything, and how to sequence your stews for flawless, professional-level results in a standard home kitchen.
The Anatomy of a Dried Bean: A Masterclass in Stubbornness
To understand why your dinner is currently ruined, we have to look at what a dried bean actually is. A bean is not just a tiny, inert pebble waiting to absorb water; it is a dormant seed designed by nature to survive harsh environmental conditions until it is ready to sprout. It is built like a microscopic fortress, and your job as a cook is to breach the walls.
The Protective Hull and the Starchy Center
Every legume consists of two primary parts that matter to us in the kitchen: the outer seed coat (the hull) and the inner cotyledon (the starchy center). The seed coat is a tough, semi-permeable membrane designed to control how quickly water enters the seed. The cotyledon is packed with complex carbohydrates, proteins, and starches tightly bound together in a cellular matrix. When we cook beans, our goal is to hydrate that inner starch and apply enough heat to gelatinize it, transforming it from a chalky, dense solid into a smooth, creamy texture. But standing between the boiling water and that starchy center is the plant’s ultimate defense mechanism: the cell wall.
The Biological Glue: Understanding Pectin
Plant cells are held together by a complex carbohydrate polymer called pectin. Think of the individual cells in a bean as bricks, and pectin as the mortar holding those bricks together. In a raw, dried bean, that mortar is incredibly strong. When you subject the beans to sustained heat—specifically temperatures between 185°F and 203°F (85°C to 95°C)—the pectin begins to dissolve and break down. As the mortar weakens, the cells separate from one another, the starches absorb water and swell, and the bean becomes tender.
If you boil beans in plain, neutral tap water, this process happens naturally over the course of an hour or two. The heat does the heavy lifting, the pectin surrenders, and you get to eat a delicious bowl of soup. Understanding this basic structural breakdown is the absolute foundation of mastering the home kitchen. However, the integrity of that pectin “mortar” is highly sensitive to the chemical environment of the water it is boiling in. If you alter the pH of that water, you completely change how the pectin behaves.
The Chemistry of Acid: Why Tomatoes Are Your Bean’s Worst Enemy
Here is where the Sunday chili goes horribly wrong. When you add crushed tomatoes, tomato paste, or a splash of wine to your simmering pot of beans, you are drastically lowering the pH of the cooking liquid, making it highly acidic. This is the exact moment you doom your dinner.
The pH Scale and Your Stew
The pH scale measures how acidic or alkaline a substance is, ranging from 0 (battery acid) to 14 (liquid drain cleaner), with 7 being perfectly neutral (pure water). Most beans prefer to cook in an environment that is neutral or slightly alkaline. Tomatoes, however, are quite acidic, typically sitting at a pH of around 4.0 to 4.5.
When pectin is exposed to an acidic environment, it undergoes a chemical reaction that prevents it from dissolving. Instead of weakening under the heat, the acid neutralizes the negative electrical charges on the pectin molecules. Without those negative charges repelling each other, the pectin chains are free to pack tightly together. The “mortar” holding the bean cells together does not just stop dissolving; it actively hardens. You can boil an acid-soaked bean until the end of time, and it will remain stubbornly tough.
The “Egg-Box” Model: A Little Food Science
Food scientists refer to this phenomenon using the “egg-box model”. Imagine a cardboard egg carton. The pectin chains form the structure of the carton, and calcium ions (which are naturally present in the beans and often in your tap water) act like the eggs sitting perfectly in the pockets. When the acid forces the pectin chains closer together, these calcium ions act like microscopic bridges, cross-linking the pectin molecules into a highly stable, rigid, water-resistant network.
Once this calcium-pectin cross-linking occurs, the cell walls become incredibly heat-resistant. You have essentially fortified the bean’s defenses. It is no longer a cooking process; it is a hostage negotiation, and the beans are winning. Knowing exactly when to introduce acidic ingredients is the ultimate secret to preventing stubborn hard legumes.
The Usual Suspects: Other Acidic Ingredients Ruining Your Dinner
We spend a lot of time vilifying the humble tomato, but it is far from the only acidic ingredient that can ruin a pot of beans. You need to be hyper-vigilant about these other common culprits:
- Wine: Deglazing your pot with a generous pour of red or white wine (pH 3.0 to 3.5) before the beans are fully cooked is a massive error. Wine is significantly more acidic than tomatoes.
- Vinegar and Citrus: A splash of apple cider vinegar or fresh lemon juice is brilliant for brightening up a heavy, earthy stew, but it must be added off the heat, right before serving.
- Molasses and Brown Sugar: If you are making homemade baked beans from scratch, beware of the molasses. With a pH around 5.5, it is acidic enough to significantly delay softening. This is why traditional baked bean recipes require boiling the navy beans until they are completely tender before baking them in the sweet, sticky sauce.
The Hard Water Conspiracy: Calcium’s Unholy Alliance
Now, some of you are currently screaming at your screens: “But I didn’t add tomatoes, and my beans are still hard!” If you live in an area with hard tap water, you are fighting a battle on two fronts.
How to Combat Mineral-Heavy Tap Water
Hard water is packed with dissolved calcium and magnesium minerals. Remember the “egg-box model” we just talked about? Calcium is the egg. If you boil your dried beans in hard tap water, you are actively supplying the exact minerals the pectin needs to build those indestructible cross-linked bridges. The calcium in the water binds with the pectin in the bean skins, reinforcing the cell walls and making the beans highly resistant to softening.
If you combine hard water with even a mild acid, you have created a culinary fortress. To combat this, if you know your tap water leaves white mineral scale on your faucets, do not use it to cook dried legumes. Use filtered water, or employ a clever chemical trick to alter the pH of the water entirely.
The Baking Soda Miracle: Using Alkalinity to Your Advantage
If acid is the mortal enemy of soft beans, alkalinity is its best friend. This brings us to one of the most powerful, time-saving kitchen hacks in existence—a vital skill for surviving everyday kitchen disasters when you are short on time.
When you add baking soda (sodium bicarbonate) to your cooking or soaking water, you raise the pH, creating a slightly alkaline environment. In an alkaline solution, the pectin in the bean’s cell walls breaks down rapidly. The alkaline water causes the hemicellulose in the cell walls to become highly soluble, essentially dissolving the biological glue at an accelerated rate. Studies have shown that adding a mere 1/8 to 1/4 teaspoon of baking soda per pound of dried beans can slash the cooking time in half.
The Fine Line Between Creamy and Mushy
However, as a sassy sous-chef who demands perfection, I must issue a warning: use baking soda sparingly. While it is a miracle worker for stubborn beans (especially notoriously hard chickpeas), an overly alkaline environment can break down the cell walls too well, resulting in a pot of exploded, mushy bean paste. Furthermore, excessive baking soda can leave an unpleasant, soapy aftertaste and actually destroy certain essential nutrients, like thiamine (Vitamin B1). Measure carefully. A tiny pinch is all you need to tip the chemical scales in your favor.
The Great Salt Myth: Why You Should Actually Salt Your Bean Water
Before we get to the definitive cooking protocol, we need to address the elephant in the room: salt. For decades, grandmothers and outdated cookbooks have aggressively warned home cooks never to salt their beans until they are fully cooked, claiming that salt makes the skins tough. This is a culinary myth, and it is entirely false.
In fact, food science proves the exact opposite. Salting your soaking water (creating a mild brine) and salting your cooking water actually helps the beans soften. The sodium ions in the salt actively displace the calcium and magnesium ions in the bean skins. By swapping out the calcium (which makes pectin rigid) for sodium (which does not), the pectin network becomes weaker and more soluble. Salting early also ensures that the beans are seasoned all the way through to their starchy centers, rather than just coated in salty broth at the very end. Salt your beans early and often. It is acid that makes them tough, not sodium.
The Sassy Sous-Chef’s Definitive Bean Sequencing Protocol
Time is money, especially when you need simple weeknight dinner strategies that actually work. To ensure you never suffer through a crunchy bowl of chili again, you must sequence your ingredients with military precision. Here is the foolproof, step-by-step protocol for cooking any bean-heavy stew or soup.
Phase 1: The Smart Soak
Sort your dried beans, discarding any shriveled specimens or actual small rocks. Rinse them thoroughly. Place them in a large bowl and cover them with at least three inches of water. Add a generous tablespoon of kosher salt to create a brine. If you have notoriously hard water or are cooking stubborn chickpeas, add 1/8 teaspoon of baking soda. Let them soak for 8 to 12 hours. Drain and rinse before cooking. (If you forgot to soak, you can quick-soak by boiling them for two minutes, removing them from the heat, and letting them sit covered for an hour, but the overnight brine yields superior texture).
Phase 2: The Aromatic Foundation
In your heavy-bottomed pot, heat your fat (olive oil, butter, or bacon grease). Sauté your onions, carrots, celery, and garlic until softened and deeply aromatic. This is the time to bloom your raw spices—cumin, chili powder, coriander—in the hot fat to release their essential oils. Do not add the tomatoes yet.
Phase 3: The Uninterrupted Simmer
Add your soaked, rinsed beans to the pot. Pour in your neutral cooking liquid—this means chicken broth, vegetable stock, or filtered water. Bring the pot to a vigorous boil for at least 10 minutes. (This step is absolutely critical if you are cooking kidney beans, as it destroys a naturally occurring toxin called phytohaemagglutinin). After the initial boil, reduce the heat to a gentle simmer. Cover the pot and let the beans cook in this neutral environment until they are 100% perfectly tender and creamy. Not “almost done.” Not “al dente.” Completely, flawlessly soft.
Phase 4: The Acid Drop and the Final Marriage
Now, and only now, do you invite the acid to the party. Pour in your crushed tomatoes, your tomato paste, your splash of wine, or your vinegar. Stir gently to combine. Because the beans are already perfectly soft, the acidic tomatoes will not turn them into rocks. In fact, the acid will now work to your advantage—it will slightly firm up the outer skins, preventing the soft beans from disintegrating into mush as the chili finishes cooking. Let the entire pot simmer together for another 30 to 45 minutes so the flavors can marry and mature.
The “No-Go” Rule: Stop Cooking Acidic Stews in Toxic Gear
As a culinary blogger who firmly advocates for the home cook, I have a strict “No-Go” rule regarding cheap, toxic kitchenware. I absolutely despise mystery metals and peeling non-stick coatings, and if you are cooking acidic, tomato-based stews in them, you are committing a culinary crime against your own body.
The Danger of Reactive Metals
Acid is highly reactive. When you simmer tomatoes, wine, or vinegar for hours in an unlined aluminum pot or a poorly seasoned raw cast iron Dutch oven, the acid actively strips the metal. The chemical reaction leaches aluminum or excessive dietary iron directly into your food, resulting in a metallic tasting tomato sauce that looks muddy and tastes like a handful of spare change.
The Horrors of Cheap Non-Stick
Worse still is the weekend cook who tries to simmer a massive batch of chili in a cheap, scratched, lightweight non-stick stockpot. Simmering heavy, acidic liquids for extended periods in compromised Teflon (PTFE) is a health hazard. As the coating degrades, it flakes off into your food, leaching forever chemicals and completely destroying the pan. Using cheap aerosol cooking sprays in these pots only accelerates the degradation, which is the fastest way of ruining your nonstick pans permanently.
The Gold Standard: Enameled Cast Iron and Stainless Steel
If you want to cook like an expert, you need the right tools. Investing in safe, durable, high-quality equipment is a non-negotiable step in banishing toxic kitchen gear from your life forever.
For long, slow, acidic simmers, the absolute gold standard is enameled cast iron (think Le Creuset or Staub). The glass-like enamel coating is completely inert; it does not react with tomatoes, it does not leach metals, and it retains thermal mass beautifully for a steady, even simmer. If enameled cast iron is out of your budget, a heavy-bottomed, multi-clad stainless steel pot is your best runner-up. Stainless steel is non-reactive, highly durable, and completely safe for acidic foods. Throw out the peeling non-stick and the raw aluminum. Your health, and your chili, deserve better.
Troubleshooting: Can You Save a Pot of Acid-Soaked, Crunchy Beans?
Let us address the harsh reality: you are reading this article because you already messed up. You dumped the tomatoes in at hour one, it is now hour four, your dinner guests are arriving in thirty minutes, and the beans are practically fossilized. Can you save them?
The brutally honest truth is that it is exceptionally difficult to reverse pectin cross-linking once it has occurred in an acidic environment. You cannot simply un-bake a cake, and you cannot easily un-link calcium-fortified cell walls. However, before you dump the entire pot into the trash and order a pizza, you have two desperate troubleshooting options.
The Pressure Cooker Hail Mary
If you own an electric pressure cooker (like an Instant Pot), this is your best bet for fixing stubbornly hard beans. Transfer the entire ruined stew into the pressure cooker. Lock the lid and cook on high pressure for 20 to 30 minutes. A pressure cooker raises the boiling point of water to around 250°F (121°C). Sometimes, this extreme, pressurized heat is aggressive enough to force the fortified pectin to break down, overpowering the chemical bonds created by the acid. It is not guaranteed, but it is your most reliable rescue mission.
The Baking Soda Neutralizer
If you do not have a pressure cooker, you must attempt to chemically neutralize the acid in the pot. Add 1/4 teaspoon of baking soda directly to the simmering chili. Be warned: the baking soda will immediately react with the acidic tomatoes, foaming up violently like a middle school volcano science experiment. Stir it down. This reaction neutralizes some of the acid, raising the overall pH of the pot. Let it simmer for another 45 minutes. The downside to this method is that neutralizing the acid will flatten the flavor profile of your tomatoes, making the chili taste a bit dull. You will need to re-season heavily with salt and perhaps a tiny splash of vinegar right in the individual serving bowls to bring the dish back to life.
The Slow Cooker Conundrum: Why Low and Slow Sometimes Fails
While we are debunking bean myths, we need to talk about the slow cooker. Many home cooks assume that tossing dried beans, broth, and tomatoes into a slow cooker before leaving for work will result in a perfect dinner. Instead, they come home to a pot of lukewarm, crunchy disappointment.
Slow cookers are fantastic for braising tough cuts of meat, but they are often terrible for cooking dried beans from scratch. Beans require sustained, vigorous heat (above 185°F) to properly gelatinize their starches and break down pectin. Many modern slow cookers, especially on the “Low” setting, take hours to reach this temperature, if they reach it at all. When you combine this gentle, insufficient heat with the acidic presence of tomatoes, you are virtually guaranteeing that the beans will never soften.
Furthermore, slow cookers trap all evaporation. As the vegetables release their cellular water, it condenses on the lid and drips back down, which is the main culprit behind watery slow cooker stews with zero depth of flavor. If you insist on using a slow cooker for chili, you must boil the beans vigorously on the stovetop first until they are completely tender, reduce your liquids, and only use the slow cooker to hold the finished dish at a warm serving temperature.
Advanced Bean Science: Cultivar Variations
Not all legumes behave the same way in the pot. While the rule of “no acid until tender” applies universally, understanding the nuances of different bean cultivars will elevate your cooking from amateur to expert.
The Stubborn Chickpea
Chickpeas (garbanzo beans) possess incredibly thick, robust seed coats and dense cotyledons. They are notoriously resistant to softening, even in neutral water. If you are making homemade hummus or a Mediterranean stew, chickpeas almost always require an overnight soak with a pinch of baking soda to weaken their formidable defenses. Never, under any circumstances, add lemon juice or tomatoes to chickpeas until they are practically falling apart on their own.
The Delicate Black Bean
Black beans, on the other hand, have relatively thin skins and cook quite quickly. They are unique because their dark, inky pigment is derived from anthocyanins—water-soluble compounds that are highly sensitive to pH changes. In an alkaline environment, black beans can turn an unappetizing grayish-green. In an acidic environment, the anthocyanins stabilize, retaining their beautiful, deep purple-black hue. Therefore, once black beans have achieved tenderness in neutral water, introducing an acidic ingredient like lime juice or tomatoes is actually highly beneficial for locking in their vibrant color.
The Toxic Kidney Bean
Kidney beans require a special safety briefing. Raw kidney beans contain extraordinarily high levels of phytohaemagglutinin, a lectin protein that is highly toxic and can cause severe gastrointestinal distress. Cooking kidney beans in a slow cooker at low temperatures can actually increase the toxicity of this protein. Kidney beans must be soaked, drained, and boiled vigorously at 212°F (100°C) for a minimum of 10 to 15 minutes to completely denature the toxic lectins before you even think about dropping the heat to a simmer or adding your tomatoes.
Conclusion: Reclaiming Your Weekend Simmer
Cooking from scratch is one of the most empowering skills you can cultivate. It buys you freedom from the drive-thru, it saves you an incredible amount of money, and it allows you to control exactly what goes into your body. But to cook with confidence, you have to stop blindly following instructions and start understanding the “why” behind the recipe.
The next time you set out to make a hearty, soul-warming pot of chili or a rustic Tuscan bean stew, remember the science of the simmer. Respect the structural integrity of the pectin. Manage your pH levels with the precision of a chemist. Banish the toxic, peeling non-stick pots to the garbage bin where they belong. And above all else, hold back those crushed tomatoes until the very end. Your beans will be impossibly creamy, your stews will be flawless, and your molars will thank you. Now get back in the kitchen, pour yourself a glass of that wine you were about to waste on un-cooked beans, and show that Dutch oven who is boss.






