
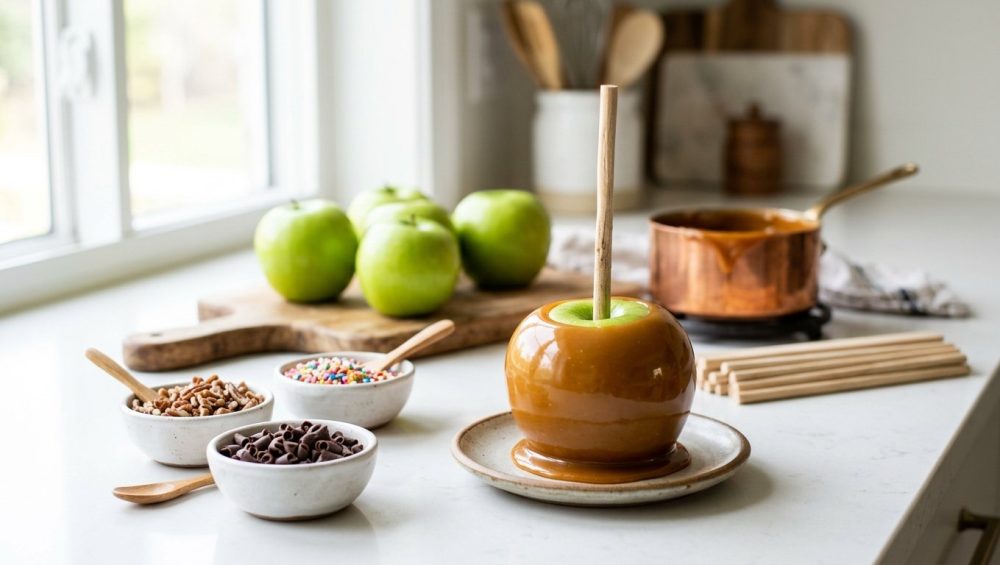
We’ve all been there. You invite friends over for a cozy, autumnal gathering. You spend an absurd amount of money on artisanal caramel, painstakingly insert rustic wooden twigs into a dozen pristine apples, and dip them with the grace of a French chocolatier. You set them on a parchment-lined tray, feeling like an absolute domestic deity. Ten minutes later, you check on your masterpieces, only to find a platter of sad, naked apples sitting in depressing puddles of congealed sugar.
Your caramel slid right off.
Before you throw your candy thermometer out the window and swear off hosting forever, take a deep breath. Your failure isn’t a lack of culinary talent, and it certainly isn’t a personal flaw. It’s basic chemistry. If you want to cure cooking anxiety, you have to stop blaming yourself for things that are entirely dictated by molecular science. You cannot fight physics with sheer willpower, no matter how aesthetically pleasing your dessert board looks on Pinterest.
The truth is, making flawless caramel apples—the kind where the thick, buttery coating actually clings to the fruit from the first bite to the last—is entirely about the prep work. It is about understanding the invisible barriers working against you and systematically dismantling them. Mastering this dessert doesn’t require a culinary degree; it just requires a few simple steps to culinary artistry that anyone can easily follow in a standard home kitchen.
Today, we are going to dive deep into the food science of why your caramel constantly betrays you. We will cover the exact hot-water washing techniques required to strip your produce of its slippery defenses, how to select the right apple cultivars, and how to set up a stress-free, interactive DIY dipping station that will make you the undisputed champion of weekend hosting. Grab your aprons and your best heavy-bottomed pots. We have some science to conquer.
The Chemical Warfare on Your Apple’s Skin
Let’s get one thing straight: the apple is actively working against you. To understand why your caramel refuses to adhere, we have to look at the anatomy of the fruit itself and the commercial journey it takes to get to your grocery store produce bin.
The Natural and Artificial Wax Barrier
Like most fruits and vegetables, apples have a remarkably high water content—usually between 80 to 85 percent. Because they are technically still living, breathing organisms even after being picked, they constantly lose moisture through respiration and transpiration. To protect themselves against shriveling, nutrient loss, and premature rotting, apples naturally secrete their own waxy covering known as epicuticular wax.
However, the story doesn’t end in the orchard. After harvest, commercial apples are subjected to rigorous washing and brushing to remove field dirt, leaf litter, and potential pathogens. This aggressive cleaning process strips away the fruit’s original, natural wax coating. Because an unwaxed apple would quickly turn soft, dry, and unappealing on a supermarket shelf, agricultural packers re-apply a microscopic layer of “food-grade” wax.
These commercial coatings are heavily regulated and entirely safe to consume. They are typically derived from natural sources, most commonly carnauba wax (harvested from the leaves of a Brazilian palm tree) or shellac (a resin secreted by the lac bug, native to Asia). While these waxes are brilliant for extending shelf life and giving the apple that irresistible, glossy, mirror-like shine, they are the exact reason your dessert is failing.
Hydrophobic vs. Hydrophilic Interactions
Here is where the kitchen science comes into play. Waxes, whether natural or artificially applied, are intensely hydrophobic. This means they repel water on a molecular level.
Caramel, on the other hand, is hydrophilic. At its core, caramel is a mixture of sugar, butter, cream, and a small amount of water, all cooked down into a sticky, water-soluble matrix. When you attempt to dip a hydrophilic sugar syrup onto a hydrophobic waxy surface, the two substances violently reject each other. The caramel cannot find any porous grip on the smooth, water-repelling skin of the apple. As gravity takes over, the heavy caramel simply slides down the sides, pooling at the base and leaving you with a sticky disaster.
To achieve flawless adhesion, we have to entirely strip the apple of its wax armor.
The Masterclass Protocol: Eradicating the Wax
You cannot just rinse your apples under cold tap water and expect the wax to disappear. Carnauba wax and shellac are specifically designed to withstand cold water and standard friction. To remove them, we have to use thermal shock and mild chemical abrasion. Grab a heavy-duty vegetable brush and a large mixing bowl—two absolute beginner cooking essentials you should already own—and let’s get to work.
Step 1: The Boiling Water Dip
The melting point of carnauba wax is roughly 180°F to 185°F. To melt it off the fruit, we need boiling water (212°F). However, timing is everything. If you leave the apple in the water for too long, you will literally cook the flesh, causing the skin to burst and turning the crisp fruit into mush.
- Fill a large, deep pot with water and bring it to a rolling, aggressive boil.
- Using a stainless steel slotted spoon or spider skimmer, carefully lower one or two apples into the boiling water.
- Count to exactly 6 to 10 seconds. Do not exceed 10 seconds. You want to flash-melt the wax without raising the internal temperature of the apple.
- Immediately remove the apples and transfer them to a wire cooling rack.
Step 2: The Abrasive Acid Scrub
While the apples are still warm and the wax is soft, you need to physically remove the residue.
- In a small bowl, create a paste using one tablespoon of baking soda and a splash of lemon juice or white vinegar.
- The baking soda (sodium bicarbonate) acts as a mild, food-safe abrasive, while the acid helps break down the structural integrity of the remaining wax polymers.
- Using a stiff vegetable brush, scrub the warm apple vigorously with the paste. Pay special attention to the crown (near the stem) and the base, where wax tends to pool heavily.
- Rinse the apple thoroughly under hot running water to wash away all the baking soda residue.
Step 3: The Crucial Drying Phase
If you successfully remove all the wax but leave the apple damp, your caramel will still slide off. Remember, caramel is hydrophilic, but excess surface water will dilute the sugars upon contact, creating a slippery syrup layer that destroys adhesion.
Wipe the apples vigorously with a lint-free microfiber cloth or a highly absorbent paper towel. Once they look dry, let them sit at room temperature on a wire rack for at least 30 minutes to allow any microscopic surface moisture to evaporate.
Selecting the Perfect Apple: The Acid-to-Sugar Matrix
Not all apples are created equal, and choosing the wrong cultivar will ruin your dessert just as quickly as failing to remove the wax. When building a caramel apple bar, you must balance the intense, overwhelming sweetness of the caramel with the natural flavor profile and structural integrity of the fruit.
The Undisputed Champion: Granny Smith
There is a reason the bright green Granny Smith is the gold standard for caramel apples. Caramel is heavy, rich, and loaded with sucrose. If you pair it with a highly sweet apple (like a Fuji or a Gala), the resulting dessert becomes cloying, one-dimensional, and exhausting to eat.
Granny Smith apples are packed with malic acid, giving them a sharp, lip-smacking tartness. This acidity slices right through the heavy butterfat and sugar of the caramel, creating a perfectly balanced flavor profile that prevents palate fatigue. Furthermore, Granny Smiths have an incredibly dense, firm cellular structure. They hold up beautifully to the heat of the warm caramel and the weight of heavy toppings without turning mealy.
Acceptable Alternatives
If you absolutely despise tart apples, you can pivot to cultivars that offer a balanced “sweet-tart” profile while maintaining a firm crunch.
- Honeycrisp: Explosively crunchy and juicy, with a rich, aromatic flavor that bridges the gap between sweet and sour.
- Pink Lady (Cripps Pink): Effervescent, crisp, and slightly floral.
- Jonagold: A fantastic hybrid that offers the sweetness of a Jonathan and the firmness of a Golden Delicious.
The “Absolutely Not” List
Never, under any circumstances, use a Red Delicious apple for this project. They are overly sweet, notoriously mealy, and their thick, bitter skin offers a terrible textural contrast to soft caramel. Leave them at the grocery store where they belong.
The Great Debate: Whole Apples vs. The Apple Wedge
If you are hosting a weekend gathering, we need to have a serious conversation about logistics. Whole caramel apples look stunning on a pedestal, but they are a nightmare to actually consume. You have to unhinge your jaw to take a bite, the caramel shatters into your lap, the toppings fall on the floor, and you inevitably end up with sticky cheeks and frustrated guests. When it comes to hosting mindful gatherings, the goal is interactive fun, not a dental emergency.
The ultimate hosting hack is the Caramel Apple Wedge Bar.
By slicing the apples into thick wedges before serving, you completely eliminate the awkward eating experience. Wedges are the perfect bite-sized canvas. They allow guests to dip their own fruit, control their own caramel-to-apple ratio, and experiment with multiple different topping combinations without having to commit to an entire piece of fruit.
Defeating the Brown Menace: Soaking Strategies
There is one glaring issue with slicing apples ahead of time: enzymatic browning. When you cut an apple, you rupture its cells, exposing an enzyme called polyphenol oxidase to the oxygen in the air. This chemical reaction rapidly turns the pristine white flesh into a sad, unappetizing rusty brown.
To keep your wedges looking pristine, you need to employ proper enzymatic browning prevention strategies before your guests arrive.
Do not use straight lemon juice. While the ascorbic acid in lemon juice will halt the browning, it will also make your apples taste aggressively like lemons, which clashes horribly with caramel. Instead, use a saltwater brine.
- Dissolve 1 tablespoon of kosher salt into 1 cup of cold water.
- Submerge your freshly cut apple wedges in the saltwater solution for exactly 10 minutes.
- Remove the slices, rinse them thoroughly under cold running water to remove the salty taste, and pat them completely dry with paper towels.
The chloride ions in the salt effectively inhibit the polyphenol oxidase enzymes, keeping your apple slices perfectly crisp and white for hours without altering their flavor. Just remember: the slices must be bone-dry before they hit the caramel station!
The Caramel Conundrum: Temperature, Viscosity, and Gear
Whether you are melting down high-quality store-bought soft caramels (a highly respectable time-saving move) or making your own from scratch by boiling sugar, butter, and heavy cream to the soft-ball stage (235°F), your choice of cookware is paramount.
The “No-Go” Rule on Toxic Gear
This is exactly why I am so militant about banishing toxic kitchen gear from your home. Listen to me very carefully: if you attempt to melt sugar in a scratched, peeling, lightweight non-stick saucepan you bought at a discount store a decade ago, you are making a massive mistake.
At the high temperatures required to melt and hold caramel, cheap Teflon and mystery-metal coatings can degrade, hot-spot, and scorch your sugar in seconds. Worse, they can leach forever chemicals directly into your dessert. We do not tolerate toxic gear here.
For making or melting caramel, you must use a heavy-bottomed, multi-clad stainless steel saucepan, a high-quality enameled cast iron Dutch oven, or an unlined copper sugar pot. These materials offer superior thermal mass and even heat distribution, preventing the sugar from burning on the bottom while remaining cold on top. If you are using a high-quality stainless steel pan, you can use the water drop test to ensure your pan is evenly heated before starting your sugar work.
Furthermore, pay attention to your utensils. Nobody wants a batch of artisanal caramel that happens to taste like soap because you used a cheap, porous utensil that absorbed last night’s dish detergent. Use a high-heat, professional-grade, seamless silicone spatula or a dedicated wooden spoon that is only used for baking.
Architecture of the Mindful Caramel Apple Bar
You have wax-free, perfectly tart, brilliantly white apple slices. You have a pot of lush, safe, perfectly melted caramel. Now, it is time to build the ultimate interactive dessert station.
The Warming Station
Caramel is highly temperature-sensitive. As it cools, its viscosity increases rapidly, turning from a silky, dippable pool into a stiff, unyielding brick. To prevent this, you need to implement some basic thermodynamic food holding strategies to keep the sugar fluid throughout your entire party.
Do not leave the caramel on the stove. Instead, transfer the melted caramel into a ceramic fondue pot over a low tea light, or into a mini slow-cooker set to the “warm” setting. This maintains the caramel at the perfect dipping temperature (around 160°F to 170°F) without continuing to cook the sugar and accidentally taking it to the hard-crack stage.
Provide your guests with sturdy bamboo skewers or elegant cocktail forks to spear their apple wedges. Place the skewers in a tall highball glass next to the apples for easy grabbing.
The Topping Matrix
The beauty of a DIY bar is the customization. Caramel is intensely sweet and rich, so your toppings need to provide contrasting textures and flavors. Arrange your toppings in a grid of small, matching ceramic bowls or ramekins around the warming station.
You need to hit three distinct flavor profiles:
- The Salty Crunch: Flaky Maldon sea salt is an absolute non-negotiable requirement. It cuts the sweetness and elevates the butter notes in the caramel. Crushed salted pretzels, roasted peanuts, and crushed potato chips also work wonders.
- The Sweet & Decadent: Mini semi-sweet chocolate chips, white chocolate curls, crushed toffee bits, and butterscotch chips. (Pro tip: use mini chips, as standard-sized chocolate chips are too heavy and will slide off the warm caramel).
- The Textural Wildcards: Toasted shredded coconut, crushed graham crackers, cinnamon sugar, and finely chopped candied pecans or walnuts.
Controlling the Chaos
Dipping apples in liquid sugar is inherently messy. Embrace it, but control the blast zone. Line the entire table area under the warming station and the topping bowls with a large, aesthetic sheet of parchment paper or a high-quality silicone baking mat. When the party is over, you simply roll up the parchment and throw it away, completely eliminating the need to chisel hardened sugar off your dining room table.
Provide a stack of small, heavy-duty paper plates or shallow bowls for guests to catch the inevitable drips as they move from the dipping station to the topping matrix.
The Host’s Timeline: Stress-Free Execution
As a home cook, your time is your most valuable asset. You should be enjoying your glass of wine with your friends, not frantically scrubbing wax off apples while your guests watch. Here is your fail-proof timeline:
The Day Before:
- Perform the boiling water dip and baking soda scrub on all your apples.
- Dry them thoroughly and store them in the crisper drawer of your refrigerator. (Chilled apples actually help the warm caramel set up faster upon contact!)
- Chop all your toppings and arrange them in their serving bowls. Cover tightly with plastic wrap.
Two Hours Before Guests Arrive:
- Slice the apples into wedges.
- Perform the saltwater soak to prevent enzymatic browning.
- Rinse, dry meticulously, and arrange the slices on your serving platter. Cover with a damp paper towel and refrigerate.
Thirty Minutes Before Dessert:
- Melt your caramel on the stove in your high-quality, non-toxic cookware.
- Transfer the fluid caramel to your fondue pot or slow cooker.
- Uncover your toppings, set out the skewers, and pull the pristine apple slices from the fridge.
Final Thoughts
Making caramel apples doesn’t have to be a frustrating battle against gravity and sliding sugar. By understanding the science of epicuticular wax, utilizing a quick hot-water bath, and choosing the right tart apples to balance the sweetness, you can achieve professional-level confections right in your own kitchen.
Ultimately, the secret to pulling off a meaningful dinner party is embracing the chaos while controlling the variables you can. Ditch the cheap non-stick pots, respect the chemistry of your ingredients, and let your guests have fun building their own messy, delicious masterpieces. Now go forth, scrub those apples, and show that caramel who is actually in charge.






