
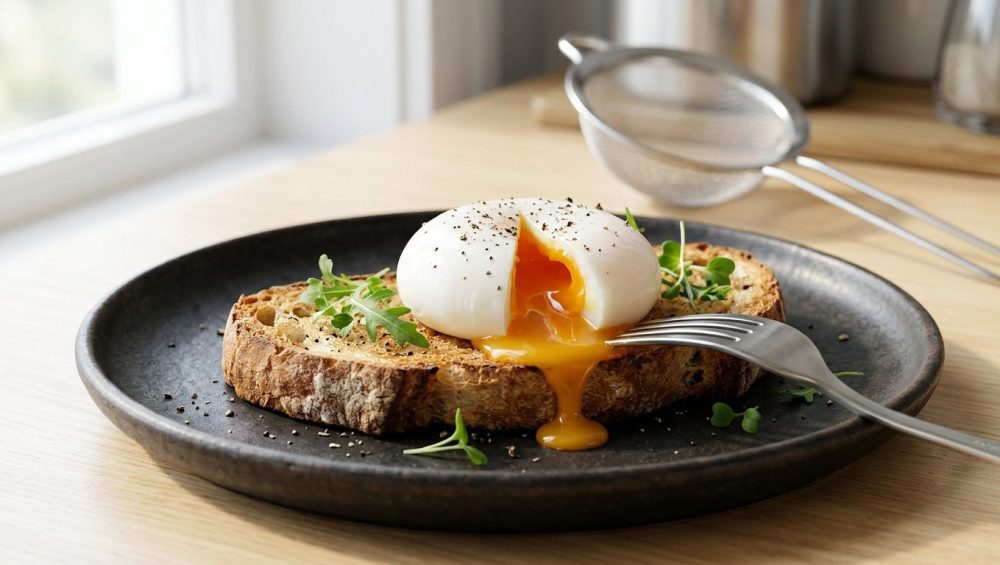
Listen up, weekend warriors. If you’ve ever stared into a pot of boiling water, wondering why your poached eggs are messy, stringy disasters instead of the café-quality orbs you were promised, pull up a chair. We need to have a serious talk.
You’ve likely spent years trying to master the art of the poached egg, only to end up with a pot full of ghostly white tentacles and a chalky, overcooked yolk. You’ve probably blamed yourself. You’ve probably assumed that professional chefs possess some sort of dark culinary magic that allows them to effortlessly slide out perfectly spherical, velvety eggs onto a slice of sourdough toast.
I am here to tell you that you are not the problem. The problem is the outdated, pretentious, and frankly ridiculous advice you’ve been fed by old-school cookbooks and chaotic internet food hacks. You do not need a culinary degree to poach an egg. You do not need to create a swirling vortex of doom in your saucepan. And you certainly do not need to ruin the flavor of your expensive farm-fresh eggs by drowning them in a gallon of harsh white vinegar.
What you actually need is a basic understanding of culinary science and one of the cheapest, most unassuming tools in your kitchen arsenal. We are going to completely deconstruct the poaching process, debunk the myths that are ruining your weekend brunch, and equip you with a foolproof, scientifically backed technique that guarantees perfection every single time. Grab your coffee, banish your cooking anxiety, and let’s dive into the definitive masterclass on poaching eggs.
The Anatomy of an Egg: Why Things Fall Apart
To understand why your eggs turn into a stringy mess the second they hit the hot water, we have to put on our lab coats and look at the biological architecture of the egg itself. Treating all egg whites as a single, uniform substance is one of the biggest rookie kitchen mistakes you can make.
When you crack an egg into a bowl, take a close look at the clear liquid surrounding the yolk. It is not just one homogenous blob of protein. It is actually composed of two very distinct types of albumen (the scientific term for egg white).
The Thick Albumen (The Good Stuff)
Immediately surrounding the yolk is the thick albumen, also known as the chalaziferous layer. This is a dense, viscous, gel-like protein structure. Its biological purpose is to act as a shock absorber, protecting the yolk and keeping it anchored in the center of the egg. When you cook an egg, this thick albumen is what forms the beautiful, cohesive, tender white shell around the runny yolk. This is the part of the egg we want to keep.
The Thin Albumen (The Enemy)
Surrounding the thick albumen is the thin albumen. This is a watery, fluid, runny liquid that spreads out rapidly as soon as the egg hits a flat surface. When you drop an egg into a pot of simmering water, it is this exact watery layer that instantly separates from the rest of the egg. Because it lacks the structural integrity of the thick white, the water currents grab it, pull it apart, and cook it into those hideous, feathery white wisps that cloud your poaching water and make your final dish look like a ragged jellyfish.
The Science of Egg Aging
Here is where things get even more frustrating for the home cook. The ratio of thick albumen to thin albumen is entirely dependent on the freshness of the egg.
When an egg is freshly laid, it has a tightly bound, highly acidic thick white. However, eggshells are porous. As an egg sits in a carton in the supermarket—and then sits in your refrigerator for another two weeks—it undergoes a chemical aging process. The egg slowly loses moisture and carbon dioxide through the microscopic pores in its shell. As the carbon dioxide escapes, the pH of the egg rises, making it more alkaline.
This shift in pH causes the protein bonds in the thick albumen to physically break down and degrade. The older the egg gets, the more the thick white transforms into the watery thin white. By the time you buy standard supermarket eggs, a significant portion of the white has already liquefied. This is exactly why farm-fresh eggs poach beautifully, while three-week-old grocery store eggs turn into a stringy nightmare.
Debunking the Great Poached Egg Myths
Before we get to the ultimate solution, we have to aggressively unlearn the terrible habits that have been passed down through generations of confused home cooks. Just like the endless internet debates over why your boiled eggs won’t peel cleanly, the poaching world is full of terrible advice that sounds smart but actually sabotages your efforts. Let’s dismantle the nonsense.
Myth 1: The Swirling Vortex of Chaos
Every old-school culinary guide tells you to take a spoon and stir your boiling water vigorously to create a whirlpool, then drop the egg directly into the center. The theory is that the centripetal force of the vortex will wrap the egg white around the yolk, creating a perfect sphere.
Here is the brutal truth: The vortex trick only works if you are using an egg that was laid by a chicken approximately five minutes ago. If your egg is exceptionally fresh, the thick white is strong enough to withstand the spinning water. But if you are using a standard, slightly aged supermarket egg, the violent currents of the whirlpool will violently rip the thin, watery albumen away from the yolk, creating an even bigger mess than if you had done nothing at all. Furthermore, trying to manage a spinning vortex means you can only poach one single egg at a time. If you are hosting brunch for four people, somebody is going to be eating cold food. The vortex is inefficient, unreliable, and frankly, exhausting.
Myth 2: The Vinegar Bath
Another classic piece of advice is to dump a heavy glug of white vinegar into your poaching water. The science behind this seems sound on the surface: acid lowers the pH of the water, which accelerates the coagulation of the egg proteins. The idea is that the acid will force the egg white to set instantly before it has a chance to feather out into the water.
While this technically works to coagulate the proteins faster, it comes at a terrible cost. First, it makes your eggs taste like a salad dressing. Nobody wants a harsh, acidic bite to their delicate, buttery egg yolk. Second, the rapid, acid-induced protein coagulation causes the egg whites to seize up too aggressively, resulting in a tough, rubbery, squeaky texture rather than a soft, velvety one. You are trading structural integrity for terrible flavor and texture. It is a bad deal.
Myth 3: The Deep-Water Plunge
Many recipes insist that you need a massive, deep stockpot filled with gallons of water to poach an egg properly, claiming the egg needs a long “drop” to form a teardrop shape. This is completely unnecessary for the home cook. A massive pot takes forever to boil, wasting your precious weekend time. A wide, relatively shallow pan (like a standard 3-inch deep sauté pan) is far superior because it allows you to carefully slide the eggs in and easily retrieve them without going deep-sea diving with a slotted spoon.
Myth 4: The Toxic Silicone Egg Poaching Cups
If you’ve read my previous rants, you know I am militant about banishing toxic kitchen gear from your life. The market is flooded with cheap, brightly colored silicone “egg poaching pods” that you float in boiling water.
Let’s get one thing straight: cooking an egg in a plastic cup is not poaching. It is steaming. You are making a hard-edged, rubbery, steamed egg puck. Worse, low-quality silicone and cheap plastic pods can contain fillers that break down at high temperatures. Recent studies have shown that cheap silicone can leach siloxanes—potential endocrine disruptors—into your food when exposed to boiling water. Do not put your beautiful, organic eggs into a cheap plastic cup. You deserve better, and your food deserves better.
The Mesh Strainer: The Culinary Science Behind the Magic
If we can’t use a vortex, and we refuse to use vinegar, how do we stop the thin albumen from ruining our lives? The answer is brilliantly simple, championed by culinary scientists like J. Kenji López-Alt and Heston Blumenthal.
The ultimate, scientifically backed solution is a standard fine mesh strainer.
Instead of trying to force the watery thin albumen to behave in the pot, we simply remove it from the equation entirely. By cracking the egg into a fine mesh strainer before cooking, the tight, cohesive thick albumen remains cradled in the mesh, while the watery, problematic thin albumen drips away into the sink.
This completely eliminates the source of the white, stringy tentacles. What you are left with is a pure, tight, structural egg white that will naturally hold its shape in the water without any spinning, swirling, or acidic chemical interventions. It is a purely mechanical solution to a chemical problem. It requires no special skills, it works on eggs of varying freshness, and it guarantees a clean, café-quality poach every single time.
The Masterclass: Step-by-Step Foolproof Poaching
Now that we understand the science, let’s put it into practice. This is the only method you will ever need. It is efficient, stress-free, and highly repeatable.
Step 1: Sourcing and Testing Your Eggs
While the strainer method works wonders on average supermarket eggs, you still want to start with the freshest eggs you can find. If you are unsure how old your eggs are, perform the float test. Drop an egg (still in its shell) into a glass of cold water. If it sinks and lays flat on its side, it is incredibly fresh. If it stands upright on the bottom, it is older but still perfectly safe to eat (and prime for the strainer method). If it floats to the top, it has lost too much moisture, the air cell has expanded massively, and it belongs in the trash.
Step 2: The Setup and Temperature Control
Fill a wide, heavy-bottomed stainless steel or enameled cast iron pan with about 2.5 to 3 inches of water. Do not use a cheap, scratched non-stick pan. You also run the risk of ruining your nonstick pans by holding them at a prolonged simmer with highly mineralized water, which can degrade older PTFE coatings. Stick to high-quality stainless steel.
Bring the water to a rolling boil, and then immediately turn the heat down to a gentle simmer. This is crucial. The ideal poaching temperature is between 180°F and 190°F (82°C to 88°C). At this temperature, the water should be barely moving. You should see tiny, champagne-like bubbles rising gently from the bottom of the pan, but the surface of the water should not be breaking violently. A rolling boil will agitate the egg and tear it apart, no matter how well you strained it. If you are a perfectionist, use an instant-read thermometer to verify your temperature.
Step 3: The Crack and Strain
Place your fine mesh strainer over a small bowl or the sink. Crack your egg firmly on a flat surface (never on the edge of a bowl, which drives shell shards into the egg) and gently empty it into the strainer.
Let the egg sit in the strainer for about 30 to 45 seconds. You will see the watery, thin albumen drip through the mesh. To help it along, you can very gently swirl the strainer in a circular motion. Do not poke or prod the egg with a spoon, or you risk puncturing the delicate yolk membrane.
Once the thin liquid has drained away, gently transfer the remaining egg (the yolk and the thick white) into a small ramekin or a teacup. This makes it infinitely easier to lower the egg into the water safely.
Step 4: The Gentle Release
Bring your ramekin down as close to the surface of the simmering water as humanly possible. Do not drop the egg from a height, or the impact will cause it to splatter. Gently tip the ramekin and let the egg slide smoothly into the hot water. Because you have removed the thin white, the egg will immediately begin to set in a beautiful, cohesive teardrop or oval shape.
If you are cooking multiple eggs, repeat the straining process for each one, sliding them into the pan one by one. Imagine the face of a clock, and drop your first egg at 12 o’clock, the next at 3 o’clock, and so on. This helps you keep track of which egg went in first so you can pull them out in the correct order.
Step 5: The Waiting Game
Do not touch the eggs. Do not poke them. Do not stir the water. Let them cook undisturbed.
For a perfectly poached egg—where the whites are fully opaque and set, but the yolk is warm, liquid, and runny—you want to cook them for exactly 3 minutes to 3 minutes and 30 seconds. If you prefer a medium poach with a jammy yolk, leave them for 4 minutes. If you want a hard-poached egg, leave them for 5 minutes (though, at that point, you might as well just hard-boil them).
Step 6: The Extraction
When the timer goes off, carefully lift the first egg out of the water. A standard slotted spoon works, but a flexible slotted fish turner is actually a fantastic alternative for scooping them out gently without applying too much pressure to the delicate yolk.
Lightly touch the center of the egg with your finger. The white should feel firm and springy, but the yolk underneath should yield to gentle pressure, feeling like a water balloon.
Do not put a wet egg directly onto your toast, unless you enjoy eating soggy, disintegrating bread. Transfer the poached egg to a plate lined with a clean paper towel to blot away the excess poaching liquid. Once drained, it is ready to be plated, seasoned with flaky sea salt and freshly cracked black pepper, and devoured.
Scaling Up: How to Poach for a Brunch Crowd
Nothing ruins a Sunday morning faster than realizing your scrambled eggs leak water all over the plate, except perhaps overcooking twelve poached eggs for a hungry crowd of guests while you sweat over a hot stove. Poaching eggs to order for a dinner party or a large family brunch is a logistical nightmare. But restaurant chefs do it every day. How? They par-cook and hold them.
If you are hosting, you can poach all of your eggs before your guests even arrive.
- Prepare a large bowl filled with cold water and ice cubes.
- Poach your eggs using the strainer method, but pull them out of the hot water about 30 seconds early (around the 2.5-minute mark). The whites should be just barely set.
- Immediately plunge the poached eggs into the ice water bath. This shocks the eggs, instantly halting the cooking process and locking the yolk in a liquid state.
- You can leave the eggs in the cold water in the refrigerator for up to 48 hours.
- When it is time to serve, bring a pot of water to a gentle simmer (140°F to 160°F). Use a slotted spoon to gently drop the cold poached eggs back into the warm water for exactly 60 to 90 seconds. This is just enough time to rethermalize the egg and warm the yolk all the way through without actually cooking it further.
- Blot on a paper towel, serve, and accept the thunderous applause from your guests.
Troubleshooting Your Kitchen Disasters
Even with the best techniques, the kitchen can occasionally throw you a curveball. Here is how to diagnose and fix the most common poaching issues.
The Egg Sticks to the Bottom of the Pan
If your egg sinks like a stone and glues itself to the bottom of your stainless steel pan, your water was likely not hot enough when you dropped it in, or your pan is prone to sticking. If you’re using a high-quality stainless steel skillet, you already know the water drop test ensures your food won’t stick when searing, but for boiling water, sticking usually means the proteins sank before they could coagulate.
The Fix: Ensure your water is at a proper 180°F simmer before adding the egg. If an egg does sink and touch the bottom, wait exactly 10 seconds for the bottom layer of white to set, then use a silicone spatula to gently nudge it free so it floats in the convection currents.
The Yolk Breaks in the Water
A ruptured yolk is a tragedy that cannot be undone. If the yolk breaks in the water, it is usually because the egg was dropped from too high of an altitude, or you aggressively poked it with a spoon while it was cooking.
The Fix: Always transfer the strained egg to a small ramekin first, and lower the lip of the ramekin directly to the water’s surface before sliding it in. Treat the egg like a fragile piece of glass until the whites are fully cooked.
The Egg Tastes Like Soap or Chemicals
If your egg has a bizarre, soapy, or metallic off-flavor, it is almost certainly an equipment issue. While you’re upgrading your gear, ditch any cheap tools that make your silicone spatulas taste like soap when exposed to high heat. Cheap silicone absorbs dishwasher detergents and food odors, which then leach back into your delicate eggs during the cooking process.
The Fix: Only use high-quality, food-grade stainless steel tools when poaching. Stainless steel is non-porous, non-reactive, and will never impart off-flavors into your food.
The Sassy Sous-Chef’s Gear Guide: What You Actually Need
I have zero patience for kitchen clutter, unitaskers, and gimmicky gadgets. You do not need a specialized “egg poaching machine.” You do not need microwave egg pods. You need three basic, high-quality, multi-purpose tools that will last you a lifetime.
- A Stainless Steel Fine Mesh Strainer: This is the star of the show. Look for a strainer with a fine mesh (around 150 microns if you want to get nerdy about it). It should be made of 100% stainless steel so it won’t rust, melt, or absorb odors. You will use this tool for straining eggs, sifting flour, dusting powdered sugar, and making silky smooth pan sauces.
- A Wide, Heavy-Bottomed Stainless Steel Pan: A 10-inch or 12-inch stainless steel sauté pan with straight sides is perfect. The heavy bottom ensures even heat distribution, preventing aggressive hot spots that cause the water to boil violently in one corner and sit stagnant in another.
- A Slotted Spoon or Fish Spatula: You need a reliable way to retrieve the eggs while leaving the water behind. A stainless steel slotted spoon is classic, but a metal fish spatula is incredibly thin and flexible, allowing you to slide under the egg gently without accidentally slicing into the yolk.
Conclusion: Reclaiming Your Brunch
Cooking should not be a source of stress. It should be a process of understanding your ingredients, applying basic scientific principles, and enjoying the delicious results.
By simply acknowledging the biological structure of the egg white and utilizing a mesh strainer to drain away the problematic thin albumen, you instantly eliminate 90% of the chaos associated with poaching eggs. You don’t need to spin the water like a maniac. You don’t need to choke your kitchen with the smell of boiling vinegar. You just need a little patience, a gentle sub-simmer, and the right technique.
So this weekend, skip the overpriced café brunch. Buy a carton of good eggs, pull out your mesh strainer, and prove to yourself that professional-level results are absolutely achievable in your own home kitchen. You’ve got this. Now go make some Hollandaise sauce and put those perfect eggs to good use.






