
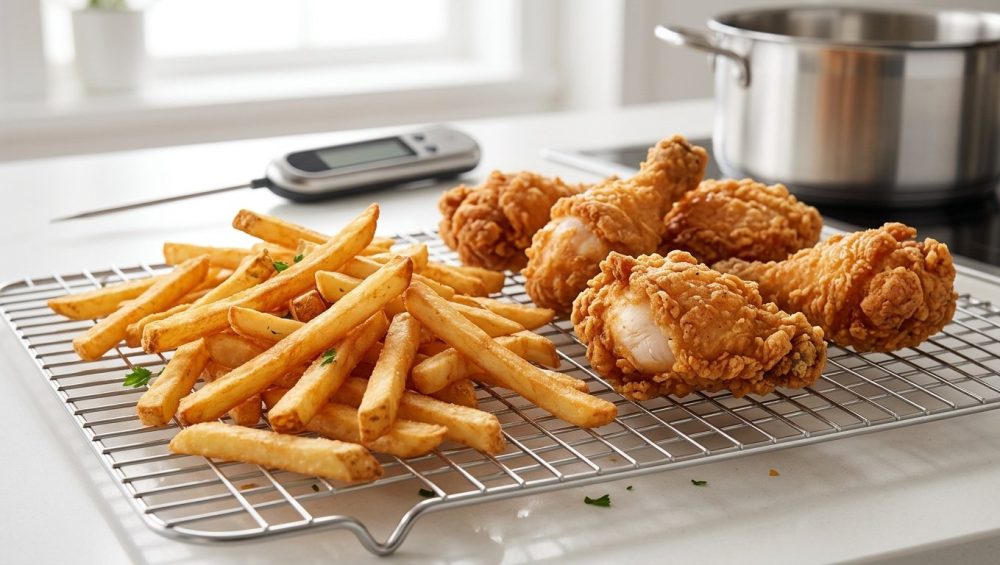
Listen up, my fellow weekend culinary warriors. We need to have a serious, brutally honest conversation about your fried food. You know exactly what I am talking about. You spend your entire Saturday afternoon breading chicken, heating up a shallow puddle of questionable oil in a flimsy pan, and praying for a miracle. But instead of pulling out a platter of shatteringly crisp, golden-brown perfection, you are left with a sad, heavy, oil-logged tragedy that leaves a greasy film on the roof of your mouth and a deep sense of culinary regret in your soul.
I am here to tell you that it does not have to be this way. You do not need a culinary degree, and you certainly do not need a commercial deep fryer taking up half your kitchen counter. What you do need is a fundamental understanding of the physics of cooking. Frying is not an art; it is a rigid, unforgiving science. When your food turns out greasy, it is not because the culinary gods are punishing you. It is because you violated the laws of thermodynamics.
Today, we are going to tear down every myth you have ever been taught about frying. We are going to dive deep into the microscopic thermodynamics of hot oil, the invisible steam barriers that protect your food, and the capillary action that ruins it the second it leaves the pot. Grab your notebook, ditch your preconceived notions, and let’s master the definitive science of the sizzle.
The Science of the Sizzle: Why Frying Isn’t Actually About the Oil
Let’s get one crucial fact straight before we go any further: deep frying is not an oil bath. It is a high-speed, aggressive, dry-heat dehydration process. If your food tastes like oil, you have fundamentally failed at the dehydration process.
The Thermodynamics of the Steam Barrier
When you drop a piece of battered food into a pot of oil heated to 350°F (175°C), a violent physical reaction occurs. The surface moisture of the food—which boils at 212°F (100°C)—instantly vaporizes. When liquid water converts into gaseous steam, it expands to roughly 1,600 times its original volume. This massive, instantaneous expansion creates a literal forcefield of outward pressure.
That aggressive bubbling you see when food hits hot oil? That is not the oil boiling. Oil doesn’t boil until it reaches temperatures far beyond what your kitchen can handle; it just smokes and catches fire. Those bubbles are the internal moisture of your food violently escaping as steam. As long as that steam is pushing outward with sufficient force, it creates a physical barrier. The outward pressure of the steam is stronger than the inward pressure of the surrounding oil. Therefore, the oil cannot penetrate the food. While you might rely on the water drop test to check if your stainless steel skillet is ready for searing, you must absolutely never drop water into a pot of hot frying oil, because that exact same violent expansion will cause a dangerous grease explosion.
The Maillard Reaction and Crust Formation
While the steam is pushing the oil away, the intense heat of the oil is doing its real job: desiccating the exterior of the food. As the surface moisture is driven off, the temperature of the crust skyrockets past the boiling point of water and enters the magical zone of 300°F (150°C) and above. This triggers the Maillard reaction—a complex chemical cascade between amino acids and reducing sugars that creates hundreds of brand-new flavor compounds and that beautiful, golden-brown color. If your oil is too cold, the steam barrier is weak, the surface never dehydrates, the Maillard reaction never happens, and you are left with pale, boiled mush.
The Capillary Action Catastrophe: Why Your Food is Soaking Up Grease
Here is the most mind-blowing fact you will learn today, and the primary reason your food is greasy: the vast majority of oil absorption does not happen while the food is submerged in the fryer. It happens the exact second you take it out.
The Physics of the Cooling Phase
Recent groundbreaking studies utilizing high-speed 4D computed tomography at the European Synchrotron Radiation Facility (ESRF) have visualized the exact microstructural dynamics of deep-frying. The scientists discovered that at proper frying temperatures (around 350°F/180°C), the food develops a hard crust with microscopic pores. During the fry, the steam barrier keeps the oil out of these pores.
However, the moment you remove the food from the hot oil and expose it to room-temperature air, the food begins to cool. The residual steam trapped inside those microscopic pores rapidly cools and condenses back into liquid water. Because water takes up a fraction of the volume of steam, this phase change creates a sudden, intense internal vacuum—a negative pressure zone.
The Suction Effect
Nature abhors a vacuum. As that negative pressure builds inside the cooling crust, the microscopic pores suddenly act like millions of tiny straws. Through a process known as capillary action, this vacuum violently sucks whatever liquid is resting on the surface of the food directly into the crust. If your food is coated in a thick layer of residual frying oil when it begins to cool, that grease is getting pulled straight into your dinner. If you’ve ever tried to fry delicate garnishes and wondered why your fresh herbs turn to slime instead of getting crispy, it’s because the oil temperature dropped, the steam barrier failed, and capillary action flooded the delicate plant cells with grease.
This is why aggressive draining is the non-negotiable secret of professional chefs. You must shake the food vigorously the moment it leaves the oil to physically dislodge the surface fat before the crust cools enough for capillary action to take over.
The Golden Rule of Temperature Control (And Why You’re Failing at It)
If you understand the steam barrier and capillary action, you now understand why temperature is the single most critical metric in frying. You are not just cooking food; you are managing a delicate thermodynamic equilibrium.
The Sweet Spot: Nailing the 350°F to 375°F Zone
For 90% of home frying, your target oil temperature is exactly 350°F to 375°F (175°C to 190°C).
- Below 325°F: The outward steam pressure is too weak. The oil breaches the barrier, soaking into the food while it cooks. The crust never fully dehydrates, resulting in a greasy, soggy nightmare.
- Above 400°F: The exterior dehydrates and burns before the internal heat can penetrate to the center of the food. You end up with a charred, bitter shell hiding raw, dangerous poultry inside.
The Physics of Thermal Mass and Specific Heat Capacity
Why is it so hard to keep the oil at 350°F? Because of a little physics concept called Specific Heat Capacity. Water has an incredibly high specific heat capacity—it takes 4.186 joules of energy to raise one gram of water by one degree Celsius. Cooking oil, however, has a specific heat capacity of roughly 2.0 joules per gram.
This means oil is incredibly volatile when it comes to temperature. It heats up twice as fast as water, but it also loses its heat twice as fast. When you take a pound of cold, water-dense chicken and plunge it into hot oil, the oil transfers its heat to the chicken at an alarming rate. If you do not have enough oil to absorb that thermal shock, the temperature of your frying pot will plummet from 350°F to 250°F in a matter of seconds. The steam barrier dies, and the grease floods in. Sometimes you might suspect your meat thermometer is lying to you, but when it comes to the volatile temperature swings of frying oil, a dedicated, highly accurate deep-fry thermometer is your only true line of defense.
The 6:1 Ratio: The Ultimate Test of Kitchen Patience
To prevent this catastrophic temperature drop, commercial food service guidelines dictate that you must maintain an oil-to-food ratio of about 6:1 by weight. If you are frying 8 ounces of chicken wings, you need at least 48 ounces (3 pounds) of oil in the pot. This massive volume of oil provides the “thermal mass” necessary to absorb the shock of the cold food without dropping below the critical 325°F threshold.
This means you must fry in small, disciplined batches. Crowding the pan is the ultimate rookie mistake. Yes, it takes longer to fry a family-sized meal in four separate batches, but patience is the price you pay for perfection.
Equipment Matters: Ditch the Toxic Gear and Flimsy Tools
I have zero patience for home cooks who try to execute high-heat cooking techniques using cheap, dangerous equipment. You cannot achieve professional results with garbage gear.
The Truth About Non-Stick Pans and Deep Frying
Let me be absolutely clear: you must never deep fry in a cheap, lightweight Teflon or non-stick skillet. First, thin aluminum pans have zero thermal mass; the moment you add food, the temperature will crash and ruin your meal. Second, and much more importantly, it is a massive health hazard. Heating a standard non-stick pan to the aggressive temperatures required for frying can quickly push the coating past its safe threshold. The polymers will begin to degrade, off-gassing toxic fumes that cause polymer fume fever. You know better than to abuse your pans like this; just like how cooking spray ruins nonstick pans over time, the intense thermal stress of deep frying will permanently destroy the finish. Throw the cheap pans in the trash where they belong.
Cast Iron and Carbon Steel: The Heavyweight Champions
To maintain a stable 350°F against the assault of cold food, you need a vessel with massive thermal retention. A heavy-bottomed, enameled cast iron Dutch oven is the undisputed king of the home fry. It takes a solid 15 minutes to come up to temperature, but once that thick iron walls absorb the heat, they hold onto it like a vault. Bare cast iron also works beautifully, but it requires meticulous maintenance. If your poorly maintained cast iron leaves black specks all over your beautiful golden fried chicken, you need to strip and re-season your cookware before you try frying again.
The Thermometer: Your Non-Negotiable Co-Pilot
You cannot eyeball 350°F. You cannot use the “throw a breadcrumb in and see if it sizzles” method. You need a long-stemmed, clip-on deep fry thermometer that stays submerged in the oil for the entire cooking process. You must watch that dial like a hawk, adjusting your burner dial constantly to ride the wave of the temperature drops and spikes.
The Breading and Batter Blueprint
A proper crust acts as a structural shield, protecting the delicate interior from the aggressive heat while providing that satisfying crunch. But if you construct your shield poorly, it will act like a sponge, absorbing oil and sloughing off into the pot.
The Architecture of a Crispy Coating
The standard three-step breading station is a classic for a reason:
- Dry Flour: Adheres to the moisture of the bare meat and provides a dry surface.
- Egg Wash: Binds to the flour and provides a sticky protein layer.
- Outer Crumb: Panko breadcrumbs or seasoned flour adhere to the egg, creating the final textured shell.
If you find yourself constantly frustrated because your breading always falls off the second the food hits the hot oil, the culprit is almost always a lack of resting time.
The Mandatory Resting Period
When you coat a piece of chicken in flour and egg, the starches in the flour need time to hydrate. If you toss it straight into the fryer, the dry flour immediately turns to dust and the egg wash violently separates from the meat, leaving you with a naked piece of chicken and a pot full of burnt debris. You must let your breaded food rest on a wire rack for at least 15 minutes before frying. This allows the moisture from the egg and the meat to fully hydrate the flour, transforming the distinct layers into a single, cohesive, glue-like gel that will lock onto the food and withstand the violent turbulence of the boiling oil.
Wet Batters and the Vodka Trick
If you are using a wet batter (like a tempura or a beer batter), the enemy is gluten development. Overmixing flour and water creates long, chewy gluten strands that result in a dense, heavy, oily crust. To combat this, smart cooks replace half of the liquid in their batter with vodka. Alcohol does not hydrate gluten proteins the way water does, keeping the batter incredibly tender. Furthermore, alcohol evaporates at a much lower temperature than water, meaning it flashes off violently in the hot oil, creating massive, airy bubbles that result in a shatteringly crisp, glass-like crust.
The Cooling Conundrum: Why Paper Towels Are the Enemy
You have meticulously monitored your oil temperature, you fried in small batches, and you achieved a perfect, golden crust. And then, you commit the ultimate culinary sin: you place your beautiful fried food onto a plate lined with paper towels. I am begging you to stop doing this.
The Steam Trap
When you pull a piece of fried chicken out of 350°F oil, it is still cooking. The internal moisture is still actively converting to steam and pushing its way out of the crust. When you place that hot food directly onto a flat paper towel, you choke off the airflow to the bottom hemisphere of the food. The escaping steam hits the paper towel, has nowhere to go, and immediately condenses into a puddle of water. Your food is now sitting in a hot, wet sauna of its own making. Within sixty seconds, the bottom of your perfectly fried chicken will turn into a soggy, gummy, depressing paste.
The Wire Rack Revolution
To save your crust, you must embrace the magic of a wire rack set over a rimmed baking sheet. This setup elevates the food, allowing for 360-degree, uninterrupted airflow. The excess surface oil drips away cleanly onto the pan below, and the internal steam is allowed to vent harmlessly into the atmosphere without compromising the structural integrity of the crust.
Essential Tools for the Weekend Fryer
We have already discussed the heavy Dutch oven and the deep-fry thermometer. But to execute a flawless frying session without burning yourself or ruining the food, you need to refine your extraction gear.
The Right Extraction Gear
Stop using standard kitchen tongs to fish delicate fried food out of hot oil. Tongs apply concentrated pressure to a very small surface area. When you squeeze a hot, freshly fried piece of fish with metal tongs, you run the risk of cracking and puncturing the delicate crust, immediately compromising the steam barrier and allowing oil to flood the interior.
Instead, ditch the flimsy plastic slotted spoons and invest in a stainless steel spider skimmer so you can safely and swiftly remove multiple pieces of food from the hot oil at once. A wide spider skimmer gently cradles the food from the bottom, allowing massive amounts of oil to drain instantly through the wide wire mesh without putting any structural stress on the crust.
Safety First: Managing the Splatter
Frying is inherently dangerous. You are dealing with a liquid that is hundreds of degrees hotter than boiling water. Always ensure your food is as dry as possible before it goes into the oil (unless it is intentionally battered). Keep a heavy metal lid right next to the stove at all times. If the oil ever flashes and catches fire, immediately turn off the heat source and calmly place the lid over the pot to smother the flames by starving them of oxygen. Never, under any circumstances, throw water on a grease fire.
Troubleshooting Common Frying Disasters
Even with the best intentions, things can go sideways. Here is how to diagnose and fix the most common frying failures.
The Burnt Outside, Raw Inside Dilemma
There is nothing more heartbreaking than pulling out a gorgeously browned piece of poultry, only to bite into it and discover the chicken breast turns out dry and stringy because it was overcooked, or worse, completely raw in the very center. This happens when your food is too thick for the temperature of the oil. The exterior dehydrates and burns before the heat can conduct its way to the center of the meat.
The Fix: If you are frying thick pieces of bone-in chicken, you must use the double-cook method. Fry the chicken at a slightly lower temperature (325°F) until it is deeply golden brown. Then, immediately transfer the chicken to a wire rack set over a baking sheet and finish it in a 350°F oven until a meat thermometer registers an internal temperature of 165°F. The dry heat of the oven gently finishes the internal cooking process while simultaneously whisking away excess grease and keeping the crust incredibly crispy.
The Soggy Middle
If your food is soggy and pale, your oil temperature crashed. You either crowded the pan, failed to let the oil come back up to 350°F between batches, or you used a flimsy aluminum pot that couldn’t hold its heat.
The Fix: Pull the food out immediately. Let the oil come back up to 375°F, and drop the food back in for a flash-fry to aggressively crisp the exterior.
Liquid Gold: Oil Maintenance and Storage
Frying requires a significant volume of oil, and high-quality neutral oils (like peanut, canola, or grapeseed) are not cheap. The good news is that you absolutely do not need to throw your oil away after a single use, provided you treat it with respect.
Straining and Storing
Every time you fry, tiny particles of flour, breadcrumbs, and proteins fall off the food and sink to the bottom of the pot. If left in the oil, these particles will burn, turning the oil dark, bitter, and rancid. Once the oil is completely cooled, pour it through a fine mesh strainer lined with a coffee filter to catch all the leftover microscopic flour particles. Store the strained, clarified oil in an airtight, opaque container in a cool, dark place (or the refrigerator) to prevent oxidation.
Knowing When to Toss It
Oil degrades over time through a combination of heat, water, and oxygen, breaking down into free fatty acids and polymerized gunk. You will know your oil is dead when it exhibits any of the following symptoms:
- It smells distinctly rancid, fishy, or like old crayons.
- It has turned dark brown and developed a thick, syrupy viscosity.
- It begins to smoke at temperatures far below 350°F.
- It foams aggressively across the entire surface the moment you add food.
When your oil reaches this state, do not pour it down the sink unless you want a massive plumbing bill. Seal it in a disposable container and throw it in the trash, or take it to a local recycling center that processes cooking oil into biofuel.
Frying at home does not have to be a greasy, chaotic nightmare. By respecting the thermodynamics of the steam barrier, managing your thermal mass with a heavy pot and a reliable thermometer, and ruthlessly avoiding paper towels, you can achieve shatteringly crisp, flawlessly light results every single time. Now get back in the kitchen, heat up that Dutch oven, and show that chicken who is really in charge.






