
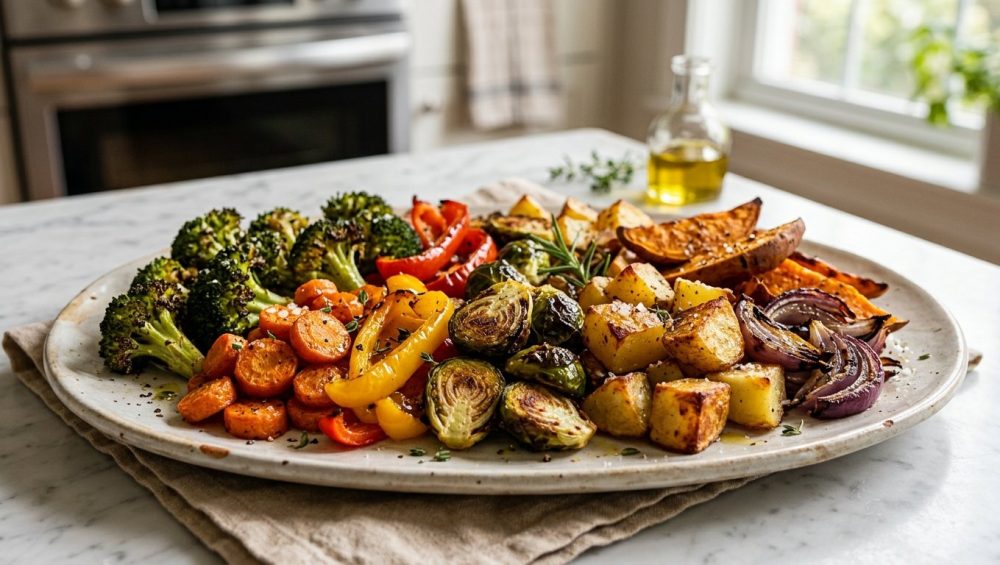
Listen to me. We need to have a serious, heart-to-heart conversation about the sad, limp, depressing state of your side dishes. You know exactly what I am talking about. You buy a beautiful, vibrant crown of broccoli or a pristine batch of Brussels sprouts. You chop them up, toss them in a little olive oil, scatter them across a room-temperature baking sheet, and shove them into a hot oven. Twenty-five minutes later, you pull out a tray of grayish, waterlogged, uninspiring mush.
If you are tired of chewing on soggy vegetables when you are trying to throw together simple weeknight dinners after a long day at the office, you have come to the right place. As a home cook who learned the hard way—by setting off smoke detectors and ruining more meals than I care to admit—I am here to tell you that achieving restaurant-quality, blistered, caramelized vegetables does not require a culinary degree. It does not require a wood-fired oven, and it certainly does not require you to spend hours in the kitchen.
Time is money, honey. We need maximum flavor with minimum weeknight effort, and the secret to unlocking that is entirely based on basic thermal dynamics. If you are constantly wondering why your roasted veggies turn mushy every single time, the culprit is right under your nose: you are putting them on a cold pan.
Today, we are leaving no stone unturned. We are going to dive deep into the science of heat transfer, the absolute magic of the Maillard reaction, the strict rules regarding what pans you should actually be using (and the toxic ones you need to throw in the trash immediately), and the foolproof techniques that will guarantee an aggressive, crispy sear on your produce every single time. Grab a glass of wine, take notes, and let’s fix your food.
The Anatomy of a Veggie Tragedy: Why Steaming Happens
To understand how to fix the problem, we first have to understand why the problem exists. The fundamental issue with roasting vegetables is that you are fighting a battle against water.
The Water Content Problem
Vegetables are, from a biological standpoint, essentially delicious little water balloons. When we look at the raw data, the numbers are staggering. Zucchini is composed of roughly 95% water. Broccoli sits at a hefty 91% water by weight. Even dense, starchy root vegetables like white potatoes are made up of about 79% water.
When you expose these water-logged plant cells to heat, the cell walls begin to break down and rupture, releasing all of that trapped internal moisture. Your goal in roasting is to evaporate that surface moisture as violently and rapidly as possible so that the exterior of the vegetable can actually begin to brown. But if you start with a cold baking sheet, you are setting yourself up for a culinary disaster.
The Cold Pan Evaporation Trap
Here is exactly what happens when you put a cold pan full of raw vegetables into a hot oven. The oven’s ambient air is hot, but the heavy metal pan is sitting at a comfortable 70°F (21°C). As the oven slowly begins to heat the metal pan, the vegetables also slowly begin to warm up.
Before the pan ever gets hot enough to sear the food, the vegetables reach a temperature where their cell walls collapse. They release their 90%+ water content directly onto the still-warm (but not scorching hot) baking sheet. Because the pan is not hot enough to instantly vaporize that liquid into steam, the water simply pools around the vegetables.
Congratulations, you are no longer roasting. You are boiling. You are steaming your vegetables in their own leaked juices. By the time the metal pan finally gets hot enough to boil off that puddle of water, the vegetables are already overcooked, mushy, and structurally destroyed inside. This is one of the most classic beginner cooking mistakes that I see, and it is entirely preventable.
The Science of the Sizzle: Thermal Dynamics and Heat Transfer
I promise to keep the pretentious chef-speak to an absolute minimum, but we have to get a little bit nerdy for a second. If you want to cook like a pro without going to culinary school, you have to understand how heat actually works in your kitchen.
Conduction vs. Convection in Your Oven
Your oven cooks food primarily through convection (the circulation of hot air) and thermal radiation (the heat radiating from the oven walls). However, air is a terrible conductor of heat. Think about it: you can reach your bare hand into a 400°F oven for a few seconds without getting burned, but if you touch a 400°F metal pan for even a fraction of a second, you are going to the emergency room.
Metal is an incredibly dense, efficient conductor of heat. When food comes into direct physical contact with hot metal, heat is transferred through conduction. Conduction is exponentially faster and more aggressive than convection. If you want a dark, crispy, caramelized crust on your broccoli, the ambient hot air in the oven is not going to do the heavy lifting. You need the aggressive, immediate conductive heat of a scorching hot metal pan to do the job.
The Maillard Reaction: The Holy Grail of Flavor
When we talk about “browning” food, we are usually talking about the Maillard reaction. Named after French chemist Louis-Camille Maillard who first described it in 1912, this is a complex chemical reaction that occurs between amino acids (the building blocks of proteins) and reducing sugars when they are exposed to high heat.
The Maillard reaction is responsible for the golden crust on a loaf of bread, the deep char on a seared steak, the rich flavor of roasted coffee beans, and the savory, nutty, complex flavor of perfectly roasted vegetables. But here is the catch: the Maillard reaction generally does not begin in earnest until the surface temperature of the food reaches about 285°F (140°C).
Do you remember what the boiling point of water is? It is 212°F (100°C).
This is the golden rule of roasting: As long as there is liquid water on the surface of your food, the temperature of that surface cannot exceed 212°F. Water acts as a thermal ceiling. Until every single drop of water has evaporated from the surface of that zucchini or potato, the temperature cannot rise to the 285°F required to trigger the Maillard reaction. If you use a cold pan, the food sits in a puddle of water, capping its temperature at 212°F, completely preventing the Maillard reaction from taking place.
Caramelization vs. Maillard Reaction
People often use the terms “caramelization” and “Maillard reaction” interchangeably, but they are chemically distinct. While the Maillard reaction requires both amino acids and sugars, caramelization is the pyrolysis (thermal decomposition) of sugar alone, which usually happens at even higher temperatures. Vegetables contain both amino acids and natural sugars, meaning that when you roast them properly, you are actually benefiting from both reactions simultaneously. That is why a properly roasted carrot tastes infinitely sweeter, richer, and more complex than a boiled carrot.
The Fix: Preheating Your Baking Sheet
The solution to the soggy vegetable epidemic is so incredibly simple that it almost feels like cheating. You need to preheat your baking sheet.
How the Preheated Pan Technique Actually Works
When you turn your oven on to 425°F (218°C), you put your empty, heavy-duty baking sheet inside the oven while it preheats. You let it sit in there for a good 15 to 20 minutes so the metal can absorb a massive amount of thermal energy.
When you finally pull that scorching hot pan out of the oven and drop your oil-coated vegetables onto it, you will immediately hear a loud, aggressive sizzle. That sound is the symphony of culinary success. That sound is the surface moisture of the vegetables instantly flashing into steam upon contact with the hot metal.
Because preheating the pan changes everything about the thermal dynamics of the cook, the conductive heat instantly vaporizes the water barrier. The surface temperature of the vegetable shoots past the 212°F boiling point and immediately enters the 285°F Maillard zone. You are jumpstarting the browning process before the vegetable’s internal structure even has time to get mushy. It buys you the time to develop a dark, crispy exterior while maintaining a tender, structurally sound interior.
Step-by-Step Guide to the Preheated Pan Method
- The Oven Prep: Place your heaviest, thickest baking sheet or roasting pan on the middle-lower rack of your oven. Set the oven to 425°F or 450°F. Do not rush this. Let the pan heat up for at least 15 minutes after the oven reaches its target temperature.
- The Veggie Prep: While the pan is heating, wash and thoroughly dry your vegetables. I cannot stress this enough: dry them. Use a salad spinner or aggressively pat them down with paper towels. Any extra water you introduce to the pan is just another hurdle preventing the Maillard reaction.
- The Coating: Toss the dry vegetables in a mixing bowl with a high-smoke-point oil (more on this later), kosher salt, and freshly cracked black pepper. Ensure every piece is evenly coated in a thin, glossy layer of fat.
- The Drop: Carefully remove the screaming-hot pan from the oven. Quickly and carefully dump the oiled vegetables onto the pan. You should hear a loud sizzle. Use a pair of tongs or a spatula to quickly spread them out into a single, uncrowded layer.
- The Roast: Put the pan back in the oven. Because you jumpstarted the searing process, your vegetables will likely cook 20% to 30% faster than they would on a cold pan. Keep a close eye on them.
The “No-Go” Rule: Toxic Gear and Why Your Pan Matters
As your sassy sous-chef, I have a strict zero-tolerance policy for toxic kitchen gear in my house, and you should too. The preheated pan method requires high heat—usually around 425°F to 450°F. If you are using the wrong type of cookware, you are not just going to ruin your dinner; you could actively be endangering your health.
Ditch the Peeling Non-Stick (The Teflon Warning)
I need you to go into your kitchen cabinets right now and look at your baking sheets. Are they coated in a dark, flaky, scratched non-stick material? If so, throw them in the garbage. I am completely serious.
Traditional non-stick coatings are made from PTFE (polytetrafluoroethylene), commonly known by the brand name Teflon. These coatings are part of a broader class of chemicals known as PFAS (per- and polyfluoroalkyl substances), which are notorious “forever chemicals” that accumulate in the environment and the human body.
Here is the terrifying scientific reality: PTFE begins to break down and degrade at temperatures around 500°F (260°C). When it degrades, it releases invisible, highly toxic fumes into the air. Inhaling these fumes causes a condition medically known as polymer fume fever, colloquially referred to as the “Teflon flu,” which manifests as severe chills, fever, body aches, and chest tightness. These fumes are so toxic that they are famously known to be instantly fatal to pet birds kept in the same house.
When you preheat an empty non-stick pan in a 450°F oven, the surface temperature of that metal can easily spike past the 500°F danger zone, especially since there is no food in the pan to absorb the thermal energy. By using cheap non-stick bakeware for high-heat roasting, you are actively ruining your nonstick pans and poisoning your food environment. Non-stick pans have absolutely no place in high-heat roasting. Period.
Flimsy Aluminum and Warping
The second type of pan you need to avoid is the cheap, paper-thin aluminum baking sheet you bought at the grocery store for four dollars. While aluminum is actually a fantastic conductor of heat (with a thermal conductivity rating of around 237 W/m-K), thin aluminum cannot handle rapid temperature changes.
If you put a thin, empty aluminum pan into a 450°F oven, and then drop a pile of cold, wet vegetables onto it, the sudden temperature shock will cause the metal to violently expand and contract. This results in the terrifying bang when your baking sheets warp violently, launching your broccoli across the oven. Warped pans create uneven cooking surfaces, meaning half your food will burn while the other half steams.
The Best Pans for High-Heat Roasting
If you want professional results, you need professional tools. You need pans with high thermal mass—meaning they are heavy and dense enough to hold onto their heat even when cold food is dropped onto them.
- Heavy-Gauge Clad Stainless Steel: Stainless steel is practically indestructible, non-toxic, and won’t react with acidic foods. While pure stainless steel actually has poor thermal conductivity (around 16.5 W/m-K), high-quality clad stainless steel pans feature a thick inner core of aluminum, giving you the extreme heat conductivity of aluminum with the safe, durable, non-reactive surface of steel.
- Carbon Steel: This is the darling of professional restaurant kitchens. Carbon steel is an alloy of 99% iron and 1% carbon. It has a great thermal conductivity (around 54 W/m-K) and holds a massive amount of thermal energy. Once seasoned, it becomes naturally non-stick without any toxic PFAS chemicals. A heavy carbon steel roasting pan or baking steel will give you the most aggressive, beautiful sear you have ever seen in your life.
Advanced Tactics for Unstoppable Crispiness
Preheating the pan is the foundational secret, but if you want to elevate your weeknight side dishes to a Michelin-star level, you need to employ a few advanced culinary tactics.
The Spacing Rule (Crowding = Steaming)
You can have the hottest, heaviest carbon steel pan in the world, but if you pile three pounds of Brussels sprouts on top of each other, they are going to steam. Remember that vegetables are actively venting water vapor as they cook. If they are packed shoulder-to-shoulder, that escaping steam gets trapped between them. You must leave adequate breathing room between each piece of food. If you have too many vegetables, use two pans. Never crowd the pan.
The Fat Factor
Oil serves two purposes in roasting: it acts as a conductive medium to transfer heat from the microscopic grooves of the pan into the irregular surface of the vegetable, and it provides flavor. However, not all fats are created equal.
Extra virgin olive oil is delicious, but it has a relatively low smoke point and contains unrefined particles that will burn and turn bitter at 450°F. For high-heat roasting on a preheated pan, you need a fat that can take the thermal punishment. Avocado oil, clarified butter (ghee), beef tallow, or refined coconut oil are spectacular choices. They will allow you to push the temperature to the absolute limit without filling your kitchen with acrid, burning smoke.
The Starch Coating Hack
If you want an almost deep-fried level of crunch on your roasted vegetables—particularly for things like potatoes or broccoli florets—toss them with a tiny amount of starch before roasting. A light dusting of cornstarch, arrowroot powder, or potato starch acts as a sponge. It absorbs the microscopic layers of surface moisture as they exude from the vegetable, creating a thin, starchy paste that fries in the hot oil on your preheated pan. The result is a shatteringly crisp exterior crust.
The Baking Soda Trick
Here is a brilliant piece of food science: the Maillard reaction occurs much faster and more efficiently in an alkaline (basic) environment. By slightly raising the pH of the surface of your vegetables, you can accelerate browning dramatically.
Tossing your vegetables with just a tiny, microscopic pinch of baking soda transforms the exterior, breaking down the pectin in the plant cell walls slightly and allowing for rapid, aggressive caramelization and Maillard browning. Be very careful—use no more than 1/8th of a teaspoon for a whole bowl of vegetables, or your food will taste metallic and soapy.
Vegetable-Specific Roasting Playbooks
Not all vegetables are created equal. You cannot treat a dense, starchy potato the same way you treat a watery, delicate bell pepper. Here is exactly how to handle the three main categories of produce using the preheated pan method.
Cruciferous Champions: Broccoli, Cauliflower, and Brussels Sprouts
These are the undisputed kings of the roasting pan. Because of their complex, textured florets and dense stalks, they hold up beautifully to aggressive heat.
- The Playbook: Cut your Brussels sprouts in half and your broccoli into flat-sided florets. When you drop them onto the screaming-hot, preheated pan, take the extra 30 seconds to flip every single piece so the flat, cut side is facing perfectly down, flush against the hot metal. This maximizes conductive heat transfer. Do not touch them for at least 12 minutes. Let that flat side develop a dark, nearly blackened crust before you even think about tossing them.
Root Vegetables: Carrots, Potatoes, and Beets
Root vegetables are dense, starchy, and take significantly longer to cook through to the center. The danger here is that the outside will burn on your hot pan before the inside becomes tender.
- The Playbook: For the ultimate roasted potato, you must parboil them first. Boil your cubed potatoes in heavily salted water (with a half teaspoon of baking soda) until the outsides just barely begin to soften. Drain them, let the steam aggressively evaporate off of them so they are bone dry, and then shake them violently in the pot to rough up the edges. Toss those roughed-up, dry potatoes in hot fat and drop them onto your preheated pan. The starchy sludge you created by shaking them will fry into an unbelievably thick, crispy crust.
The Watery Weaklings: Zucchini, Squash, and Bell Peppers
These are the hardest vegetables to roast successfully because their water content is astronomical (upwards of 95% for zucchini). If left in the oven too long, they will completely disintegrate.
- The Playbook: You need the hottest pan possible and the shortest cooking time. Preheat your thickest carbon steel pan at 450°F. Cut the zucchini into large, thick chunks (if you cut them too small, they will turn to mush instantly). Only salt them right before they hit the pan; if you salt them in the bowl and let them sit, the salt will draw out all the moisture via osmosis, ruining your sear. Drop them on the hot pan, let them blister for 8 to 10 minutes, and pull them out while they still have some structural integrity.
Troubleshooting Common Roasting Disasters
Even with the preheated pan method, things can occasionally go sideways if your technique is sloppy. Let’s troubleshoot the most common issues so you never have to eat a bad vegetable again.
“My Veggies Burnt on the Bottom but Are Raw Inside!”
If you pull your tray out and find that the bottoms are charred to a crisp but the interiors are crunchy and raw, you have a thermal mismatch. Either your oven temperature was set too high for the specific density of the vegetable (e.g., trying to blast thick chunks of raw sweet potato at 475°F), or your pieces were cut too large. The fix is simple: cut your vegetables into smaller, more uniform pieces so the heat can penetrate to the center before the outside burns, or lower the oven temperature by 25 degrees.
“My Garlic Turned Bitter and Ruined the Dish!”
People love to toss minced garlic into their mixing bowl with their raw vegetables before roasting. Do not do this. Minced garlic has almost zero water content and is incredibly tiny. At 450°F on a preheated metal pan, minced garlic will turn into bitter, acrid, black carbon in roughly 4 minutes. The reason your minced garlic always burns is because it cooks in seconds, while your carrots take 25 minutes. If you want garlic flavor, either use whole, unpeeled cloves that can withstand the long roasting time, or toss your finished, hot vegetables with fresh minced garlic the second they come out of the oven. The residual heat will gently bloom the garlic without burning it.
“They Still Turned Out Mushy!”
If you used a preheated pan and they still turned out mushy, you committed one of three cardinal sins. One: You didn’t dry the vegetables after washing them. Two: You crowded the pan, trapping the steam. Three: You skimped on the oil. I know diet culture has taught us to fear fat, but oil is a necessary conductive medium. If your pan is dry, the heat cannot transfer efficiently into the uneven surface of the vegetable. Do not drown them, but ensure they are properly coated. Furthermore, if you find that food sticks to your stainless steel, you simply didn’t let it preheat long enough. The pan must be screaming hot to create the Leidenfrost effect, which prevents sticking.
Final Thoughts from the Sassy Sous-Chef
Cooking is not magic; it is applied physics and chemistry. Once you understand the fundamental rules of thermal dynamics, you are no longer at the mercy of a recipe. You are the master of your kitchen.
By simply placing your heavy, non-toxic baking sheet into the oven while it preheats, you are completely changing the environment your food cooks in. You are eliminating the steaming phase, vaporizing the moisture barrier, and opening the door for the Maillard reaction to work its beautiful, flavor-building magic.
Stop settling for mediocre, soggy, waterlogged side dishes. Respect your ingredients, respect your time, and for the love of all things culinary, respect the heat. Now go preheat your pan, toss some broccoli in avocado oil, and show that oven who is boss. You’ve got this.






