Listen, we need to have a serious talk about what is happening in your skillet on a Tuesday night. You bought a beautiful, thick-cut pork chop. You seasoned it perfectly. You got your pan screaming hot. You laid that beautiful piece of meat into the skillet, expecting a glorious, restaurant-quality sizzle. But within three minutes, tragedy struck. The edges of your pork chop violently curled upward, the meat bowed in the middle like a cheap paper plate in the microwave, and suddenly, only the very outer edges of your dinner were actually touching the pan.
The result? A culinary disaster. The center of your pork chop steamed into a sad, unappetizing shade of gray, while the outer edges turned into tough, rubbery shoe leather. It is a frustrating, infuriating experience that drives many weekend culinary hobbyists away from cooking pork entirely, sending them right back to ditching your takeout habit.
But I am here to tell you that you do not need a culinary degree to fix this. You do not need expensive restaurant equipment. You just need a basic understanding of meat biology, the physics of a hot skillet, and exactly ten seconds of prep time with a sharp knife. Today, we are going to completely demystify why your pork chops curl, cup, and buckle under heat, and I am going to teach you the effortlessly simple technique of scoring the fat to guarantee a perfectly flat, golden-brown crust every single time.
The Anatomy of a Pork Chop: Muscle, Fat, and the Dreaded Silver Skin
To understand why your dinner is actively rebelling against you in the pan, we first have to understand the biological architecture of a pork chop. When you look at a standard center-cut pork chop, you are essentially looking at three distinct components: the lean muscle, the outer fat cap, and the connective tissue that binds them together.
The Lean Muscle
The center of the pork chop is the muscle. This is the meat you are actually trying to cook to a juicy, tender perfection. Muscle fibers are composed primarily of water and proteins (actin and myosin). When exposed to heat, these proteins denature and contract, squeezing out water. However, muscle tissue contracts relatively evenly and predictably. If your pork chop was made entirely of pure muscle, it would simply shrink a little bit in the pan, but it would remain perfectly flat.
The Fat Cap
Running along the outer edge of most high-quality pork chops is a thick, white band of fat. I need you to promise me right now that you will never trim this off before cooking. Fat is flavor, fat is insulation, and fat is what keeps modern, lean pork from tasting like sawdust. However, the fat itself is not what causes the chop to curl. As the fat heats up, it slowly renders, turning from a solid into a liquid and basting the meat in rich flavor.
The Culprit: Silver Skin and Fascia
Here is where the trouble starts. Sandwiched right between that delicious outer fat cap and the lean muscle is a thin, almost invisible layer of connective tissue known as the silver skin or fascia. This connective tissue is made primarily of a protein called elastin and collagen. In the living animal, this tissue acts as a strong, flexible sheath that holds the muscle and fat together. In your skillet, however, it acts as an absolute menace.
Unlike muscle fibers, which contract gently, and fat, which simply melts, silver skin does not break down easily during quick, high-heat cooking. When exposed to the intense heat of a frying pan, the collagen and elastin in this connective tissue shrink rapidly and aggressively. Because this tissue wraps around the outer perimeter of the pork chop, it forms what is essentially a biological tension belt.
The Thermodynamics of the Skillet: The Science of the Curl
Now that we know who the enemy is, let’s look at the physics of the crime scene. When you drop a raw pork chop into a skillet heated to 400°F, you are initiating a massive thermodynamic event. Heat energy transfers rapidly from the metal of the pan directly into the surface of the meat through conduction.
The “Tight Belt” Effect
As the temperature of the meat rapidly rises, the different tissues react at completely different speeds. The lean muscle begins to slowly firm up. The fat begins to soften. But the connective tissue—that dreaded silver skin—hits a critical temperature threshold (usually around 140°F to 160°F) and violently contracts.
Because this connective tissue is located exclusively on the outer edge of the chop, its rapid contraction acts exactly like pulling the drawstring on a pair of sweatpants. The outer edge of the meat shrinks at a much faster rate than the center of the meat. The center of the pork chop, having nowhere else to go, is forced upward, bowing into a dome shape. This phenomenon is known in the culinary world as cupping, curling, or buckling.
Why Thickness Matters
You might have noticed that this aggressive curling happens much more frequently with thin, cheap pork chops than it does with massive, two-inch-thick cuts. This is simple physics. A thick, heavy pork chop has enough sheer mass and weight to fight back against the contracting connective tissue. Gravity helps pin it to the pan. But a thin, half-inch weeknight pork chop doesn’t stand a chance. The silver skin shrinks, the edges pull tight, and the entire chop lifts right off the cooking surface.
The Cupping Catastrophe: Why Curling Ruins Your Dinner
You might be thinking, “So what if my pork chop looks like a bowl? It all tastes the same in the end.” I need you to banish that thought from your kitchen immediately. A curled pork chop is a ruined pork chop, and here is the scientific reason why.
The Death of the Maillard Reaction
The entire point of pan-searing a piece of meat is to trigger the Maillard reaction. This is a complex chemical reaction between amino acids and reducing sugars that occurs at high temperatures (typically above 300°F). The Maillard reaction is responsible for the deep, savory, complex flavors and the beautiful golden-brown crust on a perfectly cooked steak or chop.
However, the Maillard reaction requires direct, intense heat. When your pork chop curls, the center of the meat lifts completely off the surface of the hot pan. You have instantly broken the chain of thermal conduction. The only thing touching the hot metal are the very outer edges of the chop.
The Steaming Disaster
Because the center of the meat is now hovering a quarter-inch above the pan, it is no longer searing. Instead, the moisture escaping from the bottom of the meat turns into steam. That trapped steam gently par-cooks the underside of the pork chop. You are no longer pan-frying your dinner; you are boiling it. This is why you end up with a sad, gray, flabby center that lacks any depth of flavor.
Meanwhile, because the outer edges are bearing the entire weight of the meat and taking 100% of the pan’s heat, they overcook rapidly, turning into dry, tough, inedible rubber. If you want to achieve a beautiful crust across the entire surface of the meat, the chop must remain perfectly flat.
The Sassy Sous-Chef’s 10-Second Fix: Scoring the Fat
I promised you an effortless solution, and I am a woman of my word. You do not need to buy expensive meat weights or smash your dinner with a heavy brick to keep it flat. You just need to break the tension belt. We do this through a professional technique called “scoring the fat.”
Scoring simply means making shallow, strategic cuts into the exterior of the meat to sever the connective tissue. By cutting through the silver skin, you destroy its ability to pull tight. When the heat hits the pan, the individual segments of fat and tissue will still contract, but because they are no longer connected in one continuous band, they cannot pull the edges of the meat inward. The pork chop will remain perfectly, beautifully flat.
Here is exactly how to execute this technique like a seasoned pro.
Step 1: The Setup
Place your raw pork chops on a high-quality, heavy-duty cutting board. Please, for the love of all things culinary, make sure your knife is honed and razor-sharp. Trying to saw through slippery fat with a blunt blade is a great way to end up in the emergency room, and maintaining a sharp edge is the first rule of kitchen safety. Furthermore, using cheap glass or bamboo boards is actively damaging your expensive blades, so stick to thick wood or quality composite boards.
Step 2: The Vertical Hold
Take your non-dominant hand and stand the pork chop up vertically on its flat edge, so the fat cap is pointing straight up at the ceiling. This gives you a clear, unobstructed view of the fat band and the silver skin running just beneath it.
Step 3: The Slice
Take your sharp chef’s knife or utility knife and make a vertical slice straight down through the fat cap. You want to make these cuts approximately every 1 to 1.5 inches along the entire length of the fat band.
Step 4: The Depth Check (Crucial!)
This is where most beginners mess up. You must cut deep enough to sever the silver skin, but you must stop before you cut into the actual lean muscle. If you slice deep into the meat, you will create channels for all the natural juices to escape during cooking, leaving you with a dry, stringy chop. You should feel a slight resistance as the blade pops through the tough connective tissue, and then you stop.
The Crispy Bonus
Not only does this 10-second knife trick keep your pork chop perfectly flat, but it also creates a massive textural upgrade. By scoring the fat, you are dramatically increasing its surface area. When that scored fat renders in the hot pan, the edges of those slits will fry up into incredibly crispy, golden-brown, bacon-like bites. It is an absolute win-win scenario for your palate.
The “No-Go” Rule: Banishing Toxic Gear from Your Sear
Now that your pork chops are scored and ready to cook, we need to have a very serious conversation about the vessel you are cooking them in. I have a strict, non-negotiable rule in my kitchen: I absolutely despise cheap, toxic kitchenware, and I will not let you ruin a beautiful cut of meat—or your health—by searing it in a scratched-up Teflon pan.
The Danger of High Heat and Non-Stick
To get a proper, restaurant-quality sear on a pork chop, your pan needs to be hot. We are talking 400°F to 450°F. Traditional non-stick pans are coated with a chemical polymer called PTFE (polytetrafluoroethylene), which is part of a larger family of “forever chemicals” known as PFAS.
Here is the brutal truth that the cheap cookware industry doesn’t want you to know: when you heat a PTFE-coated pan above 500°F (which is incredibly easy to do if you preheat an empty pan on a high burner), that chemical coating literally begins to break down and decompose. As it degrades, it releases toxic, invisible fumes into your kitchen. Inhaling these fumes causes a documented medical condition known as “polymer fume fever,” which mimics the symptoms of a severe flu, including chills, fever, body aches, and chest tightness.
Furthermore, if your non-stick pan is peeling, flaking, or scratched by metal utensils, you are actively shedding microplastics and toxic compounds directly into your dinner. I am incredibly passionate about investing in safe cookware, because there is absolutely no reason to expose yourself to these endocrine-disrupting chemicals just to avoid scrubbing a pan.
The Right Tools for the Job
You cannot sear a pork chop in a flimsy non-stick skillet. The aluminum is too thin to hold heat, meaning the moment you drop the cold meat into the pan, the temperature plummets, and your meat boils in its own juices.
If you want to cook like an expert, you need equipment with high thermal mass. You have three acceptable options for searing meat:
- Cast Iron: The undisputed king of heat retention. It takes a while to heat up, but once it gets hot, it stays hot, delivering an aggressive, beautiful crust.
- Carbon Steel: The darling of professional restaurant kitchens. It handles high heat perfectly, seasons to become naturally non-stick, and is lighter and more maneuverable than cast iron.
- Heavy-Clad Stainless Steel: A fantastic, durable option that provides incredibly even heating. Knowing how to preheat it properly will easily keep food from sticking to the bottom.
Ditch the toxic mystery metals. Buy a heavy pan that will outlive you.
A Masterclass in the Perfect Pan-Seared Pork Chop
Alright, your fat is scored, your tension belt is broken, and your heavy-duty, non-toxic skillet is sitting on the stove. Let’s walk through the exact, step-by-step methodology to cook a pork chop that will make you weep tears of joy.
Phase 1: The Dry Brine
If you take a raw pork chop out of its plastic packaging and immediately throw it into a hot pan, you are setting yourself up for failure. Meat needs time to absorb flavor. At least 45 minutes before cooking (or ideally, the night before), generously salt both sides of the pork chop and leave it uncovered on a wire rack in the fridge. The salt will draw out moisture, dissolve into a brine, and reabsorb deep into the muscle fibers, seasoning the meat from the inside out and tenderizing the proteins.
Phase 2: Eradicating Surface Moisture
Moisture is the mortal enemy of the Maillard reaction. If there is water on the surface of your meat, the heat of the pan must first expend all its energy boiling away that water before browning can even begin. Take the meat out of the fridge and aggressively pat it completely bone-dry. Removing excess surface moisture is the single most important step for a golden crust.
Phase 3: The Fat-Rendering Start
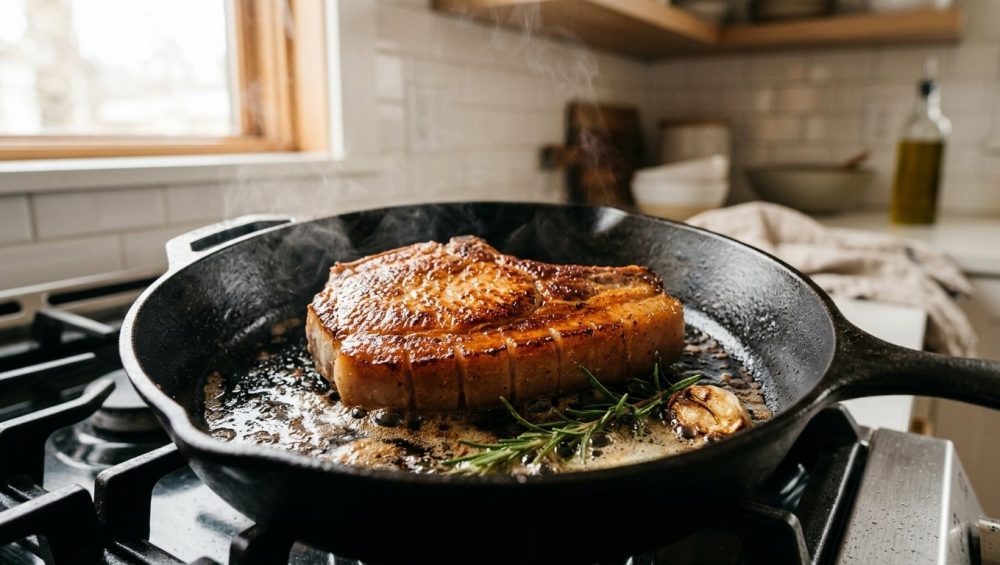
Here is a pro-level trick that will change your life. Heat your skillet over medium-high heat. Do not add oil to the pan yet. Instead, take a pair of tongs, grab your scored pork chop, and stand it up vertically in the dry pan, pressing the fat cap directly against the hot metal.
Hold it there for about 60 to 90 seconds. Because you scored the fat, it will fan out and immediately begin to render, releasing liquid pork fat into the pan while the edges crisp up into delicious crackling. You are essentially creating your own high-flavor cooking oil.
Phase 4: The Sear
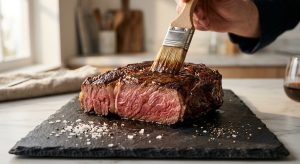
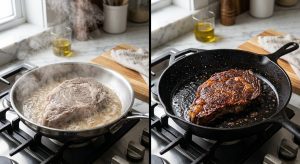
Once you have a nice pool of rendered fat in the pan, lay the pork chop down flat. Because you severed the silver skin, it will lay perfectly flush against the metal. Let it sear undisturbed for 3 to 4 minutes until a deep, mahogany crust forms. Flip it over and sear the other side.
Phase 5: Temperature Control and Resting
The biggest rookie mistake in the kitchen is cooking pork until it is tough, dry, and white all the way through. The USDA updated their guidelines years ago: pork is completely safe to eat at 145°F, which leaves a beautiful, juicy blush of pink in the center.
However, meat continues to cook after you take it off the heat due to carryover cooking. If you wait until the thermometer reads 145°F in the pan, it will carry over to 155°F on the plate, and it will be dry. You must check the internal temperature with a high-quality, instant-read digital thermometer. Pull the pork chop out of the pan the exact second it hits 140°F.
Transfer the meat to a cutting board and let it rest for at least 5 to 8 minutes. This allows the agitated muscle fibers to relax and reabsorb the juices. If you cut into it immediately, all that flavorful liquid will bleed out onto your cutting board, leaving you with dry meat.
Troubleshooting: When Good Chops Go Bad
Even with the best intentions, things can occasionally go sideways. If you are trying to troubleshoot common culinary mistakes, here is a quick diagnostic guide to what went wrong with your pork chop.
“I scored the fat, but it still curled!”
If your pork chop still cupped in the center, you simply did not cut deep enough. The fat cap itself is not what causes the curl; it is the tough, fibrous silver skin hiding just beneath it. If your knife only grazed the surface of the fat, the tension belt remained intact. Next time, apply a little more pressure and ensure you feel the blade pop through that connective tissue layer before stopping at the meat.
“My meat is incredibly tough and chalky!”
You overcooked it. Period. There is no magical marinade or pan technique that will save a piece of lean pork loin that has been blasted to 165°F. Lean muscle fibers aggressively squeeze out moisture the hotter they get. If your meat is dry, you either didn’t use a digital meat thermometer, or you ignored it. Pull the meat at 140°F, let it carry over to 145°F, and trust the science.
“The fat cap is chewy and unappetizing.”
This happens when you rush the cooking process or cook over heat that is too low. Pork fat needs time and direct heat to render properly. If you skip the step of rendering the fat cap vertically with your tongs, the fat will remain semi-solid and rubbery. High heat melts the fat; scoring it gives the heat a pathway to penetrate deeply.
“The center of my chop is gray, but the edges are burnt.”
This is the classic symptom of a curled chop that lost pan contact. But if you did score the meat and this still happened, your pan was likely warped. Cheap, thin aluminum pans warp under high heat, creating a convex dome in the center of the skillet. If the pan itself isn’t flat, your meat won’t sear evenly. Throw out the cheap warped pan and buy heavy carbon steel. Knowing how to salvage a disastrous meal is great, but preventing it with proper tools is always better.
The Final Word on the Perfect Sear
Cooking a flawless, restaurant-quality meal at home does not require pretension, it does not require a thousand-dollar knife, and it certainly doesn’t require a culinary degree. It requires a fundamental respect for the ingredients, a basic understanding of the science occurring in your skillet, and the willingness to take ten extra seconds to prepare your meat properly.
By understanding how fascia and connective tissue react to heat, and by mastering the simple technique of scoring the fat, you have permanently eliminated one of the most frustrating weeknight cooking disasters. You have reclaimed the Maillard reaction. You have ensured that every square inch of your dinner will be kissed by the glorious, crust-building heat of your skillet.
So pour yourself a glass of wine, throw away that scratched-up toxic non-stick pan, sharpen your chef’s knife, and show that pork chop exactly who is boss. You’ve got this. Now get cooking.