The Cold, Hard Truth About High-Heat Cooking
Listen, I love you, but we need to have a serious intervention about your searing technique. If you are regularly serving up pale, grey, rubbery chicken breasts or steaks that look like they were boiled in a puddle of their own despair, the problem is not your lack of a culinary degree. The problem is that you are fundamentally misunderstanding the physics of heat transfer, and worse, you are probably trying to execute high-heat techniques using the absolute worst equipment imaginable.
As a busy professional who learned to cook by trial, error, and setting off the kitchen smoke detector more times than I care to admit, I have zero patience for pretentious chef-speak. I do not care about culinary school pedigree; I care about results. And the reality is that professional-level cooking is entirely achievable in a standard home kitchen once you stop relying on blind intuition and start respecting the raw laws of thermodynamics. If you have been following my relentless crusade against cheap, peeling cookware, you already know I am fiercely passionate about banishing toxic kitchen gear from your home forever.
Today, we are going to get uncomfortably nerdy. We are leaving the fluff behind and diving deep into the metallurgical properties of carbon steel and the exact thermodynamic interactions required to master the Maillard reaction. We are going to break down specific heat capacities, thermal conductivity, and molecular polymerization so that you can finally achieve that mind-blowing, edge-to-edge crust on your weekend culinary projects. Grab a glass of wine, pull up a stool, and let’s talk science.
The Chemistry of Flavor: Deconstructing the Maillard Reaction
Before we can talk about the metal, we have to talk about the meat. That beautiful, complex, savory brown crust you are chasing on a perfectly seared steak or a golden-brown sourdough loaf is not “caramelization.” Caramelization is the pyrolysis of sugars. What you are actually looking for is the Maillard reaction.
Named after the French chemist Louis Camille Maillard, who first described the phenomenon in 1912, this reaction is a highly complex form of non-enzymatic browning. It occurs when amino acids (the building blocks of proteins) violently collide with reducing sugars in the presence of intense heat. The result is a cascade of chemical rearrangements—starting with the Amadori rearrangement and ending with the formation of melanoidins—that produce hundreds of entirely new, highly complex flavor and aroma compounds.
The Exact Temperature Sweet Spot
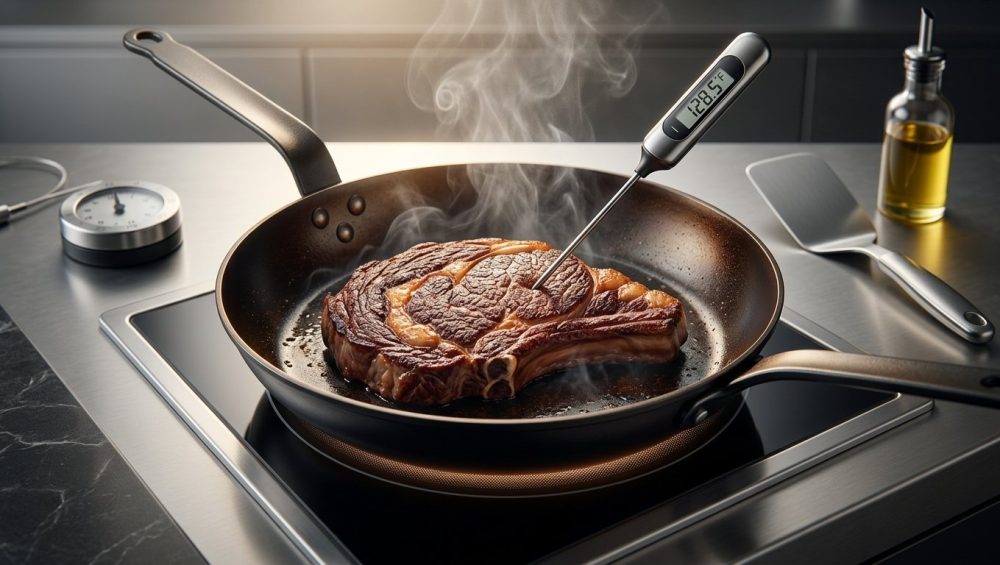
To truly master the art of the kitchen, you have to stop cooking by guesswork and start cooking by temperature. The Maillard reaction does not simply happen because a pan is “hot.” It operates within a highly specific thermodynamic window. The reaction begins to occur rapidly at temperatures ranging from 284°F to 330°F (140°C to 165°C).
This temperature range is your golden zone. If your pan is sitting at 250°F (121°C), the reaction happens so agonizingly slowly that your protein will overcook internally long before a crust ever forms on the exterior. On the flip side, once the surface temperature of your food exceeds 350°F (176°C), the Maillard reaction abruptly ends, and pyrolytic burning (charring) begins. You are no longer creating complex, savory flavors; you are just creating bitter, acrid carbon.
The Enemy of Browning: Surface Moisture
Here is the most critical physics lesson you will learn today: water boils at 212°F (100°C). As long as there is liquid water on the surface of your steak, the temperature of that surface physically cannot exceed 212°F (100°C) until every last drop of moisture has evaporated.
One of the most common beginner cooking mistakes is throwing a fridge-cold, dripping-wet piece of protein directly into a skillet. The pan’s thermal energy is immediately hijacked and wasted on boiling off that surface water. By the time the water is gone and the surface can finally climb to the 284°F (140°C) Maillard threshold, the interior of your meat is hopelessly overcooked.
The Toxic Trap: Why Your Non-Stick Pan is Sabotaging Your Sear
Now that we know we need sustained surface temperatures of around 330°F (165°C) to achieve optimal browning, we have to talk about why your cheap non-stick pan is actively working against you—and potentially poisoning you in the process.
I have a strict “no-go” rule on toxic kitchenware, and traditional non-stick pans are the worst offenders. The vast majority of non-stick pans are coated with Polytetrafluoroethylene (PTFE), a synthetic fluoropolymer. While manufacturers love to slap “PFOA-Free” labels on their boxes to make you feel safe, recent 2024 and 2025 data reveals that a staggering 79% of tested non-stick cooking pans still rely on PTFE coatings.
The 500°F PTFE Breakdown Threshold
Here is the terrifying reality: PTFE remains relatively stable at low temperatures, but it begins to rapidly degrade and decompose when heated above 500°F (260°C). When this synthetic polymer breaks down, it releases invisible, toxic fluorocarbon gases into your ambient kitchen air. Inhaling these fumes causes a documented medical condition known as “polymer fume fever” (often dubbed the “Teflon flu”), which manifests as severe shivering, sore throat, coughing, and fever.
You might be thinking, “I never cook at 500 degrees!” Think again. An empty, lightweight non-stick pan placed on a high-BTU gas or induction burner can easily rocket past the 500°F (260°C) threshold in a mere two to five minutes.
Because searing a steak requires a pan base temperature of around 400°F to 450°F (204°C to 232°C) to ensure the surface of the meat rapidly hits the Maillard zone without dropping the pan’s ambient heat, using a PTFE-coated pan leaves you with a dangerously razor-thin margin of error. You are essentially playing Russian roulette with your respiratory system just to cook dinner. Carbon steel pans, on the other hand, are essential kitchen tools precisely because they can withstand roaring, intense heat without off-gassing toxic chemicals.
Metallurgy 101: The Thermodynamics of Carbon Steel
If non-stick is out, what is the alternative? When you are building a minimalist kitchen setup, a high-quality carbon steel skillet is the undisputed MVP. But to understand why carbon steel is the ultimate searing vessel, we have to look at its metallurgical properties.
Carbon steel is an incredibly simple alloy consisting of approximately 99% iron and 1% carbon. This is often confusing for home cooks who assume cast iron has less carbon. In reality, cast iron contains roughly 2% to 4% carbon. That higher carbon content makes cast iron highly brittle, which is why cast iron skillets must be poured into thick, heavy sand molds. Carbon steel’s lower carbon content makes the metal malleable, meaning it can be stamped or spun from flat sheets of steel. This results in a pan that is significantly lighter, with a dramatically smoother surface than modern, pebbly cast iron.
Thermal Conductivity vs. Specific Heat Capacity
To master the sear, you must understand the difference between thermal conductivity (how fast a material transfers heat) and specific heat capacity (how much thermal energy a material can store).
Stainless steel is notoriously terrible at conducting heat. A pure stainless steel pan has a thermal conductivity rating of around 15 to 16.5 W/m-K, which is why high-end stainless pans must be clad with highly conductive aluminum (which clocks in at a massive 237 W/m-K) just to be usable.
Carbon steel, however, boasts a thermal conductivity of approximately 54 W/m-K. This is essentially identical to cast iron (52 W/m-K), meaning it absorbs and distributes heat at a very similar rate.
However, the magic of carbon steel lies in its specific heat capacity, which sits at roughly 0.49 kJ/kg-K. Because a carbon steel pan is slightly thinner and lighter than a massive cast iron skillet, it holds slightly less total thermal energy (around 61 kJ for an 8-inch pan compared to cast iron’s 91 kJ). This is actually a massive advantage for the home cook. It means carbon steel holds more than enough thermal mass to prevent a catastrophic temperature crash when a cold steak hits the pan, but it is responsive enough to cool down quickly if you adjust your burner dial. Cast iron is like a freight train—once it gets too hot, it stays too hot, and your delicate pan sauce will scorch before the metal cools down.
The Leidenfrost Effect: The Most Misunderstood Cooking Metric
If you are tired of dealing with rookie kitchen woes like permanently bonded chicken breasts and torn fish skin, you need to understand the physics of heat transfer and the infamous Leidenfrost effect.
Named after the 18th-century German doctor Johann Gottlob Leidenfrost, this physical phenomenon occurs when a liquid comes into contact with a surface that is significantly hotter than the liquid’s boiling point. Instead of immediately sizzling and evaporating, the bottom layer of the water droplet instantly vaporizes, creating a microscopic, insulating cushion of steam. This vapor layer suspends the rest of the droplet, allowing it to skitter and glide frictionlessly across the surface of the pan like an air hockey puck.
The “Mercury Ball” Test Explained
For water on a carbon steel or stainless steel skillet, the Leidenfrost point is approximately 379°F (193°C). Culinary hobbyists often use the “water drop test” (or mercury ball test) to determine if a pan is properly preheated. You flick a few droplets of water into the dry pan; if they violently sizzle and disappear, the pan is under 379°F. If they bead up and dance around the pan in a single, cohesive sphere, you have achieved the Leidenfrost effect.
Why Leidenfrost is a Trap for Everyday Cooking
Here is where the internet’s cooking advice usually falls apart, and where we need to apply some rigorous logic. Many bloggers will tell you to always wait for the Leidenfrost effect before adding food. This is terrible advice for everyday cooking.
Remember our Maillard reaction sweet spot? It peaks around 330°F (165°C). The Leidenfrost point is 379°F (193°C). If you drop delicate items like eggs, minced garlic, or thin fish fillets into a 380°F pan, they will instantly bypass browning and rocket straight into pyrolytic burning.
However, for searing a thick, heavy, room-temperature steak, the Leidenfrost point is your secret weapon. When you drop a massive, dense piece of meat into a 379°F (193°C) carbon steel skillet, the thermal mass of the cold meat instantly absorbs a huge chunk of the pan’s energy. The surface temperature of the pan crashes by about 40 to 50 degrees—landing perfectly right in the middle of the 330°F (165°C) Maillard zone. Understanding this thermodynamic dance is exactly how you achieve a flawless crust without overcooking the center.
The Science of Polymerization: Building a Natural Non-Stick Surface
Unlike toxic PTFE coatings that peel and flake into your food, carbon steel develops its non-stick properties through a completely natural, organic chemical process called polymerization.
Carbon steel is a reactive metal; if left exposed to water and oxygen, it will rapidly oxidize (rust). To protect the pan and create a slick cooking surface, we apply “seasoning.” But seasoning is not just baked-on grease. When you apply a microscopically thin layer of unsaturated fat to the pan and heat it past its smoke point, the heat causes the fatty acid chains to break down and release free radicals. These free radicals then rapidly cross-link with each other and bond to the porous surface of the iron, forming a hard, durable, plastic-like matrix known as a polymerized lipid layer.
Selecting the Right Oil for Cross-Linking
Not all oils are created equal when it comes to polymerization. You need an oil with a high smoke point and a high concentration of polyunsaturated fats (specifically linoleic acid), which provides the necessary double bonds for cross-linking.
While the internet was obsessed with flaxseed oil a decade ago, we now know that flaxseed creates a polymer layer that is too hard and brittle, leading to flaking. For the most resilient, durable seasoning, grapeseed oil, avocado oil, or even standard canola oil are vastly superior. They create a flexible, deeply bonded polymer matrix that naturally repels proteins. Understanding the difference between a weak seasoning layer and a resilient polymerized matrix is one of the best ways to save ruined meals and prevent food from tearing.
The Sassy Sous-Chef’s Searing Masterclass
We have covered the chemistry, the metallurgy, and the thermodynamics. Now, it is time to execute. This level of thermal control isn’t just for weekend projects; it makes simple weeknight dinners infinitely faster and more predictable. Follow this protocol strictly.
Step 1: Ruthless Moisture Eradication
As we established, surface moisture is the absolute destroyer of the Maillard reaction. If you take a steak out of a vacuum-sealed package and throw it in a pan, you are boiling it. Period.
At a minimum, you must aggressively pat the protein completely dry with paper towels. For optimal results, you should utilize the osmotic power of dry brining. Generously salt your meat and leave it uncovered on a wire rack in the refrigerator for 12 to 24 hours. The salt will initially draw moisture to the surface, but over time, the meat will reabsorb the salty liquid, tenderizing the interior while the harsh environment of the fridge perfectly desiccates the exterior.
Step 2: The Gradual Preheat
Carbon steel is tough, but it is not immune to thermal shock. Placing a cold carbon steel pan on a high-output induction burner and instantly blasting it with maximum power will cause the metal to expand unevenly, permanently warping the pan.
Start your burner on medium-low. Allow the thermal conductivity of the 54 W/m-K carbon steel to evenly distribute the heat across the entire cooking surface. Slowly step the heat up to medium-high over the course of 3 to 4 minutes. Once you can hover your hand an inch above the surface and feel intense, radiating heat, perform the water drop test to confirm you have reached the 379°F (193°C) Leidenfrost threshold.
Step 3: The Oil Buffer and the Drop
Never heat your oil from the very beginning. Heating oil for five minutes while the pan comes up to temperature will cause the lipids to break down, smoke excessively, and develop acrid, bitter off-flavors.
Once the dry pan hits the Leidenfrost point, add a tablespoon of high-smoke-point oil (like avocado or grapeseed). The oil will immediately shimmer and ripple, dropping the pan’s surface temperature slightly. Wait exactly 10 seconds for the oil to just begin to wisp with smoke, and then immediately lay your dry protein into the pan, laying it away from you to prevent splashing.
Step 4: The Discipline of the Sear
Once the meat hits the metal, you must exercise absolute discipline. Do not touch it. Do not poke it. Do not attempt to lift it.
When the cold protein contacts the hot carbon steel, the microscopic pores of the meat initially bond with the microscopic pores of the metal. If you try to force it, it will tear. However, as the Maillard reaction rapidly progresses (thanks to your pan hovering perfectly in that 284°F to 330°F zone), the surface of the meat will dehydrate, harden, and form a crust. Once that robust crust is fully formed, the protein will naturally release itself from the polymerized surface of the pan. If it is sticking, it is not done searing.
Troubleshooting Thermodynamic Failures
Even with the best intentions, things can go wrong. Once you internalize these temperature thresholds, you can transform a chaotic dinner rush into a peaceful daily habit. Let’s diagnose the most common failures.
The Grey, Steamed Meat Syndrome
If your meat looks like a wet, grey sponge, you have committed a thermal mass violation. You either failed to dry the surface of the meat, or you severely overcrowded the pan.
When you pack a 10-inch carbon steel skillet edge-to-edge with cold diced chicken, the total thermal mass of the cold meat overwhelms the specific heat capacity of the pan. The pan’s temperature plummets well below the 212°F (100°C) boiling point. The meat begins to exude its internal cellular water, and because the pan is no longer hot enough to instantly evaporate that water, the chicken ends up simmering in a pool of its own juices. The fix? Cook in batches. Give your ingredients room to breathe so the ambient heat can evaporate moisture instantly.
The Pan-Bonding Crisis
If your delicate fish fillet or fried egg has fused to the carbon steel on an atomic level, your temperature control was off. You either added the food when the pan was too cold (meaning the proteins bonded to the metal before the heat could sear them shut), or you used an ungodly amount of heat and instantly carbonized the food onto the surface. Remember: the Leidenfrost temp (379°F / 193°C) is for hard searing thick meats; for eggs and delicate fish, you want a gentle medium heat (around 275°F / 135°C), allowing the polymerized seasoning layer to do the heavy lifting.
The Bitter Char
If your crust is pitch black and tastes like an ash tray, you overshot the Maillard reaction and entered pyrolysis. This usually happens when home cooks leave a pan on a high-BTU burner for too long without monitoring the heat. Remember, carbon steel responds quickly to temperature changes. Once you achieve your sear, you can (and often should) dial the burner back slightly to maintain that perfect 330°F (165°C) sweet spot.
Adapting the Science for Weekday Efficiency
I advocate heavily for the home cook because I know that time is money. You do not have an hour to dedicate to pan-babysitting on a Tuesday night. But the beauty of mastering carbon steel thermodynamics is that it actually saves you time.
Because carbon steel has a thermal conductivity of 54 W/m-K, it preheats significantly faster than a thick cast iron skillet. By keeping your carbon steel pan permanently stationed on your stovetop (a hallmark of an efficient kitchen), you eliminate the friction of digging out heavy gear. You can come home, start preheating the pan on medium-low while you chop an onion, and by the time you are ready to cook, the pan is perfectly saturated with thermal energy. The superior heat retention means your stir-fries will cook in three minutes instead of steaming for ten, and the slick, polymerized surface means cleanup requires nothing more than a quick wipe with a paper towel and a dash of hot water.
Final Thoughts: Trust the Physics
Cooking is not magic. It is applied chemistry and physics. It is easy to get swept up in the latest modern recipe trend, but the fundamental laws of thermodynamics never change.
By ditching the toxic, peeling PTFE pans that limit your heat, and embracing the metallurgical superiority of carbon steel, you are taking the training wheels off. You now know exactly why the Maillard reaction requires dry surfaces and specific temperatures. You understand the specific heat capacity required to prevent a thermal crash, and you know how to leverage the Leidenfrost effect to your advantage.
Stop being intimidated by high heat. Respect the temperature thresholds, dry your proteins, let the pan do the work, and I promise you, your weekend dinners will rival any overpriced steakhouse in the city. Now get into the kitchen and start searing.


