
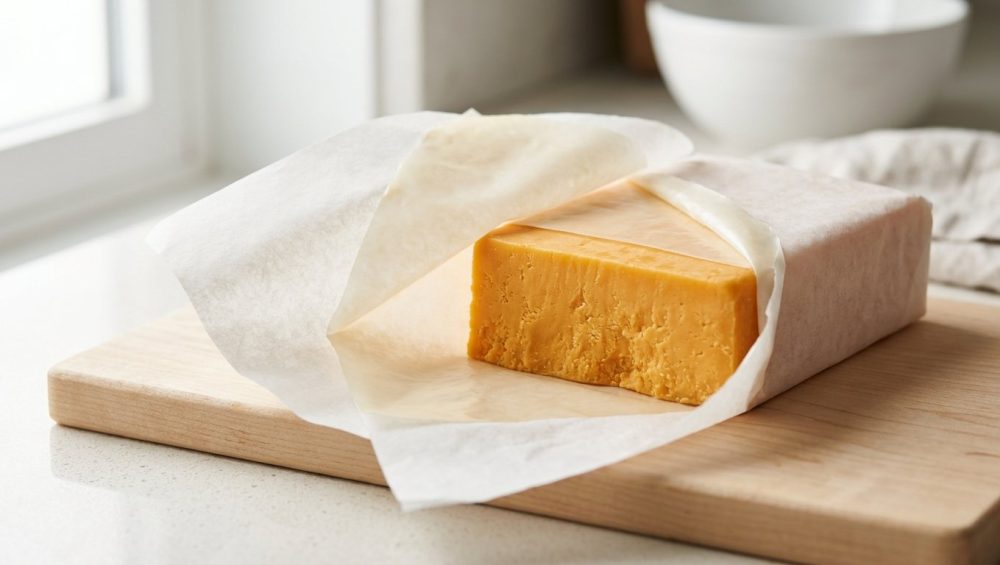
You know the exact scenario. You’ve just spent $15 on a gorgeous, artisanal wedge of clothbound cheddar or a perfectly ripe triple-crème Brie. You bring it home, enjoy a few slices, and then you do the unthinkable: you tightly swaddle the leftovers in cheap, sticky cling film and toss it into the deli drawer. A week later, you pull it out, only to be greeted by a slimy, sweaty block of dairy that smells suspiciously like household floor cleaner. Congratulations, you’ve just suffocated your cheese.
This tragic cycle of buying beautiful ingredients and watching them die in the refrigerator is entirely preventable. In fact, suffocating your expensive dairy in cheap plastic is one of the most common rookie kitchen mistakes that everyday cooks make. You do not need a culinary degree to treat your ingredients with respect, but you do need to understand a tiny bit of material science. Today, we are going to dive deep into the absolute genius of two-ply cheese paper, explore the biological reality of your favorite dairy products, and permanently end the cycle of throwing away expensive, moldy blocks of food.
The Biology of a Block: Why Your Cheese is Actually Alive
To understand why standard storage methods fail so spectacularly, you first have to accept a fundamental truth: cheese is not a static, dead object. Unlike a box of dry pasta or a can of beans, cheese is a living, breathing ecosystem of bacteria, enzymes, and proteins. Long after it leaves the aging cave and arrives in your kitchen, it continues to evolve.
The Science of Proteolysis and Ammonia Off-Gassing
As cheese ages, the cultures and enzymes introduced during the cheesemaking process continue to break down the milk proteins (casein) and butterfats. Let’s decode pretentious recipe jargon for a second: this breakdown process is scientifically known as proteolysis. During proteolysis, the long, coiled chains of amino acids are chopped into smaller, more flavorful fragments. It is the exact process that transforms a rubbery, bland curd into a complex, nutty, melt-in-your-mouth masterpiece.
However, this biological magic comes with a metabolic byproduct. As those amino acids break down further, they release ammonia gas (NH3). In a professional aging cave, this is perfectly fine; the caves are meticulously ventilated, allowing the ammonia to harmlessly dissipate into the air. But when you take that living, breathing ecosystem and trap it in a hermetically sealed plastic tomb, that ammonia has absolutely nowhere to go. It builds up, gets trapped against the surface of the cheese, and rapidly reabsorbs into the paste. This is exactly why your neglected Brie suddenly smells like hair dye and tastes like bitter chemicals.
The Cling Film Catastrophe: A One-Way Ticket to Spoilage
If you take nothing else away from this masterclass, let it be this: standard plastic wrap is the mortal enemy of good cheese. Using it is a guaranteed way to ruin your weekend culinary investments.
The Mechanics of Condensation and the “Sweat” Factor
Cheese has a high moisture content. Because it is continuously respiring, it is constantly releasing water vapor. When you wrap a wedge tightly in non-porous plastic wrap, you are creating an impermeable barrier. The water vapor leaves the cheese, hits the cold, impenetrable wall of the cling film, and immediately condenses. This condensation drips right back onto the surface of the cheese.
This is the dreaded “sweaty cheese” syndrome. You are essentially forcing your cheese to sit in a puddle of its own metabolic waste. This wet, anaerobic (oxygen-starved) environment is the absolute perfect breeding ground for invasive, harmful bacteria and unwanted molds. The beneficial white molds that give Camembert its beautiful rind will quickly be overtaken by slimy, pink, or green invasive molds that will rot the cheese from the outside in.
The Toxic Gear Warning: Keep Plasticizers Away from Your Fat
As your sassy sous-chef, I have zero patience for cheap, toxic kitchenware, and standard cling film is one of the worst offenders. To make plastic wrap stretchy and clingy, manufacturers often use plasticizers. Cheese is an incredibly high-fat food, and fat acts like a biological sponge for chemicals. When you wrap a high-fat food tightly in cheap plastic, those chemical plasticizers can leach directly into the food you are about to eat. If you are serious about banishing toxic kitchen gear from your home, evicting cling film from your cheese drawer is the absolute best place to start.
The Genius of Two-Ply Cheese Paper: Material Science in the Deli Drawer
So, if plastic wrap is a toxic suffocation hazard, and leaving the cheese completely unwrapped turns it into a petrified brick, what is the solution? Enter two-ply cheese paper. This is not just a fancy, overpriced accessory; it is a highly engineered material specifically designed to mimic the environment of a professional aging cave. It firmly belongs on the list of essential kitchen tools for beginners and experts alike.
Layer One: The Inner Moisture-Wicking Membrane
The inside layer of high-quality cheese paper is typically made from a very thin, specially perforated low-density polyethylene (LDPE) or a micro-porous wax coating. Unlike cling film, this layer is not a complete barrier. Its job is to protect the butterfat from absorbing outside fridge odors while simultaneously wicking excess condensation away from the surface of the cheese. It prevents the cheese from sitting in a puddle of its own sweat, but it retains just enough ambient moisture to keep the paste from drying out.
Layer Two: The Outer Porous Paper
The outside layer is a durable, porous paper. This layer works in tandem with the inner membrane to regulate the microclimate. It allows oxygen to slowly flow in, keeping the beneficial bacteria alive, while allowing the noxious ammonia gas to flow out and dissipate. It is essentially Gore-Tex for your dairy. By managing the Moisture Vapor Transmission Rate (MVTR), two-ply paper strikes the exact, delicate balance required to keep cheese alive, fresh, and delicious for weeks longer than any other storage method.
Evaluating the Alternatives: Why Your Other Kitchen Scraps Fail
Before you try to hack your way out of buying proper cheese paper, let’s rigorously evaluate the other common household wraps. You can spend thousands on aesthetic kitchen upgrades, but if your fridge is full of rotting food because you refused to use the right storage materials, you are just throwing money away.
Aluminum Foil
Foil is a complete barrier, meaning it traps ammonia just as badly as plastic wrap. However, it is slightly more rigid, meaning it doesn’t suffocate the cheese quite as tightly, leaving tiny pockets of air. While foil is occasionally acceptable for heavily veined blue cheeses (which require a bit less oxygen), it is prone to tearing. Furthermore, highly acidic cheeses can actually react with the aluminum, leaving a nasty, metallic taint on the surface of your food.
Wax Paper and Parchment Paper
These are a massive step up from plastic wrap because they are breathable. They allow the ammonia to escape and prevent the cheese from sweating. However, they are too breathable. Because modern refrigerators are incredibly dry environments (they literally work by pulling moisture out of the air), wrapping cheese in plain parchment paper will cause it to lose its moisture rapidly. Within a few days, your expensive cheddar will be a cracked, hard, unpalatable rock.
The DIY Hybrid Method (Parchment plus Plastic Bag)
Many home cooks attempt to recreate two-ply paper by wrapping their cheese in parchment paper and then placing it loosely inside a partially unzipped plastic storage bag. This is a respectable workaround if you are in a pinch. The parchment wicks the moisture, and the loose plastic bag creates a humid microclimate. However, it is clunky, takes up unnecessary space, and still doesn’t regulate gas exchange with the precise engineering of dedicated two-ply paper.
The Financial and Environmental Cost of Suffocated Cheese
Let’s talk numbers, because time is money, and throwing away food is literally throwing away your hard-earned cash. It is time to rethink your cheese drawer entirely.
According to data from the USDA and the EPA, a staggering 30 to 40 percent of the entire United States food supply goes uneaten. At the consumer level, the average American family of four wastes an estimated $1,500 to $3,000 worth of food every single year. Dairy products, specifically cheese and milk, are consistently ranked among the top categories of household food waste.
When you buy a $12 wedge of Gruyère, wrap it in plastic, let it mold, and throw half of it in the garbage, you aren’t just wasting $6. You are wasting the massive amounts of water, agricultural feed, transportation fuel, and human labor required to produce that cheese. Furthermore, when that suffocated cheese hits the landfill, it decomposes anaerobically beneath tons of garbage, producing methane—a greenhouse gas roughly 25 times more potent than carbon dioxide. Investing $10 in a pack of reusable, professional-grade cheese paper pays for itself the very first time it saves a wedge of artisan cheese from the trash can.
A Masterclass in Wrapping: How to Swaddle Your Cheese Like a Pro
You have the right materials; now you need the right technique. You cannot build a mindful charcuterie board with a block of sweaty, slimy cheddar. Wrapping cheese is not difficult, but it requires a bit of precision. We are going to use the classic “Cheesemonger Fold,” a technique that creates a neat, snug package without strangling the cheese.
Step 1: The Prep and Placement
Start with a clean, dry cutting board. Wash your hands thoroughly—remember, you are handling a living ecosystem, and introducing the bacteria from your unwashed hands will accelerate spoilage. Place a single sheet of two-ply cheese paper flat on the board, with the waxy/plastic side facing up (this is the side that touches the cheese). Place your wedge of cheese diagonally in the center of the paper.
Step 2: The Crisp Fold
Take the corner of the paper closest to you and pull it tightly up and over the face of the cheese. Crease the paper sharply along the edges of the wedge. A crisp crease is the secret to a tight, professional wrap. You want the paper to sit flush against the paste of the cheese to protect it from the dry fridge air, but you do not want to crush it.
Step 3: Tucking the Wings
Once the front is covered, you will have two “wings” of paper sticking out on the sides. Fold the sides of the paper in toward the center of the cheese, exactly as if you were wrapping a birthday present. Crease the edges sharply against the sides of the block. Finally, take the remaining top corner of the paper, pull it tightly down over the folded wings, and wrap it all the way around the back of the cheese.
Step 4: The Label and Date
Secure the final flap of paper with a piece of masking tape or a dedicated cheese label. Here is a non-negotiable rule of the kitchen: you must date your food. Write the name of the cheese and the date you wrapped it on the tape. If you blindly throw unlabeled packages into your deli drawer, you are playing a losing game of culinary Russian roulette.
Refrigerator Real Estate: Where Cheese Actually Belongs
Having the right paper is only half the battle; where you place that wrapped package inside your refrigerator matters immensely. Your refrigerator has distinct microclimates, and cheese is incredibly picky about its environment.
The Crisper Drawer: Your Home’s Cheese Cave
The absolute best place to store your wrapped cheese is in the vegetable crisper drawer or a dedicated deli bin. These drawers are specifically designed to be slightly warmer and significantly more humid than the rest of the refrigerator. They insulate the cheese from the harsh, dry air circulating in the main cabin and protect it from the rapid temperature fluctuations that occur every time you open the fridge door. The ideal temperature for storing cheese is between 36°F and 45°F (2°C to 7°C).
The Door: A Fluctuating Nightmare
Never, under any circumstances, store your good cheese in the compartments on the refrigerator door. The door is the warmest part of the fridge, and it is subjected to a violent blast of warm room-temperature air every single time someone opens it to look for a snack. This constant cycle of heating and cooling will cause the cheese to sweat profusely, rapidly accelerating mold growth and spoilage. Serving pristine, well-kept cheese is the ultimate cheat code for a meaningful dinner party, so treat it with the respect it deserves.
When to Salvage and When to Surrender
Even with the best paper and the perfect crisper drawer, cheese has a finite lifespan. Part of being a resourceful home cook is knowing the difference between a cheese that just needs to breathe and a cheese that belongs in the compost bin.
The Ammonia Test
If you unwrap a soft-ripened cheese (like Camembert or Brie) and are immediately hit with a sharp whiff of ammonia, do not panic and do not throw it away immediately. As we learned earlier, ammonia is a natural byproduct of aging. Leave the cheese unwrapped on your counter at room temperature for 15 to 20 minutes. If the ammonia smell dissipates and gives way to pleasant, earthy, mushroomy aromas, the cheese is perfectly fine to eat. It just needed to exhale. If, however, after 20 minutes the cheese still smells strongly of harsh chemicals and the texture has broken down into a gritty, unpleasant soup, it is past the point of no return. This degraded texture is exactly why your cheese sauce breaks when you try to melt it. Toss it.
The Mold Rules: Hard vs. Soft
Mold is a natural part of cheese, but not all molds are welcome. If you spot a patch of blue, green, or white mold on a hard, dense cheese (like Parmigiano-Reggiano, aged Cheddar, or Pecorino), you can easily salvage it. Because the paste of hard cheese is so dense and low in moisture, the mold cannot penetrate deeply below the surface. Simply take a sharp knife and cut away at least one inch around and below the mold spot. The rest of the cheese is perfectly safe to consume.
Soft cheeses (like fresh mozzarella, ricotta, cream cheese, or Brie) are a completely different story. Because they have a very high moisture content, mold can easily send invisible, thread-like roots deep into the paste of the cheese, far beyond what your naked eye can see. Furthermore, harmful bacteria like Listeria or Salmonella can grow alongside the mold in these wet environments. If you see unwanted pink, green, or black mold on a soft cheese, you must throw the entire piece away immediately. There is no salvaging it.
Conclusion: Respect Your Dairy, Elevate Your Cooking
At the end of the day, cooking incredible food at home doesn’t require a master’s degree in gastronomy or a kitchen outfitted with thousands of dollars of commercial equipment. It simply requires a basic understanding of your ingredients and a willingness to treat them properly. Taking control of your ingredients is the fastest way to cure cooking anxiety and start enjoying your time in the kitchen.
By ditching the toxic, suffocating plastic wrap and investing in scientifically backed, two-ply cheese paper, you are instantly elevating the quality of your daily meals. You are stopping the cycle of senseless food waste, saving yourself hundreds of dollars a year, and ensuring that every single slice of cheese you serve tastes exactly the way the cheesemaker intended. So go ahead, buy that beautiful wedge of artisan gouda. Just promise me you’ll wrap it right.






