
You’ve tried everything. You followed the recipe to the letter. You measured your flour like a meticulous scientist, you bought the expensive European butter, and you even whispered sweet words of encouragement to your mixing bowl. Yet, when you pull your baking sheet out of the oven, you aren’t greeted by towering, golden, flaky layers of carbohydrate perfection. Instead, you are staring at sad, dense little hockey pucks that could double as doorstops.
If this sounds entirely too familiar, welcome to the club. We are going to eliminate kitchen chaos once and for all by tackling one of the most notoriously frustrating baked goods known to humanity.
I see you scrolling through aesthetic food blogs, wondering why your weekend baking projects always seem to end in tears and a kitchen covered in flour. It is time for a brutal reality check: it isn’t your recipe, it isn’t your oven, and it certainly isn’t a lack of culinary talent. The culprit is quite literally in the palm of your hands. Or rather, it is your hands. Today, we are diving deep into the microscopic world of pastry science, debunking the romanticized myths of hand-mixing, and introducing you to the only tool that can permanently fix your dense dough: the stainless steel pastry blender.
Consider this your ultimate guide to surviving kitchen disasters and reclaiming your weekend brunch. Grab a cup of coffee, tie your apron tight, and let’s get into the hard science of why your biscuits are tough—and how a simple, inexpensive tool is about to change your life.
The Cold, Hard Truth: The Food Science of Flaky Biscuits
Baking is not magic; it is simply delicious chemistry for hungry people. To understand why your baked goods are failing, you have to understand what makes them succeed in the first place. The architecture of a perfect biscuit relies on three foundational pillars: flour, fat, and liquid. But simply throwing them into a bowl together isn’t enough. It is the physical state of that fat that dictates whether you get a tender, flaky masterpiece or a heavy, leaden lump.
Understanding the underlying thermodynamics of your dough is one of those foolproof cooking secrets that will instantly elevate everything you bake. When we talk about fat in biscuit making, we are almost always talking about butter.
The Anatomy of Butter
Butter is a beautiful, complex emulsion. It is typically composed of about 80% to 82% butterfat, 16% to 18% water, and 1% to 2% milk solids. That water content is the absolute key to your success. In a perfect world, you want to cut cold, solid butter into your dry flour mixture so that it forms tiny, distinct, flour-coated pebbles of fat dispersed throughout the dough.
The Steam Engine Effect
When you put your baking sheet into a blazing hot oven (usually around 425°F or 220°C), a rapid thermodynamic reaction occurs. The intense heat penetrates the dough, causing those tiny, solid pebbles of butter to melt. As the butterfat melts into the surrounding flour, it leaves behind a microscopic void. Simultaneously, the 18% water content trapped inside that butter rapidly boils and converts into steam.
Because steam expands to roughly 1,600 times the volume of liquid water, it violently pushes upward, lifting the layers of flour dough apart before the structure sets and bakes solid. This is the “steam engine effect.” Those distinct layers of trapped steam are exactly what we call “flakiness.” If you have ever wondered why some recipes yield towering layers that peel apart like pages in a book, this is the exact scientific mechanism at play. Whether you are making scones, croissants, or trying to figure out how to fix a tough pie crust, the goal is always to preserve the integrity of that solid fat until the very second it hits the oven heat.
The Gluten Monster
So, what happens when the butter melts before it gets into the oven? Absolute structural disaster.
If your butter warms up and melts into the flour while you are still mixing the dough in the bowl, you lose your distinct pebbles of fat. Without solid fat pebbles, there are no voids left behind. Without concentrated pockets of water, there is no steam to push the layers apart.
But it gets worse. When butter melts prematurely, the water inside it is released directly into the flour. Flour contains two proteins called gliadin and glutenin. When these proteins are hydrated by water and physically agitated (like when you mix dough), they link together to form a highly elastic, incredibly strong microscopic web called gluten.
Gluten is fantastic if you are making a chewy, artisanal sourdough pizza crust. It is your worst enemy if you are making biscuits. Melted butter hydrates the flour too early, leading to rampant gluten development. The result? A tough, chewy, dense biscuit that feels heavy in the hand and sits like a rock in your stomach.
The Hand-Mixing Trap: Why You Are Sabotaging Your Own Dough
Now that we understand the science, let’s talk about why your current method is failing. For generations, recipes and grandmothers have instructed us to “rub the butter into the flour with your fingertips until it resembles coarse meal.” It sounds romantic. It sounds artisanal. It is also one of the most common rookie kitchen mistakes you can possibly make in a modern kitchen.
The Problem with Human Anatomy
Let’s look at the basic numbers. Butter begins to significantly soften at around 68°F (20°C) and completely melts into a liquid at a surprisingly low 90°F to 95°F (32°C to 35°C).
Your body temperature, assuming you are a living, breathing human being, is 98.6°F (37°C). Your fingertips are quite literally walking space heaters. When you plunge your bare hands into a bowl of flour and cold butter, you are immediately transferring your body heat into the fat. You are melting the butter on contact.
The Friction Factor
To make matters worse, rubbing the butter into the flour generates kinetic energy. Friction produces heat. Between the ambient temperature of your kitchen, the 98.6°F temperature of your hands, and the friction of rubbing the ingredients together, your cold butter doesn’t stand a chance.
By the time you have achieved that coveted “pea-sized crumb” texture with your hands, the butter is no longer solid. It has become a greasy, semi-liquid paste that has thoroughly coated and hydrated the flour. You have unknowingly triggered the gluten monster. You have destroyed your steam pockets before you even turned the oven on.
I don’t care if your grandmother swore by the hand-mixing method. Your grandmother probably baked in a drafty farmhouse kitchen in the dead of winter, and she had decades of muscle memory allowing her to mix the dough in thirty seconds flat. You are baking in a climate-controlled apartment, and you are taking five minutes to carefully rub the butter in. You need a mechanical advantage.
Enter the Pastry Blender: Your Kitchen’s Unsung Hero
If hands are out of the question, how do we cut solid, freezing-cold butter into dry flour without transferring heat? Enter the pastry blender (sometimes called a pastry cutter).
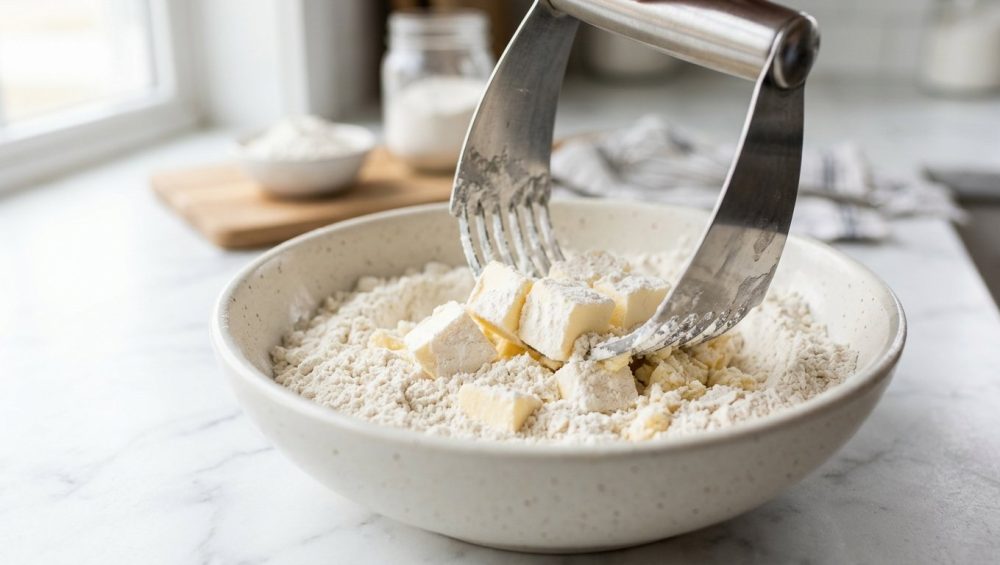
A pastry blender is a ridiculously simple, analog hand tool. It consists of a handle attached to a series of rigid, U-shaped metal blades. You grip the handle, press the blades down into the bowl of butter and flour, and the metal cleanly slices the fat into smaller and smaller pieces.
Because the metal blades are highly conductive but have very low thermal mass, they do not transfer the heat from your hand into the butter. The handle acts as an insulator, keeping your 98.6°F palms far away from the delicate fat. It allows you to use the downward force of your arm to chop the butter efficiently, cleanly, and—most importantly—coldly.
Why Forks and Knives Fail
“But Sassy Sous-Chef,” you ask, “can’t I just use two butter knives or a dinner fork?”
Absolutely not. Have you ever actually tried the “two-knife method”? It involves holding a knife in each hand and awkwardly scissoring them back and forth through a pile of flour. It is a tedious, maddening exercise in futility that takes ten times longer than it should. By the time you finish, the ambient room temperature has warmed the butter anyway.
As for forks? A standard dinner fork is not engineered to cut through a block of frozen butter. The tines will bend, your wrist will ache, and you will eventually get frustrated and stick your hands in the bowl anyway. Time is money, especially when you are trying to get a weekend breakfast on the table. Stop fighting your food and use the right tool for the job.
The Food Processor Dilemma
The modern, tech-savvy cook might point to the food processor. It’s fast, it keeps your hands out of the dough, and it chops butter in seconds. While it might be tempting to rely on an appliance, learning to stop using your food processor for delicate pastry doughs is a massive step forward in your culinary education.
Here is the problem with food processors: they are entirely too efficient. The blades spin at thousands of revolutions per minute. At those speeds, the machine generates a massive amount of friction and heat. More importantly, a food processor offers zero tactile feedback. It takes exactly three seconds to go from perfectly chopped, pea-sized butter chunks to an overworked, pulverized, greasy paste. Unless you have the reflexes of a ninja and are heavily experienced with the exact pulse timing of your specific machine, the food processor is a massive risk for overworking gluten. The analog pastry blender gives you total, unadulterated control.
The “No-Go” Rule on Toxic Kitchen Gear: Choosing the Right Pastry Blender
Now that I have convinced you that you need a pastry blender, we need to have a very serious conversation about quality. I have zero patience for cheap, toxic, poorly manufactured kitchenware. The market is flooded with garbage masquerading as cooking tools, and buying the wrong pastry blender will leave you more frustrated than when you started.
The Danger of Cheap Metals and Plastics
Do not go to a discount store and buy a $4 pastry blender. I guarantee you it is made of cheap, 400-series mystery stainless steel or, worse, chrome-plated aluminum. These cheap metals are highly susceptible to corrosion. After three trips through the dishwasher, the plating will flake off into your food, and the joints will begin to rust.
Furthermore, cheap pastry blenders often use flimsy, flexible wires instead of rigid blades. When you press a wire pastry blender into a block of freezing-cold butter, the wires simply bend and splay outward. They don’t cut; they just mash.
Then there are the handles. Cheap tools frequently feature soft-grip rubber or plastic handles. Over time, exposure to kitchen oils, dish soap, and hot water causes these synthetic polymers to degrade. The plastic becomes sticky, starts peeling, and creates microscopic fissures that harbor bacteria. Just as you might wonder why your knives go dull when using a cheap, overly hard bamboo cutting board, your baking tools suffer immensely when you settle for bottom-of-the-barrel materials.
The Anatomy of a Perfect Pastry Blender
You are going to buy a high-quality pastry blender once, and you are going to pass it down to your grandchildren. Here is exactly what you must look for:
- 18/10 (or 304/316 Grade) Stainless Steel: This is non-negotiable. 18/10 stainless steel contains 18% chromium and 10% nickel. This metallurgical composition makes it incredibly durable, completely non-reactive to acidic foods (like the buttermilk in your biscuit recipe), and highly resistant to rust. It is food-safe, non-toxic, and will not leach metallic off-flavors into your dough.
- Rigid, Thick Blades: Look for a blender that features flat, rigid, sharpened metal blades, not thin wires. The blades should be thick enough that you cannot bend them with your bare hands. They need to slice through frozen butter like a hot knife, without yielding or bowing.
- Ergonomic, Welded Handle: The handle should be seamlessly welded to the blades, ideally made from the exact same continuous piece of stainless steel, or featuring a high-quality, securely riveted grip. It needs to comfortably fit the palm of your hand, allowing you to apply significant downward pressure without digging into your skin.
A proper pastry blender should feel like a serious, heavy-duty tool in your hand. It is an investment in your sanity and your culinary success.
The Masterclass: How to Cut in Butter Like a Professional
You have the science. You have the proper, non-toxic tool. Now it is time to execute. Making flaky biscuits is not about intuition; it is about rigid temperature control and precise technique. Follow these steps exactly, and you will never bake a hockey puck again.
Step 1: The Deep Freeze
Temperature control starts long before you touch the flour. Take your high-quality, high-fat butter (European style, if you can get it, because it has a lower water content and higher fat ratio) and cut it into small, half-inch cubes.
Place those cubes on a small plate and put them directly into the freezer for at least 20 minutes. While you are at it, place your metal mixing bowl and your new stainless steel pastry blender into the freezer as well. We want every single component of this process to be as cold as physically possible.
Step 2: The Dry Mix
In your chilled metal bowl, combine your all-purpose flour, baking powder, baking soda, salt, and a pinch of sugar. Whisk them together thoroughly. This step is crucial because once the wet ingredients hit the dry, you want to mix the dough as little as humanly possible. Distributing the chemical leaveners evenly right now prevents dense pockets later.
Step 3: The Press and Twist
Retrieve your frozen butter cubes and toss them into the flour mixture. Toss them around lightly with a spatula so each cube is coated in flour. This prevents the butter pieces from sticking to each other.
Now, take your chilled pastry blender. Grip the handle firmly. Press the rigid blades straight down into the flour and butter. As you reach the bottom of the bowl, give your wrist a slight, quarter-turn twist. Lift the blender up, and repeat.
Press, twist, lift. Press, twist, lift.
The downward force slices the butter in half. The twist ensures the blades clear the fat and coat the newly exposed sticky sides of the butter with dry flour. If the butter starts to clump up inside the blades of the pastry blender (which happens occasionally), do not use your warm fingers to clear it. Use a butter knife to scrape the blades clean, and keep going.
Step 4: The Visual Cues
Do not overdo it. You are not looking for a homogeneous, sandy texture. You want a highly heterogeneous mixture. You want it to look messy.
Stop cutting when the largest pieces of butter are the size of peas, and the rest of the mixture looks like coarse, shaggy breadcrumbs. Those distinct, pea-sized chunks of frozen butter are exactly what will create the massive steam pockets in the oven.
Once the butter is properly incorporated, you can stop fighting sticky dough and easily bring it together by gently folding in your ice-cold buttermilk with a spatula.
Beyond Biscuits: Why This Tool Belongs on Your Countertop
I know what you are thinking. “Sassy Sous-Chef, I have a small kitchen. I hate unitaskers. Why should I dedicate drawer space to a tool that only makes biscuits?”
I completely agree with you. I despise unitaskers. But the pastry blender is a multi-tasking powerhouse that will save you immense amounts of time on busy weeknights, making it a critical tool for the everyday home cook.
The Baking Multitasker
Obviously, the pastry blender dominates the baking realm. It is the secret weapon for perfect, flaky pie crusts. It is the only way to make tender, crumbly English scones. But it goes further. If you want to stop baking flat cookies and start making incredible fruit crisps, crumbles, and cobblers, the pastry blender is how you cut cold butter into brown sugar and oats to create that iconic, crispy streusel topping.
The Savory Weeknight Hacks
Where the pastry blender truly earns its keep is in savory, time-saving prep. Because it features rigid steel blades designed to crush and slice simultaneously, it is the ultimate mashing tool.
- Guacamole in Seconds: Throw three pitted avocados, lime juice, and salt into a bowl. Use the pastry blender to mash them. It cuts through the slippery avocado flesh instantly, leaving you with a perfectly chunky texture in a fraction of the time it takes to use a fork.
- Egg Salad Express: Trying to chop six hard-boiled eggs with a chef’s knife is annoying and messy. Throw them in a bowl and hit them with the pastry blender. Perfectly uniform egg salad in ten seconds.
- Tuna Salad and Ground Meat: Use it to quickly flake canned tuna, or press it into a skillet to break up stubborn clumps of ground beef or turkey while it browns.
- Berry Jams: Mashing strawberries or raspberries for a quick stovetop jam? The pastry blender crushes the fruit while leaving enough texture for a rustic, artisanal feel.
It is an incredibly efficient, low-tech tool that requires no electricity, has no moving parts to break, and goes straight into the dishwasher when you are done.
Troubleshooting Your Biscuit Nightmares
If you have purchased a high-quality pastry blender, frozen your butter, and executed the press-and-twist technique perfectly, you are 90% of the way to biscuit perfection. However, baking is a fickle mistress. If you are still pulling dense bricks out of the oven, one of these secondary culprits is to blame.
The Over-Kneading Trap
Remember the gluten monster we talked about earlier? Even if your butter is perfectly cold, you can still ruin the dough by overworking it after the buttermilk is added.
Biscuits are not bread. You do not knead them. When you turn the shaggy dough out onto your counter, it will look like a dry, crumbly mess that is barely holding together. Leave it alone. Do not aggressively massage it.
Gently pat the dough together with your hands. To get those sky-high, flaky layers, perform a “letter fold.” Pat the dough into a rough rectangle, fold it in thirds like a business letter, turn it 90 degrees, gently pat it out again, and fold it one more time. This stacks the layers of butter and flour on top of each other. Then, stop touching it. The more you mess with it, the tougher it gets.
The Cutter Twist
This is the most heartbreaking mistake a home baker can make. You did everything right. The dough is beautiful. You take your round biscuit cutter, press it into the dough, and then—to ensure it cuts cleanly—you give the cutter a sharp twist.
Congratulations, you just ruined your biscuits.
When you twist a biscuit cutter, the dull friction of the metal smears the edges of the dough together. You are essentially crimping and sealing the edges of the biscuit shut. When that dough hits the oven and the steam tries to push the layers upward, it can’t. The edges are glued shut. The biscuit stays flat and dense.
If you are still wondering why your biscuits are flat after perfecting your butter technique, look at your cutting motion. Press the cutter straight down firmly, and pull it straight back up. Do not twist. If the dough sticks, dip the cutter in dry flour between every single press.
The Oven Temperature Mismatch
Finally, check your heat. The steam engine effect requires a violent, rapid shock of heat to work. If your oven is set to 350°F (175°C), the butter will slowly melt and leak out onto the baking sheet before the water can vaporize into steam. You will end up with flat biscuits swimming in a puddle of grease.
Biscuits require a blazing hot oven—typically 425°F to 450°F (220°C to 230°C). Furthermore, do not trust your oven’s built-in digital thermometer. Most home ovens are wildly inaccurate, often running 25 to 50 degrees cooler than the display claims. Invest in a cheap, analog internal oven thermometer to verify the ambient temperature before you put your hard work inside.
Final Thoughts from the Sassy Sous-Chef
You do not need a culinary degree to bake like a professional. You do not need a kitchen outfitted with thousands of dollars of commercial equipment. What you need is a fundamental understanding of how ingredients react to temperature, and the self-respect to invest in simple, high-quality, non-toxic tools that actually do the job they were designed to do.
The stainless steel pastry blender is the unsung hero of the home kitchen. It is the definitive answer to tough dough, the ultimate time-saver for weeknight prep, and the easiest aesthetic kitchen upgrade you can make for under twenty dollars. Stop melting your butter, stop fighting your flour, and stop settling for mediocre baked goods. Get yourself a rigid, heavy-duty pastry blender, freeze that butter, and go show that dough who is boss. Happy baking.






