
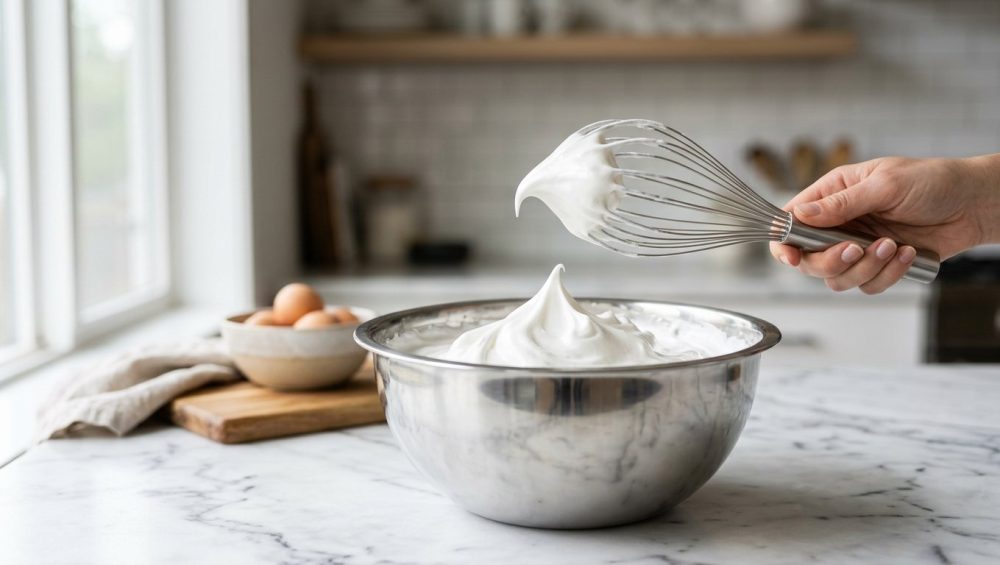
Picture this: It’s a beautiful Saturday afternoon. You’ve successfully navigated the weekday chaos using every time-saving shortcut in the book—because during the week, time is money—and now you’re ready to tackle an elaborate weekend baking project. You’ve separated your eggs with the surgical precision of a neurosurgeon. You’re dreaming of a towering, cloud-like lemon meringue pie, a batch of delicate, crisp macarons, or perhaps a show-stopping Pavlova. You fire up the stand mixer, watch the whisk blur into motion, and wait for those glossy, stiff peaks to form.
And you wait.
And wait.
Fifteen minutes later, you are staring into a bowl of sad, frothy, opaque liquid that looks more like a lukewarm bubble bath than a culinary masterpiece. Your meringue has failed. Again. You’ve just wasted half a dozen expensive organic eggs, a mountain of sugar, and an hour of your precious weekend.
Before you throw your whisk across the room, curse the baking gods, and vow to never attempt a dessert more complicated than a box brownie mix ever again, let’s get one thing straight: you are not a bad baker. You do not need a degree from Le Cordon Bleu to make mind-blowing food in a standard home kitchen. The problem isn’t your technique, your oven, or the alignment of the stars.
The problem is your bowl. Specifically, that cheap, scratched-up plastic mixing bowl you’ve been using since your college days.
Welcome to my kitchen, where we have absolutely zero patience for pretentious chef-speak and even less patience for toxic, underperforming gear that sabotages your cooking. Today, we are diving deep into the fascinating, slightly nerdy science of egg whites, the microscopic enemies lurking in your kitchenware, and why making one simple, stress-free swap will guarantee you impossibly fluffy, sky-high meringues every single time.
Grab a glass of wine, pull up a stool, and let’s talk about why your plastic bowl is ruining your life.
The Anatomy of a Meringue: What Are We Actually Doing?
To understand why your plastic bowl is public enemy number one, we first need to understand what a meringue actually is from a scientific perspective. When you strip away the sugar and the heat, egg whites (also known as albumen) are essentially just a mixture of about 90% water and 10% proteins.
But these aren’t just any proteins. The egg white is a carefully assembled biological system designed to nourish and protect. When we whip them, we are hijacking that biological system to perform a structural miracle.
The Magic of Ovalbumin and Ovomucin
In the world of egg whites, we are primarily dealing with a few heavy-hitting proteins. Let’s meet the cast of characters:
First, we have Ovalbumin. This is the dominant protein, making up about 54% of the protein content in an egg white. In its natural state, ovalbumin is a globular protein, meaning it resembles a tightly coiled, microscopic ball of yarn. When you start attacking it with a whisk, the physical force (known in physics as mechanical shear) causes these protein coils to uncurl, or “denature.”
Next, we have Ovomucin. It only makes up a tiny fraction of the egg white (about 3.5%), but it punches way above its weight class. Unlike the spherical ovalbumin, ovomucin is fibrous and rope-like. It is the physically largest protein in the egg white. Its size and shape make it incredible at thickening the liquid, providing the elasticity and structural integrity needed to hold onto air bubbles as they expand.
We also have Globulins, which are highly surface-active proteins that help form small bubbles during the initial beating phase, and Conalbumin (or ovotransferrin), which we will talk about later when we discuss the magic of copper bowls.
The Air Bubble Matrix
As you aggressively whip the egg whites, you are forcing millions of tiny air bubbles into the water. The denatured ovalbumin proteins essentially panic. Parts of these uncoiled protein strands are hydrophilic (water-loving) and parts are hydrophobic (water-fearing).
The water-fearing ends desperately want to get away from the water, so they jam themselves into the newly introduced air bubbles. Meanwhile, the water-loving ends stay happily submerged in the liquid. As thousands of these proteins align themselves around each air bubble, they link hands, creating a protective, microscopic net.
This interlocking protein matrix is what transforms a runny puddle of egg slime into a majestic, gravity-defying foam. It is a delicate, beautiful feat of structural engineering. And it is incredibly fragile.
The Arch-Nemesis of Fluff: Why Fat Ruins Everything
If proteins and air are best friends building a beautiful foam castle, who is the villain in this story? Fat. Lipids. Grease. Whatever you want to call it, fat is the ultimate party crasher.
The Lipid Disruption
You’ve probably heard the golden rule of meringue: absolutely no egg yolks allowed. Even a microscopic speck of yolk can spell disaster for your dessert. Why? Because egg yolks are packed with fat molecules (lipids).
When fat molecules are introduced to your pristine egg whites, they aggressively compete with the proteins for space around the air bubbles. But here is the kicker: fat molecules cannot form that strong, elastic, linked-hands network that proteins can. Instead, they coat the air bubbles in a weak, slippery layer.
As soon as the whisking action introduces more air and the bubbles try to expand, the fat layer gives way. The bubbles pop, the protein network collapses, and your foam turns into a tragic, weeping puddle of liquid. This is why you can add a pound of butter to a finished meringue to make Swiss meringue buttercream (because the stable matrix is already formed and cooked), but adding even a drop of fat before the matrix forms will ruin it completely.
The Invisible Enemy
This brings us to the crux of the issue. You might be thinking, “But I was so careful! I separated my eggs perfectly! I didn’t get a single drop of yolk in my bowl!”
I believe you. I really do. But yolk isn’t the only source of fat in your kitchen. If you are using a plastic mixing bowl, you are unknowingly introducing fat to your egg whites before you even turn on the mixer.
The Surprising Culprit: Why Your Plastic Bowl is Sabotaging You
Let’s talk about plastic. I despise cheap plastic kitchenware for a multitude of reasons, but when it comes to baking, my hatred is rooted in pure chemistry.
The Lipophilic Nature of Plastic
Plastics—whether we are talking about polypropylene, ABS, polystyrene, or melamine—are inherently lipophilic and hydrophobic. Because plastic is essentially a petroleum product (made of long-chain hydrocarbons), it shares a very similar chemical structure to dietary fats. As the old chemistry adage goes, “like dissolves like.” In plain English, this means plastic absolutely loves fat, and it hates water.
When you wash a plastic bowl, the water and dish soap struggle to completely strip away the oils left behind from previous meals. Think about how your plastic containers stay greasy even after a brutal cycle through the dishwasher. That same stubborn, invisible residue clings to your plastic mixing bowls.
You might not be able to see it. It might even feel squeaky clean to the touch. But on a molecular level, there is a microscopic film of fat coating the entire inside of that bowl.
Micro-Scratches: The Hidden Grease Traps
If the chemical properties of plastic weren’t bad enough, let’s talk about the physical degradation. Plastic is a soft material. Every time you use a metal whisk, a hand mixer, a fork, or even a rough scouring sponge, you are gouging microscopic scratches into the surface of the bowl.
These scratches become permanent luxury condos for grease. No amount of scrubbing is going to evict the fat molecules trapped deep within those jagged microscopic crevices. When you add your perfectly separated egg whites and start whisking, the aggressive mechanical action of the beaters pulls that trapped grease right out of the scratches and directly into your delicate protein matrix.
Boom. Dead meringue.
The Dishwasher Effect
“But I sanitize my bowls in the dishwasher on the hottest setting!” you cry out in defense.
I hate to break it to you, but the dishwasher often makes things exponentially worse for plastic. The extreme heat of a modern dishwasher can actually bake residual oils into the porous, expanded surface of the plastic. Furthermore, if you wash your mixing bowl alongside greasy dinner plates, the lipophilic plastic can actually attract aerosolized fats circulating in the hot dishwasher water. You are essentially basting your mixing bowl in a fine mist of leftover lasagna grease. It’s a chemical nightmare.
The “Sassy Sous-Chef” Rant: Why I Hate Plastic Kitchenware Anyway
Since we are on the topic of plastic, allow me a brief moment to step onto my soapbox. As a home cook who firmly believes that professional results require safe, reliable tools, banishing toxic kitchen gear is one of my most heavily enforced rules.
Toxin Leaching and Microplastics
We are constantly learning more about the dangers of microplastics and chemical leaching in our food supply. When cheap plastic bowls are subjected to heat, highly acidic ingredients (like vinegar or lemon juice), and the abrasive, high-speed spinning of an electric hand mixer, they degrade. They shed microscopic plastic particles and chemical plasticizers directly into your food.
I don’t know about you, but “shaved polypropylene” is not an ingredient in my grandmother’s lemon tart recipe. We spend so much time and money sourcing good ingredients—buying organic eggs, real vanilla beans, and high-quality butter. Why would you ruin those beautiful ingredients by violently whipping them inside a chemical-shedding plastic tub? It makes zero sense.
Weekday Efficiency vs. Weekend Perfection
I am a busy professional. During the week, my cooking routine is all about ruthless efficiency. I want tools that work flawlessly, clean up instantly, and don’t require me to second-guess my results. Plastic bowls fail on all fronts. They retain odors (nobody wants a meringue that smells faintly of last week’s taco meat), they stain easily, they warp in the microwave, and they single-handedly ruin weekend baking projects.
Do yourself a massive favor: gather up all those scratched, cloudy, warped plastic mixing bowls and recycle them. You deserve better.
The Ultimate Fix: Upgrading to the Right Gear
If you want professional-level results in a standard home kitchen, you need to use the right materials. The good news? The right materials are affordable, durable, completely non-toxic, and will last you a lifetime. Here is what you should be using to whip your egg whites.
Stainless Steel: The Everyday Hero
Stainless steel is the undisputed champion of the home kitchen, and it is my number one recommendation for everyday baking.
Unlike plastic, stainless steel is non-porous and completely inorganic. It does not absorb fats, it does not retain odors, and it certainly does not harbor micro-scratches filled with ancient grease. It is incredibly durable; it can handle boiling water for a double boiler, ice baths for chilling creams, and the aggressive metal beaters of your hand mixer without flinching.
When you whip egg whites in a properly cleaned stainless steel bowl, you are guaranteed a pristine, fat-free environment. Plus, stainless steel is lightweight, making it easy to handle when you are trying to gently fold a delicate macaron batter. Just make sure you invest in a high-quality, seamless bowl. If you buy cheap, poorly constructed tools with rolled rims that trap moisture, you might find that your whisk leaks dishwater right into your pristine batter. Stick to solid, professional-grade stainless steel.
Glass: The Heavyweight Contender
Glass is another excellent, non-porous option that completely solves the fat-retention problem. Like stainless steel, it won’t hold onto grease and is completely non-toxic. It is fantastic for acidic marinades, it is microwave safe, and it doubles as a beautiful serving vessel if you are taking a salad to a dinner party.
The downside? Glass is incredibly heavy. Trying to hold a massive glass bowl with one hand while aggressively scraping out a stiff meringue with a silicone spatula is a forearm workout you probably didn’t ask for. Furthermore, thermal shock is a real concern with cheaper glass; you have to be careful going from hot to cold to ensure your glass baking dish shattered disaster doesn’t repeat itself on your countertop. But purely for the chemistry of whipping egg whites, a glass bowl is lightyears ahead of plastic.
Copper: The Traditional (and Scientific) Flex
If you want to channel your inner French pastry chef and you have a budget to blow, you might consider the legendary copper mixing bowl. For over 200 years, traditional chefs have sworn that whipping egg whites in an unlined copper bowl produces the most voluminous, stable, and foolproof meringue possible.
And guess what? Modern science backs them up completely.
When you whisk egg whites in a copper bowl, the friction of the whisk causes microscopic copper ions to detach from the surface of the bowl. These copper ions migrate into the egg whites and chemically bind with a specific protein called conalbumin (also known as ovotransferrin).
This binding creates a golden-yellow “copper-conalbumin complex.” This complex is incredibly stable. It prevents the proteins from unfolding too quickly and prevents the sulfur bonds from linking up too tightly. In practical terms, this means it is almost impossible to over-beat egg whites in a copper bowl. The resulting foam is dense, incredibly creamy, less prone to weeping liquid, and holds its stiff peaks beautifully even when subjected to heat.
Is a $150 copper bowl strictly necessary for the weekend culinary hobbyist? Absolutely not. A standard stainless steel bowl and a tiny pinch of cream of tartar will get you 99% of the way there. But if you are an absolute perfectionist who loves the deep science of baking and wants a gorgeous heirloom piece for your kitchen, it’s a stunning addition to your arsenal.
Bulletproof Meringue Troubleshooting: My Smart Fixes
Now that we have evicted the plastic bowl from your kitchen and upgraded your gear, let’s go over a few more foolproof techniques to ensure your meringue is always a triumph. As I always say, fixing rookie kitchen mistakes is simply about controlling your variables. Here is my masterclass on flawless foam.
The Vinegar Wipe-Down
Even when I am using a pristine stainless steel or glass bowl, I never, ever leave anything to chance. Before I crack a single egg, I dampen a paper towel with a splash of white vinegar or fresh lemon juice and thoroughly wipe down the entire inside of my mixing bowl and my whisk attachments.
The acid cuts through any lingering residue, fingerprints, or soap film from the dishwasher, ensuring the environment is flawlessly clean. Do not skip this step. It takes five seconds and acts as an unbeatable insurance policy against flat egg whites.
The Acid Advantage
Speaking of acid, adding a chemical stabilizer to your egg whites is crucial if you aren’t using a fancy copper bowl. Cream of tartar (a powdered acidic byproduct of the winemaking process) is the gold standard for home bakers.
Adding an acid lowers the pH of the egg whites. This changes the electrical charge of the proteins and physically slows down the formation of disulfide bonds. If those bonds form too quickly or too tightly, the protein network acts like a net that is pulled too taut—it squeezes the water out, resulting in a grainy, weeping, over-whipped meringue. The acid keeps the protein network flexible and stable.
Add about 1/8 teaspoon of cream of tartar per egg white once the whites get frothy. If you don’t have cream of tartar, a few drops of lemon juice or white vinegar will do the exact same trick.
Temperature Matters: Cold for Separating, Warm for Whipping
Separating eggs is infinitely easier when they are cold straight from the fridge. The fat-rich yolks are firmer when chilled, meaning they are much less likely to rupture and bleed into your whites.
However, egg whites whip up to their maximum volume when they are at room temperature. The warmer temperature actually decreases the surface tension of the liquid, allowing the proteins to stretch, unfold, and trap air much more efficiently.
Just like chilling your dough transforms a flat cookie into a thick, chewy masterpiece, bringing your egg whites to room temperature transforms a flat puddle into a voluminous cloud. Separate your eggs while they are cold, put the yolks away for a batch of carbonara, and let the whites sit on the counter in your stainless steel bowl for 30 minutes before whipping.
The Sugar Strategy
Sugar is the magical glue that holds your meringue together, providing structure, gloss, and of course, sweetness. But when it comes to adding sugar, timing and patience are everything.
If you dump all the sugar in at the beginning (before the protein matrix has formed), the heavy sugar crystals will weigh down the egg whites, inhibit the proteins from unfolding, and prevent the foam from ever forming. If you add the sugar too late, or dump it in all at once, the crystals won’t have time to dissolve in the water content of the egg whites, leaving you with a gritty, weeping texture.
Wait until your egg whites have reached the “soft peak” stage. This means they look like foamy shaving cream, and when you lift the whisk, the foam forms a peak that immediately slumps over. At this point, turn the mixer to medium speed and add your sugar exactly one tablespoon at a time. Let each addition fully dissolve before adding the next.
And please, for the love of all things culinary, weigh your ingredients. Using a digital kitchen scale is the only reliable way to ensure your sugar-to-egg-white ratio is perfectly balanced. Measuring cups are for amateurs; scales are for people who want perfect results.
Know Your Meringues
Not all meringues are created equal, and understanding which one you are making will help you troubleshoot.
- French Meringue: This is the most common and the most fragile. You simply whip raw egg whites and slowly add sugar. It must be baked. Because it is uncooked during the whipping phase, it is the most susceptible to failing if a plastic bowl is used.
- Swiss Meringue: You gently heat the egg whites and sugar together over a double boiler until the sugar dissolves, then whip it. The heat partially denatures the ovalbumin early, making it much more stable.
- Italian Meringue: The most stable of all. You whip the egg whites, then slowly pour in a boiling hot sugar syrup. The intense heat cooks the proteins into a rigid structure. It is bulletproof, but requires a candy thermometer and nerves of steel.
Don’t Rush the Bake
If you are baking your meringue to make crisp cookies or a Pavlova shell, remember that you are essentially drying it out, not cooking it. Low and slow is the golden rule.
Bake them at a very low temperature (usually around 200°F to 225°F) for a long time, and then let them cool completely inside the oven with the door propped open. If your oven runs hot, the outside will burn and crack while the inside remains a sticky, marshmallowy mess. If you constantly find that your pie crust is tough or your meringues are browning too fast, your oven is likely lying to you. Invest in a cheap internal oven thermometer to verify your actual baking temperature.
The “No-Soap” Silicone Warning
Since we are on the topic of cheap kitchen gear that ruins the flavor and texture of your hard work, I have to issue a quick warning about your spatulas.
When you have finally achieved those beautiful, pristine, glossy stiff peaks, you will likely need to fold them into another mixture (like an almond flour paste for macarons, or a heavy batter for a chiffon cake). The last thing you want to do is taint that delicate meringue with a funky, chemical flavor.
Cheap, low-grade silicone spatulas are highly porous and absorb dishwasher detergents just like plastic absorbs fat. If you notice that your silicone spatulas taste soapy or smell like artificial lemon dish detergent, throw them in the trash immediately. Upgrade to high-quality, platinum-grade silicone spatulas that are non-porous and won’t leach horrific odors into your pristine desserts.
Conclusion: Reclaiming Your Weekend Baking Projects
Baking is a science, but it shouldn’t feel like a stressful, high-stakes chemistry exam. By understanding the simple mechanics of how proteins, air, and fats interact on a molecular level, you can completely eliminate the guesswork, avoid the heartbreak of a collapsed dessert, and start cooking with absolute confidence.
Ditching the plastic mixing bowl is the single easiest, most effective upgrade you can make to improve your baking game. Swap it for stainless steel, keep your gear impeccably clean with a vinegar wipe, weigh your sugar, and never scoop your dry ingredients by volume again (seriously, stop scooping your flour and use that scale).
You don’t need a culinary degree to make a show-stopping dessert. You just need a little bit of food science, a strict refusal to use garbage equipment, and the patience to let your stand mixer do the heavy lifting. Now, pour yourself a glass of wine, grab your stainless steel bowl, and go whip up something spectacular. You’ve got this.






