
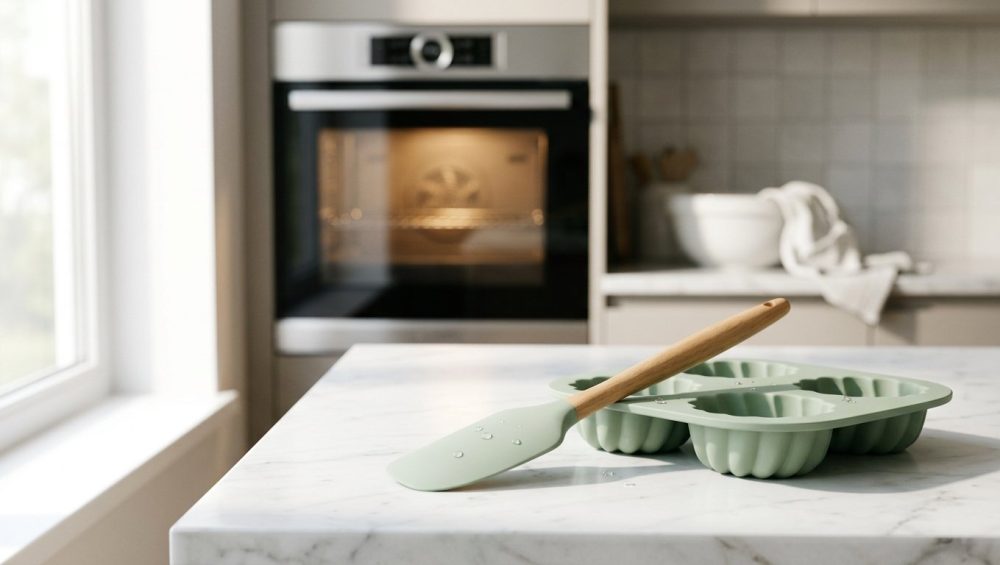
Picture this: It is Saturday morning. You have finally bought yourself enough time away from the weekday grind to whip up a beautiful, leisurely breakfast. You crack farm-fresh eggs into a bowl, whisk them to an airy perfection, and gently fold them in your favorite skillet using that trusty, brightly colored silicone spatula. You take your first bite, expecting rich, buttery, savory perfection. Instead? You get a mouthful of what tastes suspiciously like a lavender-scented dishwasher pod.
Congratulations. You have just been victimized by the phantom soap flavor, a culinary tragedy that is single-handedly ruining your dinners and turning your weekend brunches into an exercise in psychological torture.
Do not throw your spatula across the room just yet. You aren’t crazy, your tastebuds aren’t broken, and you certainly aren’t doomed to eat potpourri-flavored omelets for the rest of your life. As a home cook who has ruined more than a few meals learning things the hard way, I am here to tell you that this is a completely solvable science problem. You do not need a culinary degree to fix this; you just need a basic understanding of polymer chemistry and a functioning oven.
We are going to dive deep into the molecular mechanics of why your favorite kitchen tools suddenly taste like soap, why your dishwasher is secretly betraying you, and the exact, scientifically backed heat-stripping method you need to salvage your gear. Grab a cup of coffee. We have some kitchen chemistry to conquer.
The Chemistry of the Molecular Sponge: Why Silicone Absorbs Everything
To defeat the enemy, you have to understand the battlefield. Food-grade silicone is hailed as the ultimate modern kitchen material, and for good reason. It is flexible, highly heat-resistant, naturally non-stick, and it won’t scratch your expensive enameled cast iron or stainless steel cookware. But silicone is not an impenetrable, magical forcefield.
At a microscopic level, silicone is a synthetic polymer made from a backbone of alternating silicon and oxygen atoms, known as siloxanes. Manufacturers create it through a process called polymerization, resulting in a flexible rubber that doesn’t react with food or release harmful chemicals under normal cooking conditions. The FDA approved silicone for food contact back in 1979, and it has since dominated the culinary world.
However, while it feels completely smooth and solid to the touch, silicone is actually incredibly porous on a molecular level. Think of it as a microscopic sponge. Because of its specific chemical structure, silicone is highly lipophilic, meaning it has an intense chemical affinity for fats, oils, and lipids. This is known in the scientific community as lipid absorption.
When you cook with butter, olive oil, bacon grease, or heavy cream, the silicone eagerly absorbs these lipid molecules right into its polymer matrix. This is exactly why, over time, you might notice that your plastic containers stay greasy or your silicone tools develop a weird, tacky film even after you have aggressively scrubbed them. They aren’t just coated in grease; they have literally absorbed the grease into their cellular structure.
But the fat from your food is only half of the problem. A greasy spatula might be annoying, but it doesn’t taste like a laundromat. The real nightmare begins when you drop that fat-soaked, porous silicone tool into the dishwasher.
The Dishwasher Dilemma and Surfactant Sabotage
Time is money, and during the busy workweek, the dishwasher is a home cook’s best friend. I am the first person to advocate for efficiency and shortcuts when you are trying to get a weeknight meal on the table. But when it comes to silicone, your dishwasher is basically a chemical warfare zone.
Modern dishwasher detergents are complex, highly engineered cocktails of enzymes, bleaching agents, water softeners, and, most importantly, surfactants. Surfactants (surface-active agents) are chemical compounds designed to drastically lower the surface tension of water. This allows the water to bind with the stubborn grease and oil on your dishes so they can be easily rinsed away.
Here is where the chemistry turns against you. Many mainstream household detergents use heavily fragranced synthetic oils, essential oils, and powerful chemical rinse aids. When you run a load of dishes, the high heat of the dishwasher causes the microscopic pores in your silicone tools to expand. The surfactants in the detergent rush into those pores to bind with the food greases trapped inside.
But instead of washing cleanly away, the heavy fragrances, synthetic perfumes, and detergent oils seep right back into the expanded pores of the silicone. Furthermore, commercial rinse aids are literally designed to leave a hydrophobic (water-repelling) chemical film on your dishes to prevent hard water spots. Your silicone spatula acts like a magnet for this film.
By the time the drying cycle finishes and the machine cools down, the pores in the silicone close back up, trapping those soapy, floral, or citrus-scented chemical compounds deep inside the polymer matrix. You take the spatula out of the rack, it looks perfectly clean, and it might even smell totally fine at room temperature. But make no mistake: it is a ticking time bomb waiting to ruin your next meal.
The Thermal Trigger: Why Hot Food Tastes Like Soap
You might be wondering why you don’t notice the soapy flavor when you use a silicone whisk to mix a cold vinaigrette, or when you use a silicone scraper to get the last bit of cold mayonnaise out of a jar. Why does the soap flavor only attack when you are cooking? It all comes down to thermodynamics.
When silicone is sitting in your drawer at room temperature, the trapped volatile organic compounds (VOCs) from your dish detergent remain safely locked inside the polymer structure. But the moment you introduce heat—like pressing a spatula into a sizzling pan of brown butter, or sliding a silicone baking mat into a 400-degree oven—the material heats up rapidly, and those microscopic pores expand once again.
As the silicone expands, the trapped detergent oils and synthetic fragrances vaporize. Because they have nowhere else to go, they are violently expelled directly into whatever food they are touching.
This chemical transfer is especially aggressive when you are cooking foods that are high in fat or delicate in flavor. If you are making scrambled eggs—which are essentially delicate sponges made entirely of fat and protein—they will absorb those expelled soapy compounds instantly. This is precisely why your scrambled eggs turn out rubbery and taste like a mouthful of lavender detergent. The heat acts as a thermal trigger, releasing the trapped chemicals from previous wash cycles right into your breakfast.
The Definitive Masterclass Fix: Thermal Outgassing (Heat-Stripping)
If you search the internet for solutions to this infuriating problem, you will find a lot of terrible, unscientific advice. People will tell you to scrub the silicone with more soap (which literally adds to the problem), soak it in white vinegar, or bury it in a mound of baking soda.
Let me save you some time: none of those gentle methods will work for a severe case of soap-absorption. While a baking soda soak can help neutralize minor surface odors, it cannot penetrate the polymer matrix to extract deeply trapped detergent oils. Vinegar is an acid, which is great for mineral deposits, but it does absolutely nothing to break down synthetic surfactants.
To actually fix this, we have to use science. We have to force the silicone to release the trapped compounds using sustained, controlled heat. In the manufacturing and scientific world, this process is called thermal outgassing. I like to call it heat-stripping. Here is the exact, foolproof, step-by-step method to salvage your gear.
Step 1: The Deep Clean Wash
Before we bake the tools, we need to remove any lingering surface oils or food residue. Wash your soapy-tasting silicone items by hand using a grease-cutting, unscented, clear liquid dish soap. Do not use anything cloudy, moisturizing, or fragranced. Rinse them thoroughly in the hottest water your hands can tolerate, and dry them completely with a clean microfiber cloth.
Step 2: The Oven Bake (Thermal Outgassing)
Preheat your oven to 250°F (121°C). Do not guess the temperature; if you don’t trust your oven’s calibration, use an oven thermometer. This specific temperature is the absolute sweet spot. It is hot enough to expand the silicone pores and vaporize the trapped detergent oils, but low enough that it will not degrade the structural integrity or melt the silicone.
Place your clean, dry silicone spatulas, baking mats, or muffin liners directly on a bare metal baking sheet. Crucial warning: Make sure you remove any detachable wooden handles or hard plastic components first! Only 100% silicone pieces should go into the oven.
Bake the silicone for 40 to 60 minutes. As the tools heat up, you will likely smell a very strong, unpleasant odor of dish detergent filling your kitchen. Do not panic; this means the method is actively working. The sustained heat is forcing the VOCs and synthetic fragrances to vaporize out of the silicone pores and into the air. Turn on your oven hood fan or open a window to ventilate the kitchen.
Step 3: The Sniff Test
After 40 to 60 minutes, carefully remove the baking sheet from the oven using oven mitts. Let the silicone cool completely to room temperature on the counter. Once it is entirely cool, give it a firm, close sniff.
If it smells like absolutely nothing, you have successfully heat-stripped it. If a faint chemical odor or a situation where your spatula smells like garlic still lingers, pop it back into the oven for another 20 minutes. High-quality silicone can handle this low-temperature baking without any issue.
The Boiling Method (For Non-Oven Safe Items)
Sometimes you have silicone parts that simply cannot go in the oven. This includes the silicone gasket seals on your blender blades, baby bottle nipples, or spatulas with permanently attached plastic handles that would melt into a toxic puddle in the oven. For these specific items, we pivot to the boiling method.
While water boils at 212°F (100°C)—which is slightly cooler than our ideal 250°F oven temperature—it is still hot enough to force the silicone pores open and extract a significant amount of the trapped chemical residue.
Fill a large stainless steel pot with water and bring it to a rolling, aggressive boil. Drop the silicone items into the water and let them boil for 10 to 15 minutes. The intense heat combined with the physical agitation of the boiling water will pull the oils out of the material. You can add a tablespoon of white vinegar to the water if you have hard water, just to prevent mineral scaling on the silicone, but the heat is what is doing the actual cleaning.
Use a pair of stainless steel tongs to carefully remove the items, rinse them immediately under freezing cold water to shock the pores closed, and let them air dry on a clean rack.
The “No-Go” Rule on Toxic Gear: Platinum vs. Peroxide Cured
As your sassy culinary guide, I have absolutely zero patience for cheap, toxic kitchenware that actively sabotages your cooking. If you find that your baking sheets keep warping in the oven, or your silicone tools constantly taste like soap no matter how many times you heat-strip them, you are likely dealing with low-grade manufacturing.
It is time for a brutal truth: not all silicone is created equal. There are two primary ways that silicone is manufactured and cured (the chemical process that turns it from a liquid, pliable gum into a solid, usable rubber elastomer): Peroxide Curing and Platinum Curing. Understanding the difference is the key to banishing toxic kitchen gear from your home forever.
The Cheap Stuff: Peroxide-Cured Silicone
Most mass-market, budget-friendly silicone tools you find in bargain bins or cheap online storefronts are peroxide-cured. This manufacturing method uses organic peroxides to force the polymer chains to cross-link. It is a fast and cheap process for the manufacturer, but it is a disaster for the home cook.
Peroxide curing leaves behind volatile byproducts and chemical residues inside the material itself. Because of these chemical byproducts, peroxide-cured silicone is far more prone to absorbing odors, degrading under high heat, and leaching an oily, sticky film over time. It is also generally less transparent and can yellow as it ages. If you are constantly battling soapy flavors and sticky residues, you almost certainly own peroxide-cured gear.
The Gold Standard: Platinum-Cured Silicone
If you want professional-level results and gear that will last a lifetime, you need to upgrade to platinum-cured silicone. This advanced process uses a true platinum catalyst to cure the rubber. It is an “addition cure” system, meaning the chemical reaction is perfectly balanced and leaves absolutely no chemical byproducts behind.
Platinum-cured silicone is medical-grade. It is incredibly pure, highly resistant to extreme temperatures, wildly durable, and vastly superior at repelling odors and resisting lipid absorption. Because there are no residual chemicals in the rubber, it will not leach strange flavors into your food.
Yes, it costs a few dollars more, but it is an investment that will save your dinners. When you are shopping for your core kitchen arsenal, which are exactly the beginner kitchen tools you should never cheap out on, you must read the packaging. Always look for the words “Platinum-Cured,” “100% Platinum Silicone,” or “LFGB Certified” (which is the incredibly strict European food safety standard that far exceeds basic FDA requirements).
The Infamous Pinch Test: Spotting Counterfeits
Beyond the curing method, sketchy manufacturers often cut costs by pumping their liquid silicone full of cheap plastic fillers, like BPS, chalk, or low-grade industrial rubbers. These fillers compromise the heat resistance of the tool, making it vastly more porous and turning it into a literal sponge for dishwasher soap. Worse, these plastic fillers can melt or leach toxic chemicals into your food when exposed to high heat.
You can instantly identify these toxic frauds using a simple, brilliantly effective scientific method known as the Pinch Test.
Take the silicone spatula, muffin liner, or baking mat in your hands. Tightly pinch a small section of the material, twist it, and stretch it aggressively.
- If the stretched area stays the exact same color: Congratulations, you have pure, high-quality silicone. Pure silicone absorbs light evenly, so it will not change color under stress.
- If the stretched area turns stark white: Throw it in the trash immediately. That white color is the light scattering against cheap plastic impurities and chemical fillers that do not belong anywhere near your hot food.
Do not let cheap fillers dictate your culinary success. If you have ever wondered why your cookies spread unevenly, burn on the bottoms, or bake weirdly on a cheap silicone mat, those plastic fillers disrupting the thermal heat transfer are likely to blame.
Preventative Maintenance for the Busy Cook
Once you have successfully heat-stripped your good silicone and thrown away the plastic-filled garbage, you need to maintain your gear properly. I am a firm believer that weekday cooking should be incredibly efficient, but saving time should never mean ruining your equipment.
If you want to keep using the dishwasher for your silicone gear (because let’s be real, nobody wants to stand at the sink hand-washing spatulas on a Tuesday night), you have to change your detergent strategy.
First, ditch the heavily fragranced, brightly colored detergent pods. Switch to a fragrance-free, clear, liquid or powder dishwasher detergent. Avoid anything labeled with terms like “essential oils,” “citrus burst,” “lavender breeze,” or “heavy-duty degreaser.”
Furthermore, you must skip the chemical rinse aids. Rinse aids are specifically designed to leave a micro-film on your dishes to prevent water spots. That film is exactly what absorbs into your silicone and causes the soapy taste. If you need a rinse aid for your glassware, use plain white vinegar in the rinse aid compartment instead of commercial chemicals.
If you choose to hand-wash your silicone, never use abrasive scouring pads or steel wool. Abrasives create microscopic scratches and gouges in the smooth silicone surface, giving oils and soaps even more places to hide and breed bacteria. Use a soft microfiber cloth or a non-scratch sponge.
And please, for the love of all things culinary, stop ruining your nonstick pans and your silicone gear with aerosol cooking sprays. The soy lecithin and chemical emulsifiers in those sprays bake into a sticky, impossible-to-remove resin that permanently bonds to silicone. Use real butter, high-quality olive oil, or avocado oil instead.
When to Finally Toss It
Even the highest quality platinum-cured silicone will not last forever if it is subjected to years of heavy abuse. You need to know when a tool is past the point of no return.
If you have tried the 250°F baking method twice and the silicone still smells like a French laundromat, the polymer matrix is likely permanently degraded. Similarly, if the silicone has developed a sticky, gummy texture that does not go away after a deep clean, or if it has visible tears, deep scratches, or extreme dark discoloration, it is time to retire it. Silicone is durable, but once the structural integrity of the polymer is broken, it becomes a magnet for bacteria and chemical leaching. Throw it out and treat yourself to a new, LFGB-certified replacement.
Final Thoughts from the Sous-Chef
Cooking should be a joy, an escape, and a creative outlet—not a frustrating game of chemical roulette. You do not need a Michelin star or a culinary degree to make incredible, mind-blowing food in your home kitchen, but you do need to understand the tools you are working with.
Silicone is a brilliant, modern material that makes baking and cooking significantly easier, but it demands a specific kind of respect. By understanding the chemistry of lipid absorption, avoiding cheap peroxide-cured knockoffs with toxic fillers, and utilizing the thermal outgassing bake method, you can permanently banish that phantom soapy flavor from your kitchen.
Now go preheat your oven, strip those spatulas, and get back to cooking food that actually tastes like food. You’ve got this.






