
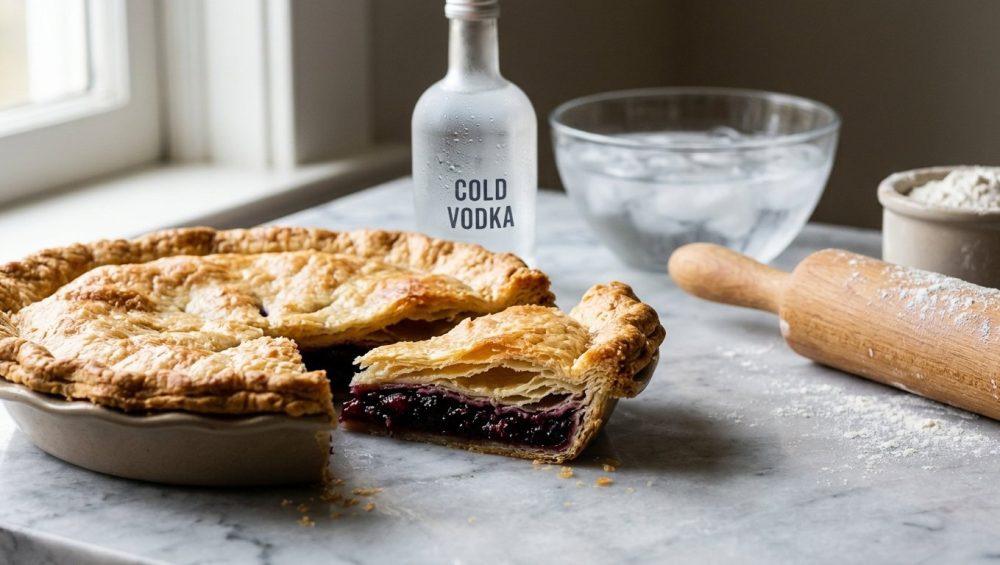
Welcome to the weekend, my fellow culinary hobbyists. You’ve survived another grueling week of back-to-back meetings, overflowing inboxes, and the sheer existential dread of figuring out what to make for dinner on a Tuesday. But now, it is the weekend. You have the time, the energy, and the ambition to tackle a proper baking project. You’ve decided to make a pie from scratch.
And almost immediately, a cold sweat breaks out on the back of your neck.
I know exactly why you are panicking. You are terrified of the crust. You are not alone in this fear; in fact, a widespread phobia of handling pastry dough paralyzes countless home cooks every single holiday season. We have all been traumatized by the ghosts of pies past. We have all stood over a kitchen counter, staring at a crumbly, dry mound of flour that refuses to come together, eventually panicking and dumping a quarter cup of tap water into the bowl. We have all rolled out a dough that snapped back like a rubber band, and we have all served a beautifully crimped pie that ultimately required a serrated steak knife to chew through.
You do not need a culinary degree to fix this. You do not need to spend ten years apprenticing in a humid Parisian bakery. You just need to understand a tiny bit of kitchen chemistry, and you need to open your liquor cabinet. Today, we are going completely scorched-earth on the pretentious, outdated baking advice that has been ruining your desserts for decades. We are going to explore the definitive, foolproof, brilliantly simple magic of cold vodka.
The Anatomy of a Kitchen Disaster: Why We Fear the Dough
Before we can solve the problem, we have to look the enemy right in the eye. Why is pie dough so inherently stressful for the everyday home cook?
The answer lies in the maddeningly contradictory advice found in traditional recipes. If you open a vintage cookbook, the instructions for pie crust read like a psychological thriller. You are told to “add ice water sparingly.” You are warned to “never overmix.” You are threatened with the ultimate baking sin: “Do not overwork the dough, or it will become tough.”
For a beginner, this is a nightmare. You are expected to magically hydrate a bowl of dry flour and cold butter using only two tablespoons of water, while simultaneously being told not to touch it too much. When you try to follow these rules, you end up with a bowl of dusty, shaggy clumps. When you dump those clumps onto your counter to roll them out, the dough shatters into a dozen jagged tectonic plates.
In a state of sheer panic, you do what any rational human would do: you add more water so the dough actually holds together, and you knead it with your warm hands until it forms a smooth, cohesive ball. Congratulations. It looks beautiful on the counter. But you have just unknowingly signed your pie’s death warrant. By adding that extra water and working the dough with your hands, you have activated the ultimate enemy of tender pastry. You have created a gluten monster.
The Science of Toughness: Hello, Gluten
To truly master the art of the pie crust, we have to talk about molecular biology. Don’t roll your eyes at me—I promise to keep the chef-speak to an absolute minimum. But if you want to bake like an expert without stressing over your mixing technique, you need to know what is happening inside that mixing bowl.
Wheat flour is packed with two specific proteins: glutenin and gliadin. When flour is sitting dry in its bag, these proteins are completely dormant. They are lazy. They are doing absolutely nothing. But the exact second these proteins come into contact with water, they wake up, link arms, and form a highly elastic, incredibly strong protein network known as gluten.
Gluten is a miracle of nature when you are baking bread. It provides the chew, the structure, and the stretchy balloon-like walls that trap yeast gases and allow a loaf of sourdough to rise beautifully. But in a pie crust? Gluten is your worst nightmare. You do not want chew. You do not want elasticity. You want a crust that shatters into a million buttery flakes the moment a fork touches it.
The development of this tough gluten network relies on two primary triggers: hydration (water) and mechanical action (mixing, kneading, and rolling). The more water you add, the more gluten forms. The more you mix and roll the dough, the more those gluten strands align and tighten up. Just like why your batter needs to rest when you are flipping Sunday morning hotcakes, pie dough requires a delicate touch to prevent those protein strands from turning your breakfast—or your dessert—into a rubber tire.
This is the cruel paradox of the traditional pie crust. You need liquid to physically bind the flour and butter together so you can roll it out with a rolling pin. But the very liquid you are using (water) is actively working against you, turning your delicate pastry into a dense, leathery disc.
The Traditional Fix (And Why It Fails the Home Cook)
For generations, professional pastry chefs have circumvented this paradox through sheer willpower and practiced technique. Their solution is to use the absolute bare minimum amount of ice water required to hold the dough together by a microscopic thread. Because they have years of muscle memory, they know exactly how to gently press and coax a seemingly dry, crumbly mess into a beautiful pie tin without overworking it.
But you are not a professional pastry chef. You are a busy professional trying to make a decent apple pie on a Saturday afternoon. You do not have the time or the patience to spend six months perfecting the tactile sensation of a “perfectly shaggy” dough.
When recipes demand that you use only three tablespoons of water for two cups of flour, they are setting you up for failure. A low-hydration dough is incredibly difficult to roll out. It cracks at the edges. It tears in the center. It sticks to the pin. To fix the tearing, you inevitably end up kneading the dough back together, which applies mechanical action, which develops the gluten you were trying to avoid in the first place. It is a vicious, frustrating cycle that ends in tears and a frantic trip to the grocery store to buy a pre-made frozen crust.
We need a cheat code. We need a way to add enough liquid to the dough so that it is soft, pliable, and incredibly easy to roll out, without triggering the formation of tough gluten strands.
The Surprising Magic of Cold Vodka
Enter the hero of our story: a bottle of standard, 80-proof vodka.
The brilliant application of vodka in pie dough was popularized by the legendary food scientist and author J. Kenji López-Alt during his tenure at Cook’s Illustrated. It remains one of the most liberating, game-changing baking hacks ever introduced to the everyday home cook.
Here is the brilliant science behind it: Glutenin and gliadin (our flour proteins) only form gluten when they are hydrated by water. They do not form gluten in the presence of ethanol (alcohol).
Standard 80-proof vodka is composed of 40% ethanol and 60% water. Because ethanol behaves completely differently than water on a molecular level, it acts as a liquid without acting as a gluten-activator. When you substitute half of the ice water in your pie dough recipe with cold vodka, you are fundamentally tricking the flour.
You are adding a generous volume of liquid to the bowl. This physical moisture is exactly what you need to easily bring the flour and butter together into a smooth, cohesive, highly workable dough that rolls out like an absolute dream. It won’t crack. It won’t crumble. It won’t tear.
But chemically? The flour proteins are completely blind to the ethanol. Even though your dough is highly hydrated and easy to handle, you have only introduced a fraction of the water that would normally be required. Therefore, you severely limit the amount of gluten that can possibly form.
You get the best of both worlds. You get the stress-free, crack-free workability of a high-hydration dough, combined with the impossibly tender, shatteringly flaky texture of a low-hydration dough. It is a foolproof safety net that practically guarantees professional-level results, regardless of how clumsily you mix or roll the dough.
Busting the Evaporation Myth (And Why It Doesn’t Matter)
Now, whenever I bring up the vodka pie crust trick, I inevitably get bombarded with the same two questions: “Will this pie get my kids drunk?” and “Does the alcohol actually bake off completely?”
Let’s address the great culinary myth of alcohol evaporation. For decades, chefs and home cooks have blindly repeated the mantra that “all alcohol burns off during cooking.” This is scientifically false. According to exhaustive data from the U.S. Department of Agriculture (USDA), the amount of alcohol retained in a cooked dish depends entirely on the cooking method, the temperature, and the duration of exposure.
If you simmer a dish for 15 minutes, roughly 40% of the alcohol remains. If you bake a dish for two and a half hours, about 5% of the alcohol still remains. Alcohol molecules can bond with water molecules in the food, making it nearly impossible to completely eradicate every single drop of booze.
So, does 100% of the vodka evaporate from your pie crust in the oven? No. A tiny, microscopic fraction of it likely remains. But here is the critical takeaway: It absolutely does not matter.
First of all, the amount of vodka used in an entire pie crust is usually around two to three tablespoons. Spread across eight slices of pie, and subjected to a 400-degree oven for an hour, the residual alcohol per slice is so mathematically insignificant that it has zero physiological effect. You could eat the entire pie yourself and you wouldn’t even register a buzz.
Secondly, vodka is specifically chosen for this hack because it is a neutral spirit. It is essentially flavorless and odorless. It leaves absolutely no boozy aftertaste in your delicate fruit tarts or savory quiches.
But most importantly, the evaporation rate in the oven is totally irrelevant to the success of the hack. The magic of the vodka doesn’t happen in the oven; it happens on the kitchen counter. The vodka’s sole purpose is to inhibit gluten formation during the mixing and rolling phase. By the time your pie goes into the oven, the vodka has already done its job. The gluten was stopped in its tracks twenty minutes ago. The fact that the ethanol vaporizes and creates a little extra steam to puff up the flaky layers is just a delightful bonus.
The Sassy Sous-Chef’s Masterclass: Step-by-Step Vodka Pie Crust
Alright, enough theory. It is time to put on your apron, pour yourself a glass of wine (or a neat pour of that vodka), and get to work. Here is my definitive, no-nonsense guide to executing the perfect vodka pie crust.
1. The Ingredients and the Scale
Baking is not a whimsical art; it is a rigid science. If you are still measuring your flour by scooping a measuring cup directly into the bag, we need to have an intervention. Depending on how tightly packed the flour is, a “cup” can vary in weight by up to 30%. This completely ruins your liquid-to-dry ratio. Do yourself a massive favor and invest in a digital kitchen scale. Weighing your ingredients is faster, cleaner, and guarantees perfection every single time. And please, for the love of all things holy, stop scooping your flour with a cup. Weigh out 350 grams of all-purpose flour.
You will also need 1 teaspoon of kosher salt, 1 tablespoon of sugar, 2 sticks (226 grams) of unsalted butter, 1/4 cup (60ml) of ice water, and 1/4 cup (60ml) of 80-proof vodka.
2. The Golden Rule of Temperature
Heat is the enemy of a flaky crust. When butter gets warm, it melts into the flour, creating a dense, cookie-like texture. You want the butter to remain in distinct, solid little pebbles suspended throughout the dough. When those cold pebbles of butter hit the hot oven, the water inside the butter rapidly turns to steam, pushing the layers of flour apart and creating those glorious, shatteringly crisp flakes.
Therefore, everything must be cold. Cut your butter into half-inch cubes and put them in the freezer for 15 minutes before you start. Put your vodka and your water in a glass in the freezer. If your kitchen is incredibly hot, put your mixing bowl in the freezer too.
3. The Mixing Strategy
Combine your weighed flour, salt, and sugar in a large bowl. Toss in your freezing cold butter cubes. Using a pastry blender (or your fingertips, working very quickly so you don’t melt the butter), cut the butter into the flour until the mixture resembles coarse meal, with some larger, pea-sized chunks of butter remaining.
Now, sprinkle your ice-cold vodka and water mixture over the flour. Use a rubber spatula to fold the liquid into the dry ingredients. Press the dough against the side of the bowl to help it clump together. Because we are using the vodka hack, you will notice that the dough comes together beautifully without leaving a massive pile of dry dust at the bottom of the bowl.
If you turn the dough out onto the counter and it feels a little messy, do not panic. You just need a bench scraper to easily gather the loose bits, fold them over the top, and gently press the dough into a cohesive disc. Wrap the disc tightly in plastic wrap.
4. The Mandatory Rest Period
Do not skip this step. Place the wrapped dough in the refrigerator for at least one hour (or up to two days). This resting period accomplishes two crucial things: it allows the flour to fully hydrate evenly, and it allows the butter to firm back up after being handled.
5. The Rolling Phase
When you are ready to roll, lightly flour your counter. Take your chilled dough disc and strike it a few times with your rolling pin to soften it slightly.
Now, let’s talk about your rolling pin. If you are using one of those heavy, ball-bearing rolling pins with handles on the sides, you are doing it wrong. Those handled pins apply uneven pressure, which is exactly French rolling pin—a simple, tapered wooden cylinder—is the superior tool. It allows you to feel the dough beneath your hands and apply precise, even pressure from the center outward.
Because you used vodka, the dough will roll out smoothly. It won’t fight you. It won’t tear. Rotate the dough a quarter-turn after every roll to ensure it isn’t sticking to the counter.
6. The Blind Bake
If you are making a pie with a liquid filling (like pumpkin or custard), you must “blind bake” the crust first to ensure the bottom doesn’t get soggy. Line your chilled pie crust with parchment paper and fill it to the brim with ceramic pie weights (or dried beans). This physical weight prevents the crust from puffing up and shrinking down the sides of the pan in the hot oven. Bake it until the edges are golden, remove the weights, and bake for a few more minutes until the bottom is dry and crisp.
The “No-Go” Rule on Toxic and Terrible Gear
I cannot write a masterclass on pie crust without addressing the absolute garbage equipment that is currently sitting in your kitchen cabinets. You can use all the cold vodka in the world, but if you put your beautiful, scientifically perfected dough into a terrible pie pan, you are going to ruin your dessert.
I have zero patience for cheap, toxic kitchenware. If you are currently baking your pies in a flimsy, dark-coated, non-stick pie tin that you bought at a grocery store for four dollars, throw it in the trash immediately.
First of all, non-stick coatings are notoriously fragile. The moment you take a metal pie server or a knife to slice your pie, you are going to scratch that coating. Once it scratches, it begins to peel and flake off directly into your food. I don’t care how hungry your dinner guests are; nobody wants a side of mystery synthetic chemicals with their cherry pie.
Secondly, dark, thin metal pans conduct heat far too aggressively and unevenly. Your crust will burn on the edges before the bottom has a chance to crisp up. Furthermore, cheap, thin metals warp under high heat. Just like the reason your flimsy baking sheets keep warping and popping in the oven, a cheap pie tin will flex, causing your crust to crack and your filling to spill over the sides.
What about glass? Glass is incredibly popular for pies because you can see if the bottom crust is browned. However, you must be extremely careful. Cheap, non-tempered soda-lime glass cannot handle sudden temperature changes. If you take a freezing cold pie crust and put it directly into a roaring hot oven, you run the very real risk that your glass bakeware shatters into a thousand pieces, completely destroying your oven and your weekend. If you use glass, ensure it is high-quality, thermal-shock-resistant borosilicate glass.
My personal recommendation? Invest in a heavy-gauge, uncoated aluminum pie pan, or a high-quality, thick-walled ceramic pie dish. Ceramic heats up slowly and evenly, holding onto that ambient heat to gently bake the bottom crust to a perfect, golden crisp. It is a durable, non-toxic heirloom piece that will last a lifetime. Buying cheap, disposable kitchenware is a false economy. It is the exact same reason why your cheap wooden spoons keep cracking after a month of use. Buy the good stuff once, and never think about it again.
And finally, you cannot trust the digital display on your oven. Home ovens are notorious liars. When your oven beeps to tell you it has reached 400 degrees, it is almost certainly lying to you; it might be 350, or it might be 450. Baking is a game of precise thermodynamics. If your oven is running cold, your butter will melt before it creates steam, resulting in a dense, greasy crust. You absolutely must hang a simple oven thermometer from the center rack. It costs five dollars and it will save every single meal you ever bake.
The Final Slice
Baking should not be an exercise in anxiety. You do not need to fear the dough. The culinary world is full of pretentious gatekeepers who want you to believe that making a perfect pastry requires innate talent or years of grueling practice. It doesn’t. It requires an understanding of your ingredients, a refusal to use toxic, flimsy equipment, and a willingness to embrace a clever scientific shortcut.
By swapping out a splash of water for a splash of cold vodka, you are taking control of the chemistry in your mixing bowl. You are disarming the gluten monster before it even has a chance to form. You are giving yourself the grace, the time, and the physical moisture needed to easily roll out a beautiful, crack-free crust that bakes up impossibly tender and flaky.
So this weekend, skip the frozen aisle. Grab your flour, grab your butter, and raid your liquor cabinet. You are about to bake the best pie of your life, and you are going to do it without breaking a sweat.
Cheers to better baking. Now, if you’ll excuse me, I have a leftover splash of vodka that needs my attention.






