
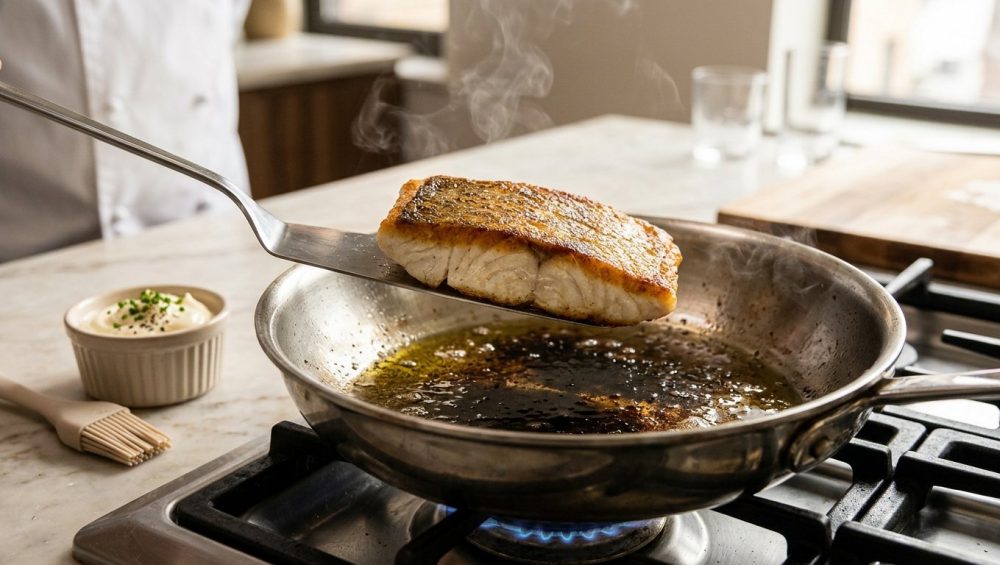
The Heartbreak of the Shredded Fillet
Listen, I know exactly why you are here. We have all lived through the universal culinary trauma of the ruined seafood dinner. You go to the market, you spend an embarrassing amount of money on a beautiful, wild-caught Alaskan halibut or a pristine fillet of sea bass, and you bring it home with the best of intentions. You envision a flawless, golden-brown crust, the kind you pay forty dollars for at a white-tablecloth restaurant. You carefully place the fish into your skillet, wait a few minutes, and confidently slide your spatula underneath to execute the flip.
And then, disaster strikes.
The fish refuses to yield. It is bonded to the metal as if secured by industrial superglue. Panic sets in. You push harder. The delicate flesh tears, the beautiful crust remains cemented to the pan, and you are left staring at a mangled, steaming pile of shredded protein that looks more like expensive cat food than a romantic weekend dinner. It is incredibly frustrating, and it is one of the most common rookie kitchen mistakes that ultimately drives well-intentioned home cooks to give up and order takeout.
But here is the absolute truth, delivered with zero pretentious chef-speak: you do not need a culinary degree to sear a piece of fish perfectly. You do not need commercial kitchen equipment, and you certainly do not need culinary tweezers. If your fish fillets always fall apart, you are not a bad cook; you are simply losing a battle against physics. Fish proteins are incredibly delicate, and when they meet hot metal under the wrong conditions, they undergo a rapid chemical reaction that causes them to cold-weld to the surface.
For years, the standard advice has been to just “use more oil” or “buy a better non-stick pan.” Both of those suggestions are flawed. Swimming your expensive seafood in a pool of neutral oil often leads to greasy, unevenly cooked results, and relying on cheap, disposable non-stick pans introduces a whole host of toxic chemicals into your home. We need a better way. We need a method that guarantees a flawless release on high-quality, safe cookware, prioritizing efficiency for our busy weeknights while delivering absolute perfection for our elaborate weekend dinners.
Enter the secret weapon hiding in the door of your refrigerator: mayonnaise. Yes, you read that correctly. The exact same humble condiment you spread on a Tuesday afternoon turkey club is the scientifically validated, foolproof key to achieving a restaurant-quality sear. Stick with me, because we are about to dive deep into the thermal dynamics of cooking, banish toxic gear from our kitchens, and master the magic of the mayonnaise sear.
The Toxic Cookware Epidemic (And Why We Refuse to Play That Game)
Before we talk about the chemistry of mayonnaise, we need to have a brutally honest conversation about the surface you are cooking on. As a home cook who values both my health and my wallet, I have a strict “no-go” rule when it comes to cheap, toxic kitchenware. If you are currently trying to solve your sticky fish problem by purchasing a new Teflon pan every twelve months when the coating inevitably starts peeling into your food, I am officially staging an intervention.
We are currently living through a massive shift in how we understand cookware safety. For decades, manufacturers relied heavily on PFAS (per- and polyfluoroalkyl substances) to create slick, non-stick coatings. These are synthetic compounds that resist heat, water, and grease, making them seemingly perfect for frying eggs and searing delicate fish. However, these are notoriously known as “forever chemicals” because they simply do not break down in the environment or in the human body. There are over 14,000 identified compounds in this chemical family, and widespread exposure has been linked to severe health issues, including hormone disruption, reproductive harm, and cancer. In fact, the International Agency for Research on Cancer recently classified PFOA—a chemical historically used to manufacture these coatings—as a Group 1 carcinogen, meaning it is definitively carcinogenic to humans.
The regulatory landscape is finally catching up to the science. Throughout 2025 and 2026, a sweeping wave of state-level bans and restrictions on intentionally added PFAS in cookware has gone into effect across the United States. Retailers are actively pulling these toxic pans from their shelves, forcing the industry to pivot. But unfortunately, many brands are simply replacing legacy chemicals with alternative, under-tested compounds, or pushing “ceramic-coated” pans that lose their non-stick properties after just a year of moderate use, creating an endless, expensive replacement cycle.
This is precisely why banishing toxic kitchen gear is the first step to becoming a better cook. You do not need a chemical crutch to cook delicate proteins. Professionals rely on high-quality stainless steel, enameled cast iron, and traditional carbon steel pans because they are virtually indestructible, they provide superior thermal conductivity, and they last a lifetime. Yes, cooking fish on bare metal requires a slight adjustment in technique, but once you understand the science of the sear, you will never look at a cheap non-stick skillet again.
The Physics of the Stick: Why Your Pan Hates You
To defeat the enemy, you must first understand the enemy. Why does fish stick to metal so aggressively compared to a steak or a pork chop? The answer lies in the unique biological structure of seafood and the uncompromising laws of thermal dynamics.
Fish flesh is fundamentally different from terrestrial meat. It is supported by water rather than gravity, meaning it lacks the dense, tough connective tissues found in beef or pork. Instead, fish is primarily composed of very short muscle fibers and delicate proteins, most notably myosin and albumin. Furthermore, raw fish has an incredibly high moisture content, often containing up to 82% water by weight.
When you place a wet, delicate piece of fish into a hot metal pan, a violent interfacial reaction occurs. If the pan is not hot enough, the moisture on the surface of the fish does not instantly vaporize. Instead, it forms a thin, viscous, glue-like film. Simultaneously, the myosin proteins in the fish denature rapidly—often at temperatures as low as 122°F—and become highly adhesive. Because the metal surface of your pan is not perfectly smooth (even polished stainless steel is full of microscopic pores and irregularities), the denatured proteins flow into these microscopic valleys and solidify.
This creates a mechanical interlocking at the molecular level. The fish is literally cold-welding itself to the iron or aluminum oxide in your cookware. You aren’t just dealing with a bit of friction; you are fighting a covalent bond.
The only way to prevent this protein adhesion is to achieve the Leidenfrost effect. This is a physical phenomenon where the surface moisture of the food flashes into steam so rapidly that it creates a microscopic vapor cushion, physically lifting the protein a fraction of a millimeter above the hot metal. This vapor barrier prevents direct contact while allowing the intense radiant heat to dehydrate the surface and begin the browning process. However, achieving and maintaining this vapor cushion requires precise temperature control and a protective barrier of fat. This is where traditional cooking oil often fails us, and where our secret weapon steps into the spotlight.
Enter the Emulsion: The Culinary Magic of Mayonnaise
If you want a perfectly seared fish, you need to rethink your fat source. Pouring a glug of canola or olive oil into a skillet is the standard approach, but plain oil has a major functional flaw when it comes to wet proteins: oil and water famously hate each other. When raw, moisture-rich fish hits a puddle of hot oil, the oil actively repels the water, beading up and sliding away from the very surface it is supposed to protect. This leaves the delicate fish proteins exposed directly to the harsh metal, leading inevitably to sticking and tearing.
Mayonnaise, on the other hand, is a marvel of culinary engineering. At its core, mayonnaise is an emulsion—a stable mixture of two liquids that normally refuse to combine. It is primarily composed of oil (usually 70% to 80% fat) suspended in water and acid (like vinegar or lemon juice), held together tightly by the miraculous emulsifying power of egg yolks.
The egg yolk is the hero of this story. It contains lecithin, a phospholipid that acts as a chemical peace treaty between fat and water. Because mayonnaise is already an emulsion, it does not run away from the moisture on the surface of the fish. Instead, it eagerly binds to it. When you brush a thin layer of mayonnaise onto a fillet, it clings to the meat like a second skin, creating an even, protective, microscopic layer of fat that stays exactly where you put it.
When this mayo-coated fish hits the hot pan, magic happens. The emulsion breaks down under the intense heat. The water and vinegar rapidly evaporate, leaving behind a perfectly distributed, ultra-thin layer of hot oil and egg protein right at the interface between the fish and the metal. This lowers the surface tension, promotes uniform heat conduction across the irregular muscle fibers, and completely prevents the fish’s myosin proteins from welding to the pan.
The Maillard Reaction on Fast-Forward
Preventing the fish from sticking is only half the battle; the other half is achieving that gorgeous, golden-brown, crispy crust. To understand why mayonnaise excels here, we have to talk about the most important chemical process in the kitchen: the Maillard reaction.
Discovered in 1912 by French chemist Louis-Camille Maillard, this reaction is the complex series of chemical interactions between amino acids (proteins) and reducing sugars when subjected to heat. It is the exact same reaction that turns pale dough into a crusty loaf of bread, gives roasted coffee its deep flavor, and makes a seared steak taste savory and complex. The Maillard reaction typically requires a dry environment and temperatures exceeding 285°F to kick into high gear.
Here is the problem with seafood: fish cooks incredibly fast. By the time the surface of a standard fish fillet gets hot enough and dry enough to undergo a proper Maillard reaction in plain oil, the delicate flesh inside is often tragically overcooked, resulting in a chalky, dry dinner. It is a race against the clock, and just like when your chicken breasts are dry, overcooked fish is a textural nightmare.
Mayonnaise acts as a culinary cheat code, putting the Maillard reaction on fast-forward. Plain cooking oil can only brown food thermally—it transfers heat to the meat until the meat’s own proteins and sugars begin to react. But mayonnaise brings its own party to the pan. Because mayonnaise contains egg yolks, it is packed with its own amino acids and natural sugars.
When the mayo hits the hot skillet, it undergoes its own independent Maillard reaction, browning chemically in addition to heating the fish thermally. The egg proteins react rapidly, creating a complex, deeply flavorful, and incredibly crispy crust in a fraction of the time it would take for the fish to brown on its own. Furthermore, egg yolks contain xanthophyll, a natural carotenoid pigment that imparts a vibrant, rich golden-yellow hue to anything it cooks with, guaranteeing a visually stunning presentation. In laboratory trials, steaks seared with a mayonnaise coating achieved a 22% thicker crust and retained 31% more internal moisture than those seared in plain oil, simply because the rapid browning allowed the meat to be pulled from the heat much sooner.
The 70/30 Rule: Setting the Stage for Success
Now that we understand the deep science of the emulsion and the browning process, we need to talk about execution. Even with the magic of mayonnaise, you must respect the foundational rules of thermal dynamics. In the realm of food science, preventing protein adhesion is governed by what we call the 70/30 rule: 70% of your success depends on the surface dryness of the fillet, and 30% relies on precise pan preheating.
First, let’s address the moisture. As we established, fish is essentially a sponge filled with water. If you take a fillet straight from its plastic packaging, slap some mayonnaise on it, and throw it into a skillet, the excess surface water will rapidly convert to steam, blowing the mayonnaise barrier right off the flesh. You will end up steaming the fish rather than searing it, and you will inevitably find that it sticks to your stainless steel pan regardless of the condiment used.
Gravimetric analysis from food science labs has proven that fish fillets with a surface moisture content higher than 12% have a 310% higher incidence of sticking to cookware. You must aggressively dry your seafood. Use heavy-duty paper towels and firmly press them into both sides of the fillet. Do not just dab lightly; gently squeeze the moisture out of the surface layers. If you have the time, leaving the fish uncovered on a wire rack in the refrigerator for an hour will allow the cold, circulating air to completely desiccate the exterior, setting you up for the crispiest possible results.
Second, we must respect the thermal mass of the pan. You cannot put fish into a cold or lukewarm skillet. If the pan temperature drops below 248°F (120°C) when the cold fish is introduced, the Leidenfrost effect fails, the proteins weld to the metal, and the crust is ruined. You need to preheat your stainless steel, cast iron, or carbon steel pan dry—without any oil—until the surface temperature reaches between 325°F and 375°F. If you do not have an infrared thermometer, do not panic. You can rely on the water drop test: flick a tiny droplet of sink water into the dry pan. If it violently fizzles and evaporates instantly, the pan is too cold. If it forms a perfect, cohesive bead of mercury-like water that glides effortlessly across the surface without evaporating, you have achieved the exact temperature needed to prevent sticking.
The Masterclass: Executing the Mayo Sear Flawlessly
We have covered the theory. Now it is time to step up to the stove and execute the technique. Follow these steps meticulously, and you will never ruin a piece of expensive seafood again.
Step 1: The Gravimetric Dry-Down
Remove your fish from the refrigerator about 15 minutes before cooking to take the aggressive chill off the meat. Using high-quality paper towels, firmly press every square inch of the fillet until the paper towel comes away completely dry. Season the fish generously with kosher salt and freshly ground black pepper.
Step 2: The Emulsion Schmear
Using a butter knife or a silicone brush, apply a very thin, even layer of full-fat, real mayonnaise to the presentation side of the fish (the side you want facing up on the plate). You are not frosting a birthday cake here; you want a sheer, translucent glaze. Roughly one to two teaspoons per standard fillet is plenty. Do not use “light,” low-fat, or fat-free mayonnaise. Those diet variations replace the essential oils and egg yolks with water and modified cornstarch, which will completely ruin the Maillard reaction and burn into a sticky, blackened mess in your skillet.
Step 3: The Dry Preheat
Place your heavy-bottomed skillet (stainless steel or carbon steel preferred) over medium-high heat. Let it preheat completely dry for 2 to 3 minutes. Perform the water drop test to ensure the metal has reached the optimal Leidenfrost temperature zone. Because the mayonnaise already contains 70% to 80% fat, you do not need to add a massive pool of extra cooking oil to the pan. However, wiping a microscopic sheen of neutral oil (like avocado or grapeseed) into the pan with a paper towel right before dropping the fish can provide an extra layer of thermal insurance.
Step 4: The Drop and The Patience
Gently lay the fish into the skillet, mayonnaise-side down, laying it away from your body so that any microscopic oil splatters do not hit your hands. The moment the fish hits the pan, you will hear an aggressive, satisfying sizzle.
Now, step away. Do not touch the pan. Do not nudge the fish. Do not attempt to peek underneath it. The most critical error home cooks make is fiddling with the protein before the Maillard crust has fully formed. You must give the egg proteins and sugars in the mayonnaise exactly 90 seconds of completely undisturbed contact with the hot metal to polymerize, brown, and naturally release themselves from the pan’s microscopic pores.
Step 5: The Release and Flip
After 90 seconds to 2 minutes, the edges of the fish will turn opaque, and you will see a golden-brown halo forming where the fish meets the metal. Take a thin, flexible slotted spatula (often called a fish turner) and gently slide it under the fillet. If you followed the steps, it will glide underneath with absolutely zero resistance. Flip the fish, and marvel at the breathtaking, shatteringly crisp, mahogany crust. Cook the remaining side for just another 60 seconds until the center is barely opaque, and remove it immediately from the heat.
The “But I Hate Mayo!” Support Group
Whenever I teach this masterclass, I inevitably face a chorus of skeptics who violently object to the technique because they claim to despise the taste of mayonnaise. Let me address this with absolute scientific clarity: your fish will not taste like a potato salad.
When mayonnaise is subjected to 400°F heat in a skillet, its chemical structure is fundamentally deconstructed. The sharp, tangy vinegar volatilizes and evaporates into the air almost instantly. The neutral soybean or canola oil simply acts as a frying medium, rendering out to crisp the flesh. The egg proteins undergo the Maillard reaction, transforming into savory, roasted flavor compounds.
By the time the fish hits your plate, the mayonnaise has completely vanished as a condiment. It leaves behind zero creamy texture, zero eggy odor, and zero tangy flavor. The only evidence that it was ever there is the remarkably rich, savory, perfectly intact golden crust that is currently making your mouth water. Furthermore, there is zero food safety risk here; commercial mayonnaise is highly pasteurized, heavily acidic (with a pH of 3.6 to 4.0), and perfectly safe to use as a room-temperature coating.
Weekend Perfectionism: Flavor-Infused Searing
During the chaotic weekday rush, a simple smear of plain mayonnaise and a dash of salt is a lifesaver. But on the weekend, when you have the time to pour a glass of wine and truly enjoy the culinary process, you can elevate this technique into an art form.
Because mayonnaise is fundamentally an emulsion of fat, it is an exceptional carrier for fat-soluble flavor compounds. By mixing aromatics and spices directly into the mayonnaise before you coat the fish, you essentially create a protective flavor-paste that blooms beautifully in the hot pan without burning.
If you are searing a robust fish like salmon or swordfish, try swirling a spoonful of smoky chipotle adobo sauce or fiery North African harissa into your mayonnaise. The thick condiment protects the delicate chili powders from scorching while infusing the meat with deep, smoky heat. For delicate white fish like cod or sole, fold in fresh lemon zest, finely minced garlic, and chopped dill. The mayonnaise acts as a thermal blanket, gently cooking the garlic to a sweet, mellow finish rather than allowing it to turn bitter and acrid against the bare metal. You can even mix in umami-rich ingredients like miso paste or mushroom powder to create a savory crust that mimics the depth of a dry-aged steak.
Troubleshooting: When Things Still Go Wrong
Even with the best techniques, the kitchen can occasionally humble us. If you try the mayonnaise sear and still encounter issues, do not throw your pan out the window. Let’s troubleshoot the variables.
If the fish still stuck to the pan, you almost certainly violated the 70/30 rule. Either you did not dry the fish thoroughly enough, causing a steam blowout that ruined the emulsion, or you dropped the fish into a pan that had not fully reached the 325°F Leidenfrost threshold. Remember, patience during the preheat phase is non-negotiable.
If your crust looks pale and greasy rather than deeply browned, you likely used way too much mayonnaise. You only need a microscopic layer to lower the surface tension and provide the necessary egg proteins. Slathering it on like a thick marinade will overwhelm the pan’s thermal mass, dropping the temperature and resulting in a soggy, oily mess.
Finally, if your salmon oozes white stuff out of the sides while cooking, it means the internal temperature of the fish rose too rapidly, violently squeezing out the liquid albumin protein. While the mayo sear protects the surface, you still need to monitor your heat. Once the fish is flipped, lower the burner temperature to gently coast the protein to its final internal temperature.
Cooking is not magic; it is simply applied chemistry and physics. By ditching the toxic non-stick pans, respecting the thermal dynamics of your cookware, and harnessing the brilliant emulsifying power of mayonnaise, you can permanently eliminate the stress of searing seafood. You have the tools, you have the science, and you have the technique. Now get into the kitchen, grab that jar of mayo, and show that expensive piece of halibut exactly who is boss.






