
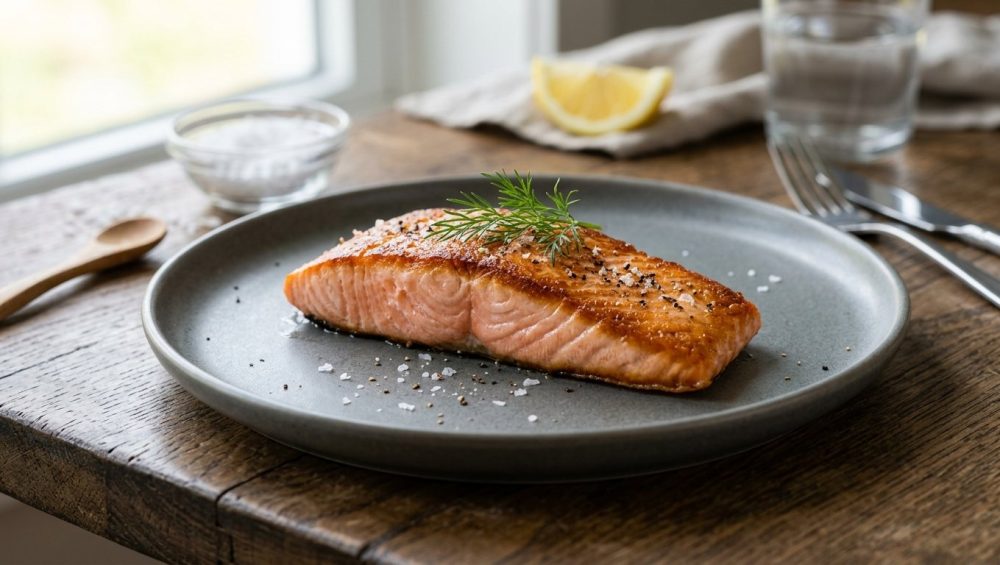
Picture this: It is a beautiful Tuesday evening. You just dropped a small fortune at the seafood counter for a gorgeous, ruby-red slab of premium salmon. You have envisioned a flawless, restaurant-quality meal. You gingerly place the fish into your skillet, feeling like an absolute culinary goddess. You are doing everything right. And then, ten minutes later, you look down to find your beautiful, expensive fillet covered in a terrifying, oozing white slime. It looks less like a gourmet dinner and more like a bizarre science experiment gone wrong.
Listen, I have been there. I have set off the smoke detector more times than I care to admit, and I have served my fair share of ugly, white-speckled fish to polite guests who chewed with forced smiles. But you do not need a culinary degree to make mind-blowing, visually stunning food in a standard home kitchen. If you are tired of burning dinner every night and feeling defeated by your ingredients, you are in the exact right place.
Today, we are stripping away the pretentious chef-speak and diving deep into the science of why your salmon oozes that unappetizing white stuff. More importantly, I am going to teach you a foolproof, fifteen-minute trick that will banish it forever. We are going to master the magic of the quick brine, upgrade your weeknight seafood game, and ensure that your salmon always looks as spectacular as it tastes.
The Unappetizing Elephant in the Room: What Exactly is That White Stuff?
Let us start by identifying the enemy. That white, gooey substance that bubbles up from the flesh of your cooking salmon is a protein called albumin.
Meet Albumin: The Misunderstood Protein
Albumin is not fat. It is not a sign that your fish has gone bad, and it is certainly not a chemical injected into the fish by the supermarket. Albumin is simply a liquid protein that naturally exists in liquid form within the raw muscle fibers of all fish.
When the fish is raw, the albumin is completely invisible. It hangs out in the cellular structure, minding its own business. However, when you apply heat to the fish, a dramatic biological reaction occurs. The muscle fibers begin to contract, and as they tighten, they forcefully squeeze the liquid albumin out of the cells and push it to the surface of the flesh.
Once this liquid protein hits the surface of the fish and comes into direct contact with the hot air of your oven or the searing heat of your skillet, it coagulates. It transforms from a clear liquid into a semi-solid, opaque white substance. Think about what happens when you crack a raw egg into a hot pan. The clear, liquid egg white (which is also predominantly made of albumin proteins) rapidly turns into a solid white mass. The exact same thermal reaction is happening on the surface of your beautiful salmon.
Is It Safe to Eat? (Spoiler: Yes, But It Is Gross)
Let me put your mind at ease immediately: albumin is one hundred percent safe to eat. It is completely harmless, highly nutritious, and packed with pure protein. If you were to scrape it off and eat it by itself, you would find that it is virtually tasteless.
So, if it is safe, nutritious, and tasteless, why do we care so much? Because we eat with our eyes first. According to recent culinary surveys, the appearance of albumin is the number one aesthetic complaint home cooks have when preparing salmon. It looks messy, it ruins the beautiful pink-to-orange color contrast of the fish, and it makes a premium ingredient look distinctly amateurish. When you are rushing to throw together simple weeknight dinners, you still want the food to look appetizing. You deserve a dinner that looks like it came from a high-end bistro, not a cafeteria line.
The Science of the Squeeze: Why Does Albumin Appear?
To defeat our enemy, we must first understand how it operates. Why does albumin aggressively ruin some salmon fillets while leaving others perfectly pristine? The answer lies in the unforgiving laws of thermodynamics and protein contraction.
The Muscle Contraction Phenomenon
Imagine the muscle fibers of your salmon as a collection of tiny, water-logged sponges. When these sponges are cold and raw, they are relaxed and expansive, happily holding onto their internal moisture (which includes water, fats, and our liquid albumin).
When you apply heat to these sponges, the primary muscle protein—myosin—begins to denature and unwind. As the temperature climbs, these unwound proteins start to cross-link and bond tightly with one another. This causes the entire muscle fiber network to shrink and contract violently.
If the heat is applied too quickly or too intensely, the “sponges” are squeezed so rapidly and with such force that the liquid albumin has nowhere to go but out. It is forcefully evicted from the interior of the fish, pushed to the surface, and instantly cooked into that dreaded white sludge.
Temperature Shock: The Ultimate Culprit
The biggest mistake rookie cooks make is shocking their fish with aggressive, unmitigated heat. If you take a freezing cold piece of salmon straight from the refrigerator and throw it onto a smoking hot skillet, you are asking for an albumin disaster.
The extreme temperature differential causes the exterior muscle fibers to seize up and contract instantly, while the interior remains cold. This aggressive tightening acts like a vice grip, squeezing the albumin out of the flesh before the center of the fish has even begun to warm up. Overcooking is the secondary culprit. The longer you cook the fish, and the higher the internal temperature climbs, the tighter those muscle fibers become. By the time your salmon reaches the FDA’s highly conservative recommended temperature, those fibers have squeezed out almost every drop of moisture and albumin they contained.
Farmed vs. Wild-Caught: Does It Make a Difference?
You might have noticed that some pieces of salmon seem more prone to oozing than others. This often comes down to the origin of the fish.
Farmed salmon (typically Atlantic salmon) are raised in controlled aquaculture environments and fed a specialized, nutrient-dense diet. As a result, farmed salmon generally have a much higher fat content. A standard 113-gram portion of farmed salmon contains roughly 15 grams of fat, while the exact same portion of wild-caught salmon contains only about 5 grams of fat.
This massive difference in intramuscular fat plays a crucial role in the cooking process. Fat acts as a natural insulator and a thermal buffer. When you cook a fatty piece of farmed salmon, the fat slows down the transfer of heat into the muscle fibers. The fibers warm up more gently, contract less violently, and subsequently squeeze out less albumin.
Wild-caught salmon (such as Sockeye, Coho, or King) are the elite athletes of the ocean. They swim for thousands of miles, resulting in incredibly lean, muscular flesh. Because they lack that thick insulating layer of fat, heat penetrates their muscle fibers incredibly fast. If you cook a lean piece of wild Sockeye salmon the exact same way you cook a fatty piece of farmed Atlantic salmon, the wild salmon will overcook in a fraction of the time, contract violently, and push out a massive amount of white albumin.
Understanding this difference is crucial. You might be chopping garnishes on your bamboo cutting boards while the fish cooks, completely unaware that your lean, expensive wild salmon is currently seizing up and overcooking in the pan.
The Magic Solution: The 15-Minute Quick Brine
Now that we understand the biology and physics of the problem, we can introduce the ultimate, foolproof solution. It requires no special equipment, costs practically nothing, and takes only fifteen minutes of passive time. It is the magic of the quick brine.
What is a Quick Brine?
A brine is simply a solution of salt and water. While traditional brining is often used for massive Thanksgiving turkeys or thick pork chops and requires hours (or days) of soaking, a “quick brine” is specifically tailored for delicate proteins like seafood. Because fish is naturally tender and lacks the tough connective tissues found in land animals, it only takes a few minutes for a brine to work its magic.
The Scientific Sorcery Behind the Salt
Why does soaking a piece of fish in salty water stop it from oozing white goo? It all comes down to chemistry.
When you submerge a salmon fillet in a brine, the salt ions begin to penetrate the outermost layers of the fish’s flesh. As the salt enters the cells, it interacts with the muscle fibers. Specifically, the salt partially dissolves the myosin proteins near the surface of the meat.
When these partially dissolved muscle fibers are exposed to heat in your skillet or oven, they behave completely differently than untreated fibers. Instead of aggressively shrinking, tightening, and contracting like a snapped rubber band, the dissolved fibers simply congeal and set in place.
Because the surface fibers do not contract violently, they do not squeeze the internal cells. The albumin remains trapped safely inside the flesh where it belongs, keeping the fish incredibly moist, tender, and visually flawless. As a phenomenal bonus, the brine deeply seasons the fish from the outside in, resulting in a perfectly flavored fillet that tastes like it was prepared in a Michelin-starred kitchen.
Step-by-Step: How to Execute the Perfect Wet Brine
I am a firm believer that time is money, and weeknight cooking requires ruthless efficiency. This wet brine method takes less than a minute of active prep. You can easily let the fish soak while you chop your vegetables or preheat your oven.
Step 1: The Golden Ratio
The universally accepted ratio for a perfect seafood quick brine is one tablespoon of kosher salt per one cup of cold water. (Note: If you are using fine table salt, cut the amount in half, as table salt is much denser than kosher salt and will make your fish aggressively salty).
Step 2: The Setup
Find a shallow baking dish, a glass tupperware container, or even a large zip-top bag. Pour in enough cold water to fully submerge your salmon fillets. Do the math on your water volume and whisk in the appropriate amount of kosher salt until it is completely dissolved.
Step 3: The Soak
Gently place your salmon fillets into the saltwater bath. Make sure the water is cold; using warm water will put your fish in the culinary danger zone for bacterial growth. Set a timer for exactly 15 minutes. Do not leave the fish in the brine for an hour while you watch television, or the delicate flesh will begin to cure, turning your dinner into accidental lox.
Step 4: The Rinse and Dry
When the timer goes off, carefully remove the salmon from the brine. When it is time to handle the delicate fillet, a slotted fish turner is your absolute best friend to prevent tearing the flesh. Briefly rinse the fillets under cold running water to remove the excess surface salt.
This next part is absolutely critical: you must dry the fish thoroughly. Take heavy-duty paper towels and pat the salmon completely dry on all sides. If you put wet fish into a hot pan, the surface moisture will instantly turn to steam. Steam prevents the skin from crisping, prevents the Maillard reaction (browning) from occurring, and leads to a soggy, sad piece of fish. Dry it like your life depends on it.
Dry Brining: The Lazy Cook’s Alternative
If you do not want to deal with a bowl of sloshing saltwater, you can utilize a dry brine. A dry brine achieves the exact same scientific result—dissolving the surface proteins to prevent contraction—using only salt and time.
To dry brine, generously sprinkle kosher salt over all sides of your salmon fillets. Place them on a wire rack set over a baking sheet and leave them uncovered in the refrigerator for 15 to 30 minutes. The salt will initially draw moisture out of the fish, creating a highly concentrated salty liquid on the surface. Given enough time, the fish will reabsorb this salty liquid, pulling the seasoning deep into the muscle fibers and dissolving the proteins.
Before cooking, you must rinse the heavy layer of salt off the fish and pat it aggressively dry. Whether you choose a wet brine or a dry brine, the result will be a stunning, albumin-free masterpiece.
Beyond the Brine: Foolproof Techniques for Restaurant-Quality Salmon
While the 15-minute quick brine is the ultimate weapon against albumin, how you actually cook the fish plays a massive role in the final outcome. You cannot brine a piece of salmon, blast it with a blowtorch for an hour, and expect it to look pretty. We need to pair our brining science with smart, gentle cooking techniques.
The Low and Slow Method
If you are baking your salmon, step away from the 400°F oven dial. High ambient heat causes rapid muscle contraction. Instead, embrace the gentle art of low and slow roasting.
Preheat your oven to 275°F (135°C). Place your brined, dried salmon on a baking sheet lined with parchment paper. Because the heat is so gentle, the muscle fibers warm up gradually and evenly, completely eliminating the shock factor that forces albumin to the surface. Depending on the thickness of your fillets, it will take about 20 to 30 minutes to cook through. The resulting fish will be unbelievably buttery, tender, and boasting an even consistency from edge to edge.
The Cold Pan Trick
If you prefer a crispy, pan-seared skin, you might think you need a smoking hot skillet. Think again. You might have heard of the cold pan trick for rendering fat, and it works absolute wonders for salmon skin.
Place your brined, dried salmon skin-side down in a completely cold skillet. Turn the heat to medium-low. As the pan slowly heats up, it gently renders the thick layer of fat located just beneath the salmon’s skin. By the time the pan is hot, the fat has melted out, and the skin fries in its own natural oils until it is as crispy as a potato chip. Because the heat was introduced gradually, the flesh never experiences temperature shock, and the albumin stays put.
The Mayonnaise Hack (Yes, Really)
I know it sounds crazy, but stay with me. If you struggle with fish sticking to your skillet, I even advocate for using a little mayo on the exterior of the fish instead of standard cooking oil.
Mayonnaise is essentially an emulsion of oil and egg yolks. When you brush a microscopic layer of mayonnaise onto your dried salmon fillet before searing, the oil provides a beautiful, even coating of fat, while the proteins in the egg yolk create a delicate, non-stick crust. It browns magnificently, releases from the pan effortlessly, and adds zero mayonnaise flavor to the final dish.
The “No-Go” Rule: Ditch the Toxic Gear
As a dedicated culinary blogger, I have a strict, uncompromising philosophy: I absolutely despise cheap, toxic kitchenware. If you are going to spend your hard-earned money on beautiful, wild-caught seafood, you cannot cook it in a scratched, peeling, ten-dollar pan you bought at a discount store five years ago. We need to talk about banishing toxic kitchen gear from your home once and for all.
Why Cheap Non-Stick Pans Are Sabotaging Your Fish
Those lightweight, mystery-metal non-stick pans are a menace to society and your dinner. The Teflon (PTFE) coatings degrade rapidly, especially when exposed to high heat. Once that coating starts to scratch and peel, it not only leaches forever chemicals into your food, but it also completely loses its non-stick properties.
Furthermore, do not even get me started on the horrors of aerosol cooking sprays that polymerize into a sticky, un-washable nightmare on the surface of these pans. Cheap non-stick skillets have terrible thermal mass; they heat unevenly, create aggressive hot spots that shock your salmon (causing albumin explosions), and drop in temperature the second you add the fish. They are culinary garbage. Throw them away.
The Holy Trinity of Seafood Cookware
If you want to cook fish like a professional, you need equipment that respects the ingredient.
First, invest in a heavy-bottomed carbon steel or multi-clad stainless steel skillet. These materials offer incredible thermal conductivity and retention. If you are using a bare stainless steel pan, temperature control is everything. You simply utilize the Leidenfrost effect—heating the pan until a drop of water beads up and dances across the surface like mercury—before adding your oil and your fish. The moisture in the fish will instantly create a barrier of steam, preventing it from sticking to the metal.
Second, buy a flexible, slotted fish spatula. The thin, angled edge slides effortlessly under delicate fillets without tearing the crispy skin, while the slots allow excess oil to drain away.
Third, and perhaps most importantly, you must own a high-quality, instant-read digital meat thermometer. You cannot judge the doneness of a fish by poking it with your finger or staring at it aggressively.
The Temperature Debate: FDA Guidelines vs. Culinary Reality
This brings us to the most controversial topic in seafood preparation: internal temperature. Why does your salmon always turn out dry, chalky, and covered in white albumin? Because you are probably following the rules.
The 145°F Fallacy
If you look up food safety guidelines, the FDA explicitly recommends cooking all seafood to a safe minimum internal temperature of 145°F (63°C). From a purely microbiological standpoint, this guarantees the destruction of pathogens.
From a culinary standpoint, it guarantees absolute ruin.
Fish possesses almost no tough connective tissue (collagen) compared to beef or pork. It does not need to be cooked to high temperatures to break down and become tender. In fact, as salmon pushes past 130°F, the muscle fibers tighten so aggressively that they wring out all remaining moisture, leaving you with a dry, fibrous, albumin-covered brick.
Most professional chefs and culinary scientists agree that for a perfectly moist, flaky, and tender medium doneness, salmon should be cooked to an internal temperature of 120°F to 125°F. If you do not own a high-quality meat thermometer, you are just guessing, and guessing leads to overcooked, ruined fish.
The Carryover Cooking Factor
When you pull your salmon out of the oven or off the stove, it does not magically stop cooking. The residual heat trapped in the outer layers of the flesh continues to travel inward, raising the core temperature of the fish by another 5 to 10 degrees as it rests on the cutting board. This phenomenon is known as carryover cooking.
If you leave your salmon in the pan until the center registers 145°F, it will carry over to 155°F while it rests. It will be completely destroyed.
To achieve perfection, pull your brined salmon off the heat when the thickest part of the fillet registers 120°F. Transfer it immediately to a room-temperature plate, tent it loosely with foil, and let it rest for five minutes. The carryover heat will gently bring the final temperature up to a safe, succulent 125°F-130°F. The muscle fibers will relax, the juices will redistribute, and the albumin will stay exactly where it belongs.
Frequently Asked Questions (Because I Know You Are Wondering)
Even with the science laid out, I know my weekend culinary hobbyists always have a few lingering concerns. Let us tackle the troubleshooting head-on.
Will Brining Make My Salmon Too Salty?
Absolutely not, provided you follow the golden rule of time. A 15-minute quick brine is not long enough for the salt to penetrate all the way to the core of a thick fillet. It only seasons the outer millimeter of the flesh, which is exactly where the albumin-squeezing muscle contraction happens. However, because the exterior is now perfectly seasoned, you should omit any additional salt from your recipe before cooking. Add your pepper, your garlic powder, or your herbs, but step away from the salt shaker.
Can I Brine Frozen Salmon?
You can, but you must thaw it safely first. Never attempt to brine a rock-solid, frozen fillet. The ice crystals prevent the salt ions from penetrating the cell walls, rendering the brine completely useless. Thaw your salmon overnight in the refrigerator, or submerged in a sealed bag in cold water, before proceeding with the 15-minute brine.
Can I Use This Trick on Other Fish?
Yes! The quick brine is a universal seafood hack. It works wonders on cod, halibut, trout, and even shrimp. It keeps lean white fish incredibly moist and prevents them from drying out in the oven. Just remember that thinner, more delicate fillets (like sole or flounder) might only need 10 minutes in the brine, while a monstrous, two-inch-thick piece of Chilean sea bass can handle the full 15 to 20 minutes.
What If I Still See a Tiny Bit of White Stuff?
Perfection is a noble pursuit, but we live in the real world. If you execute the brine perfectly, dry the fish, and monitor your temperatures, you will eliminate 95% of the albumin. However, fish are organic creatures, and occasionally, a particularly stubborn fillet might still push out a tiny white droplet or two.
If this happens, do not panic. Simply take the edge of a damp paper towel or a soft pastry brush and gently wipe the coagulated albumin off the surface of the fish before serving. You can also mask minor imperfections by brushing the cooked salmon with a beautiful glaze—like a reduction of soy sauce, mirin, and ginger—or topping it with a vibrant, fresh compound butter.
Your Weekend Culinary Project Awaits
Cooking seafood at home does not have to be an anxiety-inducing chore that ends in a smoke-filled kitchen and a plate of white, rubbery goo. By understanding the simple biology of muscle proteins, respecting the thermodynamics of your pan, and embracing the 15-minute magic of the quick brine, you have completely leveled up your culinary arsenal.
You now know how to outsmart the albumin. You know why your cheap non-stick pans belong in the trash, why the FDA temperature guidelines are ruining your dinner, and why a little salt water is the ultimate secret weapon.
So this weekend, march up to that seafood counter with confidence. Buy that gorgeous, wild-caught King salmon. Give it a quick soak, pat it ruthlessly dry, and cook it with the gentle respect it deserves. I promise you, the results will absolutely blow your mind—no culinary degree required.






