
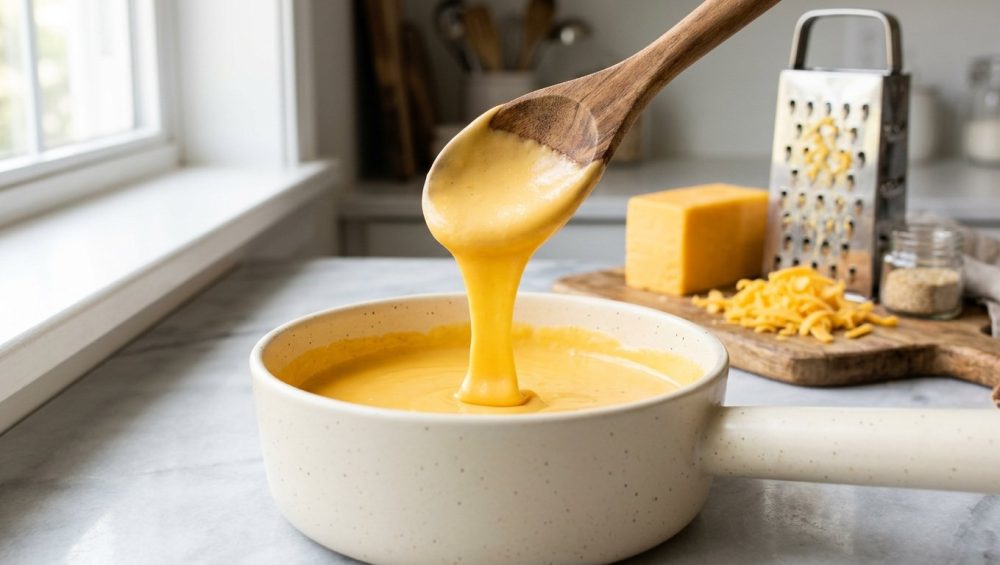
The heartbreak of a broken cheese sauce is a universal culinary rite of passage. We’ve all been there. You were craving a rich, velvety bowl of homemade macaroni and cheese, or perhaps a luscious queso dip for a Tuesday night Netflix binge. You stood over the stove, whisking with the optimism of a culinary school graduate. You tossed in your cheese, gave it a stir, and watched in sheer horror as your beautiful sauce violently rebelled. In the blink of an eye, the emulsion shattered. You were left staring into a saucepan containing a sickly pool of yellow grease floating on top of a gritty, sandy, clumped-up mass of dairy proteins.
It is a culinary tragedy. When your melted cheese turns oily, it feels like a personal failure. You start questioning your skills, your recipe, and your worth as a home cook. But put down the wooden spoon and take a deep breath. You are not a bad cook. You did not ruin your evening because of a lack of talent. You ruined it because you picked a fight with thermodynamics and food chemistry—and chemistry always wins.
I firmly believe that anyone can create restaurant-quality food in a standard home kitchen without a fancy culinary degree. You just need to understand the rules of the game. Melting cheese isn’t just about applying heat to a solid until it becomes a liquid; it is a delicate, high-stakes balancing act of fat, water, and protein. If you disrespect that balance, the cheese will punish you. But once you learn the science behind the melt, you will never serve a broken, greasy sauce again. So, pour yourself a glass of wine, pull up a stool, and let’s get into the nitty-gritty of why your cheese sauce is breaking and exactly how we are going to fix it.
The Chemistry of the Melt (Or: What is Cheese, Really?)
To understand why your sauce broke, you have to understand what cheese actually is. At its core, cheese is a masterful, fragile emulsion. It is a harmonious matrix of water, dairy fat, and a network of proteins called casein.
In its solid state, this casein protein network is tightly bound together by calcium phosphate, acting like a microscopic net that traps the fat and water molecules in a stable structure. When you apply heat, you are essentially vibrating that net. As the temperature rises, the bonds holding the casein proteins together begin to relax and break apart. The protein structure sags, the trapped fat liquefies, and the cheese stretches into that glorious, lava-like puddle we all know and love.
But here is the catch: that emulsion is incredibly fragile. Fat and water naturally hate each other. They want to separate. The only thing keeping them together is that delicate protein net. If you push the temperature too high, or if there isn’t enough water to maintain the emulsion, the protein net violently tightens and collapses. The proteins curdle into tight, rubbery little clumps (that’s the grit you feel), and they squeeze out all the liquefied dairy fat (that’s the oil slick on top).
This is what chefs mean when they say a sauce has “broken.” The emulsion has failed. And while it is a scientific inevitability if you mishandle the ingredients, it is also entirely preventable.
Culprit #1: The Pre-Shredded Trap
Let’s have a brutally honest conversation about the contents of your refrigerator. I understand that time is money. When you are trying to get dinner on the table on a frantic weeknight, the convenience of a plastic bag of pre-shredded cheddar is incredibly tempting. But buying pre-shredded cheese is the absolute worst thing you can do for a sauce.
Manufacturers know that shredded cheese wants to stick back together in the bag. To prevent this, they coat the shreds in anti-caking agents. We are talking about potato starch, calcium sulfate, and powdered cellulose. Yes, cellulose. That is literally derived from wood pulp or cotton fibers. While these additives are generally recognized as safe to eat, they are an absolute disaster for your cooking.
When you toss starch-coated cheese into a hot liquid, those anti-caking agents do their job way too well. They prevent the cheese from melting smoothly. Instead of melting into a cohesive, velvety liquid, the cellulose acts as a barrier, causing the proteins to clump awkwardly. This is the primary reason why your cheese sauce gets grainy. You are essentially trying to melt wood pulp into your dinner. Stop it.
The Block Rule
If you want a flawless sauce, you must grate your own cheese from a solid block. Period. No exceptions. It takes exactly sixty seconds with a standard box grater. If you are making a massive batch of mac and cheese for a weekend party, use the shredding disc on your food processor. To make cleanup a breeze, use a stainless bench scraper to scoop up the mountain of freshly grated cheese from your cutting board and transfer it directly to your bowl. Freshly grated cheese lacks the toxic-adjacent fillers, retains its natural moisture, and melts like an absolute dream.
Culprit #2: The Wrong Cheese for the Job
Not all cheeses are created equal, and not all cheeses are meant to be melted into a sauce. The meltability of a cheese is directly tied to its moisture content and its age.
Young, high-moisture cheeses (like Monterey Jack, Fontina, young Gouda, and low-moisture mozzarella) are the undisputed champions of melting. Their protein networks are loose, and they contain plenty of water to keep the emulsion stable when heated.
Aged cheeses (like sharp Cheddar, Parmesan, Gruyère, and Pecorino) are flavor powerhouses, but they are terrible melters on their own. As cheese ages, it loses moisture to evaporation, and its protein bonds become incredibly tight and rigid. When you try to melt a 3-year-old extra-sharp cheddar, there isn’t enough water left in the cheese to hold the emulsion together. The fat instantly separates from the protein, leaving you with an oily mess.
The Fix: You don’t have to sacrifice flavor, but you do have to blend. If you want the sharp, tangy punch of an aged cheddar, you must cut it with a high-moisture melting cheese. A 50/50 blend of sharp cheddar and Monterey Jack gives you the best of both worlds: robust flavor and a silky, stable melt.
Culprit #3: The Heat Wave
This is the rookie mistake that breaks more sauces than anything else: boiling the cheese. Let me tattoo this onto your brain: Cheese has a melting point, not a boiling point.
When you are building a sauce—whether it’s a classic béchamel or a modern shortcut—you must respect the temperature. If your liquid is at a rolling boil when you add the cheese, the extreme heat will instantly shock and denature the casein proteins. They will seize up, curdle, and aggressively expel their fat.
The Fix: Remove the pan from the heat completely. Let your base liquid (milk, cream, or broth) come to a gentle simmer, not a boil. Once it is hot, turn off the burner. Move the pan to a cool burner. Then, and only then, add your freshly grated cheese. Add it in small handfuls, whisking gently until each handful is fully melted before adding the next. The residual heat of the liquid is more than enough to melt the cheese perfectly without breaking the emulsion.
The Evaporated Milk Hack (The Weeknight Hero)
If you are exhausted after a long day at the office and you just want a bowl of creamy comfort food without fussing over a traditional flour-and-butter roux, this is your holy grail.
The magic of evaporated milk is one of the greatest culinary shortcuts of the modern era. Evaporated milk is exactly what it sounds like: milk that has had about 60% of its water content removed. What you are left with is a highly concentrated source of milk proteins.
When you use evaporated milk as the base for your cheese sauce, those concentrated proteins act as a massive structural reinforcement for your emulsion. They provide a flowy, stable internal structure that happily embraces the extra fat from your cheese, preventing it from separating.
How to Execute the Hack
- Toss with Starch: Take your freshly grated cheese (about 8 ounces) and toss it in a bowl with 1 tablespoon of cornstarch. The cornstarch absorbs excess moisture and physically coats the fat and protein molecules, preventing them from clumping together.
- Heat the Milk: Pour one 12-ounce can of evaporated milk into a saucepan. Bring it to a gentle simmer over medium heat. Do not let it boil.
- Melt and Whisk: Turn the heat down to the absolute lowest setting (or turn it off entirely). Gradually whisk in your starch-coated cheese, a handful at a time.
- Season: Add a pinch of salt, a dash of mustard powder, and a splash of hot sauce.
In under ten minutes, you will have a glossy, perfectly emulsified sauce that rivals any high-end restaurant queso. It reheats beautifully and stays fluid even as it cools.
Sodium Citrate: The “Science Cheese” Masterclass
If you are ready to graduate from weekend hobbyist to absolute kitchen wizard, it is time to order a tub of sodium citrate. Don’t let the chemical name intimidate you. Sodium citrate is simply the sodium salt of citric acid (it literally has the chemical formula Na3C6H5O7, which hilariously spells out NaCHO). It is a safe, natural food additive that will fundamentally change the way you cook.
Back in 1916, James L. Kraft figured out that if you add sodium citrate to cheese, it acts as a miraculous emulsifying salt. It is the secret ingredient that gives American cheese and Velveeta their supernatural melting abilities.
Here is the food science: When you add sodium citrate to a liquid and heat it with cheese, the sodium ions swap places with the calcium ions in the cheese’s casein protein network. This chemical swap prevents the proteins from binding tightly together. Instead of curdling and separating, the proteins become highly soluble, happily binding with both water and fat.
The result? You can turn any cheese—even a crumbly, aged, low-moisture cheddar or an aged Gouda—into a velvety, pourable, Velveeta-smooth sauce, using nothing but the cheese, a splash of liquid, and a pinch of white powder. No flour, no butter, no starchy thickeners. Just pure, unadulterated cheese flavor.
The Sodium Citrate Ratio
You don’t need a recipe; you just need a ratio. Grab a digital kitchen scale.
- Cheese: 100% (e.g., 200 grams of your favorite sharp cheddar)
- Liquid: 90% to 100% (e.g., 180 to 200 grams of water, milk, or even beer)
- Sodium Citrate: 4% (e.g., 8 grams)
Bring the liquid to a simmer in a saucepan. Whisk in the sodium citrate until it fully dissolves. Add your grated cheese a handful at a time, whisking continuously instead of using a hand mixer which will just create a chaotic mess. A simple silicone whisk or an immersion blender is all you need to bring the emulsion together. The sauce will be unbelievably glossy, intensely cheesy, and it will never break. You can literally pour it over nachos, let it cool into a solid block, and melt it again the next day without it splitting.
The Traditional Route: Mastering the Mornay
If you are a purist who insists on doing things the classical French way, you will be making a Mornay sauce. This involves creating a Béchamel (a roux of butter and flour, whisked with whole milk) and then melting cheese into it.
The flour in the roux acts as the stabilizer here. The starch molecules swell and thicken the liquid, creating a physical barrier that keeps the melted cheese fat suspended in the sauce. But the Mornay is notoriously finicky.
If your traditional mac and cheese sauce breaks, it is almost always due to one of three things:
- You didn’t cook the roux properly. The flour and butter must be cooked for a couple of minutes to neutralize the raw flour taste and properly coat the starch granules in fat.
- You boiled the milk after adding the cheese. We already covered this. Heat is the enemy. Once the Béchamel is thick and bubbling, take it off the heat before adding the dairy.
- You skimped on the fat. If you use skim milk instead of whole milk, you are starving the emulsion of the fat and structure it needs to bind the cheese. Always use whole milk.
The “No-Go” Rule: Banishing Toxic Gear
We need to have a serious talk about the hardware you are using to make these sauces. I have zero patience for cheap, toxic kitchenware. If you are whisking your delicate cheese sauce in a scratched, peeling, ten-dollar non-stick pan from a discount store, you are actively ruining your food and your health.
Those cheap non-stick coatings cannot handle the whisking required to build a proper emulsion, and they degrade rapidly, flaking mystery chemicals into your dinner. It is time to start banishing toxic kitchen gear from your cabinets once and for all.
For sauce-making, you need heavy, conductive, non-reactive cookware that distributes heat evenly. Hot spots in thin, cheap pans will scorch the bottom of your cheese sauce before the top even melts.
What to buy instead:
Invest in a high-quality, fully clad stainless steel saucier pan, or an enameled cast iron Dutch oven. A saucier has sloped sides that perfectly accommodate a whisk, ensuring no clumps of flour or cheese get stuck in the corners. Yes, cooking with stainless steel pans requires a basic understanding of temperature control, but they are practically indestructible, they hold heat beautifully, and they won’t leach forever chemicals into your beautiful Gruyère.
The Rescue Mission: Can You Save a Broken Sauce?
Let’s say you messed up. You left the burner on high, you dumped in a bag of pre-shredded cheddar, and now you have a pan full of oily, clumpy misery. Can you actually rescue a ruined dinner?
Often, yes. You can force a broken emulsion back together with a combination of temperature shock and violent mechanical agitation. This is the exact same scientific principle you use when a pan sauce separates on the stove.
- Remove from heat immediately. Stop the thermal assault on your proteins.
- Add a splash of cold liquid. A tablespoon of ice-cold milk or even cold water can rapidly drop the temperature of the sauce, halting the protein denaturing process and giving the fat a chance to re-integrate.
- Agitate violently. A standard whisk might not cut it here. Grab your immersion blender (stick blender). The high-speed blades will physically smash the fat droplets back into the protein and water matrix, forcing the emulsion to stabilize.
- Add a binder. If it’s still stubborn, whisk a teaspoon of cornstarch into a tablespoon of cold milk to create a slurry, then blend that into the warm sauce. The fresh starch will help mop up the loose oil and bind the sauce back together.
The Final Whisk
Cooking is not magic; it is applied physics and chemistry. But when you understand the rules, the results taste pretty magical. You do not need a culinary degree to make mind-blowing food in your own kitchen. You just need to ditch the pre-shredded bags, respect the temperature of your stove, and maybe keep a little sodium citrate in your pantry for emergencies.
Your days of serving greasy, gritty, disappointing cheese sauces are officially over. Now get back in the kitchen, grab a block of sharp cheddar, and show that mac and cheese who is boss. You’ve got this.






