
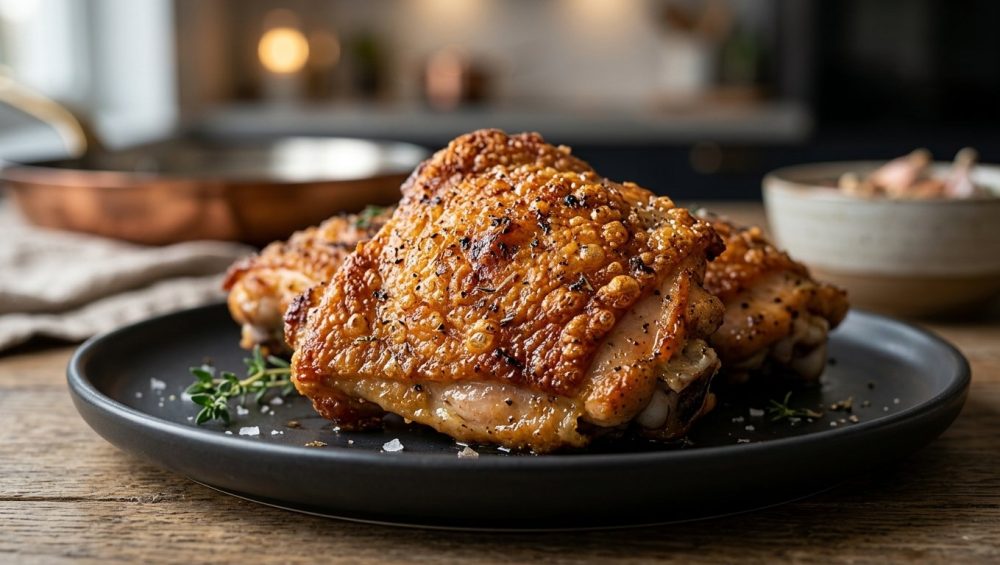
Look, nobody likes flabby chicken skin. It is the culinary equivalent of a wet handshake—deeply disappointing, slightly uncomfortable, and entirely avoidable. You have likely been lied to by pretentious restaurant chefs who claim that the only way to achieve shatteringly crisp, golden-brown poultry is to drop it into a terrifying vat of boiling oil. I am here to tell you that you do not need a culinary degree, a commercial kitchen, or a hazardous deep fryer to make mind-blowing food. We are skipping the deep fryer because who has the time or the patience to scrub aerosolized grease off their kitchen ceiling on a random Tuesday night? Not me, and certainly not you.
I have written extensively about banishing toxic kitchen gear from your home, and today we are applying that same zero-tolerance policy to bad cooking techniques. We are going to master a foolproof, science-backed method that creates restaurant-quality crunch using nothing but your standard home oven and a humble pantry staple you probably currently have sitting next to your flour. Today, we are taking a deep, exhaustive dive into the magic of baking powder.
The Anatomy of a Poultry Disaster: Why Your Chicken Skin is Rubbery
Before we can fix the problem, we have to understand the enemy. Why does baked chicken so often emerge from the oven looking pale, sad, and texturally reminiscent of a rubber band? It all comes down to the biological structure of the bird and the basic laws of thermodynamics.
The Moisture Problem (Water is the Enemy)
Chicken skin is essentially a biological sponge. It is a complex matrix of water, collagen, and fat. When you take a piece of chicken out of its packaging, it is absolutely drenched in surface moisture. If you throw that wet chicken directly into a hot oven, you are not roasting it; you are steaming it.
Water is the ultimate enemy of crispiness. Water cannot exceed 212°F (100°C) before it turns into steam. The chemical reaction responsible for browning and crisping requires temperatures well above 300°F (150°C). As long as there is liquid water present on the surface of your chicken, the skin physically cannot reach the temperature required to crisp up. Instead, it sits there in a humid sauna of its own making, gently poaching until it becomes a chewy, unappetizing mess. If you were cooking in a skillet, you might rely on the water drop test to ensure your pan is hot enough to instantly vaporize moisture, but in the ambient heat of an oven, that surface moisture just creates a localized steam cloud that ruins your dinner.
The Fat Rendering Conundrum
The second hurdle is the subcutaneous fat. Chicken skin is thick and naturally high in fat. In order for the skin to become crispy, that fat needs to melt and drain away—a process culinary professionals call “rendering.”
If the oven temperature is too low, or if the chicken is sitting in a puddle of its own juices, the fat never fully renders. It remains trapped within the protein structure of the skin. You are left with a thick, gelatinous layer of un-rendered lipid tissue that feels incredibly unpleasant in the mouth. To achieve that delicate, glass-like crunch, we need to extract the water and melt the fat, leaving behind only the thin, protein-rich structure of the skin itself to toast in the heat.
Enter the Hero: What Baking Powder Actually Does to Chicken
This is where we put on our lab coats and utilize a little bit of food chemistry. Adding baking powder to your chicken is not some old wives’ tale or kitchen folklore; it is a measurable, reproducible scientific process that fundamentally alters the cellular structure of the poultry.
The pH Shift and the Maillard Reaction
The secret to golden, savory, roasted flavor is the Maillard reaction. This is the complex chemical process where amino acids (proteins) and reducing sugars react under high heat to create hundreds of new flavor compounds and that beautiful brown color.
Normally, the Maillard reaction requires intense heat. However, the Maillard reaction is highly sensitive to pH levels. Raw chicken skin is naturally slightly acidic, sitting at a pH of around 5.6 to 5.9 due to lactic acid accumulation in the muscle tissue post-mortem.
Baking powder is mildly alkaline. When you dust chicken skin with baking powder, you raise the surface pH level from roughly 5.8 to a highly alkaline 8.2. This alkaline environment acts like a chemical catalyst. It dramatically accelerates the Maillard reaction, allowing visible browning to begin at just 275°F instead of the usual 325°F. Furthermore, this pH shift causes a partial denaturation of the myosin and actin proteins at the skin-muscle interface. In layman’s terms: the alkaline powder chemically breaks down the tough peptide bonds in the skin, destroying its rubbery elasticity so it can shatter like glass when you bite into it.
The Desiccation Effect: Drawing Out the Moisture
Beyond altering the pH, baking powder acts as a powerful desiccant. When it makes contact with the natural moisture on the chicken, it begins to draw water out from the cellular structure and up to the surface.
As the chicken sits, the baking powder pulls this moisture out, allowing it to evaporate quickly in the dry heat of the oven. Furthermore, as the baking powder heats up, it produces tiny, microscopic bubbles of carbon dioxide gas. These tiny gas bubbles form on the surface of the skin, increasing the overall surface area and creating a micro-blistered texture that mimics the exact craggy, crunchy exterior you would normally only get from a deep fryer.
Baking Soda vs. Baking Powder: Don’t Mess This Up
Pay very close attention here, because this is the number one mistake rookie cooks make when attempting this technique. You must use baking powder, absolutely never baking soda.
Baking soda (pure sodium bicarbonate) is roughly three times more alkaline than baking powder. If you rub pure baking soda on your chicken, you will irreversibly over-denature the proteins. The skin will turn a horrifying, fissured gray color, and your chicken will taste intensely bitter and metallic, like you are chewing on battery acid.
Baking powder, on the other hand, is a buffered blend. It contains sodium bicarbonate, but it is mixed with a dry acid (like cream of tartar) and a starch (like cornstarch). This buffer controls the alkalinity, giving you the perfect pH shift without ruining the flavor of your dinner.
The Aluminum-Free Mandate
Even if you correctly grab the baking powder, you are not out of the woods yet. You absolutely must check your label and ensure you are using aluminum-free baking powder.
Many cheap, commercial baking powders use sodium aluminum sulfate as their acid-reacting ingredient because it is highly stable and heat-activated. However, when exposed to oven temperatures above 375°F, these aluminum-based powders degrade and leave behind a highly distinct, bitter, metallic aftertaste that will completely ruin your meal. I cannot stress this enough: check your pantry right now. If your baking powder contains aluminum, throw it in the trash and buy a high-quality, aluminum-free brand. Your tastebuds will thank you.
The “No-Go” Gear: Don’t Ruin Good Chicken with Toxic Pans
As your favorite sassy sous-chef, I have zero patience for cheap, toxic kitchenware. You can have the best science and the highest-quality organic chicken in the world, but if you cook it on garbage equipment, you are going to get garbage results.
Ditch the Flimsy, Peeling Non-Stick
We are going to be blasting this chicken in a very hot oven. Do not even think about putting your poultry on a cheap, dark-coated non-stick baking sheet. Those traditional PTFE (Teflon) coatings are not designed to withstand the high-heat roasting required for crispy skin. At high temperatures, those cheap coatings begin to degrade, off-gassing toxic fumes and flaking peeling chemical chips directly into your food.
Furthermore, cheap pans warp. There is nothing more terrifying than pulling a pan of hot, rendered chicken fat out of a 425-degree oven on warped and flimsy baking sheets that buckle under pressure and send boiling grease cascading onto your forearms. Invest in a heavy-duty, commercial-grade bare aluminum half-sheet pan, or a high-quality multi-clad stainless steel pan. They will never peel, they will never warp, and they will outlive you.
The Wire Rack: Your Crispy Skin Secret Weapon
You cannot bake crispy chicken directly on a flat sheet pan. If the chicken sits flat on the metal, the fat will render out and pool around the meat. The bottom of your chicken will essentially deep-fry in its own juices for a few minutes before ultimately becoming soggy and greasy.
You must elevate the chicken using a stainless steel wire cooling rack set inside your heavy-duty baking sheet. Elevating the meat serves two critical functions. First, it allows the rendered fat to drip safely away from the skin. Second, it promotes 360-degree thermodynamic convection. The hot air of the oven can circulate completely underneath the chicken, crisping the bottom just as effectively as the top.
Make sure your wire rack is 100% stainless steel, not a cheap chrome-plated rack that will rust after one run through the dishwasher. And please, for the love of all things holy, avoid aerosol cooking sprays when greasing that rack. Aerosol sprays contain soy lecithin and chemical propellants that will bake onto your stainless steel rack like a permanent layer of industrial glue. Just use a paper towel dipped in a little neutral cooking oil to lightly grease the wires.
The Step-by-Step Masterclass for Shatteringly Crispy Chicken
Now that you understand the chemistry and have the proper safe equipment, it is time to execute. This technique works brilliantly on chicken wings, drumsticks, bone-in thighs, and even whole roasted birds.
Step 1: The Pat Down (Dry It Out)
Remove your chicken from its packaging and grab a massive roll of paper towels. You need to aggressively pat every single inch of that chicken completely dry. Do not just dab it gently; press the paper towels into the skin to absorb as much surface moisture as physically possible. If you skip this step, the baking powder will turn into a wet, pasty sludge, and you will be left with a chalky texture. The skin must be bone-dry to the touch before you proceed.
Step 2: The Magic Ratio (Baking Powder to Salt)
Precision is key here. Do not eyeball this measurement. You need exactly 1 teaspoon of aluminum-free baking powder for every 1 pound of chicken.
In a small bowl, combine the baking powder with your kosher salt. (I recommend about 1/2 to 3/4 teaspoon of kosher salt per pound of meat, depending on your preference). Toss your dry chicken pieces in a large bowl, sprinkle the baking powder and salt mixture evenly over the top, and toss vigorously with your hands until every piece is coated in an invisible, even layer. Combining the baking powder with kosher salt harnesses the power of dry brining, which seasons the meat all the way down to the bone while simultaneously drawing moisture to the surface.
Step 3: The Air Chill (Patience is a Virtue)
Place your coated chicken pieces onto your greased stainless steel wire rack, ensuring there is at least an inch of space between each piece. Overcrowding is a cardinal sin; if the pieces touch, they will trap moisture and steam each other.
Now, place the entire tray into your refrigerator, completely uncovered, for a minimum of 12 hours, and ideally up to 24 hours.
Why? Because your refrigerator is essentially a giant, highly efficient dehydrator. Cold air holds significantly less moisture than warm air. As the internal fan of your fridge circulates that cold, dry air over the chicken, it rapidly evaporates the moisture that the baking powder and salt have drawn to the surface. The skin will become tight, translucent, and slightly leathery. This is exactly what you want.
While preventing dry chicken breasts usually requires careful temperature monitoring and shorter cooking times, dark meat like wings and thighs actually benefits from this extended chill, as the dry-brining process locks in the internal juices while aggressively drying out the exterior skin.
(Weeknight shortcut: If you do not have 24 hours, even letting the chicken sit uncovered on the counter for 30 minutes while the oven preheats will yield noticeably better results than baking it immediately. But for true, mind-blowing crunch, overnight is mandatory.)
Step 4: The Oven Strategy (High Heat, Safe Gear)
When you are ready to cook, we are going to employ a highly strategic, two-stage temperature method.
First, preheat your oven to a very low 250°F (120°C). Place your tray of cold chicken into the oven on the middle rack and bake for 30 minutes. This low-temperature phase is crucial. It gently raises the internal temperature of the meat and, more importantly, it slowly melts and renders the subcutaneous fat without burning the skin.
After 30 minutes, leave the chicken in the oven and crank the heat all the way up to 425°F (220°C). Bake for an additional 40 to 50 minutes. This high-heat blast is where the magic happens. The rendered fat acts as a frying medium, effectively oven-frying the desiccant-treated skin. The alkaline pH shift accelerates the Maillard reaction, turning the skin a deep, mahogany brown and creating those glorious micro-blisters.
Always pull your chicken when an accurate digital meat thermometer reads 165°F (or up to 175°F for dark meat, which can easily handle higher internal temperatures as the connective tissues break down). Let the chicken rest for 5 minutes on the rack before serving so the skin can fully set and harden.
Flavor Enhancements: Seasoning Beyond the Basics
You will notice that my masterclass recipe only includes baking powder and salt. This is intentional. When you are cooking at 425°F for nearly an hour, delicate spices will incinerate.
When to Add Spices
If you coat your raw chicken in garlic powder, onion powder, paprika, or dried herbs before putting it in the oven, those spices will scorch and turn incredibly bitter long before the chicken is cooked through.
If you want a dry-rubbed wing, you have two options. You can either lightly dust the chicken with your spices during the final 10 minutes of the high-heat bake, or you can toss the hot, finished chicken in a bowl with your dry spices immediately after it comes out of the oven. The residual heat and rendered fat on the surface of the skin will instantly toast the spices without burning them. Instead of burning raw garlic powder in the oven, try blooming spices in oil on the stovetop to create a rich, infused tossing sauce that you can brush over the crispy skin right before serving.
Sauce Protocol: Don’t Drown the Crunch
If you are a fan of wet wings—like classic Buffalo or sticky teriyaki—you must respect the crunch you just spent 24 hours building.
Never sauce your chicken and then put it back in the oven. The water content in the sauce will instantly reverse the desiccation process, turning your shatteringly crisp skin back into a soggy, rubbery mess. Always toss your chicken in the sauce at the absolute last possible second before you eat.
If you are making a homemade buffalo sauce, you can emulsify it beautifully by whisking in cold butter off the heat, creating a thick, velvety glaze that clings to the chicken rather than soaking into it and ruining your hard work.
Troubleshooting Your Crispy Chicken Journey
Even with the best science, the kitchen can sometimes throw you a curveball. Here is how to fix the most common issues you might encounter with the baking powder method.
“My Chicken Tastes Metallic”
I warned you about this in section three, but if your chicken tastes like you licked a 9-volt battery, you used a baking powder containing aluminum. The high heat of the oven caused the sodium aluminum sulfate to break down, leaving a bitter, chemical residue. Throw out that tin of powder, go to the store, and buy a brand clearly labeled “Aluminum-Free.”
“The Skin is Still Chewy in Spots”
If your chicken is crispy on the edges but flabby and rubbery in the center, you committed the sin of overcrowding. When chicken pieces are packed too tightly together on the wire rack, the ambient heat cannot circulate properly. The moisture evaporating off of one wing creates a steam cloud that constantly bathes the wing next to it.
Unlike the standard technique of preheating your baking sheet for roasting vegetables, this chicken method requires starting on a cold rack with plenty of breathing room. Ensure there is at least one inch of empty space around every single piece of chicken. If you have to use two sheet pans, use two sheet pans.
“My Smoke Alarm is Screaming”
Because we are rendering a significant amount of chicken fat at 425°F, it is highly likely that some of that fat will smoke when it hits the hot aluminum sheet pan below the wire rack.
If your oven is prone to smoking, you can employ a brilliant little trick: before you put the tray in the oven, pour just enough water into the bottom of the sheet pan to barely cover the metal. Do not let the water touch the chicken on the rack above! The dripping fat will fall into the shallow layer of water, instantly cooling down and preventing it from vaporizing into smoke. Just be careful not to add too much water, or you will accidentally turn your oven into a steam room and defeat the entire purpose of the dry bake.
Conclusion: Your New Weeknight Superpower
Mastering the art of the home kitchen is rarely about buying expensive gadgets or memorizing complicated, pretentious French terminology. It is about understanding the fundamental science of your ingredients and respecting the process.
By utilizing the alkaline power of baking powder to manipulate the pH of the chicken skin, accelerating the Maillard reaction, and leveraging your refrigerator as a dehydrator, you have completely bypassed the need for a deep fryer. You have saved yourself a massive mess, eliminated the risk of third-degree oil burns, and achieved a texture that rivals the best sports bar in your city.
So throw away your toxic non-stick pans, check your pantry for aluminum-free powder, and go buy a pack of chicken wings. You are about to make the crispiest, most mind-blowing poultry of your life, and you are going to do it entirely in your oven. Happy cooking!






