
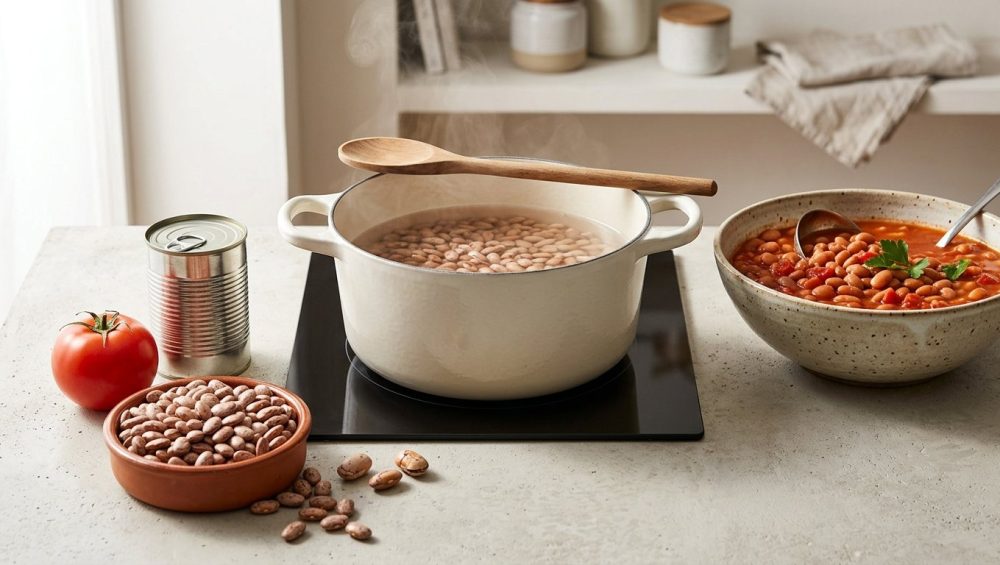
We’ve all been there, standing over the stove on a crisp Sunday afternoon, feeling like an absolute culinary champion. You bypassed the canned goods aisle, scoffed at the sodium-laden pre-cooked options, and proudly brought home a bag of dried heirloom beans. You did everything right. You soaked them overnight. You chopped your aromatics with the precision of a Michelin-starred chef. You tossed in a beautiful, expensive can of crushed San Marzano tomatoes, set the pot to a gentle simmer, and waited for the magic to happen.
And waited. And waited.
Three hours later, your kitchen smells like a rustic Tuscan dream, but when you bite into a spoonful of your artisanal stew, you are met with the horrifying, unmistakable texture of aquarium gravel. The beans are rock hard. You simmer them for another two hours. Nothing changes. You question your skills, your recipe, and your life choices.
Welcome to the club. You’ve just fallen victim to the most common, infuriating, and entirely preventable trap in the culinary world. You added your acid too early.
The modern food industry thrives on the assumption that you are entirely dependent on their factory-processed, BPA-lined cans. They want you to believe that cooking dried legumes is a mystical art form reserved for pioneer women and professional chefs. It is absolute nonsense. I am here to tell you that you do not need a culinary degree to make mind-blowing, perfectly creamy, melt-in-your-mouth beans from scratch. You just need a basic understanding of food chemistry and the willingness to follow a few non-negotiable rules. If you want to fix your food and stop ruining your weekend meal prep, you need to understand exactly what is happening inside that simmering pot.
As a home cook who learned by trial, error, and setting off the smoke detector more times than I care to admit, I have zero patience for pretentious chef-speak. We are going to break down the actual, literal science of why your dinner is betraying you, and how to guarantee perfect results every single time. By the end of this masterclass, you will understand the molecular mechanics of your food, and you will never serve a crunchy chili again.
The Anatomy of a Bean: Why They Are So Stubborn
Before we can get into the sabotage, we need to talk about what a bean actually is. Dried beans are essentially dormant seeds, locked in a state of suspended animation, waiting for the right conditions (moisture and warmth) to wake up. They are heavily armored little fortresses.
The outer layer is the seed coat, designed by nature to protect the precious interior from pests, rot, and physical damage. Inside that tough exterior lies the cotyledon, which contains the starchy, protein-rich payload that we actually want to eat. When you soak a bean, water enters primarily through a tiny structure called the hilum (that little “eye” on the side of the bean), slowly permeating the seed coat and swelling the starches inside.
But hydration is only half the battle. A fully hydrated bean is still a raw, crunchy bean. To transform it into a creamy, edible delight, we have to apply heat to break down the cellular structure.
This brings us to the star of today’s scientific lecture: pectin.
Pectin is a complex carbohydrate—a polysaccharide—that acts as the structural “glue” holding the plant’s cell walls together. In a raw, dried bean, this pectin network is incredibly rigid and unyielding. When you boil beans in pure, neutral water, the heat energy gradually weakens this cellular glue. The pectin dissolves, the individual cells separate, and the bean transforms from a tiny rock into a luscious, tender bite.
It sounds simple enough. Apply heat, dissolve the glue, eat the beans. So why do things go so disastrously wrong? Because the kitchen is a chemistry lab, and you keep throwing a wrench into the molecular machinery. If you want to avoid the most common beginner cooking mistakes, you have to respect the chemical makeup of your ingredients.
The Pectin Problem: Why Acid is the Ultimate Saboteur
Here is the brutal truth: acid is not just “ruining” your beans; it is fundamentally altering the mechanical structure of their cell walls.
The Chemistry of the Crunch
Let’s look at the pH scale. Neutral water has a pH of 7. When you introduce an acidic ingredient like tomatoes, wine, vinegar, or citrus juice, you lower the pH of the cooking liquid.
In a low-pH environment, that pectin glue doesn’t just refuse to dissolve—it actually fights back. Acidity causes the pectin molecules to shift into a “bound” state, promoting the cross-linking of polysaccharides. The pectin network tightens, fortifies, and becomes highly resistant to heat. Instead of breaking down and allowing the cells to separate, the glue turns into a microscopic straightjacket.
The cell walls lock up completely. You can boil those beans for hours, days, or until the end of time, and they will remain stubbornly hard. One frustrated home cook left their slow cooker on for 28 hours straight, only to find their 15-bean soup was still full of crunchy, undercooked legumes. The culprit? They had dumped a can of crushed tomatoes into the pot at the very beginning of the cook.
A rigorous experiment conducted by the meticulous folks at Cook’s Illustrated confirmed this phenomenon. They found that a pot of black beans cooked with citric acid was still entirely hard after 45 minutes of aggressive boiling, whereas the control batch softened perfectly. The acid strengthens the pectin coat, making it nearly impossible for the bean to absorb water and break down.
The Tomato Trap in Soups and Chilis
Tomatoes are highly acidic, and they are the number one reason home cooks fail at making bean-based dishes from scratch. When you are making a hearty chili, a rustic minestrone, or a rich bean stew, the urge to throw every single ingredient into the pot at once is overwhelming. We have been culturally conditioned by dump-and-go slow cooker recipes to believe that cooking is just about tossing things into a cauldron and walking away.
But timing is absolutely everything. If you add tomatoes, a splash of white wine, or a squeeze of lemon before the beans have fully tenderized, you are essentially embalming the beans in their raw state.
The solution is maddeningly simple: stagger your cooking. You must boil or simmer your beans in a neutral environment until they are completely, 100% tender. Only then—when you can easily mash a bean against the roof of your mouth with your tongue—are you allowed to introduce your tomatoes, vinegar, or wine. Once the pectin has already broken down and the cells have separated, the acid can no longer lock the structure. The beans will remain soft, and they will soak up all that delicious acidic flavor without turning into gravel.
The Hard Water Conspiracy: Calcium’s Sneaky Role
Now, I can already hear some of you screaming at your screens: “But Sassy Sous-Chef, I didn’t add any tomatoes, and my beans are STILL crunchy!”
Alright, put the wooden spoon down and let’s talk about your plumbing. If you live in an area with hard tap water, you are fighting a massive uphill battle before you even turn on the stove.
Hard water is water that contains substantial levels of dissolved minerals, primarily calcium and magnesium. Look at your electric kettle. Is there a crusty, white, chalky buildup on the heating element? Look at your wine glasses when they come out of the dishwasher. Are they covered in cloudy water spots? If you answered yes, you have hard water. That same mineral buildup is currently staging a hostile takeover of your dinner.
When you cook dried beans in hard water, a devastating chemical reaction takes place. The calcium and magnesium ions in the water bond directly with the pectin in the bean’s cell walls. This reaction forms what scientists call “insoluble pectates”.
Think of it as reinforcing the bean’s cellular glue with microscopic concrete. The calcium acts as a bridge, cross-linking the pectin molecules and creating a rigid, impenetrable structure that resists water absorption and prevents the cells from separating upon cooking. In fact, studies have shown that adding calcium chloride to cooking water significantly increases the cooking time and the physical hardness of the beans.
If your tap water leaves a chalky white residue on your faucets, it is doing the exact same thing to your dinner. The minerals are literally petrifying your legumes.
Debunking the Salt Myth: Yes, You Should Salt Your Bean Water
For generations, well-meaning grandmothers and pretentious culinary instructors have peddled one of the most pervasive, damaging myths in the history of cooking: “Never salt your beans before they are cooked, or it will make the skins tough.”
I am here to tell you that this is categorically, scientifically false. In fact, it is the exact opposite of the truth.
Salt (specifically the sodium in sodium chloride) is your absolute best friend when cooking dried beans. When you add salt to the soaking water or the cooking water, a beautiful process called ion exchange occurs. The sodium ions from the salt actively displace the calcium and magnesium ions present in the bean skins and the cooking water.
By kicking the calcium out of the way, the salt actively prevents the formation of those tough, insoluble pectates. The pectin remains free to break down under the heat, allowing the bean to soften beautifully.
Extensive scientific and culinary investigations have proven this beyond a shadow of a doubt. A comprehensive study evaluating the effects of salt on navy, black, pinto, kidney, and faba beans found that brining beans in salted water (about 3 tablespoons of salt per gallon) actually reduced the cooking time by 12% to 14%. Furthermore, the salted treatments vastly improved the flavor and texture of the beans, resulting in creamier interiors and intact, attractive seed coats.
Just like you should ditch the hand mixer when making mashed potatoes to avoid a sticky disaster, you need to abandon the myth that beans require a salt-free environment. Salting your beans early allows the seasoning to penetrate all the way to the center of the cotyledon, giving you a deeply seasoned, savory bite instead of a bland, starchy mush.
The Baking Soda Hack: Alkaline Magic for Weekday Warriors
If time is money, then baking soda is the ultimate kitchen currency. We’ve established that acid (a low pH) locks the beans down and prevents softening. Therefore, basic chemistry dictates that a base (a high pH) will do the exact opposite.
When you add a small amount of baking soda (sodium bicarbonate) to your soaking or cooking water, you raise the pH, creating an alkaline environment. In this alkaline state, the pectin in the cell walls breaks down at an accelerated rate.
But the magic doesn’t stop there. Baking soda also helps to break down the oligosaccharides in the beans. Oligosaccharides are the complex carbohydrates that human bodies struggle to digest, which famously lead to gas and bloating. By degrading these carbohydrates early, baking soda not only slashes your cooking time but also makes the beans much easier on your digestive system.
Adding just a pinch of baking soda—about 1/4 teaspoon per cup of dried beans—can drastically reduce the hours you spend hovering over the stove. It yields incredibly creamy, soft beans that practically melt in your mouth.
However, a word of caution from your Sassy Sous-Chef: do not go overboard. If you dump a massive spoonful of baking soda into your pot, you will over-tenderize the beans into a sludgy paste, and worse, you will give your entire meal a highly unpleasant, metallic, soapy flavor. Precision is key. A tiny pinch is all it takes to shift the pH and unlock the cellular walls.
The Old Bean Syndrome: When Time is the Enemy
Sometimes, you do everything perfectly. You use filtered water, you salt generously, you hold back the tomatoes, you even add a pinch of baking soda, and the beans STILL refuse to soften. What gives?
You might be dealing with the “Hard-to-Cook” (HTC) defect. This is a textural defect that occurs when dried beans are stored for prolonged periods, especially in hot and humid conditions.
As beans sit in a warehouse, on a grocery store shelf, or in the back of your pantry for years, complex chemical changes occur. The pores through which water normally enters the bean begin to close. Furthermore, phenolic compounds within the bean begin to bind to the cell wall components, creating a lignification-like mechanism (essentially turning the bean into wood).
Just because you bought a bag of beans from the supermarket last Tuesday does not mean they are fresh. They could have been harvested three years ago. If you find yourself repeatedly battling uncookable beans despite flawless technique, throw the bag away and buy from a reputable supplier with high turnover. Freshly dried beans (harvested within the last year) are a revelation and will cook in a fraction of the time.
The Pressure Cooker Loophole: Can Technology Save You?
What about the modern marvel of the electric pressure cooker? Every week, someone asks me if they can just dump their beans, tomatoes, and hard water into an Instant Pot, press a button, and bypass the laws of chemistry entirely.
The short answer is: sort of, but you’re still playing with fire.
Pressure cookers work by trapping steam, which raises the boiling point of water to around 250°F (121°C). This intense, superheated environment accelerates the breakdown of pectin dramatically. Because the heat is so extreme, it can sometimes overcome the fortifying effects of an acidic environment or hard water.
However, it is a massive gamble. Even in a pressure cooker, highly acidic tomato-based sauces can significantly delay the softening of the beans. You might find that a recipe that normally takes 35 minutes under high pressure suddenly takes 60 or 70 minutes because you added a jar of marinara sauce to the raw beans. And because you can’t open the lid to check on them, you risk either serving undercooked, crunchy beans or obliterating them into a flavorless paste by overcompensating with too much time.
My advice? Even if you are using a pressure cooker, stick to the golden rule. Cook the beans in a neutral, salted broth under pressure first. Once the pressure releases and you confirm they are tender, stir in your acidic ingredients and let the pot simmer on the “saute” function for ten minutes. Technology is great, but it shouldn’t be used as an excuse for sloppy technique.
The Sassy Sous-Chef’s Foolproof Strategy for Perfect Beans
Alright, let’s put all of this glorious science together into an actionable plan. You want to execute simple weeknight dinners without the stress of hovering over a pot of crunchy legumes for six hours. Here is my definitive, science-backed protocol for achieving absolute bean perfection.
Step 1: The Brine (Not Just a Soak)
Do not just soak your beans in plain tap water. Create a brine. Dissolve 3 tablespoons of kosher salt in a gallon of water, and let your sorted, rinsed beans soak in this solution for 8 to 24 hours. The salt will displace the calcium in the skins, ensuring they cook up tender and intact. If your tap water is exceptionally hard, throw in 1/4 teaspoon of baking soda for good measure.
Step 2: The Aromatic Simmer
Drain the soaking liquid and rinse the beans. Place them in a heavy-bottomed pot and cover them with fresh water or chicken stock. This is the time to build your flavor foundation. Toss in halved onions, smashed garlic cloves, bay leaves, and hearty herbs. When preparing your aromatics, remember the magic of blooming them in oil before adding your liquid to extract the maximum amount of fat-soluble flavor compounds.
Bring the pot to a boil, then immediately reduce the heat to a very gentle simmer. A rolling boil will violently thrash the beans around, causing their skins to blow out and leaving you with a pot of mush. Low and slow is the mantra here.
Step 3: The Patience Phase
Let them simmer. Do not rush this. Depending on the variety and age of the bean, this could take anywhere from 45 minutes to 2 hours. Taste them frequently. You are looking for a completely creamy interior with absolutely no chalky resistance in the center.
Step 4: The Acid Drop (Timing is Everything)
Only when the beans are 100% tender—when you would happily eat them straight out of the pot—are you allowed to add your acidic ingredients. Now is the time to pour in that can of crushed tomatoes, splash in the red wine vinegar, or squeeze in the fresh lime juice. Simmer for another 15 to 20 minutes to allow the flavors to meld. Because the pectin has already broken down, the acid can no longer lock the cell walls. You will have perfectly seasoned, perfectly textured beans.
Once you master this baseline technique, you’ll have the confidence to tackle other scientific cooking hacks—like why you should ditch the cooking oil when searing certain delicate proteins, or how to properly rest a steak. Cooking is just applied chemistry, and you are the head scientist.
The “No-Go” Rule: Ditch the Toxic Gear
I cannot and will not write a comprehensive masterclass on long-simmering foods without addressing the massive, peeling elephant in the room: your cookware.
Cooking a proper batch of dried beans requires a long, slow, sustained simmer. If you are executing this process in a cheap, scratched, lightweight non-stick pot that you bought at a discount store five years ago, we have a serious problem. Heating degraded Teflon or mystery-metal non-stick coatings for hours on end is a fantastic way to leach toxic forever chemicals (PFAS) directly into your family’s dinner.
I have absolutely zero patience for this. It is time to start actively banishing toxic kitchen gear from your life. Your health, and the quality of your food, demand better.
To truly eliminate kitchen chaos, you need a reliable system built on high-quality, safe materials. Investing in essential kitchen tools like a heavy-bottomed, enameled cast-iron Dutch oven is non-negotiable for the serious home cook. Enameled cast iron provides unparalleled heat retention and distribution, ensuring your beans simmer gently and evenly without scorching on the bottom. Furthermore, the glass-like enamel surface is completely non-reactive, meaning it won’t interact with your acidic tomatoes once you finally add them at the end of the cook.
If you opt for traditional, uncoated cast iron, make sure you know how to clean it properly—grab a chainmail scrubber and skip the harsh detergents to preserve your seasoning. But for simmering acidic chilis and tomato-heavy bean stews, enameled cast iron or high-quality, fully clad stainless steel are the only acceptable vessels in my kitchen.
The Final Word
Cooking dried beans from scratch is not a chore; it is a culinary flex. It is the ultimate transformation of a cheap, humble, rock-hard ingredient into a luxurious, creamy, deeply satisfying meal.
Yes, they require a bit of planning. Yes, they demand that you respect the laws of thermodynamics and cellular biology. But once you understand the hidden trap of adding tomatoes too early, the sabotage of hard water, and the liberating magic of a salt brine, you will never look at a can of store-bought beans the same way again.
You are the master of your kitchen. Stop letting pectin dictate your life. Salt your water, hold the acid until the very end, and go make some mind-blowing food.






