Listen up, folks. If you are still dumping dry, dusty spoonfuls of ground cumin directly into a simmering pot of watery tomato sauce, we need to have a serious intervention. You are leaving an embarrassing amount of flavor on the table. Actually, you’re not even leaving it on the table; you’re drowning it in a watery grave. I see it all the time. Home cooks complain that their curries taste flat, their chili lacks depth, and their weeknight meals are just generally uninspired, which is a major factor in ruining your weeknight dinners. The solution isn’t to buy a fifty-dollar jar of artisanal saffron or to spend six hours simmering a homemade stock. The solution takes exactly thirty seconds, requires zero culinary degree, and uses the ingredients already sitting in your pantry.
It’s called blooming.
Blooming your spices—briefly frying them in hot fat before adding your liquid ingredients—is the single most transformative technique you can master in a home kitchen. It is the dividing line between food that tastes like it came from a sad college dorm room and food that tastes like it was prepared by a seasoned chef. Today, we are diving deep into the science, the history, and the foolproof methods of extracting every last drop of flavor from your spice rack. No fluff, no pretentious chef-speak, just the hard culinary facts and a few witty observations to keep you awake.
The Molecular Magic: Why Blooming Actually Works
Let’s get into the food science, because understanding why something works is the secret to a peaceful daily cooking habit. You don’t need a lab coat, just a basic understanding of how flavor molecules behave.
Spices are essentially tiny, dormant flavor vaults. Inside these vaults are chemical compounds that give each spice its signature aroma and taste. For example, chili peppers get their heat from capsaicin, which not only provides spice but also heightens your overall aroma perception by a staggering 45 percent. Cloves owe their warm, sweet intensity to a phenol called eugenol. Coriander seeds are packed with linalool, a floral compound also found in lavender. Turmeric boasts curcuminoids, which provide that brilliant yellow hue and earthy depth.
Here is the crucial part: the vast majority of these flavor compounds are fat-soluble, not water-soluble.
When you dump raw spices into a watery environment—like a simmering soup, a watery vegetable sauté, or a cold sauce—those fat-soluble compounds stubbornly refuse to dissolve. They just sit there, grainy and muted, tasting like the inside of a dusty cabinet. Water is the absolute enemy of raw spice extraction.
However, when you introduce those same spices to hot fat (like oil, butter, or ghee), an aggressive chemical reaction occurs. The heat breaks down the tough cellular walls of the spices, and the hot fat acts as a solvent, aggressively pulling out the volatile essential oils. This process neutralizes the harsh, raw, powdery notes of the spices and amplifies their complex, deep flavors. The oil literally becomes infused with the spice, meaning every single drop of fat in your dish will now carry that flavor to your palate. You extract maximum flavor with minimal effort. It is culinary alchemy, and it takes less than a minute.
A Global History: Tadka, Chhonk, and Beyond
I’d love to claim I invented this, but humanity figured this out centuries ago. If you want to see the absolute pinnacle of spice blooming, look to the Indian subcontinent.
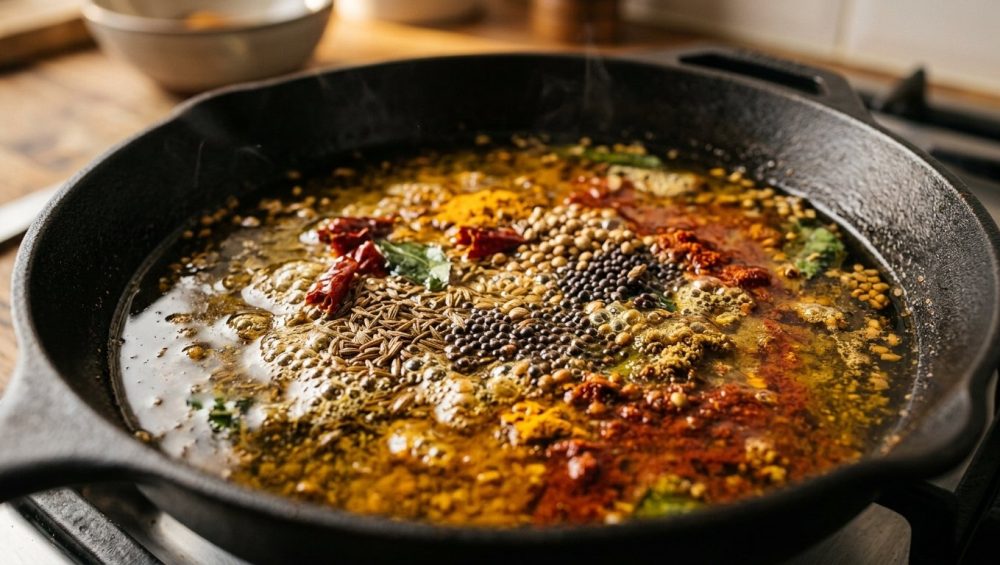
In Indian cuisine, this technique is so fundamental that it has its own dedicated name, varying by region: tadka, chhonk, baghar, phodni, or phoron. A tadka isn’t just a step in a recipe; it is the soul of the dish. As culinary experts note, a pot of plain lentils is just boiled mush until you add the tadka. When you heat ghee or mustard oil and toss in cumin seeds, mustard seeds, garlic, and dried chilies, you are orchestrating a molecular disco party. The moment those spices hit the hot fat, they sizzle, pop, and release a cloud of aromatic oils that can literally be smelled down the street.
This technique is highly regional. In Bengal, cooks might use panch phoron (a five-spice blend) bloomed in sharp mustard oil. Down in Kerala, you’ll find mustard seeds and fresh curry leaves snapping and crackling in rich coconut oil. Up North, cumin and asafoetida (hing) sizzle in clarified butter (ghee). The tadka is often added at the very end of cooking, poured dramatically over a finished dish to coat it in a layer of intensely flavored fat.
But this concept isn’t limited to India. Look at the Latin American sofrito, where aromatics and spices are slowly bloomed in oil to build a foundational flavor base. Look at the fiery, complex chili oils of Sichuan cuisine, created by pouring screaming-hot oil over dried chilies and Sichuan peppercorns to extract their fat-soluble capsaicin and numbing compounds. Even the classic French mirepoix relies on fat to extract the aromatic oils from vegetables and herbs before any liquid is introduced. Across the globe, cooks know the golden rule: fat plus heat equals flavor.
The Non-Negotiable Rule: Banishing Toxic Cookware
Now, before we get to the practical steps, we need to have a very serious conversation about your gear. I am a staunch advocate for the home cook, but I have absolutely zero patience for cheap, toxic kitchen equipment. If you are going to heat oil to 350°F (175°C) to bloom spices, you cannot do it in a scratched, peeling, ten-dollar non-stick pan from a discount bin.
We are officially banishing toxic kitchen gear.
Most conventional non-stick pans are coated with Polytetrafluoroethylene (PTFE), a type of PFAS (per- and polyfluoroalkyl substances)—famously known as “forever chemicals”. These chemicals are incredibly resistant to breaking down in the environment and in our bodies, and exposure is linked to a terrifying laundry list of health issues, including kidney cancer, liver damage, and thyroid disease.
When you heat a PTFE-coated pan, especially when you are just heating a small pool of oil for blooming without a large mass of food to absorb the heat, the surface temperature can skyrocket. Above 500°F (260°C), intact PTFE routinely off-gasses toxic fumes. These fumes cause a documented medical condition called “polymer fume fever” or “Teflon flu,” which leaves humans with fever, chills, and headaches, and is notoriously lethal to pet birds at temperatures as low as 326°F. Let that sink in.
Furthermore, as these pans age, the coatings degrade, scratch, and release microplastics directly into your beautifully bloomed spices. These flaking non-stick pans are a chemical hazard. The evidence is so overwhelming that legislative action is finally catching up. As of January 1, 2025, Minnesota enacted “Amara’s Law,” becoming the first US state to implement a comprehensive ban on the sale of cookware containing intentionally added PFAS. Other states like Vermont, Connecticut, Rhode Island, and Colorado are following suit with bans enforcing between 2026 and 2028.
So, what should you use? You need cookware that can handle heat safely and effectively. This is why basic beginner kitchen tools should always prioritize durable, uncoated materials. For blooming spices, use a small stainless steel skillet, a cast iron pan, or traditional carbon steel skillets. If you want to be truly authentic to the Indian tadka method, invest in a dedicated, small, deep “tadka pan” made of stainless steel or hard-anodized metal, designed specifically to pool the oil and contain the sputtering spices. And please, ditch those ruined ceramic pans once their temporary non-stick coating wears out and starts grabbing onto your food.
The Step-by-Step Masterclass: How to Bloom Like a Pro
Alright, you have your safe pan. You have your spices. Let’s execute this flawlessly. Blooming is fast, which means you need to have your mise en place (ingredients prepped and ready) before you even think about turning on the stove. Spices can go from perfectly toasted to bitter ash in a matter of seconds.
Step 1: Choose Your Fat Wisely
You need a fat with a relatively high smoke point because we want the oil hot enough to fry the spices without burning the fat itself.
- Ghee (Clarified Butter): The absolute gold standard for flavor. Because the milk solids have been removed, ghee can handle high heat (up to 450°F/232°C) without burning, and it adds a rich, nutty backbone to your spices.
- Neutral Oils: Avocado oil, grapeseed oil, or canola oil are excellent blank canvases that let the pure flavor of the spices shine.
- Mustard Oil: Traditional in Bengali cooking, it provides a sharp, pungent kick, but it must be heated to its smoking point first to mellow its raw bite before adding spices.
- Olive Oil: Great for Mediterranean flavor profiles (like blooming red pepper flakes and garlic for pasta), but be careful—extra virgin olive oil has a lower smoke point and can turn bitter if overheated.
Step 2: Heat the Oil
Place your pan over medium heat. You want the oil shimmering, not smoking like a chimney. A good test is to drop a single cumin or mustard seed into the oil. If it immediately sizzles and dances, the oil is ready. If it just sinks and sits there, wait. If it instantly turns black, take the pan off the heat immediately—your oil is too hot.
Step 3: The Order of Operations (Whole vs. Ground)
This is where rookies mess up. Whole spices and ground spices cook at vastly different rates.
- Whole Spices First: Things like mustard seeds, cumin seeds, fennel seeds, and cinnamon sticks need more time to release their oils. Drop them in. Listen for the auditory cues: mustard seeds will literally pop and crackle (keep a lid handy to shield your eyes from flying seeds), and cumin seeds will sizzle and turn a shade darker, smelling intensely earthy. This takes about 10 to 20 seconds.
- Aromatics Second: If you are adding minced garlic, ginger, fresh chilies, or curry leaves, add them now. They contain water, so the oil will violently bubble and spit. Let them fry until fragrant and slightly golden.
- Ground Spices Last: Ground spices (like turmeric, paprika, coriander powder, or ground cumin) have a massive surface area and will burn almost instantly. Take the pan off the heat, or turn it down to the absolute lowest setting, and stir in your ground spices. Let them bloom in the residual heat for just 5 to 10 seconds until they smell incredibly fragrant.
Step 4: Stop the Cooking Process
Once the spices are bloomed, you must immediately halt the frying process so they don’t burn. You do this by adding your liquid ingredients (like diced tomatoes, broth, coconut milk, or the cooked lentils or beans you are flavoring). The liquid drops the temperature of the pan instantly, locking in that perfect flavor profile.
The “Time is Money” Weeknight Strategy
I am a massive proponent of weekend culinary projects, but on a Tuesday night after a long day of work, time is money. You need maximum flavor in minimum time. This is where blooming becomes your secret weapon for fixing a boring dinner.
Let’s say you are making a quick weeknight chili using canned beans and canned tomatoes. If you just dump raw chili powder, cumin, and oregano into the simmering liquid, your chili will taste powdery and flat. Instead, heat two tablespoons of oil in your pot. Add your diced onions and sauté until soft. Then, clear a little space in the center, add a touch more oil if needed, and dump in your chili powder, cumin, and oregano. Stir them in the hot oil for 15 seconds until your kitchen smells like a Tex-Mex restaurant. Then add your tomatoes and beans. You have just tricked your palate into thinking that chili simmered for four hours.
Making a jarred marinara sauce? Heat some olive oil, bloom some red pepper flakes, dried oregano, and minced garlic for 30 seconds, then pour the jarred sauce over it. It completely revitalizes the stale, processed flavors of the jar.
Making roasted vegetables? Don’t just toss raw spices onto the broccoli before baking. Briefly bloom your spices in warm olive oil, let it cool slightly, and then toss your vegetables in that infused oil before roasting. The fat will coat every floret, ensuring the flavor penetrates deeply. And remember, adding a splash of acid like lemon juice right before serving will cut through that rich, spiced fat perfectly.
Fixing Rookie Mistakes
Because I know some of you are going to set off your smoke detectors tonight, let’s troubleshoot the most common blooming disasters.
“My spices turned black and taste like battery acid!”
You burned them. There is no saving burnt spices; they turn irrevocably bitter. Throw it out, wash the pan, and start over. Next time, use lower heat, and remember that ground spices need mere seconds. If your stove runs hot, take the pan completely off the burner before adding the ground powders.
“My dish is incredibly greasy now.”
Blooming requires fat, but you need to account for that fat in your overall recipe. If a recipe calls for two tablespoons of oil to sauté onions, use that same oil to bloom your spices. Don’t add an extra quarter cup of oil just for the spices unless you are making a specific infused chili oil or a finishing tadka.
“The flavor is still weak.”
Your spices might be dead. Ground spices lose their volatile oils rapidly after about six months. If your jar of ground coriander has been sitting in your pantry since the 2018 Olympics, no amount of hot oil is going to resurrect it. Buy fresh spices, preferably whole, and grind them yourself in small batches.
“The oil sputtered everywhere and burned my hand.”
You added an ingredient with a high water content (like fresh garlic, ginger, or curry leaves) to screaming hot oil. Water and hot oil react violently. Stand back, use a longer spoon, or employ a splatter guard.
Advanced Weekend Techniques: Layering and Infusing
Once you master the basic 30-second weeknight bloom, you can start playing with advanced applications.
The Double Tadka
In many traditional Indian recipes, spices are bloomed twice. First, whole spices are bloomed in oil at the very beginning of the recipe to create a flavor foundation (like a sofrito). Then, the dish is cooked. Finally, a second, fresh tadka—often containing more delicate spices, garlic, or dried chilies—is prepared in a separate small pan and poured over the finished dish right before serving. This layers the flavors: you get the deep, mellow, cooked-out notes from the first bloom, and the sharp, bright, punchy aromatics from the second.
Batch Infused Oils
If you want to save even more time, you can bloom large batches of spices in oil, strain them (or leave them in, like a chili crisp), and keep the infused oil in your fridge. A jar of homemade garlic, chili, and star anise oil can be spooned over eggs, noodles, or roasted meats all week long, delivering instant, complex flavor without having to dirty a pan every single night.
Blooming in the Oven
While the stovetop is the most controlled method, you can also bloom spices in the oven. If you are roasting a whole chicken, mix your spices with softened butter or oil, and rub it under the skin. The heat of the oven will bloom those spices in the rendering chicken fat, creating an unimaginably flavorful bird.
Conclusion
Cooking is not about blindly following a list of ingredients; it is about understanding how to manipulate those ingredients to extract their maximum potential. The difference between a mediocre home cook and a great one usually comes down to technique, not the shopping budget.
Stop treating your spices like an afterthought. They are not edible dust meant to be sprinkled into water. They are powerful, fat-soluble flavor bombs waiting to be detonated by heat. Banish your toxic pans, heat up a splash of good oil, and let your spices sizzle. It takes thirty seconds, it costs nothing extra, and it will fundamentally change the way you cook. Now go get your pans hot, keep an eye on your garlic, and stop settling for boring food. Class dismissed.


