Listen, we need to have a serious talk about your breakfast.
Picture this: It is a beautiful Saturday morning. You have decided to treat yourself. You crack a few expensive, pasture-raised eggs into a bowl, whisk them up, and gently push them around a skillet. You slide those seemingly perfect, golden curds onto a plate next to a beautifully toasted slice of artisanal sourdough. You turn your back for exactly thirty seconds to pour yourself a cup of coffee, and when you look back, disaster has struck.
Your beautiful eggs are sitting in a miserable, unappetizing puddle of yellowish water. Your crisp sourdough toast is now a soggy, ruined sponge. Your morning is officially compromised.
If this scenario triggers a deep, visceral rage within you, take a deep breath. I am here to tell you that it is not your fault. You have been lied to by screaming celebrity chefs, outdated culinary school textbooks, and viral internet cooking hacks. You do not lack talent, and you certainly do not need a culinary degree to fix this. You just need to understand a tiny bit of basic kitchen chemistry and unlearn the biggest, most pervasive myth in the breakfast world: the idea that salting your eggs before cooking makes them tough.
Today, we are tearing down the pretentious chef-speak. We are going to permanently eliminate that dreaded puddle of egg water, and we are going to do it without buying a single new gadget.
The Anatomy of a Tragic Breakfast: Why Your Eggs Are Weeping
Before we can fix the problem, we have to understand why your eggs are betraying you in the first place. In the culinary science world, that gross puddle of liquid on your plate has a highly technical name: syneresis. I prefer to just call it “weeping,” because it makes me want to cry.
The Science of Syneresis (No Culinary Degree Required)
To understand syneresis, we have to zoom in on the microscopic structure of an egg. Egg whites are predominantly made up of water and specific proteins, primarily ovalbumin and ovotransferrin. In their raw, uncooked state, these proteins are folded up into tight, complex little bundles, floating peacefully in the water. They are like microscopic balls of yarn.
When you drop those eggs into a hot pan, you introduce thermal energy. This heat causes those tightly wound balls of yarn to unravel—a process called denaturation. Once they are unraveled, they start bumping into each other and linking hands, forming a vast, three-dimensional mesh network. This process is called coagulation. As this mesh network forms, it traps the water inside of it, transforming your liquid egg into a soft, solid curd.
Here is where it all goes wrong. If that protein network binds together too tightly, the mesh shrinks. It acts exactly like a vise grip, physically squeezing the trapped water out of the curds. The proteins contract, the moisture is expelled, and you are left with dry, rubbery, bouncy eggs swimming in a pool of their own squeezed-out liquid. If you are constantly wondering scrambled eggs leak water, this aggressive protein contraction is your culprit.
The Great Salt Myth: Why You’ve Been Lied To By Pretentious Chefs
If you have ever watched a cooking show, you have undoubtedly seen a Michelin-starred chef aggressively warning the audience to never, ever salt scrambled eggs until they are completely cooked and sitting on the plate. The theory pushed by these culinary elites is that salt “cures” the raw egg, breaks down the proteins prematurely, and draws out moisture, resulting in a tough, watery scramble.
This is fundamentally, scientifically, and demonstrably false.
Debunking the Ramsay Rule
The “salt at the end” rule is a classic example of kitchen folklore masquerading as fact. It forces home cooks to rely entirely on absolute, split-second temperature control to prevent their eggs from overcooking and weeping. While a professional line cook with a perfectly calibrated French top stove might be able to pull that off, the rest of us are working with uneven residential burners and screaming toddlers in the background.
I have zero patience for culinary gatekeeping. You do not need to stress yourself out trying to decode pretentious recipe jargon to make a decent breakfast. Thanks to exhaustive food science testing by brilliant minds like J. Kenji López-Alt and Harold McGee, we now have empirical data proving that salting your eggs early does not make them tough. In fact, it does the exact opposite.
The 15-Minute Rule: Your New Morning Ritual
Here is the counterintuitive, rule-breaking secret that will change your weekday mornings forever: You need to salt your eggs exactly 15 minutes before they hit the hot pan.
This is not a viral trend; this is peer-reviewed food chemistry. Let’s break down exactly what happens in that crucial 15-minute window.
The Chemistry of Chloride Ions
When you add kosher salt (sodium chloride) to your raw, whisked eggs, the salt does not immediately draw out moisture. Instead, over the course of about 15 minutes, the salt crystals fully dissolve into the egg’s natural water content, breaking down into positively charged sodium ions and negatively charged chloride ions.
These chloride ions are the magic bullet. They wiggle their way between the egg proteins and actively disrupt the weak electrostatic bonds that normally cause the proteins to seize up. In scientific terms, the salt acts as a “protein plasticizer.” It does not denature the proteins; it simply gives them flexibility.
When these plasticized, pre-salted eggs finally hit the heat of your skillet, the proteins still unravel and link together to form curds. However, because the chloride ions are buffering the connections, the proteins are physically incapable of binding too tightly. The salt literally prevents the vise grip from closing.
Because the protein network remains relaxed and loose, it cannot squeeze the water out. The moisture stays locked inside the curd. The result? You get incredibly tender, pillowy, deeply seasoned eggs that will never, ever leave a puddle on your plate. This technique is an absolute essential kitchen survival guide staple because it requires zero effort. You just have to shift your timeline.
The “No-Go” Rule on Toxic Gear: What Are You Cooking These Eggs In?
Before we get to the step-by-step technique, we need to address the elephant in the kitchen. I can teach you all the protein chemistry in the world, but if you are pouring your beautifully pre-salted eggs into a scratched-up, peeling, toxic nightmare of a frying pan, you are setting yourself up for failure.
I have a strict, non-negotiable rule when it comes to kitchen equipment: I despise cheap, toxic gear.
The Danger of Degraded Non-Stick
Far too many home cooks are still using cheap Teflon pans they bought at a big-box store five years ago. The coating is flaking off into your food, the aluminum core is warped, and everything sticks to the center. When you notice your losing their slip, that is not a sign to use more butter. That is a sign that the chemical coating has degraded and is actively leaching into your meals.
I am a relentless advocate for banishing toxic kitchen gear from your home immediately. You do not need to consume mystery chemicals with your morning coffee.
Safe, Durable Alternatives for Perfect Eggs
If you want professional-level eggs, you need a pan that provides even, reliable thermal conductivity without poisoning you. Here is what you should be using:
- A Well-Seasoned Carbon Steel Skillet: Carbon steel is the unsung hero of the breakfast kitchen. Once properly polymerized with thin layers of oil, it becomes naturally non-stick, incredibly durable, and completely free of synthetic chemicals.
- High-Quality Clad Stainless Steel: Yes, you can absolutely cook scrambled eggs in stainless steel. You just need to understand basic thermodynamics. By preheating the pan correctly, you can utilize the moisture in the eggs to prevent food sticking via the Leidenfrost effect. It takes a bit of practice, but it is a bulletproof, lifetime method.
- High-End Ceramic: If you absolutely must have a convenience pan for busy weekday mornings, invest in a premium, heavy-gauge ceramic-coated pan. Just remember that ceramic is not a forever pan; the sol-gel coating will eventually wear down, so treat it gently.
And while we are auditing your gear, throw away those cheap plastic spatulas with the melted, jagged edges. Have you ever noticed that your silicone spatulas taste like soap? That happens because low-grade, filler-packed silicone absorbs dishwasher detergents and rancid food odors over time. Upgrade to a seamless, platinum-grade silicone spatula. It will glide through your eggs beautifully and won’t make your breakfast taste like lavender dish soap.
The Step-by-Step Masterclass to Flawless, Puddle-Free Scrambled Eggs
We have covered the chemistry, and we have audited your equipment. Now it is time to execute. Cooking is about workflow. If you want to transform your chaotic morning rush into a peaceful daily habit, you need a repeatable system. Here is the definitive, step-by-step masterclass for perfect scrambled eggs.
Step 1: The Pre-Salt and the Waiting Game
Crack your eggs into a mixing bowl. Immediately add your salt. I highly recommend using kosher salt rather than dense table salt, as it dissolves more evenly. A good rule of thumb is a generous pinch (about 1/8th of a teaspoon) for every two eggs.
Whisk the eggs vigorously until the yolks and whites are completely homogenized. You should not see any distinct strands of clear egg white floating in the bowl.
Now, walk away. This is the hardest part for impatient cooks. Set a timer for 15 minutes. Use this time efficiently. Go brew your pour-over coffee, pack the kids’ lunchboxes, load the dishwasher, or simply stare out the window. Give the chloride ions the time they need to plasticize those proteins.
Step 2: The Whisking Strategy (Air vs. Density)
After 15 minutes, return to your bowl. The color of the eggs will have deepened slightly into a rich, translucent orange-yellow. This is visual proof that the salt has done its job.
Now you must make a stylistic choice. Do you want fluffy, diner-style eggs, or dense, creamy, French-style eggs?
If you want fluffy eggs, give the mixture another vigorous whisk right before cooking to incorporate air bubbles. As the eggs cook, the water inside will turn to steam, expand those air pockets, and give you a voluminous scramble. If you prefer dense, custard-like eggs, do not whisk again. Just give them a gentle stir with a fork.
Step 3: Fat is Your Flavor Carrier
Place your safe, non-toxic skillet on the stove over medium-low heat. Add your fat. While olive oil works in a pinch, butter is the undisputed king of scrambled eggs.
Let the butter melt slowly. You want it to foam slightly as its water content evaporates, but you absolutely do not want it to brown. Brown butter is delicious in baked goods, but in scrambled eggs, it overwhelms the delicate flavor of the yolk. Swirl the melted butter so it coats the entire bottom and lower sides of the pan.
Step 4: Temperature Control (Low and Slow)
Pour your eggs into the center of the pan. Do not touch them immediately. Let them sit for just a few seconds until you see a very thin layer of cooked egg form around the absolute edge of the puddle.
Now, using your high-quality silicone spatula, begin gently pushing the eggs from the outside edge of the pan directly toward the center. This creates large, sweeping curds.
The most critical factor here is heat management. High heat is the enemy of eggs. Even with the 15-minute salt buffer protecting your proteins, blasting the pan with high heat will cause the eggs to cook unevenly, resulting in dry, rubbery edges and a raw center. Keep the heat at medium-low. The cooking process should take a few minutes, not 30 seconds.
Step 5: The Pull (Respecting Carryover Cooking)
This is where 90% of home cooks ruin their breakfast. You must pull the eggs off the heat before they look done.
Thermodynamics dictates that food retains heat and continues to cook even after it is removed from the heat source. This is called carryover cooking. If you leave your eggs in the skillet until they look perfectly dry and finished, the residual heat in the pan and in the eggs themselves will continue to cook them for another 60 to 90 seconds on the plate. By the time you sit down to eat, they will be overcooked.
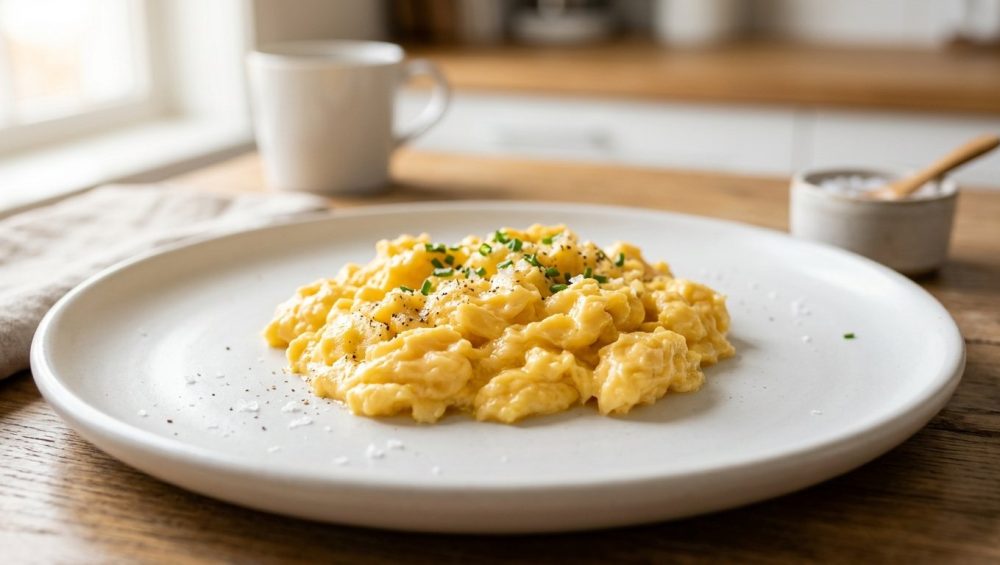
You must remove the pan from the burner when the eggs are mostly set but still look slightly wet, glossy, and underdone. The residual heat will gently finish setting the curds as you transfer them to your plate, resulting in a perfectly moist, tender scramble.
Elevating the Humble Egg: Additions, Upgrades, and Rookie Mistakes
Once you have mastered the basic 15-minute salted scramble, you can start experimenting. However, there are a few common pitfalls you need to avoid if you want to keep your eggs puddle-free.
The Dairy Debate: To Milk or Not to Milk?
Many people grew up adding a splash of milk or water to their raw eggs, believing it makes them fluffier. Here is the truth: adding liquid dilutes the egg proteins, which does make the resulting curds softer. However, adding extra water content (like skim milk) significantly increases the risk of syneresis if you overcook the eggs even slightly.
Because you are utilizing the 15-minute early salting technique, your proteins are already protected from seizing. You do not need milk to achieve tenderness. If you absolutely want to add dairy for flavor, use a tiny splash of heavy cream or a dollop of crème fraîche. The high fat content adds luxurious richness without introducing excess water.
The Veggie Dilemma: Do Not Steam Your Eggs
If you want to add vegetables to your scramble—like onions, bell peppers, or mushrooms—you must respect their water content. Raw vegetables are essentially little sponges filled with water. If you throw raw diced peppers into a pan along with your raw eggs, the vegetables will heat up and release all their internal moisture directly into the eggs. You will end up steaming your eggs in vegetable juice, resulting in a broken, watery mess.
The fix is simple. You must cook your vegetables completely before the eggs ever touch the pan. Sauté them down in a little oil to evaporate their moisture and bring them back to life with deep, caramelized flavor. Once the vegetables are fully cooked and the pan is dry, remove them to a side plate. Cook your eggs using the method above, and then gently fold the cooked vegetables back into the eggs at the very last second before plating. Absolute separation is the key to a dry plate.
The Finishing Touch: Acid and Herbs
Eggs are incredibly rich, especially when cooked in butter. Sometimes, even perfectly salted eggs can taste a bit flat or heavy on the palate. People often forget that rich foods require balance, and just like a heavy beef stew, your dinner actually needs acid, and so does your breakfast.
Try adding a microscopic squeeze of fresh lemon juice, a dash of vinegar-based hot sauce, or a sprinkle of bright, fresh herbs like chives or tarragon right as the eggs hit the plate. The acidity cuts through the fat of the yolks and the butter, elevating the dish from a basic morning staple to a restaurant-quality culinary experience.
The Final Word: Reclaiming Your Breakfast
Cooking is not magic. It is not an exclusive club reserved for people who spent fifty thousand dollars on a culinary degree. Cooking is simply applied chemistry, heat management, and a willingness to question the way things have “always been done.”
The myth that salting scrambled eggs makes them watery has ruined millions of breakfasts over the decades. By understanding the simple mechanics of protein denaturation and the buffering power of chloride ions, you have taken total control over your food. You now possess the knowledge to manipulate the molecular structure of an egg to your exact preferences, using nothing more than a pinch of salt and a fifteen-minute timer.
You do not need to stress over split-second timing. You do not need to eat dry, rubbery curds. You just need to salt your eggs early, use safe and reliable cookware, manage your heat, and pull them from the pan before they look completely done.
So tomorrow morning, crack those eggs, whisk in that salt, and walk away. Let the chemistry do the heavy lifting while you enjoy your coffee. When you finally sit down to eat, you will be met with the most tender, flavorful, and perfectly dry plate of scrambled eggs you have ever made. No puddles. No soggy toast. Just pure, unadulterated breakfast perfection. Now go clean your skillet.


