
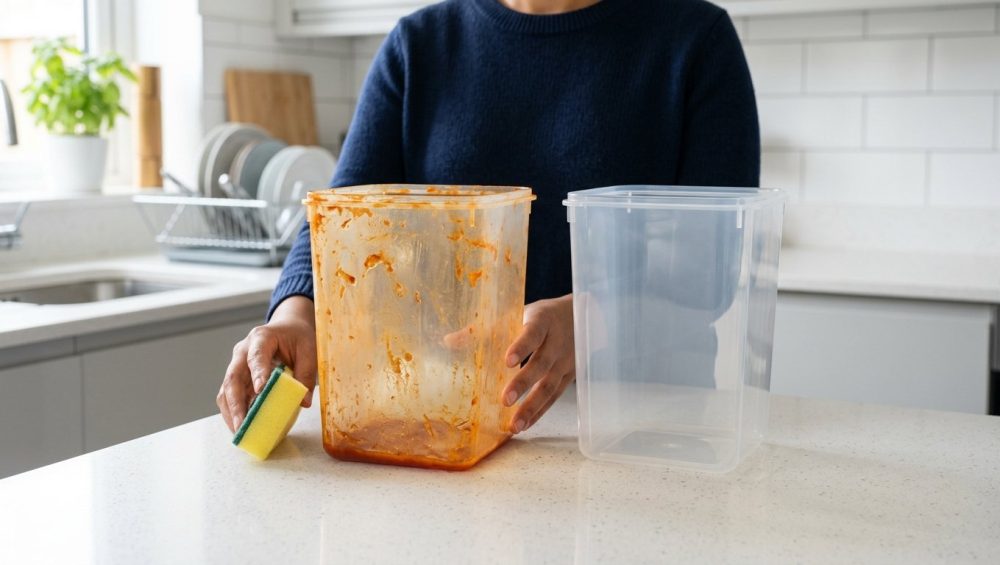
Listen, I know exactly why you are here. You spent your entire Sunday afternoon lovingly simmering a massive, beautiful batch of homemade Bolognese. You achieved absolute culinary perfection, portioned it out for your simple weeknight dinners, and went to bed feeling like an absolute domestic god. But then Tuesday rolled around. You popped that leftover spaghetti into the microwave, enjoyed a fantastic desk lunch, and took your plastic container to the office sink.
And there it was. The dreaded orange ring of death.
No matter how hard you scrub, no matter how much dish soap you relentlessly pump onto your sponge, your once-pristine food storage container now looks like it survived a localized nuclear fallout inside a tomato paste factory. It is stained, it feels permanently greasy, and it is staring back at you in defiance.
I see you. I have been you. As a busy professional and a home cook who relies heavily on weekend meal prep to survive the chaos of the workweek, I used to have a dedicated “sacrificial Tupperware” shelf reserved strictly for anything remotely red, greasy, or heavily spiced. But you don’t need a culinary degree to understand the kitchen chemistry at play here, and you certainly don’t need to accept defeat and throw away your hard-earned money.
Today, we are going to dive incredibly deep into the fascinating, slightly horrifying science of why your plastic containers stain, when those stains cross the line into highly toxic territory, and the proven, scientifically-backed methods to actually clean them out. We are leaving absolutely no stone unturned. Grab a glass of wine, and let’s get into the masterclass.
The Kitchen Crime Scene: Why Your Leftovers Leave a Mark
If you want to defeat your enemy, you must first understand them on a molecular level. The primary villain in our orange-stained saga is a chemical compound called lycopene, and it is an absolute mastermind of destruction.
The Culprit: Lycopene and Fat-Soluble Pigments
Lycopene is a naturally occurring carotenoid pigment found in high concentrations in tomatoes, watermelon, red bell peppers, and papaya. From a nutritional standpoint, it is a fantastic antioxidant for your body. From a culinary and storage standpoint, it is a total menace to your kitchenware.
Here is the crucial bit of organic chemistry you need to wrap your head around: lycopene is a highly hydrophobic molecule. In plain English, that means it violently repels water. It is a fat-soluble compound, which is exactly why your grandmother always told you to cook your crushed tomatoes in a generous glug of olive oil to extract the absolute best flavor and nutrients. However, this fat-soluble nature is precisely what makes it bond so aggressively to certain materials in your kitchen. If you have ever wondered why your tomato sauce tastes metallic when simmered in an unlined, poorly seasoned cast iron skillet, it is because of these intense, reactive chemical properties. Lycopene does not simply sit quietly; it interacts with its environment.
The Victim: Polypropylene (Plastic #5)
Now, let’s look at the victim of this crime. Take a look at the bottom of your stained container. If it is a standard, inexpensive plastic food storage tub, you will likely see a little recycling triangle with the number “5” inside it, or the letters “PP.” This stands for polypropylene.
Polypropylene is the undisputed darling of the commercial food storage industry because it is incredibly cheap to manufacture, lightweight, flexible, and relatively durable against physical drops. However, polypropylene is a petroleum-based polymer. Because it is born from petrochemicals, the plastic itself is also highly hydrophobic and lipophilic (meaning it loves fat).
Remember the golden rule of high school chemistry: “Like dissolves like.”
When you put a fat-loving, hydrophobic pigment (the lycopene from your pasta sauce) inside a fat-loving, hydrophobic container (the polypropylene), they do not just sit next to each other. They become chemically intertwined best friends. The lycopene physically diffuses and bonds with the polymer chains of the plastic. You aren’t just looking at a stain sitting on top of the plastic; you are looking at a stain that has embedded itself inside the molecular matrix of the plastic.
The Thermodynamics of Tupperware: Why Heat is the Enemy
If lycopene is the culprit and polypropylene is the willing victim, heat is the getaway driver that ensures the crime is permanent. Storing cold tomato sauce in a plastic container will give you a mild, annoying stain. But microwaving that same sauce in that same container? You are practically guaranteeing a permanent orange dye job.
Thermal Expansion in Plastics
To understand this, we have to look at the thermal dynamics of polymers. Polypropylene is not a solid, impenetrable wall of material. At a microscopic level, it is a tangled web of polymer chains with amorphous (unstructured) regions. When polypropylene is exposed to heat, it undergoes thermal expansion.
As the temperature rises, the polymer chains gain kinetic energy and begin to move further apart. The microscopic pores and gaps in the plastic physically open up and widen. It is essentially the plastic equivalent of your skin pores opening in a hot steam room.
The Microwave Effect and Superheated Fats
While the plastic’s pores are expanding, the microwave is simultaneously performing dielectric heating on your food. The microwave targets the water and fat molecules in your leftover chili or Bolognese. The fats (like the olive oil you used to sauté your onions, or the rendered grease from your ground beef) liquefy and superheat very quickly.
These superheated liquid fats act as a highly mobile, lycopene-rich delivery system. The hot, red grease seeps deep into the newly expanded pores of the polypropylene. When you finally take the container out of the microwave and it eventually cools down, the polymer chains contract. The pores snap shut, permanently trapping the lycopene deep inside the plastic matrix. No amount of surface scrubbing can reach it, because the stain is literally locked inside the walls of the container. This is the exact mechanism that leads to so many people surviving kitchen disasters only to have their storage gear ruined the very next day.
The “Toxic Gear” Warning: When to Throw It Away
You know my philosophy by now. I am a fierce advocate for the everyday home cook, and I have absolutely zero patience for pretentious, inaccessible chef-speak. But I also have a strict, non-negotiable rule that I enforce in my own home and on this blog: I absolutely despise cheap, toxic kitchenware. I am on a lifelong mission to help you banish toxic kitchen gear from your life for good.
There is a massive difference between a superficial lycopene stain on a brand-new container and a container that is structurally compromised and actively poisoning your meals.
Microplastics and Nanoplastics
This is where the science gets slightly terrifying, and why you need to pay close attention. When you repeatedly heat polypropylene, it undergoes thermal degradation. The structural integrity of the plastic begins to break down at a molecular level.
A landmark 2023 study published in Environmental Science & Technology by researchers at the University of Nebraska-Lincoln revealed something that should make every single home cook pause. They tested FDA-approved polypropylene and polyethylene baby food containers. They found that microwaving these plastics for just three minutes released up to 4.22 million microplastics and a staggering 2.11 billion nanoplastics per square centimeter of plastic [1].
Let that sink in. Billions of nanoplastics. Leaching directly into your food. Every single time you hit the start button on your microwave. Furthermore, the researchers cultured embryonic kidney cells and exposed them to these specific plastic particles, observing up to a 75% mortality rate in the cells over a 48-hour period.
While polypropylene is generally free of BPA (Bisphenol A), it still contains a cocktail of chemical additives, plasticizers, and antioxidants (like BHT and Irganox 1010) that are not permanently bound to the polymer. When the plastic is heated, these chemicals can easily migrate into your food.
The Physical Signs of Degradation
You must immediately throw away (or recycle, if your local facilities accept it) any plastic container that exhibits the following symptoms:
- Warping or Bubbling: If the bottom of your container looks like a topographical map of the Himalayas, the plastic has melted and reformed. Its chemical stability is completely compromised.
- Pitting or Roughness: Run your finger along the inside of the container. If it feels rough, scratched, or pitted, it means the protective surface layer has degraded away. Those micro-scratches are not only harboring billions of bacteria, but they are actively shedding microplastics into your leftovers.
- Peeling or Flaking: If any part of the plastic is visibly peeling or shedding films, it belongs in the trash immediately.
- The “Forever Smell”: If you have washed the container five times and it still smells distinctly like last month’s garlic chicken curry, the polymers have permanently absorbed the volatile organic compounds (VOCs) of the food. It is structurally compromised.
The Single-Use Epidemic
Statistics show that the average family throws away approximately 300 single-use or cheap plastic containers every single year. This is not only an environmental catastrophe; it is a massive, unnecessary drain on your wallet. We buy cheap plastic because it feels convenient in the moment, but we end up treating it as disposable because it degrades and stains so quickly. We can do better.
How to Actually Clean Orange Stains: The Methods That Work
Alright, let’s get down to business. If your container is structurally sound, not warped, perfectly smooth on the inside, and just suffering from a stubborn case of the orange uglies, we can save it. Put down the abrasive sponge. Here are the scientifically proven, highly effective methods to resurrect your Tupperware and fix your food storage game.
The Viral Emulsion Hack (Dish Soap, Warm Water, Paper Towel)
If you take absolutely nothing else away from this article, let it be this specific technique. This is the definitive, 45-second fix that will change your life. It went viral on social media for a reason: it relies on pure fluid dynamics and mechanical emulsion to completely obliterate grease stains.
The Science: By adding a physical abrasive (the paper towel) to a closed environment with a surfactant (dish soap) and kinetic energy (vigorous shaking), you create a high-pressure emulsion. The paper towel physically scrubs the microscopic pores of the plastic, acting as a highly absorbent magnet for the fat-soluble lycopene as the dish soap actively lifts it away from the polymer chains.
The Method:
- Squeeze a generous squirt of high-quality, grease-cutting dish soap (like Dawn, which has a very high concentration of anionic surfactants) directly into the stained container.
- Add a little warm water. Do NOT fill it to the top. You only need about an inch or two of water. You need empty atmospheric space inside the container to generate kinetic energy.
- Tear a single sheet of standard paper towel into three or four pieces and drop them into the soapy water.
- Snap the lid on tightly. (Double-check that the seal is completely locked, unless you want a soapy tomato explosion all over your kitchen walls).
- Shake it vigorously for 45 to 60 seconds. Shake it like it owes you money. You want the wet paper towel to rapidly ricochet around the interior walls, hitting every single corner.
- Open the lid, dump the gross, orange-tinted paper towel into the trash, and rinse the container with warm water.
The stain will be completely gone, or at the very least, dramatically reduced. It is practically magic, and it requires zero elbow grease.
The Baking Soda Paste Method
Sometimes you need to call in the heavy artillery. If the paper towel hack didn’t quite get the deepest, oldest stains, baking soda is your next best friend. Baking soda (sodium bicarbonate) is a mild alkali and a gentle physical abrasive.
The Science: The alkaline nature of baking soda helps to break down the acidic compounds found in tomatoes, while its crystalline structure provides just enough mechanical abrasion to lift trapped pigments without scratching the soft polypropylene. It is the exact same chemical principle that explains why you should add sugar to tomato sauce to balance out harsh acidity.
The Method:
- Rinse the container with warm water, leaving the interior walls slightly damp.
- Sprinkle a very thick layer of baking soda over the stained areas.
- Use your fingers or a soft microfiber cloth to rub the baking soda into a thick, gritty paste.
- Let it sit undisturbed for 15 to 30 minutes. Do not rush this step; give the alkali time to chemically react with the stains.
- Scrub gently with a soft sponge and rinse thoroughly with hot water.
The Sunlight UV Bleaching Trick
If you have time on your hands and absolutely zero desire to scrub anything, let nature do the heavy lifting for you.
The Science: Ultraviolet (UV) light from the sun is highly energetic. It physically breaks down the chemical bonds of the lycopene molecules through a process called photodegradation. When the conjugated double bonds in the lycopene molecule are struck and broken by UV photons, the molecule loses its ability to absorb visible light, effectively turning the stubborn red pigment completely colorless.
The Method:
- Wash the container as best as you can to remove any surface grease.
- Place it outside in direct, unobstructed sunlight. (A windowsill works, but modern window glass is often treated to filter out the specific UV rays needed for this to work optimally, so outside is best).
- Leave it for 24 to 48 hours.
When you bring it back inside, the stain will have magically faded into oblivion.
The Hand Sanitizer / Rubbing Alcohol Technique
Remember how we discussed earlier that lycopene is hydrophobic and will not dissolve in water? Well, it will dissolve in alcohol.
The Science: Isopropyl alcohol or ethanol (the main active ingredients in hand sanitizer) act as non-polar solvents. They can easily penetrate the pores of the plastic and dissolve the fat-soluble lycopene molecules that standard water-based soaps simply cannot touch.
The Method:
- Coat the stained interior of the completely dry container with a generous layer of hand sanitizer or rubbing alcohol.
- Let it sit for 45 minutes to an hour.
- Wipe it out with a dry paper towel. You will literally see the orange pigment transfer directly from the plastic onto the towel.
- Wash the container thoroughly with standard dish soap and water to remove any lingering alcohol residue before using it for food again.
The Denture Tablet Soak
This is an old-school trick that utilizes effervescent cleaning power.
The Science: Denture tablets contain sodium bicarbonate, citric acid, and oxidizing agents. When dropped in water, they create an effervescent mechanical action (bubbles) that physically dislodges trapped particles, while the oxidizers gently bleach organic stains.
The Method:
- Fill the container with warm water.
- Drop in two effervescent denture cleaning tablets.
- Let it sit overnight.
- Dump the solution and wash normally in the morning.
Methods to Avoid: What Ruins Your Containers
As your Sassy Sous-Chef, it is my sworn duty to tell you when you are doing something terribly wrong in the kitchen. Some of the most common cleaning methods you see recommended online are actually destroying your gear. Just like ruining your nonstick pans by scraping them with metal spatulas, you can permanently ruin plastic with the wrong cleaning tools.
Abrasive Sponges and Scrubbers
Put down the green scouring pad. Put down the steel wool. Put down the melamine sponges (Magic Erasers).
When you use a highly abrasive material on soft polypropylene, you are aggressively gouging microscopic scratches into the surface of the plastic. Yes, you might successfully scrub away the stain today, but you have just created thousands of tiny, jagged canyons for future food, grease, and bacteria to hide in. The next time you store spaghetti in that container, the lycopene will seep deeply into those fresh scratches, making the stain ten times worse and completely impossible to ever remove.
Bleach and Harsh Chemicals
While a highly diluted bleach solution can technically oxidize lycopene and remove the color, I strongly, vehemently advise against it for everyday home cooks. Polypropylene is highly porous. If you soak it in bleach, the plastic can easily absorb the chlorine. If you don’t rinse it with absolute, scientific perfection, that bleach will leach into your next meal. Furthermore, harsh chemicals severely accelerate the degradation of the plastic, making it brittle and significantly more likely to shed toxic microplastics. We are cooking food here, not sanitizing a hospital floor. Keep the bleach under the bathroom sink.
The Dishwasher Bottom Rack
Never, ever put thin plastic containers on the bottom rack of your dishwasher. The exposed heating element at the bottom of the machine generates intense, localized heat during the drying cycle. This heat will literally bake any remaining lycopene permanently into the polymer matrix, and it will likely warp the container beyond repair. Always wash plastics on the top rack, or better yet, hand wash them.
Prevention: How to Stop the Orange Stains Before They Start
An ounce of prevention is worth a pound of cure. If you want to stop scrubbing and start living your life, implement these incredibly easy, time-saving weeknight hacks.
The Cold Water Shield
Before you pour that leftover chili or Bolognese into your plastic container, spray the inside of the container with a light mist of very cold water, or simply rinse it under the tap and don’t dry it.
The Science: The cold water causes the pores of the polypropylene to constrict tightly. It also creates a microscopic, temporary hydrophilic (water-based) barrier between the hydrophobic plastic and the hydrophobic lycopene. It won’t last forever, but it provides just enough protection to prevent the initial deep staining while the food cools down in the fridge.
The Fat Separator Principle
Lycopene travels via fat. If you reduce the liquid fat, you reduce the staining power. If you make a massive batch of chili or stew, let it cool slightly in the pot. The excess fat will naturally rise to the top. Skim off that top layer of bright orange grease before you portion the food into your plastic containers. Less fat equals less lycopene delivery system.
Strategic Plating and Storage (The Ultimate Hack)
The absolute best way to prevent stains is to fundamentally change how you reheat your food.
Store your leftovers in the plastic container in the fridge. That is perfectly fine. But when it is time to eat, do not microwave the plastic. Transfer the cold food to a ceramic bowl or a glass plate, and microwave that instead.
By keeping the plastic entirely cold, you completely prevent the thermal expansion that allows the lycopene to penetrate the polymer matrix. You also completely eliminate the risk of microwaving billions of nanoplastics into your lunch. It takes exactly four extra seconds to transfer your food to a real plate, and it saves you five minutes of angry scrubbing later. Time is money, people.
The Oil Barrier (And Why It’s a Double-Edged Sword)
You will see many culinary bloggers recommend spraying the inside of your container with non-stick cooking spray before adding tomato sauce.
Does it work? Yes. The oil creates a sacrificial lipid barrier that the lycopene bonds to instead of the plastic.
Do I recommend it? Absolutely not.
First, aerosol cooking sprays often contain emulsifiers like soy lecithin that build up and become a sticky, impossible-to-remove residue over time. Second, you are intentionally adding extra, unnecessary processed oils to your leftovers. Third, if you microwave that container, the oil will superheat rapidly, melting the plastic underneath it and causing severe pitting. Skip the oil spray entirely.
Upgrading Your Kitchen Storage Arsenal
At the end of the day, polypropylene is a fundamentally flawed material for hot, greasy, highly pigmented foods. If you are serious about your long-term health, your time, and your sanity, it is time to graduate from the cheap plastic lifecycle. Upgrading your storage containers is just as important as investing in essential kitchen tools like a good chef’s knife or a heavy-bottomed skillet.
Investing in Borosilicate Glass
Glass is non-porous, non-toxic, and completely inert. It does not care about lycopene. It does not expand and open microscopic pores when heated. You can bake a lasagna in it, freeze it solid, microwave it for ten minutes, and run it through a commercial dishwasher, and it will emerge looking brand new every single time.
If you have ever had a glass baking dish shattered on you in the past, it was likely made of cheap soda-lime glass experiencing rapid thermal shock. You want to look specifically for borosilicate glass containers (like Pyrex, specifically the older or European models, or brands like OXO). Borosilicate glass (traditionally used in laboratory beakers) contains boron trioxide, which gives it a very low coefficient of thermal expansion. It is highly resistant to thermal shock, meaning it won’t explode if you take it from the fridge directly to the microwave. Yes, glass is heavier and more expensive upfront than plastic, but it is a one-time purchase that will literally last a lifetime.
High-Grade Silicone Alternatives
If you need something lightweight for commuting to the office or packing school lunches for the kids, look into platinum-grade food silicone. Silicone is a synthetic rubber made from bonded silicon and oxygen. It is highly heat-resistant, incredibly durable, and does not leach microplastics into your food when heated.
While silicone can occasionally hold onto strong smells (which is why you might find yourself searching for odor-free silicone cleaning tricks), it is vastly superior to polypropylene when it comes to chemical safety and stain resistance. Brands like Stasher have completely revolutionized the reusable bag and container market with thick, microwave-safe, dishwasher-safe silicone that completely eliminates the need for disposable plastics.
Stainless Steel Containers
For cold storage, stainless steel is king. It is indestructible, lightweight, and completely non-toxic. It will never, ever stain orange. The obvious drawback is that you absolutely cannot put metal in the microwave. However, if you are packing a cold pasta salad, a sandwich, or snacks, a high-quality stainless steel bento box is an incredible, lifetime investment.
Final Thoughts from the Sassy Sous-Chef
Cooking should be a joyful, creative, deeply satisfying process. It should not be a stressful chore that ends with you furiously scrubbing a $2 piece of plastic over the sink for twenty minutes while cursing the very existence of tomatoes. By understanding the underlying chemistry of your kitchenware, you can work smarter, not harder.
Throw away the warped, pitted, smelly containers that are actively shedding microplastics into your meals. Use the 45-second paper towel emulsion hack to save the containers that are simply stained but otherwise structurally sound. And moving forward, protect your food, your health, and your precious time by keeping intense heat far away from polypropylene.
You don’t need a fancy culinary degree to master your home kitchen; you just need a little bit of science, a dash of common sense, and the willingness to demand better from your gear. Now go enjoy that leftover Bolognese—on a real ceramic plate, please.






