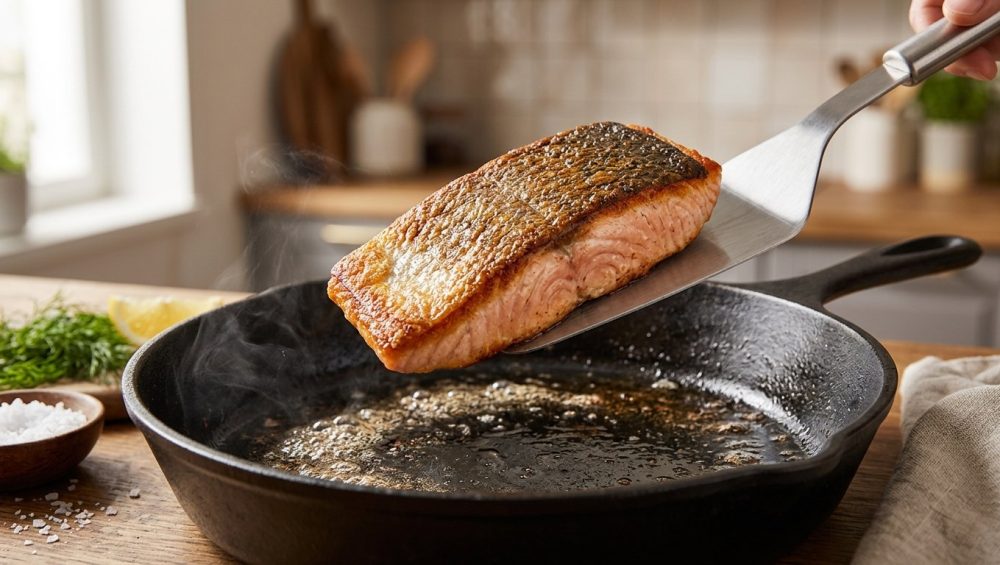
Picture this: it is a beautiful Tuesday evening. You have just spent an absurd amount of your hard-earned money on a pristine, glistening fillet of wild-caught salmon or a delicate, buttery piece of halibut. You have a glass of wine in one hand, a rigid plastic spatula in the other, and a vision of culinary glory in your head. You want that shatteringly crisp, golden-brown skin that you get at overpriced seafood restaurants. You drop the fish into the pan, wait a few minutes, and confidently go in for the flip.
And then, tragedy strikes.
The fish refuses to move. You push harder. The delicate flesh tears, the skin fuses permanently to the metal, and your beautiful, expensive fillet is instantly reduced to a mangled, shredded pile of fish mush. You are left scraping the burnt remnants off the bottom of the skillet while holding back tears of frustration.
We have all been there. It is the ultimate kitchen heartbreak. But wipe your tears, pour yourself another splash of wine, and listen to me: you do not need a Michelin star or a culinary degree to fix this. You just need to understand a few basic, unshakeable rules of physics, chemistry, and heat control. Anyone can master simple weeknight dinners without resorting to ordering expensive takeout. Today, we are going to dive deep into the molecular reasons why your seafood hates your frying pan, and exactly how you can manipulate temperature, moisture, and technique to achieve a flawless, intact, restaurant-quality sear every single time.
The “No-Go” Rule: Why I Absolutely Despise Toxic Non-Stick Pans
I can already hear some of you whispering in the back of the class. “But Sassy Sous-Chef, I’ll just use my trusty non-stick pan! Nothing sticks to that, not even my scrambled eggs!”
Stop right there. Put the cheap, peeling pan down and step away from the stove.
As your resident culinary advocate, I have a strict, non-negotiable rule against cheap, toxic kitchenware. Those so-called “convenient” non-stick pans are a crutch that prevents you from actually learning how to cook, and worse, they are a chemical nightmare. The vast majority of traditional non-stick pans are coated in PTFE (polytetrafluoroethylene), which belongs to the PFAS family of “forever chemicals”. Even if a manufacturer proudly slaps a “PFOA-free” label on their packaging, do not be fooled by the marketing garbage. A 2026 study by the Ecology Center found that 79% of non-stick cooking pans tested still rely on PTFE coatings, often without disclosing it to the consumer.
When these cheap pans inevitably get scratched by a rogue fork, or when you accidentally heat them past their safe thermal threshold, they can begin to degrade and leach these forever chemicals directly into your dinner. According to NIH-reviewed research, the accumulation of PFAS in the human body has been linked to severe health issues, including kidney cancer, testicular cancer, and thyroid disorders. In fact, in 2026, a massive $2.5 million class-action settlement was approved against a major cookware brand, legally barring them from calling their PTFE-coated pans “non-toxic”.
So, no, we are not using a flimsy, toxic crutch to cook our beautiful seafood. banishing toxic kitchen gear is step one to becoming a confident, capable home cook. We are going to use stainless steel, carbon steel, or cast iron. Yes, these materials require you to actually pay attention to what you are doing, but they will last lifetimes, they are entirely safe, and they produce a crust that a non-stick pan could only dream of.
The Science of the Stick: Why Fish Proteins Hate You
To defeat your enemy, you must first understand your enemy. Why do fish fillets always fall apart when they hit a hot stainless steel pan, while a ribeye steak seems to sear effortlessly?
It all comes down to molecular biology and metallurgy.
Fish live in cold, buoyant aquatic environments. Because they do not have to fight gravity the way land animals do, their muscle fibers (actin and myosin) and connective tissues (collagen) are incredibly delicate and designed to function at low temperatures. When you take these fragile, cold-adapted proteins and throw them into a 400°F (200°C) metal environment, they panic. The proteins denature—meaning their tightly wound structures rapidly unwind and seek out new things to bond with.
Now, let us look at your stainless steel pan. To your naked eye, the cooking surface looks perfectly smooth and polished. But under a microscope, that steel is a rugged, jagged landscape full of microscopic pores, valleys, and striations.
When cold, wet, delicate fish proteins hit improperly heated steel, they seep directly into those microscopic valleys. As the heat causes the proteins to denature and unfold, their molecular chains literally form chemical bonds with the metal. They fuse. It is not just that your fish is “stuck”—on a molecular level, your fish and your pan have temporarily become one single entity. When you aggressively try to force a spatula under the fillet, the fragile flesh of the fish gives way long before those chemical bonds do, resulting in a torn, mangled mess.
The Leidenfrost Effect: Your Invisible Shield
So, how do we stop this molecular marriage from happening? We manipulate physics. Specifically, we harness the power of the Leidenfrost effect.
The Leidenfrost effect is a physical phenomenon that occurs when a liquid comes into contact with a mass that is significantly hotter than the liquid’s boiling point. Instead of immediately boiling away, the bottom layer of the liquid instantly vaporizes, creating a microscopic, insulating cushion of steam. This vapor barrier suspends the rest of the liquid (or the moisture in your food) slightly above the hot surface, preventing direct contact.
When searing fish on stainless steel, achieving the Leidenfrost point is your invisible, natural shield. It is the barrier that keeps those unwinding proteins from sinking into the microscopic pores of the metal. If you want to prevent food from sticking, you must respect the thermal dynamics of your cookware. Heating the pan properly before adding the protein—not the other way around—is the single most deterministic rule of cooking on stainless steel.
Moisture is the Enemy: The Art of the Dry Brine
We have established that we need heat to create our vapor shield. But there is a catch: water is the ultimate enemy of a good, crisp sear.
If you take a soaking wet fillet of fish straight from its plastic packaging and throw it into a hot pan, the thermal energy of the skillet is immediately hijacked. Instead of searing the flesh, the heat is forced to expend all its energy boiling away the surface water. The temperature of the pan plummets, the Leidenfrost shield collapses, the fish steams instead of searing, and those denaturing proteins dive right into the metal pores to fuse. Steaming equals sticking.
To achieve a flawless release, the surface of your fish must be bone-dry.
The Weekday Shortcut: Aggressive Patting
If it is a Wednesday night, you are exhausted, and you just want dinner on the table in fifteen minutes, you do not have time for elaborate prep. Your time is money. In this scenario, take a stack of heavy-duty paper towels and pat that fish aggressively. Press down on the skin. Press down on the flesh. Wipe the sides. Let it sit on a dry paper towel for five minutes while you prep your pan, and then pat it dry one more time right before it hits the oil.
The Weekend Perfectionist: The Dry Brine
If it is the weekend and you want to truly elevate your culinary game, you need to dry brine your fish. Brining fish with salt before cooking extracts excess moisture from the flesh and firms up the delicate muscle fibers, making it significantly easier to handle in the pan.
For a quick, highly effective dry brine, use the “Golden Ratio”: 2 parts kosher salt, 1 part white sugar, and 1 part brown sugar. The salt draws out the water through osmosis, while the sugar balances the salinity and aids in caramelization later on.
- Lay your fillets on a wire rack set over a baking sheet.
- Generously coat the flesh side with your brine mixture (do not salt the skin yet, as it can draw out too much moisture and cause oil splattering later).
- Let it sit in the refrigerator for 10 to 15 minutes. Do not leave it for hours unless you are making cured lox, or you will end up with a salt lick.
- Rinse the fish quickly under freezing cold water to remove the excess cure, and then pat it absolutely, ruthlessly dry with paper towels.
As a massive bonus, this dry brining process firms up the exterior proteins so quickly that it prevents the dreaded albumin leak—which is exactly salmon oozes white stuff out of the sides when it cooks.
The Maillard Reaction: Your Natural Non-Stick Coating
Now that we have a bone-dry piece of fish and an understanding of the Leidenfrost effect, we need to talk about the actual cooking process. The ultimate goal of pan-searing is to trigger the Maillard reaction.
Often mistakenly referred to simply as “caramelization” (which is the browning of sugars alone), the Maillard reaction is a highly complex chemical reaction between amino acids (proteins) and reducing sugars that occurs under high heat. This reaction is responsible for the glorious brown crust on a seared steak, the golden exterior of a baked loaf of bread, and the savory, umami-rich flavor of crispy fish skin.
The Maillard reaction generally kicks into high gear at temperatures around 300°F (150°C). Because water boils at 212°F (100°C), the reaction absolutely cannot happen if there is surface moisture present; the temperature will stall at the boiling point until the water is gone. This is why our dry brining step was so crucial for accelerating the Maillard reaction.
Patience is a Culinary Virtue
Here is the magic secret that separates professional chefs from panicked home cooks: the Maillard reaction is your natural pan release.
When the fish first hits the hot steel, it will stick temporarily. This is normal. As the heat drives off the remaining microscopic moisture and the Maillard reaction begins to build a crust, the proteins undergo a physical change. They complete their denaturing process, they dehydrate slightly, and they contract. Once that deeply browned, structurally sound crust has formed, the fish will spontaneously release itself from the metal.
The biggest mistake you can make is letting your anxiety take over. If you try to slide your spatula under the fish and you feel resistance, stop. Do not force it. The pan is literally telling you, “I am not done building the crust yet.” Have patience. I promise you, I have stopped burning dinner every night simply by learning to step back, take a sip of wine, and let the thermodynamics of the skillet do the heavy lifting.
The Secret Weapon: Why You Need a Flexible Fish Spatula
We have covered the biology, the physics, and the chemistry. Now, we need to talk about the mechanics of your gear. If you are trying to flip a delicate piece of fish with a thick, rigid, plastic pancake flipper, you are setting yourself up for failure. You need a specialized tool.
Long before we were searing salmon in modern kitchens, 18th-century European dining tables featured ornate silver “fish slices”—broad, perforated serving utensils designed to lift fragile cooked fish without breaking it while allowing cooking liquids to drain. Today, that concept has evolved into one of the most brilliant, versatile tools in the culinary arsenal: the flexible stainless steel fish spatula.
Anatomy of the Perfect Tool
A proper fish spatula is a masterclass in functional design. It features an extra-long, razor-thin, slotted blade made of highly flexible stainless steel.
- The Beveled Edge: Unlike a blunt plastic flipper, a fish spatula has a sharp, beveled leading edge that can pry and scrape under food with the precision of a knife.
- The Flexibility: The thin steel is springy and flexible, allowing you to press down on the handle and force the blade to sit completely flush against the bottom of the pan.
- The Slots: The wide slots reduce the surface area of the spatula, preventing a vacuum effect from sticking the spatula to the fish, while also allowing excess hot oil to drain away safely.
- The Angle: The head of the spatula is bent at a slight angle, meaning you do not have to awkwardly contort your wrist to get under the food.
The Tangent Technique
When you use a rigid spatula, you are attacking the food at a steep angle. You end up pushing the fish across the pan, plowing into the crust, and tearing the flesh.
With a flexible fish spatula, you apply downward pressure on the handle so the blade bends. This makes the leading edge of the spatula completely tangent to the surface of the pan. Tangency means you are sliding under the crust, cleanly severing any lingering bonds between the food and the metal with minimal force and zero deformation. It acts as an extension of your own hand. Once you buy one, you will use it for everything from flipping delicate eggs to scraping roasted vegetables off baking sheets.
The Step-by-Step Masterclass for Flawless Pan-Seared Fish
Alright, class. We have learned the theory. Now it is time for the practical exam. Here is your definitive, foolproof, step-by-step guide to pan-searing fish on a stainless steel skillet without tearing it to pieces.
Step 1: Prep the Fish
Take your fish out of the refrigerator 15 minutes before you plan to cook it to take the chill off. If it is the weekend, perform the 15-minute dry brine method mentioned above. If it is a busy weekday, aggressively pat the fish bone-dry with paper towels. Season it with salt and pepper right before it goes into the pan (if you salt it too early without rinsing, it will draw moisture to the surface and ruin the sear).
Step 2: The Naked Pan Preheat
Place your clean stainless steel skillet on the stove over medium heat. Do not put oil in yet. We are going to preheat the pan naked. Let it heat up for 2 to 3 minutes.
To test if the pan is ready, perform the water drop test. Flick a few drops of water into the skillet.
- If the water sits there and aggressively boils away, the pan is too cold. Wait another minute.
- If the water instantly shatters into a dozen tiny, aggressive droplets that spit everywhere, the pan is too hot. Take it off the heat for a moment.
- If the water forms a single, cohesive bead that glides and dances around the surface of the pan like a bead of mercury, you have achieved the Leidenfrost point. The pan is perfectly ready.
Step 3: The Oil Shimmer
Now, add your cooking oil. Do not use extra virgin olive oil or butter for this initial sear; their smoke points are too low and they will burn instantly. Use a high-heat oil like grapeseed, avocado, or clarified butter (ghee). You want just enough to coat the bottom of the pan.
Because the pan is already hot, the oil will heat up in seconds. Watch it closely. When the oil begins to shimmer and flow like water, and you see the very first, faintest wisp of smoke, it is go-time.
Step 4: The Drop
Carefully lay your bone-dry fish into the pan, skin-side down. Always lay the fish away from you. This way, if the fish slips and splashes the hot oil, the oil splatters toward the back of the stove, not onto your hands or your favorite apron.
Step 5: The Press
When fish skin hits high heat, the proteins contract violently, which causes the fillet to curl up into a U-shape. If it curls, only the very edges of the skin will touch the pan, and the center will be pale and rubbery.
Immediately take your flexible fish spatula and press down firmly and evenly on the top of the fillet for about 10 to 15 seconds. This forces the entire surface area of the skin to maintain direct contact with the hot metal until the proteins relax and the fish holds its flat shape.
Step 6: The Wait (Do Not Touch It!)
Once the fish is flat, take your hand off the spatula. Step back. Do not poke it. Do not nudge it. Do not try to peek underneath it. Let the Maillard reaction do its job.
Lower the heat slightly to medium-low so you do not burn the crust before the heat penetrates the flesh. You will see a white, opaque line of cooked fish slowly creeping its way up the side of the fillet.
Step 7: The Flip
When that line of cooked flesh has moved about two-thirds of the way up the side of the fish (usually 3 to 5 minutes, depending on thickness), it is time to flip.
Press your fish spatula down so the blade bends and becomes tangent to the pan. Slide it confidently under the fish. If the crust has formed properly, the fish will release with virtually no resistance. Flip it over.
Step 8: Weekday Efficiency vs. Weekend Elegance
If you are cooking on a Tuesday, simply let the fish cook on the flesh side for another 60 seconds until it is opaque, remove it from the pan, and serve.
Weekday Hack: If you want an absolute guarantee that your fish will not stick, and you want a gorgeously browned crust without managing smoking oil, utilize the secret power of mayonnaise. Instead of pouring oil into the pan, brush a very thin layer of full-fat mayonnaise directly onto the dry fish fillet before placing it in the hot skillet. Mayonnaise is an emulsion of oil and egg yolks. The oil provides the searing fat, and the egg proteins trigger an incredibly fast, perfectly even Maillard reaction that releases from the pan effortlessly. It sounds crazy, but it works flawlessly.
If it is the weekend and you are showing off, this is when you drop the heat to low, throw a tablespoon of cold unsalted butter, a crushed garlic clove, and a sprig of fresh thyme into the pan. As the butter foams, tilt the skillet and use a spoon to repeatedly baste the foaming, aromatic butter over the top of the crispy skin. This adds immense flavor and gently finishes cooking the fish.
Troubleshooting: When Good Fish Goes Bad
Even with the best intentions, sometimes things go slightly awry. Here is how to diagnose your kitchen failures so you never repeat them.
The Skin Curled Up and Didn’t Crisp
You forgot Step 5. You must press the fish down firmly for the first 10 seconds. Alternatively, if you are cooking a fish with incredibly thick skin (like a large snapper or bass), the contraction can be so strong that pressing isn’t enough. Next time, use a sharp knife to score shallow diagonal slits into the skin before cooking. This severs the connective tissue and prevents curling.
The Oil Splattered Everywhere and Smoked Violently
Your fish was too wet. Water and hot oil are mortal enemies. When water hits hot oil, it rapidly expands into steam, violently throwing droplets of scalding oil into the air. Pat your fish drier next time. If your oil is smoking heavily before the fish even goes in, your pan is entirely too hot. Take it off the burner, let it cool for a minute, wipe it out, and start over.
It Still Stuck (A Little Bit)
If you followed all the rules and the fish still grabbed onto the pan, there are two likely culprits. First, you might have panicked and tried to flip it 30 seconds too early. Remember, the Maillard reaction is your release mechanism. Let it finish. Second, your pan might not have been completely clean. If there was polymerized, burnt-on grease from a previous meal hiding in the microscopic pores of your stainless steel, it will act like glue. Scrub your pans properly with a specialized stainless steel cleaner (like Bar Keepers Friend) to keep the surface pristine.
You Are the Master of Your Skillet
Cooking delicate seafood on stainless steel is not a dark art reserved for restaurant chefs. It is a predictable, manageable process governed by the laws of thermodynamics. By ditching the toxic non-stick crutches, respecting the Leidenfrost effect, aggressively removing surface moisture, and employing the mechanical genius of a flexible fish spatula, you have completely eliminated the variables that cause fish to tear.
You are no longer at the mercy of your cookware. You are the master of your skillet. Now go buy a beautiful piece of salmon, pour that glass of wine, and sear with absolute confidence. Dinner is going to be spectacular.