
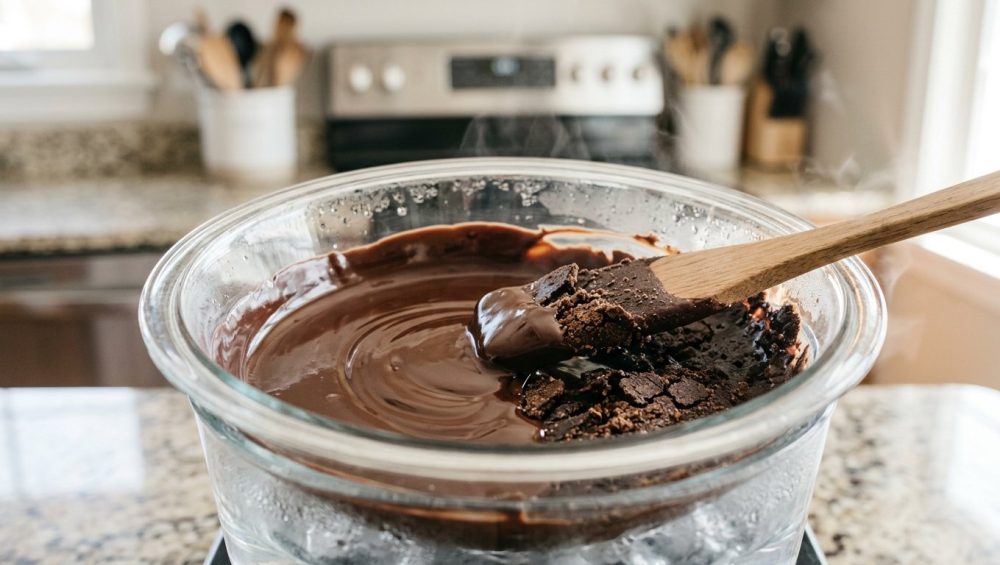
Listen here, my ambitious weekend culinary warriors. We need to have a serious, sit-down conversation about one of the most soul-crushing, expletive-inducing tragedies that can occur in a home kitchen. You know the exact scenario I am talking about. You have spent good money on premium couverture chocolate. You are meticulously preparing a decadent dessert to impress your friends, your in-laws, or maybe just your cat. You place your chocolate over the heat, watching it transform into a glossy, liquid pool of pure joy. You turn your back for five seconds, and when you look again, your glorious, glossy pool has transformed into a stiff, gritty, muddy paste that looks like potting soil.
You panic. You stir faster. It gets worse. You have just experienced the devastating betrayal of seizing, and you are currently staring into the abyss of a ruined dessert.
Before you throw the bowl across the room and order takeout in a fit of rage, take a deep breath. I have ruined more batches of chocolate than I care to admit, and I am here to tell you that you do not need a fancy culinary degree from a pretentious French institute to understand why this happens. More importantly, you do not need to throw that expensive chocolate in the trash.
Today, we are going to dive deep into the fascinating, slightly infuriating chemistry of why your melted chocolate turns clumpy, how to prevent it from ever happening again, and the completely counterintuitive miracle cure that will resurrect your seized chocolate from the dead. Grab a glass of wine, tie your apron, and let us get to work.
The Science Behind the Grainy Mess: What Actually Just Happened?
If we are going to conquer the kitchen, we have to understand the science of our ingredients. I promise I will keep the pretentious chef-speak to an absolute minimum, but we need to talk about chemistry for a minute. Understanding the molecular behavior of your food is the only way to stop relying on blind luck and start cooking with actual authority.
Cocoa Butter: The Fragile Fat Matrix
To understand why chocolate seizes, you first have to understand what chocolate actually is. In its solid state, a bar of chocolate feels like a single, unified ingredient. It is not. Chocolate is actually a highly complex, metastable emulsion—or more accurately, a suspension.
At a microscopic level, chocolate is made up of millions of tiny, dry solid particles. These particles are primarily cocoa solids and microscopic sugar crystals (and milk powder, if you are using milk chocolate). These dry particles are suspended in a continuous fat phase, which is the cocoa butter.
When you heat chocolate, the cocoa butter melts, transforming from a solid fat into a liquid oil. The dry cocoa and sugar particles do not melt; they simply float around in this liquid fat, creating the smooth, glossy, fluid texture we associate with melted chocolate. Because cocoa butter is a fat, it coats the dry particles, allowing them to slide past one another with zero friction. It is a beautiful, delicate, and incredibly fragile ecosystem.
The Enemy Unveiled: Why a Single Drop of Water Ruins Everything
Here is the crux of the problem: those dry cocoa and sugar particles are hydrophilic, meaning they absolutely love water. Cocoa butter, being a fat, is hydrophobic, meaning it repels water.
Under normal circumstances, the sugar and cocoa particles are perfectly content floating in their cocoa butter swimming pool. But the moment you introduce even a microscopic amount of moisture—as little as 1 to 2 percent by weight—everything goes to hell.
When a stray drop of water enters the bowl, the hydrophilic sugar and cocoa particles instantly aggressively absorb it. The water acts as a binding agent, causing the sugar particles to form tight hydrogen bonds with one another. They instantly glue themselves together into massive, gritty clumps, violently dragging themselves out of the continuous fat phase.
Because the particles are now glued together by the water, they can no longer slide past one another. The cocoa butter is squeezed out, and the smooth, fluid suspension instantly collapses into a stiff, dull, grainy mass. This is a physical phase separation, and it happens in the blink of an eye. This is why a wet spatula is one of the most common rookie kitchen mistakes that will instantly destroy your dessert prep.
Temperature Tantrums: Scorching vs. Seizing
Before we move on, we need to clarify a crucial distinction. People often confuse “seized” chocolate with “scorched” chocolate, but they are two entirely different kitchen disasters.
Seizing, as we just established, is a physical reaction caused by the introduction of moisture. The chocolate becomes thick and grainy, but it does not necessarily taste burnt.
Scorching is a chemical burn caused by excessive, aggressive heat. Dark chocolate should never be heated above 120°F, and milk or white chocolate should never exceed 105°F to 110°F. If you blast your chocolate over a roaring flame, the proteins will denature, the sugars will caramelize and burn, and the chocolate will develop a foul, bitter, “burnt cardboard” flavor.
If you scorch your chocolate, there is no saving it. It belongs in the garbage. But if you have merely seized your chocolate with a stray drop of water, we can fix it.
The “No-Go” Rule: Toxic Gear That Is Sabotaging Your Desserts
As your sassy sous-chef, I have a strict, non-negotiable philosophy when it comes to kitchen equipment. I have zero patience for cheap, toxic, poorly manufactured garbage that makes your life harder and leaches mystery chemicals into your food. If you are struggling with your cooking, there is a very high probability that your terrible cookware is to blame.
Ditch the Mystery Metal and Peeling Non-Stick
When setting up a double boiler (or a bain-marie, if you want to sound fancy at dinner parties), the vessel you use to hold your chocolate matters immensely.
I want you to go into your cabinets right now and throw away any cheap, peeling non-stick pots you are using for this process. We are banishing toxic kitchen gear from our lives permanently. When non-stick coatings degrade, they not only flake into your food, but they also fail to distribute heat evenly.
You need high-quality, heavy-gauge stainless steel. A high-quality stainless steel bowl set over a stainless steel saucepan is the undisputed champion of the home kitchen. Stainless steel is non-reactive, incredibly durable, and transfers heat efficiently and predictably. If you ever want to test the quality of your stainless steel pans, look up the water drop test; while it is primarily used for searing meats, it will quickly teach you how your specific pans hold and distribute thermal energy.
The Glass Bowl Dilemma
Many home cooks use a tempered glass bowl over a saucepan for their double boiler. While glass is non-toxic and perfectly safe, it comes with a massive caveat that you need to be aware of: glass is a thermal insulator, not a thermal conductor.
This means that glass takes a long time to heat up, but once it gets hot, it stays hot for a very long time. If you melt chocolate in a glass bowl and turn off the stove, the glass will continue to pump intense, residual heat into your chocolate for minutes afterward, which can easily lead to scorching. If you insist on using a glass bowl, you must remove it from the saucepan before the chocolate is fully melted, allowing the residual heat to finish the job gently.
How to Melt Chocolate Like a Professional (Without the Culinary Degree)
Now that we understand the chemistry and have thrown our toxic pans in the dumpster, let us talk about proper technique. Professional results in a home kitchen are entirely achievable, provided you follow the rules.
The Double-Boiler Method: The Gold Standard (If You Do It Right)
The double boiler is the most reliable, foolproof way to melt chocolate, but only if you respect the thermodynamics at play.
You fill a saucepan with a small amount of water and place a slightly larger, completely dry stainless steel bowl on top. The bowl should rest snugly on the rim of the saucepan, trapping the steam inside. Crucial Rule: The bottom of the bowl must never touch the water. If the bowl touches the water, you are applying direct, aggressive heat to the chocolate, which will cause it to scorch.
Here is the secret protocol that most amateur recipes fail to mention: you must maintain the water in the saucepan below 130°F. Do not let the water come to a rolling boil. If the water boils, it generates violent, aggressive steam. That steam will seek the path of least resistance, escaping through the tiny gaps between the bowl and the pan, condensing in the cooler kitchen air, and raining microscopic water droplets down into your chocolate.
Keep the water at a gentle, barely-there simmer (around 130°F). The gentle, indirect steam will warm the bowl perfectly. Stir the chocolate continuously with a bone-dry silicone spatula. It takes a little patience, but the resulting glossy, fluid texture is perfect for everything from truffles to a mindful fondue bar.
The Microwave Method: The Weekday Shortcut
I am a staunch advocate for the home cook, and I know that on a Tuesday night, time is money. Sometimes, you do not have the patience to set up a double boiler. You can use the microwave, but you must treat it like a loaded weapon.
Microwaves do not heat food evenly; they create intense, localized hotspots that can scorch chocolate in seconds. To prevent this, chop your chocolate into uniform, small pieces. Place them in a dry, microwave-safe bowl.
Set your microwave to exactly 50% power. This is non-negotiable. Microwave the chocolate in 15-second bursts. After every single 15-second interval, you must take the bowl out and stir it vigorously with a dry spatula, even if it looks like nothing has melted yet. The friction of stirring redistributes the heat and prevents those localized hotspots from burning the cocoa solids. Stop microwaving when the chocolate is about 90% melted, and let the residual heat finish melting the remaining lumps.
The Counterintuitive Miracle Cure: How to Fix Seized Chocolate
Alright, let us address the elephant in the room. You messed up. A rogue drop of water got into your bowl, or you stirred your chocolate with a wooden spoon that was holding onto hidden moisture. Your chocolate has seized into a grainy, horrific paste.
Your first instinct is going to be to panic. Your second instinct will likely be to try and thin it out by adding a splash of cold milk or cold water. If you do this, you will only make the clumping worse.
To fix seized chocolate, we have to look back at our chemistry lesson. The sugar particles have glued themselves together because there was just enough moisture to make them sticky, but not enough moisture to actually dissolve them. Therefore, the fix is completely counterintuitive: you must aggressively add more liquid to forcefully break the hydrogen bonds and re-emulsify the mixture.
Here are the two scientifically proven, foolproof methods to rescue your batch.
The Boiling Water Rescue Mission
If you want to restore your seized chocolate to a fluid, workable state, you are going to use boiling water. Yes, you heard me correctly. We are going to fight water with water.
The Protocol: For every 1 ounce of seized chocolate in your bowl, you must add exactly 1 tablespoon of boiling water.
Do not use warm water. Do not use tap water. It must be boiling. Pour the exact measurement of boiling water directly into the seized grainy mess, and immediately begin whisking vigorously.
Why does this work? By flooding the environment with a significant volume of boiling water, you are providing enough liquid to completely dissolve the stubborn, clumped sugar particles, turning them into a fluid syrup. The intense heat of the boiling water melts the rigid clumps, and the vigorous whisking forces the newly formed syrup to emulsify back into the continuous fat phase of the cocoa butter.
Within seconds of aggressive whisking, your chocolate will magically transform from a gritty paste back into a smooth, glossy, liquid state. Once you learn how to save it, you will feel like an absolute culinary wizard.
The Warm Oil Emulsion Trick
If you do not want to introduce water into your dessert (perhaps you are making a rich ganache or a specific glaze), you can use fat to fix the problem instead.
The Protocol: For every 1 ounce of seized chocolate, add exactly 1 tablespoon of warm, neutral-flavored oil (like grapeseed, canola, or sunflower oil), or warm clarified butter.
Pour the warm oil into the seized chocolate and stir gently but firmly.
Why does this work? By introducing a massive wave of compatible liquid fat, you are artificially rebuilding the continuous fat phase that the water destroyed. The warm oil coats the clumped, hydrophilic sugar particles, lubricating them and forcing them to separate and slide past one another once again. The result is a beautifully smooth, fluid chocolate sauce.
When to Accept Defeat (And What to Do With the Gritty Remains)
I need to be brutally honest with you: while these rescue missions will restore the smooth, fluid texture of your chocolate, they permanently alter the chemical structure of the ingredient.
Once chocolate has been seized and rescued with boiling water or oil, it can never be tempered again. It will never set up into a hard, snappy, shiny shell. You cannot use rescued chocolate to make homemade truffles with a crisp exterior, and you cannot use it for delicate candy-making.
However, rescued chocolate is absolutely perfect for applications where the chocolate is meant to be soft. You can use it as a drizzle for cakes, a base for hot cocoa, a rich sauce for a mindful sundae bar, or fold it into a brownie batter.
If you absolutely needed tempered chocolate for your recipe, you have to accept defeat, set the rescued chocolate aside for a future baking project, and start over with a fresh batch. Knowing how to pivot and repurpose your mistakes is the absolute key to surviving kitchen disasters without losing your mind.
Foolproof Protocols to Prevent Seizing Before It Starts
Fixing seized chocolate is a great party trick, but as a home cook who values efficiency and sanity, your ultimate goal should be to prevent it from ever happening in the first place. Here is my non-negotiable checklist for flawless chocolate melting.
The 130°F Rule for Double Boilers
I am repeating this because it is the single most important rule of the double boiler: keep the water in your saucepan below 130°F. Buy an instant-read digital thermometer. Use it. If your water is bubbling aggressively, it is too hot. You want a lazy, gentle, barely-visible simmer. This prevents the aggressive steam vapor that causes condensation, which is the primary culprit behind seized chocolate.
Humidity and Your Kitchen Environment
Chocolate is a diva, and it is highly sensitive to the ambient environment. You cannot successfully melt chocolate if your kitchen feels like a tropical rainforest.
If you are boiling a massive pot of pasta for dinner, or simmering a huge batch of soup on the adjacent burner, the ambient humidity in your kitchen will skyrocket. That airborne moisture can and will settle into your bowl of chocolate, causing it to seize inexplicably. When working with chocolate, ensure your kitchen is cool, dry, and well-ventilated.
The Condensation Trap
Never, under any circumstances, place a lid over a bowl of warm, melting chocolate.
When you cover warm chocolate, the heat radiating from the bowl gets trapped by the lid. When that warm air hits the cooler surface of the lid, it immediately forms condensation. Those water droplets will gather, grow heavy, and rain directly down into your beautiful chocolate, destroying it instantly. Let your chocolate breathe.
Furthermore, when you lift your bowl off the saucepan of the double boiler, immediately wipe the bottom of the bowl with a dry kitchen towel. If you do not wipe the bottom, the condensation clinging to the exterior of the bowl can easily drip into your chocolate when you tilt the bowl to pour it. It is the hidden danger of a wet bowl that catches even experienced bakers off guard.
Dry Your Tools. Then Dry Them Again.
Water is the enemy. Before you even open your chocolate bars, you must ensure that your bowls, your spatulas, your cutting boards, and your hands are bone dry.
Do not use wooden spoons to stir chocolate. Wood is a porous material that absorbs and retains moisture from previous washings. Even if a wooden spoon feels dry to the touch, the heat of the chocolate can draw hidden moisture out of the wood grain, instantly seizing your batch. Use a seamless, high-quality silicone spatula.
If you are washing strawberries or other fruits to dip in your chocolate, you must wash them hours in advance and pat them aggressively dry with paper towels. A single drop of water hiding in the leaves of a strawberry will ruin the entire bowl.
Frequently Asked Questions About Chocolate Disasters
Because I know you still have questions, and because I want to leave absolutely no stone unturned in this masterclass, let us address the most common inquiries I get from frustrated weekend bakers.
Can I use seized chocolate for baking?
Absolutely. As long as you have not scorched it (burnt it to a bitter crisp), seized chocolate is perfectly safe to eat and bake with. Once you have rescued it using the boiling water or warm oil protocols mentioned above, it is fantastic for folding into muffin batters, brownie mixes, or using as a base for a rich chocolate glaze. It will not have the structural integrity for a snappy candy coating, but it will taste incredible in a baked good.
Why does white chocolate seize faster than dark chocolate?
White chocolate is the ultimate prima donna of the baking world. In fact, legally speaking, white chocolate isn’t even technically chocolate, as it contains zero cocoa solids. It is a fragile blend of cocoa butter, sugar, milk solids, and lecithin. Because it contains a high percentage of dairy and sugar, its melting point is significantly lower than dark chocolate, and its emulsion is much weaker.
White chocolate will seize at the absolute slightest provocation of moisture, and it will scorch at temperatures above 110°F. When working with white chocolate, you must be doubly vigilant about keeping your double boiler water well below 130°F and ensuring absolute bone-dry conditions.
Does the quality of the chocolate matter?
Yes, immensely. Cheap, mass-market chocolate chips found in the baking aisle are heavily engineered to retain their shape in the oven. They are packed with stabilizers, artificial emulsifiers, and a lower percentage of cocoa butter. Because they are designed not to melt easily, they are incredibly prone to seizing and becoming clumpy when you try to force them into a liquid state.
If you want smooth, professional-grade melted chocolate, you need to buy high-quality chocolate bars or professional couverture discs (callets). Couverture chocolate contains a higher percentage of pure cocoa butter, which creates a stronger, more fluid emulsion that is far easier to work with. Stop buying cheap ingredients and expecting premium results.
Can I use extracts to flavor my melted chocolate?
This is a phenomenal question and a trap that catches thousands of home cooks. Standard baking extracts (like vanilla, almond, or peppermint extract) are water-based or alcohol-based.
If you pour a teaspoon of standard liquid vanilla extract into a bowl of perfectly melted chocolate, you are dumping a concentrated dose of water directly into the fat matrix. The chocolate will seize violently and immediately.
If you want to flavor your melted chocolate, you must strictly use oil-based flavorings or powdered flavorings. Oil-soluble flavorings will blend seamlessly into the cocoa butter without disrupting the delicate suspension.
Conclusion: You Are Now a Chocolate Whisperer
Cooking and baking should not be a source of anxiety. It should be a joyful, creative process. Yes, things will go wrong. You will drop things, you will burn things, and you will inevitably seize a bowl of chocolate at some point in your life.
But the difference between a stressed-out amateur and a confident home cook is not perfection; it is the ability to understand the science of what went wrong and possessing the knowledge to fix it.
You now understand the delicate, hydrophilic nature of cocoa particles. You know why a single drop of water acts as a catastrophic binding agent. You know how to maintain your double boiler below 130°F to prevent rogue condensation, and you know how to wield boiling water and warm oil to forcefully re-emulsify a broken batch.
You are fully equipped to tackle your next dessert project, whether you are crafting an elaborate ganache for a dinner party or just melting down some dark chocolate for a relaxed s’mores night on the weekend.
Throw out your toxic peeling pans, dry your silicone spatulas, respect the thermodynamics of your ingredients, and stop letting a little bit of chemistry intimidate you. You have got this. Now, get back in the kitchen and make something spectacular.






