
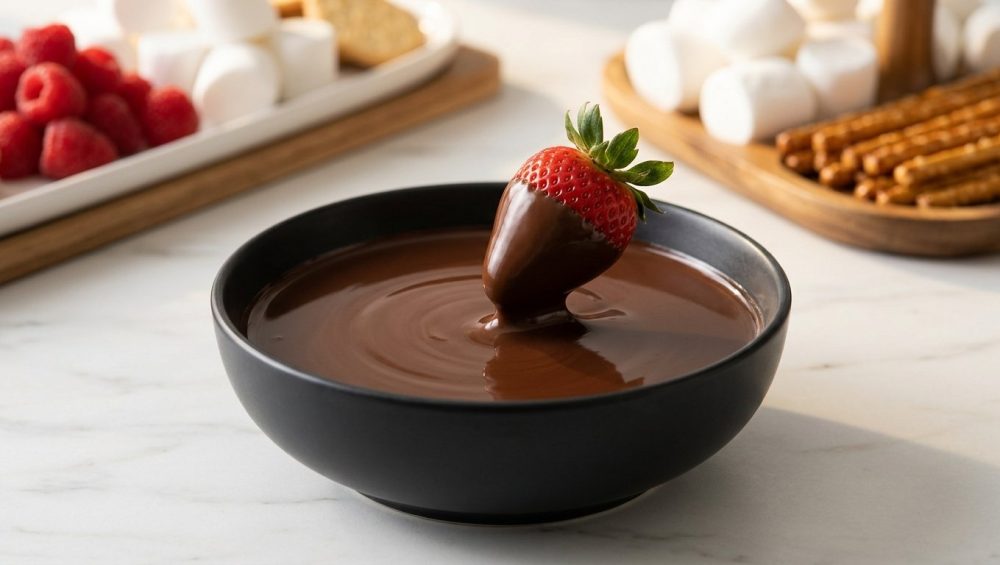
Picture this: you have just executed a flawless dinner party. The wine is flowing, the ambient playlist is hitting all the right notes, and your guests are laughing. You retreat to the kitchen to prepare the grand finale—a luxurious, interactive chocolate fondue bar. You place your premium chocolate into a bowl, apply some heat, and wait for that glossy, cascading waterfall of dessert perfection. But instead of a silky pool of liquid cocoa, you are suddenly staring at a dull, gritty, sludgy mass that looks suspiciously like wet potting soil. Panic sets in. You stir frantically, which only makes it worse. The chocolate has seized, and your dessert course is officially ruined.
Take a deep breath. Pour yourself a splash of that wine. We have all been there. I have ruined more batches of expensive chocolate than I care to admit, usually while rushing through a weeknight dessert shortcut or trying to multitask during a weekend gathering. But here is the brutal truth: chocolate does not care about your feelings, your timeline, or how much you paid for it. Chocolate only cares about chemistry.
If you have ever wondered exactly why melted chocolate turns clumpy at the worst possible moment, you are in the right place. Today, we are skipping the pretentious chef-speak and diving deep into the actual food science of melting chocolate. I am going to teach you exactly why this culinary tragedy happens, how to prevent it, how to miraculously save it when it does, and how to set up a foolproof fondue station that will make you look like an absolute genius.
The Chemistry of a Catastrophe: Why Chocolate Seizes
To understand why your dessert turned into a grainy brick, we have to look under the microscopic hood of your chocolate bar. We tend to think of chocolate as a single, uniform ingredient, but it is actually a highly complex, delicate dispersion of different molecules.
The Anatomy of Melted Chocolate
At its core, chocolate is a finely milled mixture of cocoa butter, cocoa solids, and sugar. The most important thing to understand here is the relationship between these ingredients and water. Cocoa butter is a fat, which means it is heavily hydrophobic (it absolutely hates water and repels it). On the other hand, the sugar and cocoa particles suspended inside that fat are hydrophilic (they love water and will aggressively absorb it).
In a solid, perfectly tempered bar of chocolate, the hydrophobic cocoa butter coats the hydrophilic sugar and cocoa particles, creating a stable, smooth matrix. During the manufacturing process, the cocoa beans are roasted and processed to remove virtually all of their moisture. By the time a chocolate bar reaches your kitchen, it is an entirely dry environment. When you melt it properly, the cocoa butter turns into a liquid, allowing the dry sugar and cocoa particles to glide smoothly past one another. This is what gives melted chocolate its signature glossy, fluid texture.
The Enemy Within: Moisture and the “Sugar Glue” Effect
The number one reason chocolate seizes is the introduction of a microscopic amount of moisture. And I do mean microscopic. A single drop of water from a wet spoon, a tiny splash from a simmering pot, or even a heavy cloud of steam from your dishwasher is enough to trigger a catastrophic chain reaction.
When that tiny bit of water breaches the cocoa butter defense, the hydrophilic sugar particles immediately aggressively absorb it. Because there is not enough water to actually dissolve the sugar, the water acts like a sticky syrup or “sugar glue.” The sugar particles instantly clump together, dragging the cocoa solids with them, and separating entirely from the fat. In a matter of seconds, your smooth liquid chocolate transforms into a stiff, grainy, unyielding paste. When it comes to surviving kitchen disasters, knowing how to identify a moisture-seize versus a heat-seize is your first line of defense.
The Heat Death: Overheating and Cocoa Butter Separation
If you are absolutely certain that your bowls and utensils were bone-dry, your chocolate likely seized due to extreme overheating. Chocolate is incredibly sensitive to temperature fluctuations. Cocoa butter displays polymorphism, meaning it can form different types of crystals depending on how it is heated and cooled.
Cocoa butter typically has a melting point of around 34–38°C (93–101°F), which is beautifully close to human body temperature, explaining why a good piece of chocolate literally melts in your mouth. However, milk chocolate and white chocolate contain dairy proteins and extra sugars that make them even more fragile. If you blast chocolate with aggressive, direct heat, the delicate cocoa solids will scorch, and the cocoa butter will rapidly separate from the mass. You will be left with a burnt, muddy lump sitting in a puddle of clear, yellowish oil. Unlike moisture-seized chocolate, severely scorched chocolate cannot be saved. By fixing rookie kitchen mistakes like cranking your stove burner to high, you can completely avoid this specific tragedy.
The Sassy Sous-Chef’s Guide to Bulletproof Melting
Now that we know the science of the seize, how do we melt chocolate without ruining it? As a home cook who prioritizes efficiency without sacrificing quality, I rely on two primary methods.
The Double Boiler (Bain-Marie) Done Right
The most reliable way to melt chocolate is using a double boiler, also known as a bain-marie. But most people do this completely wrong. You do not need a fancy, specialized piece of equipment. You just need a saucepan and a heatproof bowl (glass or stainless steel) that fits snugly over the top of the pan without touching the bottom.
Here is the exact, foolproof protocol:
First, ensure your bowl and your spatula are meticulously, obsessively dry. Wipe them with a dry paper towel even if they look clean.
Second, fill the saucepan with only one or two inches of water. The water must never touch the bottom of the bowl. If the boiling water touches the bowl, it will transfer heat too rapidly and scorch the chocolate.
Third, bring the water to a gentle simmer—not a rolling boil. Once it is simmering, turn the heat off entirely.
Place the bowl of chopped chocolate over the hot water. The gentle, residual steam trapped beneath the bowl will slowly and evenly melt the chocolate. Stir it gently and constantly.
The biggest risk with a double boiler is steam escaping from the sides of the pan and condensing directly into your chocolate. Make sure your bowl is wide enough to trap the steam completely. And when you remove the bowl from the pot, immediately wipe the condensation off the bottom of the bowl with a towel so a stray drop doesn’t fall into the chocolate when you pour it. If you want to transform your chaotic cooking routine, mastering the gentle art of the bain-marie is a massive leap forward.
The Microwave Method: A Risky but Viable Shortcut
I firmly believe that time is money, especially when you are rushing to prep a dessert bar before guests arrive. You can absolutely melt chocolate in the microwave, but you must respect the appliance. Microwaves heat food unevenly by exciting water molecules, and since chocolate has almost no water, it is very easy to scorch the cocoa butter.
To do this safely, place your finely chopped chocolate in a microwave-safe bowl. Lower your microwave’s power setting to 50%. This is non-negotiable. Microwave the chocolate in short, 15-second bursts. After every single 15-second interval, take the bowl out and stir it thoroughly, even if it looks like nothing has melted yet. Chocolate holds its shape in the microwave until it is stirred. If you skip the stirring, the center will burn while the edges look completely solid. Once the chocolate is about 90% melted, stop microwaving. The residual heat of the bowl and the melted chocolate will gently melt the remaining stubborn chunks.
The Fat Fix: Adding Emulsifiers
If you are melting chocolate specifically for a fondue bar, you actually want a slightly thinner, more fluid consistency than pure melted chocolate provides. You can build an insurance policy against seizing by adding a fat directly to the chocolate before you even start melting.
Adding a tablespoon of refined coconut oil, vegetable oil, or food-grade cocoa butter to your chocolate chips lowers the overall viscosity and gives the cocoa solids more fat to glide through. Alternatively, if you are making a ganache-style fondue, you can melt the chocolate directly into warm heavy cream. The fat and the existing water content in the heavy cream create a stable emulsion, preventing the sugar from clumping. Just ensure the cream is warm; pouring cold cream into hot melted chocolate will shock the cocoa butter and instantly seize it.
Rescuing the Un-Rescueable: Can You Save Seized Chocolate?
Let’s say the worst has happened. You turned your back for ten seconds, a rogue drop of condensation fell into your bowl, and your glossy chocolate is now a gritty, ugly mess. Do you throw it away? Absolutely not. You can save it, but you have to understand the paradoxical science behind the rescue.
The Boiling Water Trick (Yes, Really)
It sounds completely insane to add water to chocolate that was just ruined by water. But chemistry is a wild ride. The chocolate seized because a tiny amount of water acted as a glue, clumping the sugar particles together. To fix it, you need to add enough water to completely dissolve those sugar clumps and create a fluid emulsion.
Here is the exact rescue operation:
Keep your bowl of seized chocolate over your warm double boiler. Bring a separate kettle or pot of water to a rolling boil. You must use boiling water; cold water will instantly chill the cocoa butter and make the problem infinitely worse.
Add exactly one teaspoon of boiling water to the seized chocolate and whisk vigorously. At first, it might look like it is getting worse, turning slightly oily or sludgy. Do not panic. Keep whisking.
If it is still clumpy, add a second teaspoon of boiling water and whisk again. Suddenly, as if by magic, the clumps will dissolve, the emulsion will stabilize, and the chocolate will return to a smooth, glossy, liquid state.
There is a catch, however. You have now fundamentally altered the composition of the chocolate by diluting it with water. This rescued chocolate is absolutely perfect for a fondue dipping bar, a drizzle over ice cream, or making hot cocoa. But it is completely useless for baking brownies, making structural truffles, or tempering for chocolate molds. For our fondue purposes, though? It is a total lifesaver.
The Fat Addition Rescue
If your chocolate seized because it got slightly too hot (but not fully scorched and burnt), or if you absolutely cannot introduce water to your recipe, you can try the fat rescue method. Add a tablespoon of warm vegetable oil, clarified butter, or melted vegetable shortening to the clumpy chocolate and stir vigorously. The extra fat coats the separated cocoa particles and smooths out the mass. Again, this changes the structural integrity of the chocolate, but it will save your dessert presentation. Knowing these culinary rescue tactics is essential when you host a relaxed dinner party, because it allows you to pivot gracefully without your guests ever knowing disaster struck.
Gear That Won’t Poison You (or Ruin Your Night)
Now that we have the chocolate perfectly melted and stabilized, we need to talk about the vessel you are serving it in. As your resident culinary truth-teller, I have a strict, non-negotiable rule: I absolutely despise cheap, toxic kitchenware. We are not serving our loved ones a side of forever chemicals with their dessert.
The Absolute Ban on Cheap Non-Stick Fondue Pots
If you go to a big-box store, you will see shelves lined with flimsy, electric fondue pots coated in cheap non-stick Teflon. Do not buy them. If you own one, and the coating is starting to peel, flake, or scratch, throw it in the garbage immediately. I am a huge advocate for banishing toxic kitchen gear from your home. When guests are repeatedly stabbing metal fondue forks into the bottom of a cheap non-stick pot, that coating is going to chip off directly into your beautiful chocolate. It is disgusting, it is unsafe, and it is completely avoidable.
Furthermore, do not use thin, uncoated stainless steel pots for chocolate fondue. Stainless steel is a fantastic material for boiling broth or frying meat in hot oil, because it transfers heat rapidly. But for delicate chocolate, stainless steel is a nightmare. It creates aggressive hot spots that will scorch your cocoa butter in minutes.
Ceramic and Enameled Cast Iron: The Only Acceptable Vessels
For a flawless, stress-free chocolate fondue bar, you have two elite options: ceramic or enameled cast iron.
Ceramic Fondue Pots: Glazed ceramic is the traditional Swiss choice for a reason. Ceramic is a fantastic insulator that provides gentle, incredibly even heat distribution. It eliminates hot spots, meaning your chocolate will stay warm and fluid without scorching on the bottom. They are generally heated by a small tea light candle, which provides just enough ambient warmth to keep the chocolate in its liquid state. Plus, glazed ceramic is incredibly easy to clean.
Enameled Cast Iron: If you want the absolute pinnacle of heat retention, enameled cast iron is the undisputed king. Cast iron is incredibly dense and holds onto heat for a very long time. Once you get the chocolate warm, the heavy pot will keep it warm with very little active heat required. The interior enamel coating is basically a layer of baked glass, meaning it is non-toxic, non-reactive, and completely safe from the scratching of metal fondue forks. Cleanup is a breeze, especially if you know why you need a bench scraper to gently lift away hardened sugar spills from your countertops afterward.
For fuel, skip the toxic-smelling liquid Sterno if you are doing a delicate chocolate fondue. The chemical smell will completely overpower the aroma of the cocoa. Stick to unscented tea lights for ceramic pots, or clean-burning ethanol gel paste for heavier cast iron setups.
Designing the Mindful Fondue Bar: Setup and Staging
You have the perfect melted chocolate and a gorgeous, non-toxic pot. Now you have to actually execute the party. A mindful fondue bar is all about flow, accessibility, and temperature control. You want your guests interacting and having fun, not bumping elbows or waiting in a stressful line.
Temperature Control for the Long Haul
Chocolate is highly susceptible to ambient temperature. If you set up your fondue station right under a blasting air conditioning vent, or next to a drafty open window, the surface of your chocolate will begin to harden and form a dull skin, regardless of the heat source underneath it. Position your fondue pot in a draft-free zone.
If you are hosting a large party over several hours, you need to monitor the heat. A tea light will eventually burn out, and a gel burner might run too hot as the volume of chocolate in the pot decreases. Check the chocolate periodically. If it looks like it is getting too thick, stir in a splash of warm heavy cream to loosen it back up. Utilizing scientific food staging techniques means keeping a small thermos of warm cream on standby at the dessert station for quick, on-the-fly viscosity adjustments.
The Flow of the Table: Preventing Bottlenecks
A fondue pot is a communal experience, which means it is a prime target for traffic jams. Do not push the fondue pot against a wall. Place it in the absolute center of a round table, or on a kitchen island where guests can approach it from a full 360 degrees.
Do not put all of your dipping ingredients in one giant bowl. Divide your dippables into multiple smaller ramekins and scatter them around the perimeter of the fondue pot. This allows four or five people to load their forks simultaneously without crossing arms. Provide a dedicated cup for clean fondue forks, and a highly visible, separate receptacle for used forks to prevent the dreaded double-dipping disaster. Implementing thermodynamic food holding strategies sounds intimidating, but it really just means keeping your chocolate pot centrally located on an insulated mat to retain ambient heat while keeping the cold fruit platters slightly distanced so they don’t cool the chocolate down.
The Ultimate Dipper Strategy: Prepping for Perfection
The chocolate is only half of the equation. The items you choose to dip will make or break the entire experience. And because we now know that moisture is the mortal enemy of melted chocolate, the way you prep your dippables is critical.
Fruit Prep: The Moisture Mitigation Protocol
Fresh fruit is the undisputed champion of the chocolate fondue bar. Strawberries, bananas, pineapple chunks, and raspberries provide a bright, acidic contrast to the rich, heavy chocolate. But fresh fruit is basically just little water balloons waiting to ruin your chocolate.
If a guest dips a freshly washed, dripping wet strawberry into the communal fondue pot, that water will pool in the chocolate. After three or four wet strawberries, the entire pot of chocolate will seize up and turn gritty.
You must execute a strict moisture mitigation protocol. Wash your strawberries and berries several hours before the party begins. Lay them out in a single layer on a wire rack lined with paper towels and let them air dry completely. Do not slice the strawberries; leave the green hulls intact. The hull acts as a natural handle, and slicing the berry exposes the wet, juicy interior, which will leak water into the chocolate.
For bananas and pineapples, slice them into thick, substantial chunks. If you slice them too thin, they will break apart and get lost in the chocolate abyss. Toss the banana slices very lightly in a tiny splash of lemon juice to prevent enzymatic browning, but dab them dry with a paper towel before plating them.
Baked Goods and Salty Contrasts
A mindful fondue bar needs texture and flavor contrast. You cannot just serve sweet fruit and sweet chocolate; you will fatigue your guests’ palates. You need salt, and you need crunch.
The Salty Crunch: Large, thick pretzel rods are mandatory. The heavy hit of coarse salt cuts through the sweetness of the chocolate perfectly. Thick-cut, ruffled potato chips are an unexpected but highly sophisticated addition. The ridges hold the chocolate, and the salty, oily potato flavor pairs beautifully with dark chocolate.
The Baked Goods: When selecting baked goods, freshness is actually a liability. If you use a freshly baked, incredibly moist piece of pound cake, it will instantly crumble and disintegrate the moment it hits the heavy liquid chocolate. Your fondue pot will turn into a swamp of cake crumbs.
You want structural integrity. Buy a high-quality pound cake or angel food cake, cut it into one-inch cubes, and leave the cubes sitting out on a baking sheet for a few hours to stale slightly. The exterior will dry out just enough to hold firm on a fondue fork, while the inside remains tender.
Large, gourmet marshmallows are a classic choice, but avoid the miniature ones as they will melt off the fork too quickly. Graham crackers, crispy biscotti, and firm coconut macaroons all offer fantastic crunch and won’t leave a crumbly mess in your pot.
Conclusion: Embrace the Melt
Hosting a dinner party should not require you to sacrifice your sanity or your expensive ingredients. When you finally master the art of effortless hosting, you realize that culinary success is not about being a perfect, flawless chef. It is about understanding the basic rules of the kitchen and knowing exactly how to pivot when things go sideways.
Chocolate is a dramatic, finicky diva of an ingredient. It demands absolute dryness, gentle heat, and constant attention. But once you understand the chemical triggers that cause it to seize, you hold the power to control it. You know to banish every drop of water from your bowls. You know to respect the gentle steam of the double boiler. And most importantly, you know the paradoxical, magical secret of the boiling water rescue trick.
So throw out that peeling, toxic Teflon pot, invest in a gorgeous piece of enameled cast iron, thoroughly dry your strawberries, and invite your friends over. You are officially ready to host the ultimate, stress-free, mind-blowing fondue bar.
Now, if you will excuse me, I have a bowl of perfectly tempered dark chocolate and a bag of salty pretzels calling my name. Happy dipping!






