
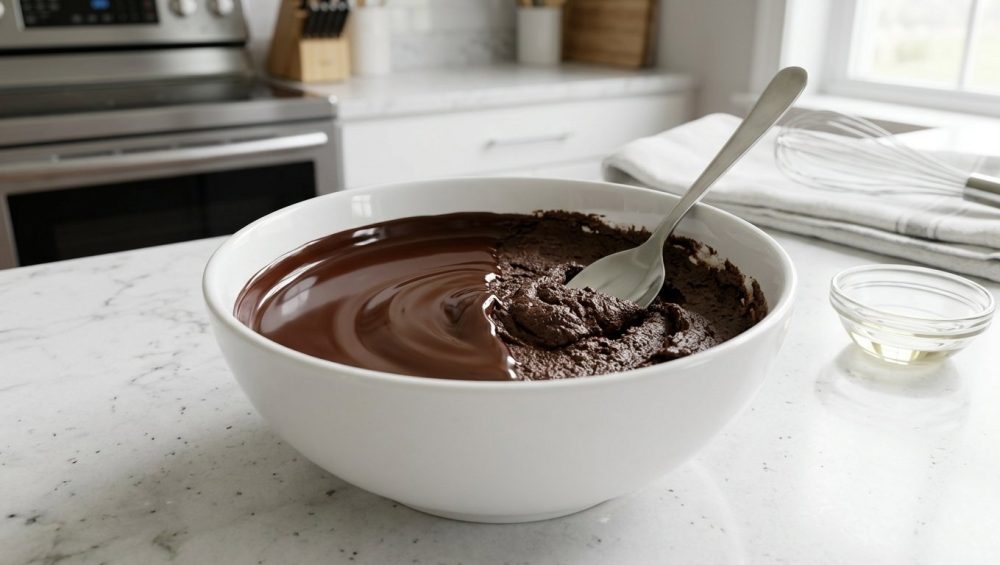
Listen, I’ve been there. You bought the expensive artisanal chocolate, you set up your makeshift double boiler, and you’re feeling like an absolute French pastry chef on a Sunday afternoon. The kitchen smells like a Parisian café, the chocolate is melting into a luxurious, glossy pool of perfection, and everything is going exactly to plan.
Then, disaster strikes.
You turn your back for three seconds, give the bowl a gentle stir, and suddenly, that silky curtain of liquid cocoa turns into a stiff, gritty, matte paste that looks and stirs like wet sand. Your heart sinks. Your expensive Valrhona is ruined. If you feel like you are constantly surviving kitchen disasters, let me assure you that this specific tragedy is a universal rite of passage.
The exact moment your melted chocolate turns clumpy is enough to make a grown adult cry, but I am here to tell you to put down the whisk and take a deep breath. You do not need a culinary degree from Le Cordon Bleu to understand what just happened, and you certainly don’t need to throw that expensive chocolate in the trash. Professional pastry chefs aren’t performing magic in their commercial kitchens; they are simply managing moisture. You have the exact same ability to create mind-blowing, professional-level desserts in your standard home kitchen once you understand the basic, underlying chemistry of your ingredients.
Today, we are going to break down the frustrating, fascinating science of chocolate seizing. We will cover exactly why a single, microscopic drop of water is the ultimate enemy of melted chocolate, how to keep your kitchenware bone-dry, and the counterintuitive, scientific trick to bringing your ruined chocolate back from the dead. We don’t have all day, so let’s skip the pretentious chef-speak and get straight into the science.
What Is Chocolate, Anyway? A Microscopic Look
To understand why chocolate throws a temper tantrum when it touches water, we first have to understand what chocolate actually is on a molecular level.
When you look at a solid bar of high-quality dark chocolate, it appears to be a single, uniform substance. But under a microscope, chocolate is actually a highly complex, tightly packed emulsion—or more accurately, a solid dispersion. It is made up of millions of microscopic dry particles suspended in a continuous matrix of fat.
The Anatomy of a Chocolate Bar
There are three main players in any standard bar of baking chocolate:
- Cocoa Solids: These are the dry, finely ground particles of the cacao bean that give chocolate its dark color and bitter, complex flavor.
- Sugar: The finely milled crystals that provide sweetness and balance the bitterness of the cocoa.
- Cocoa Butter: The natural, pure fat extracted from the cacao bean. This is the magical substance that gives chocolate its smooth mouthfeel and allows it to melt just below human body temperature (typically between 93°F and 101°F).
During the manufacturing process—specifically a step called “conching”—the cocoa solids and sugar are ground down for hours, or even days, until they are so incredibly small that the human tongue cannot detect any graininess. These tiny dry particles are then thoroughly coated and suspended in the liquid cocoa butter.
Here is the most critical fact you need to memorize: Chocolate contains virtually zero moisture. The moisture content of a standard commercial chocolate bar is usually well under 1%. It is a completely dry environment masked by a luxurious fat.
The “One Drop” Rule: The Chemistry of Seizing
If you’ve ever stared at a bowl and wondered why your chocolate never melts the way it does on those pristine cooking shows, the culprit is almost always hidden moisture.
In the world of chemistry, ingredients are generally divided into two camps: hydrophobic (water-fearing) and hydrophilic (water-loving).
Cocoa butter is highly hydrophobic. It is a fat, and as we all know, oil and water despise each other. Sugar, on the other hand, is aggressively hydrophilic. It absolutely loves water. In a dry bar of chocolate, the sugar is perfectly content being coated in fat. But the moment you introduce a tiny amount of water into the melted chocolate, all hell breaks loose.
The Sponge Effect
When a single rogue drop of water falls into your bowl of smoothly melted chocolate, the water bypasses the fat and immediately seeks out the sugar. The microscopic sugar particles act like tiny sponges, eagerly absorbing that stray droplet of moisture.
However, because there is only a tiny bit of water present, there isn’t nearly enough liquid to actually dissolve the sugar. Instead, the water and sugar combine to form a thick, sticky, highly concentrated syrup.
This sticky syrup acts like microscopic superglue. It instantly binds the dry cocoa particles and sugar crystals together into massive, heavy clumps. As these particles aggressively stick to one another, they violently push the cocoa butter away, breaking the smooth emulsion. In a matter of seconds, your glossy, free-flowing liquid seizes into a dull, grainy, unworkable paste.
Seizing vs. Blooming: Decoding Dessert Disasters
Before we go any further, we need to clear up a massive point of confusion for novice bakers. Seizing is not the same thing as blooming, even though both will ruin the aesthetic of your desserts.
Chocolate Blooming
If you open a bar of chocolate and notice a dusty, chalky white film or grayish streaks on the surface, your chocolate has bloomed. This is a temperature issue, not a moisture issue.
- Fat Bloom: Occurs when chocolate is exposed to warm temperatures, causing the cocoa butter to melt, rise to the surface, and re-solidify in ugly white streaks.
- Sugar Bloom: Occurs when chocolate is stored in a humid environment (like the refrigerator). Condensation forms on the surface, dissolves the sugar, and when the water evaporates, it leaves behind a crusty white layer of sugar crystals.
Bloomed chocolate is perfectly safe to eat and can easily be melted down and re-tempered.
Chocolate Seizing
Seizing, as we just established, happens during the melting process when liquid water physically enters the bowl, destroying the emulsion and causing the solids to clump into a paste. You cannot simply stir or heat your way out of seized chocolate. It requires a specific chemical intervention to fix.
The Invisible Enemies: How Moisture Sneaks Into Your Bowl
You might be thinking, “I didn’t pour a glass of water into my chocolate! How did it seize?” Moisture is a stealthy saboteur in the kitchen. It doesn’t take a torrential downpour to ruin your dessert; a single drop of condensation or a damp utensil is more than enough to trigger the superglue effect.
Here are the most common ways home cooks accidentally assassinate their chocolate:
The Double Boiler Steam Trap
The classic bain-marie (double boiler) is the traditional method for melting chocolate, but it is also a massive hazard. If the water in your bottom saucepan is boiling too vigorously, steam will billow out from the sides. Steam is just aerosolized water. If those steam clouds roll over the lip of your top bowl and condense on the surface of your chocolate, it’s game over. Furthermore, if your top bowl doesn’t fit snugly, or if you lift it to check the water level, condensation from the bottom of the bowl can easily drip onto your countertop and run right into your mixture.
The Wet Whisk and the Damp Spatula
We are all guilty of washing a utensil, giving it a half-hearted shake, and immediately using it. When dealing with chocolate, a “mostly dry” silicone spatula is a weapon of mass destruction. Even the microscopic droplets hiding inside the tines of a whisk will cause immediate seizing.
The Wooden Spoon Sabotage
I have a deep, burning hatred for using wooden utensils when precision baking. Wood is naturally porous, meaning it absorbs and holds onto moisture from the air, from your dishwasher, and from previous meals. This is exactly why your wooden spoons keep cracking and harboring residual moisture that you can’t even see. When you stir warm chocolate with a wooden spoon, the heat forces that trapped moisture out of the wood grain and directly into your delicate emulsion.
The Flavor Extract Trap
Many novice bakers try to flavor their melted chocolate by pouring in a teaspoon of vanilla, peppermint, or almond extract. Most flavor extracts are formulated with water and alcohol. Pouring cold, water-based liquid directly into pure melted chocolate is a guaranteed, one-way ticket to Seize City.
The Sassy Sous-Chef’s Golden Rules for Bone-Dry Baking
If you want to bake on the weekends without throwing your mixing bowls across the room, you need to establish rigorous, non-negotiable habits. My ultimate kitchen survival guide demands that you dry your tools like your life depends on it.
- The Double-Towel Protocol: Before any chocolate touches a bowl, wash your equipment, dry it with a highly absorbent microfiber towel, and then dry it again with a paper towel. If you see even a smudge of humidity, wipe it down.
- Ditch the Wood: Keep your wooden spoons far away from your baking station. Use a seamless, high-quality, heat-resistant silicone spatula.
- Control the Simmer: If using a double boiler, the water should be barely quivering—never at a rolling boil. The heat of the trapped steam is more than enough to melt the chocolate gently without creating a sauna in your kitchen.
- Oil-Based Flavors Only: If you want to flavor your chocolate, you must purchase oil-based candy flavorings. Never use water-based extracts.
The Gear Rant: Banish the Toxic Junk
I promised you I wouldn’t waste your time with fluff, so I am going to be brutally honest with you right now. I have zero patience for pretentious culinary school jargon, but I have even less patience for cheap, toxic kitchenware.
If you are currently trying to melt delicate, high-quality chocolate in a scratched, peeling, mystery-metal non-stick pot, stop what you are doing immediately. You are literally leaching forever chemicals, PFAS, and toxic polymer flakes into your beautiful dessert. We are officially banishing toxic kitchen gear from our culinary spaces. Go to your cupboards, take out those flaking Teflon pans, and throw them in the trash. You deserve better, your food deserves better, and frankly, I refuse to let you serve your family a side of toxic chemicals with their strawberries.
The Right Tools for the Job
You cannot achieve professional results with garbage equipment.
- The Spatula: Invest in a seamless, platinum-grade, solid-core silicone spatula. If your cheap silicone spatulas taste like soap, they are likely leaching cheap chemical fillers into your food when exposed to heat. A pure silicone spatula will not hold moisture, will not absorb odors, and will not melt.
- The Bowl: Use a high-quality, heavy-gauge 18/10 stainless steel mixing bowl for your double boiler. Do not use cheap soda-lime glass bowls. We all know the horror stories where a glass baking dish shattered under thermal shock because the temperature changed too quickly. Stainless steel is incredibly conductive, lightweight, and indestructible.
- The Bottom Pan: Stop ruining your nonstick pans with aerosol sprays and start investing in fully-clad stainless steel saucepans. A heavy-bottomed stainless steel pan will provide perfectly even, gentle heat to the water bath without off-gassing toxic fumes.
Quality gear does not have to cost a fortune, but it must be safe, durable, and reliable. End of rant.
The Phase Inversion Paradox: How to Rescue Seized Chocolate
Okay, let’s say the worst has happened. Despite your best efforts, a drop of water sneaked in, and your beautiful bowl of melted chocolate has seized into a grainy, cement-like paste. Your first instinct is to throw it away. Don’t you dare.
We are going to use the science of phase inversion to bring it back to life.
Here is the grand paradox of chocolate chemistry: A tiny bit of water will ruin melted chocolate, but a lot of water will save it.
Remember the sponge effect? The chocolate seized because there was just enough water to make the sugar sticky, but not enough water to actually dissolve it. Therefore, the scientific solution is to flood the environment with enough liquid to completely dissolve the sugar crystals and suspend the cocoa particles in a fluid emulsion.
The Boiling Water Rescue Method
- Remove from Heat: Immediately take your seized chocolate off the double boiler to prevent any further heat damage.
- Boil Fresh Water: In a separate kettle or pan, bring a small amount of water to a rolling boil. (Do not use cold or room-temperature water, as this will drop the temperature of the cocoa butter and cause it to solidify).
- The Drip Strategy: Add exactly 1 teaspoon of boiling water to the seized chocolate.
- Whisk Vigorously: Using a completely dry metal whisk or your platinum silicone spatula, beat the chocolate aggressively. At first, it might look like it’s getting worse. Keep whisking.
- Evaluate and Repeat: If it is still thick and grainy, add another teaspoon of boiling water and whisk again.
As you add the boiling water, you are fundamentally changing the chemical structure of the mixture. You are converting it from a fat-continuous dispersion (where fat is the main background liquid) into a water-continuous emulsion (where water is the main background liquid, much like a ganache).
Suddenly, as if by magic, the gritty clumps will relax, the sugar will dissolve, and the mixture will smooth out into a glossy, beautiful, fluid chocolate sauce.
The Fat Rescue Method (Alternative)
If you absolutely cannot bring yourself to add water to chocolate, you can rescue it by adding more fat. By introducing a warm, pure fat, you provide enough lubrication to coat the sticky sugar clumps and allow the cocoa particles to slide past one another again.
- Warm up 1 tablespoon of pure cocoa butter, clarified butter (ghee), or a neutral vegetable oil (like avocado oil). Do not use standard butter, as American butter contains about 15-18% water, which will only make the seizing worse.
- Vigorously whisk the warm fat into the seized chocolate until it smooths out.
What to Do with Diluted Chocolate (The Repurposing Guide)
I need to be perfectly clear: while the boiling water trick will magically restore the smooth, glossy texture of your chocolate, you have fundamentally altered its chemical makeup.
You cannot use water-rescued chocolate for delicate candy-making. It will not temper, it will not set up into a hard, snappy shell for truffles, and it cannot be used for structural chocolate work. Just like how flimsy baking sheets keep warping in a hot oven, seized chocolate will buckle under the pressure of complex pastry applications.
However, time is money, and we do not waste expensive ingredients in this kitchen. Rescued chocolate is absolutely perfect for dozens of weekday baking applications where the chocolate is going to be mixed into other ingredients anyway.
How to use your rescued chocolate:
- Brownie and Cake Batters: Fold the smoothed, rescued chocolate directly into your brownie, blondie, or chocolate cake batter. The added moisture will simply bake out or contribute to the fudgy texture of the final crumb.
- The Ultimate Hot Cocoa: Whisk the rescued chocolate into a saucepan of steaming whole milk with a pinch of sea salt and a dash of real vanilla extract for the most decadent, rich drinking chocolate of your life.
- Quick Chocolate Sauce: Thin the rescued chocolate out with a little more warm water or heavy cream, add a pinch of espresso powder, and pour it over high-quality vanilla bean ice cream.
- Fruit Dip: Keep it warm in a fondue pot and dip fresh strawberries, bananas, and marshmallows into it. Nobody will ever know it was previously seized.
The Masterclass Methods: Melting Chocolate Without the Tears
Now that you know how to rescue seized chocolate, let’s make sure you never actually have to use that trick again. As a home cook, you need methods that are reliable, safe, and efficient. Here are the two definitive ways to melt chocolate perfectly every single time.
Method 1: The Proper Bain-Marie (The Weekend Project)
When you have the time to be a perfectionist, the double boiler is the gold standard for melting chocolate gently and evenly.
- The Setup: Fill a heavy-bottomed saucepan with exactly one to two inches of water. Place a wide, shallow, stainless steel mixing bowl on top. The bottom of the bowl must never touch the surface of the water. If the bowl touches the water, the chocolate will burn.
- The Simmer: Remove the bowl, place the saucepan on the stove, and bring the water to a gentle, rolling simmer. Turn the heat down to low.
- The Melt: Place the bone-dry stainless steel bowl containing your finely chopped chocolate over the simmering water. Do not cover it. Let the ambient steam heat the bowl gently.
- The Stir: Wait until the edges of the chocolate begin to look glossy and soft before you start stirring. Use your silicone spatula to gently fold the chocolate until it is 90% melted.
- The Finish: Remove the bowl from the heat entirely (wipe the bottom of the bowl with a towel immediately to catch any condensation) and let the residual heat of the bowl melt the remaining 10% of the chocolate.
Method 2: The Microwave Hack (The Weekday Lifesaver)
I am a busy professional, and sometimes I don’t have the patience to babysit a double boiler on a Tuesday night. The microwave is an incredibly powerful tool if you respect its power. The secret to microwaving chocolate is mitigating the heat so you don’t scorch the cocoa solids.
- The Bowl: Place your chopped chocolate in a microwave-safe, non-porous ceramic or glass bowl. (Again, make sure it is completely dry).
- The Power Level: This is the most important step. You must reduce your microwave’s power to 50%. Microwaving chocolate on full power will scorch the cocoa butter, leaving you with a burnt, acrid mess that cannot be rescued.
- The Intervals: Microwave the chocolate in 15 to 20-second bursts. After every single burst, take the bowl out and stir it vigorously with your silicone spatula, even if it looks like nothing has melted yet. Microwaves heat unevenly, and stirring distributes the heat from the hot spots to the cold spots.
- The Finish: Stop microwaving when the chocolate is about 80% melted. The residual heat of the bowl and the melted chocolate will gently coax the remaining stubborn lumps into a smooth, glossy liquid.
You Are the Master of Your Kitchen
Baking is not an innate talent bestowed upon a lucky few; it is simply a series of chemical reactions that anyone can learn to control. Chocolate is a diva. It demands a dry environment, gentle heat, and your undivided attention. But once you understand the “One Drop” rule and the underlying mechanics of cocoa butter and sugar, you strip away the intimidation factor.
You don’t need to fear the double boiler. You don’t need to panic when the texture shifts. Armed with a dry whisk, a heavy stainless steel bowl, and the knowledge of phase inversion, you are fully equipped to handle whatever curveballs your ingredients throw at you.
So go ahead. Buy the good chocolate. Set up your station. Keep the water out of your bowl, banish the toxic non-stick gear from your house, and treat yourself to the glossy, flawless, professional-quality desserts you absolutely deserve to eat. You’ve got this. Now get cooking.






