Listen, I know exactly why you are here. You spent your hard-earned money on beautiful chicken breast cutlets. You lovingly set up your little bowls of flour, egg, and breadcrumbs. You breaded those cutlets, dropped them into the hot oil, and watched in absolute horror as the golden, crispy crust immediately detached itself, floating away into the grease like a tiny, mocking life raft. When you finally pulled the chicken from the pan, you were left with a pale, naked, rubbery piece of poultry and a pan full of burnt crumbs.
It is infuriating. It makes you want to throw your spatula across the room and order takeout. But put the phone down, because we are going to fix this.
As a home cook who has set off the smoke detector more times than I care to admit, I can promise you one thing: making restaurant-quality, perfectly breaded pan-fried chicken does not require a culinary degree. It requires a basic understanding of kitchen physics, a little bit of patience, and the willingness to stop rushing the process. If you want to master simple weeknight dinners without having a meltdown, you need to understand why food behaves the way it does.
Today, we are diving deep into the definitive masterclass on breading. We are going to break down the starch gelation process, analyze the thermodynamics of your frying pan, and completely overhaul your standard breading procedure. By the time we are done, your breading will be fused to your chicken like concrete, and you will never serve a bald cutlet again.
The Anatomy of a Kitchen Disaster: Why Breading Fails
Before we can fix the problem, we need to understand the enemy. And in the world of pan-frying, your two biggest enemies are moisture migration and starch retrogradation.
When you drop a piece of breaded chicken into hot oil, a violent chemical and physical reaction occurs. The surface temperature of the chicken spikes, and the moisture inside the meat rapidly turns into steam. This process is scientifically known as moisture migration. If your breading is not properly anchored to the surface of the meat, that escaping steam acts like a microscopic hydraulic press, literally pushing the crust away from the chicken from the inside out.
Think of it like trying to apply a piece of tape to a wet window. It doesn’t matter how good the adhesive is; if there is a barrier of water between the tape and the glass, it is going to slide right off.
But moisture is only half the battle. The other half is the “glue” that holds the whole operation together: starch gelation. When starches (like the flour in your dredge) combine with a liquid (like your egg wash) and are subjected to heat, the starch granules swell, absorb water, and eventually burst, creating a sticky, web-like matrix. This matrix is what binds the breadcrumbs to the egg, the egg to the flour, and the flour to the meat.
If you don’t give those starches enough time to hydrate and gel before you subject them to the aggressive heat of the frying pan, the glue never forms. The result? A crust that shatters and falls off the second you try to flip it.
Phase 1: The Prep and The Purge
The foundation of a bulletproof crust begins long before the chicken ever sees a breadcrumb. If you are taking chicken straight out of the package, giving it a half-hearted wipe with a paper towel, and tossing it into the flour, you are setting yourself up for failure.
The Eradication of Surface Moisture
Chicken cutlets, especially those injected with saline solutions by the manufacturer to plump them up, are essentially water balloons. When you pull them out of the fridge, they are covered in a slick, wet film of myoglobin and water.
You must aggressively dry the surface of the meat. I am not talking about a gentle pat. I am talking about sandwiching the chicken between heavy-duty paper towels and pressing down firmly to extract as much surface moisture as humanly possible. If the chicken is wet, the flour will turn into a gummy, uneven paste rather than a thin, anchoring dust.
The Power of the Refrigerator Air-Dry
If you want to take your prep to the next level—and buy yourself the time to be a perfectionist—you need to harness the magic of dry brining to lock in flavor.
Salting your chicken and leaving it uncovered in the refrigerator for a few hours (or overnight) accomplishes two critical things. First, the salt penetrates the meat, breaking down the muscle proteins and ensuring the chicken stays incredibly juicy during the frying process. Second, the modern refrigerator is basically a giant dehumidifier. Leaving the chicken uncovered allows the cold, circulating air to completely desiccate the surface of the meat. A dry, tacky surface is the absolute best canvas for flour adhesion. Always avoid cheap cutting boards that dull your knives when butterflying or trimming your chicken before this step; clean, precise cuts ensure even cooking.
Phase 2: The Standard Breading Procedure (SBP) Deconstructed
The Standard Breading Procedure is a sacred culinary trinity: Flour, Egg, and Crumb. But the devil is entirely in the details. You cannot just haphazardly toss the chicken between three bowls and hope for the best. You need a systematic, clean approach.
Set up three wide, shallow dishes. If you are serious about your kitchen setup, invest in essential kitchen tools that won’t slide around your countertops while you work.
Station 1: The Dredge (Flour and Starch)
The first layer is the primer. Its sole purpose is to absorb any remaining microscopic moisture on the chicken and provide a dry, textured surface for the egg wash to grip.
Most people use straight all-purpose flour, which is fine. But if you want a professional-grade crust, you need to manipulate the starch content. Wheat flour contains gluten, which can get heavy and doughy. By cutting your all-purpose flour with 25% to 30% pure cornstarch, you are increasing the amylose content. Cornstarch undergoes starch gelatinization at a slightly different temperature and creates an incredibly delicate, shatteringly crisp barrier that acts as a superior binding agent.
Pro-Tip: Season your flour! If you only season the outside breadcrumbs, your chicken will taste bland. Whisk salt, black pepper, garlic powder, and paprika directly into the flour mixture.
When dredging, press the chicken firmly into the flour, making sure every single crevice is coated. Then—and this is crucial—shake off the excess. You want a translucent, powdery dusting, not a thick, caked-on layer. If the flour layer is too thick, the egg wash will only adhere to the top layer of flour, leaving a dry layer of flour underneath that will instantly detach in the pan.
Station 2: The Binder (The Egg Wash)
The egg wash is the glue. Eggs are packed with water and protein. When those proteins hit the hot oil, they coagulate and harden, locking the breadcrumbs into place.
However, a pure, unadulterated beaten egg is often too thick and viscous. It will go on in heavy, gloopy streaks, resulting in patches of overly thick breading that will steam and fall off. You need to thin the egg wash to ensure an even, uniform coating.
Whisk your eggs thoroughly until the yolks and whites are completely homogenous—no stringy bits of egg white should remain. Then, add one tablespoon of water or milk per egg. This thins the viscosity just enough to allow the excess to drip off easily.
Dip the floured chicken into the egg wash, turn it to coat completely, and then hold it over the bowl for at least three to five seconds, letting gravity pull the excess liquid away.
Station 3: The Crunch (The Crumb)
Now we arrive at the final layer. Whether you are using traditional Italian breadcrumbs, crushed crackers, or my personal favorite, Japanese Panko breadcrumbs (which have a jagged, airy structure that absorbs less oil and provides maximum crunch), the technique remains the same.
Drop the egg-coated chicken into the crumbs. Do not just lightly toss the crumbs over the top. You need to use the heel of your hand to actively press the crumbs down into the meat. You are forcing the breadcrumbs into the egg wash and the flour layer, compacting the three layers into a single, unified crust.
Once coated, gently shake off the loose crumbs.
Phase 3: The Mandatory Hydration Rest (The Step You Are Skipping)
If you take nothing else away from this masterclass, let it be this: If you take a freshly breaded piece of chicken and immediately throw it into a hot frying pan, your breading will fall off. Every single time.
This is the number one rookie mistake, and it all comes back to the science of starch gelation and protein hydration.
When you first apply the flour, egg, and breadcrumbs, they are sitting on top of each other as three distinct, separate layers. The flour is still dry powder. The egg is still wet liquid. The breadcrumbs are still hard, dry shards.
You must give the breaded chicken a resting period. Place the coated cutlets on heavy-duty baking sheets for resting, and put them in the refrigerator for a minimum of 15 to 30 minutes.
During this resting phase, a microscopic miracle occurs. The moisture from the egg wash and the chicken slowly migrates outward, hydrating the dry flour and the inner layer of the breadcrumbs. The starches in the flour begin to swell and gel, acting as a cement that fuses the three separate layers into a single, cohesive, tacky sheath. The cold air of the refrigerator also slightly dries out the very outer layer of the breadcrumbs, ensuring they fry up incredibly crispy instead of absorbing excess oil.
Do not skip the rest. Use this time to clean up your breading station, wash your bowls, and grab your bench scraper to clear the flour off your countertops.
Phase 4: The Fry, The Thermodynamics, and The Gear Warning
Alright, the chicken is rested, the starches are gelled, and it is time to fry. But before you even think about turning on the stove, we need to have a very serious conversation about your equipment.
The “Sassy Sous-Chef” Zero-Tolerance Policy on Toxic Gear
I am going to be brutally honest with you: if you are planning to pan-fry this beautiful, painstakingly prepped chicken in a cheap, scratched-up, lightweight non-stick pan, you are ruining your food and potentially poisoning your kitchen.
I absolutely despise cheap, toxic kitchenware. Traditional non-stick pans are coated with Polytetrafluoroethylene (PTFE), historically part of the broader PFAS family of “forever chemicals”. These pans are designed for gently scrambling eggs on medium-low heat. They are not designed for the aggressive, high-heat environment required for pan-frying.
When you heat a PTFE-coated non-stick pan past 500°F (260°C)—which can happen in mere minutes if you are preheating it empty—the chemical coating begins to degrade. It releases invisible, toxic fumes that can cause a condition literally known as “polymer fume fever”. Furthermore, as these cheap pans age, the coating blisters, peels, and flakes directly into your food.
Beyond the severe health and environmental concerns, non-stick pans are terrible for frying from a purely culinary standpoint. They lack the thermal mass required to hold heat. When you drop cold chicken into a thin non-stick pan, the temperature of the oil plummets, and the pan cannot recover fast enough. Instead of frying, your chicken ends up boiling in its own tepid grease, resulting in a soggy, greasy crust that will—you guessed it—slide right off.
Throw the peeling non-stick pan in the trash. You need heavy, durable cookware that retains heat. A well-seasoned cast iron skillet is a classic choice, and you can easily clean up with a chainmail scrubber later. However, my ultimate recommendation for pan-frying is carbon steel. Using a carbon steel skillet ensures rapid heat conductivity, incredible thermal retention, and a naturally polymerized non-stick surface that won’t leach synthetic chemicals into your dinner.
Executing the Fry
Pour a high-smoke-point oil (like peanut, canola, or avocado oil) into your skillet. You do not need to deep fry; a quarter-inch of oil is plenty for a standard pan-fry.
Heat the oil over medium-high heat until it reaches roughly 350°F to 375°F. If you do not have a frying thermometer, you can test the oil by dropping a single breadcrumb into the pan. It should immediately sizzle and dance on the surface. If it sinks and does nothing, the oil is too cold. If it instantly turns black and smokes, the oil is too hot.
Carefully lay the chicken into the oil, laying it away from you so that any splattering oil goes toward the back of the stove, not onto your shirt.
Do not crowd the pan. If you pack four massive chicken breasts into a single skillet, the temperature of the oil will crash. The oil will seep into the breading before the crust has a chance to set, making it heavy and greasy. Fry in batches if necessary.
Do not touch the chicken. Once the meat is in the pan, leave it alone. Human beings have an overwhelming urge to poke, prod, and shift food while it cooks. Resist this urge. The crust needs time to polymerize and release naturally from the metal. If you try to force a spatula under the chicken before a proper crust has formed, you will tear the breading right off the bottom. Let it fry undisturbed for 3 to 4 minutes until you can see a golden-brown halo forming around the edges.
When it is time to flip, use a pair of thin tongs or a fish spatula, and turn it gently. Always trust your meat thermometer to check the internal temperature; you are looking for 165°F (74°C) in the thickest part of the breast.
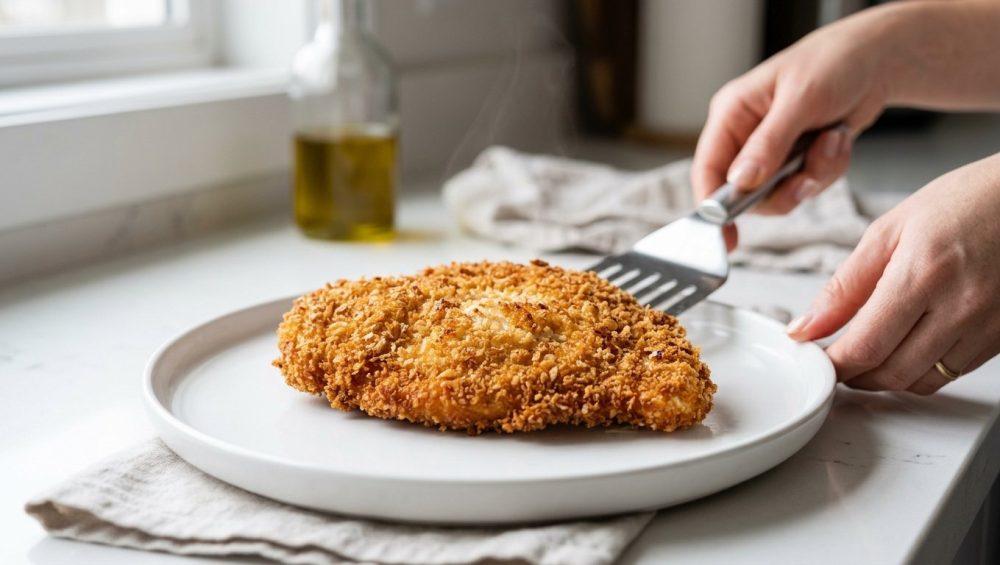
Phase 5: Post-Fry Protocol (Cooling Without Steaming)
You have done everything right. The chicken is perfectly golden, the crust is fused to the meat, and it looks like a masterpiece. Do not ruin it in the final thirty seconds.
The instinct of almost every home cook is to pull the fried chicken out of the pan and drop it directly onto a plate lined with paper towels to absorb the excess grease.
This is a fatal error.
When you place screaming hot, freshly fried chicken onto a flat surface covered in paper towels, the residual heat from the meat continues to push moisture out in the form of steam. Because the chicken is sitting flat against the plate, that steam has nowhere to go. It gets trapped underneath the chicken, condensing back into water. Within sixty seconds, the bottom of your perfectly crispy chicken will turn into a soggy, mushy mess, and the breading will slough off.
To maintain the structural integrity of your crust, you must elevate it on a wire rack so air can circulate underneath. Place the cooling rack over a baking sheet to catch any dripping oil. This allows the excess grease to drain away while the steam escapes harmlessly into the air, ensuring that both the top and the bottom of the chicken remain shatteringly crisp.
The Final Verdict
Cooking is not magic; it is applied science. The reason your breading always falls off is not because you are a bad cook. It is because you were fighting against the laws of thermodynamics and moisture migration without even knowing it.
By taking the time to thoroughly dry your protein, properly executing the flour-egg-crumb sequence, enforcing a mandatory hydration resting period, and using high-quality, safe, heat-retaining cookware, you are taking complete control of the process. You are allowing the starches to gel, the proteins to bind, and the crust to form an impenetrable, delicious shield around your food.
You do not need a culinary degree to make mind-blowing food. You just need to respect the process, ditch the toxic shortcuts, and give your food the time it needs to become great. Now get back in that kitchen, throw out that peeling non-stick pan, and go fry some perfect chicken. You’ve got this.


