
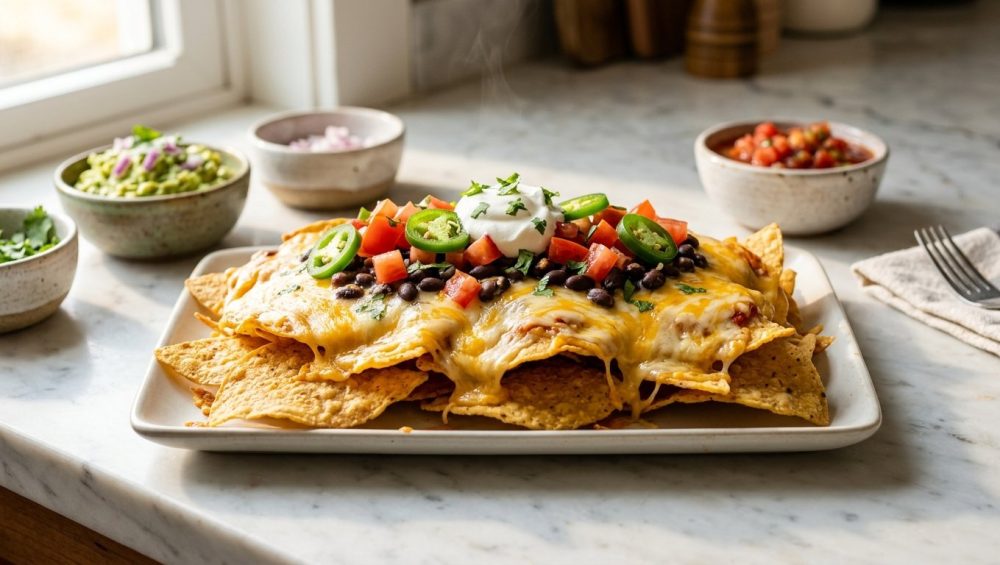
Listen, we need to have a serious talk about the absolute tragedy that is the modern homemade nacho platter. You know exactly what I’m talking about. You invite a few friends over for a casual weekend get-together. You buy the expensive tortilla chips, you splurge on the good avocados, and you spend twenty minutes carefully piling everything onto a plate. It looks like a masterpiece right out of a glossy food magazine. Then, ten minutes into the party, someone reaches for a chip in the center of the pile. Instead of a satisfying crunch, they pull up a limp, soggy, structurally compromised triangle of sadness. The chip bends under the weight of the toppings, tearing in half and dropping a glob of sour cream squarely onto their jeans.
It is a culinary disaster, and it happens in home kitchens across the globe every single weekend. But here is the good news: you do not need a culinary degree to fix this. You just need a basic understanding of kitchen physics, a ruthless approach to ingredient staging, and a commitment to never, ever using terrible equipment. As a busy professional who has ruined more than my fair share of dinner parties through trial and error, I can promise you that professional-level results are entirely achievable in your standard home kitchen.
Today, we are going to dive deep into the food science of moisture migration, the hydrophobic magic of melted cheese, and the exact staging techniques you need to host a build-your-own nacho bar where the chips actually stay crispy. We are going to eliminate the stress, optimize our prep time, and build something spectacular.
The Food Science of Sad, Soggy Chips
To defeat the enemy, you must first understand the enemy. In the world of nachos, the enemy is not the salsa, nor is it the beans. The enemy is moisture migration, a relentless physical process that will destroy your chips if you do not actively defend against it.
The Physics of Moisture Migration
Let us look at the humble tortilla chip. A high-quality, freshly fried or baked corn tortilla chip is a marvel of textural engineering. During the cooking process, water is driven out of the corn dough, leaving behind a rigid, porous structure of gelatinized starch. According to recent food science data, a perfectly crisp tortilla chip contains a residual moisture level of around 1.2 percent or less. It is essentially a dry sponge waiting to absorb liquid.
Now, consider your typical nacho toppings. Pico de gallo, black beans, sour cream, and guacamole are all incredibly water-dense. When you dump these wet ingredients directly onto your dry chips, you create a massive moisture gradient. Physics dictates that water will always move from an area of high concentration to an area of low concentration. Within seconds of contact, the water molecules from your salsa begin migrating into the porous starch matrix of the tortilla chip.
Starch Retrogradation and the Death of Crunch
When that moisture enters the chip, it does not just make the surface wet; it fundamentally alters the molecular structure of the corn. The water triggers a process known as starch retrogradation. The rigid amylose and amylopectin chains inside the chip begin to reorganize and swell, causing the chip to lose its brittle fracture points. Instead of snapping cleanly when you bite into it, the chip becomes chewy, leathery, and entirely incapable of supporting the weight of its toppings.
This is why the “mountain of regret” nacho architecture—where you blindly pile chips, salsa, beans, and meat into a massive vertical heap—is fundamentally flawed. The chips trapped at the bottom and in the center of the pile are subjected to a humid microclimate. Even if they are not touching the wet ingredients directly, the ambient steam from the hot meat and beans raises the relative humidity inside the pile, causing the chips to go stale and soggy in a matter of minutes.
The Melted Cheese Forcefield
If moisture migration is the villain of our story, melted cheese is the undisputed superhero. When properly applied, melted cheese acts as a hydrophobic (water-repelling) barrier between the dry starch of the chip and the wet ingredients you pile on top. But applying this forcefield requires precision. You cannot just throw a handful of cheap cheese at a pan and hope for the best.
Understanding the Melting Point of Cheese
Cheese is essentially an emulsion of milk protein (casein), water, and fat. When you apply heat, the fat begins to soften at around 90°F (32°C). As the temperature climbs toward 130°F to 150°F (54°C to 66°C), the protein molecules begin to relax and break their bonds, allowing the cheese to flow and become that gooey, beautiful liquid we all crave.
However, cheese is highly sensitive to thermal shock. If you blast it with too much heat too quickly, the protein matrix seizes up, aggressively squeezing out the fat and water. This is exactly why your melted cheese turns oily and separates into a pool of grease and rubbery curds. To create an effective barrier for your chips, you need a smooth, cohesive melt.
For the ultimate nacho barrier, you need cheeses with a high moisture content and a relatively young age. Medium cheddar, Monterey Jack, and Oaxaca cheese are the holy trinity here. Aged cheeses, like sharp cheddar or parmesan, have lost too much water during the aging process. They have a higher melting point and are highly prone to breaking and becoming greasy when subjected to the heat of an oven or broiler.
The Hidden Evils of Pre-Shredded Cheese
I am going to say this clearly, and I need you to hear me: stop buying bags of pre-shredded cheese. I know that time is money, and I am the biggest advocate for weekday kitchen shortcuts, but this is one area where you absolutely cannot compromise.
Pre-shredded cheese is coated in anti-caking agents to keep the strands from clumping together in the bag. Typically, these powders are either potato starch or powdered cellulose (which is quite literally refined wood pulp). While these additives are perfectly food-safe, they are an absolute disaster for your nachos.
When you heat pre-shredded cheese, those starchy anti-caking agents act as a sponge, soaking up the moisture that the cheese needs to melt smoothly. They physically interfere with the protein matrix, preventing the cheese from forming a cohesive seal. The result is a gritty, grainy texture that fails to create a proper hydrophobic barrier over your chips. Taking sixty seconds to grate your own block of Monterey Jack on a box grater will save your dish. Do not let a bag of dusty cellulose ruin a perfect melt. It is simply not worth the shortcut.
The “No-Go” Rule: Ditching Toxic Gear for Good
Before we even talk about assembling these nachos, we need to address the equipment you are using. I have a strict “no-go” rule when it comes to toxic, low-quality kitchenware, and baking nachos is where a lot of home cooks expose themselves to serious chemical hazards.
Far too many people build their nachos on cheap, scratched, non-stick baking sheets. Non-stick coatings (like Teflon/PTFE) are not designed for the high, direct heat of an oven broiler. When these chemical coatings are heated past 500°F (260°C), they begin to degrade, releasing toxic fumes and microscopic plastic particles into your food and the air. If your pan has peeling flakes or deep scratches, you are actively contaminating your meals. Furthermore, using aerosol cooking sprays on these pans creates a sticky, polymerized residue that ends up ruining your nonstick pans permanently anyway.
If your cheap, flimsy baking sheets keep warping with a loud “pop” every time you put them in the oven, throw them in the recycling bin immediately. They suffer from terrible thermal conductivity, meaning your nachos will burn on the edges and stay cold in the middle.
The Only Cookware You Actually Need
To cook like a pro, you need professional-grade, safe materials. For nachos, you have three acceptable options:
- The Heavy-Duty Sheet Pan: You want a heavy-gauge, bare aluminum sheet pan. Aluminum is a fantastic conductor of heat, ensuring that the cheese melts evenly across the entire surface of the pan without scorching the chips on the perimeter. It contains no toxic coatings, it will not warp under the broiler, and it will last you a lifetime.
- The Cast Iron Skillet: If you are making a smaller, denser batch of nachos, a well-seasoned cast iron skillet is phenomenal. Cast iron holds thermal mass beautifully, meaning it will keep your nachos warm long after you pull them out of the oven.
- Carbon Steel: Similar to cast iron but lighter, carbon steel can handle the intense heat of a broiler without flinching.
Do not line your pans with aluminum foil. Foil traps steam underneath the chips, contributing to the soggy factor. If you must use a liner for easy cleanup, use unbleached parchment paper, but be mindful that parchment can burn if exposed directly to a broiler flame.
The Architecture of the Perfect Nacho
Now that we have the right cheese and the right gear, we need to talk about construction. The goal here is to ensure that every single chip receives a protective layer of melted cheese before it ever comes into contact with a wet topping.
The “Wide and Shallow” Method
Throw away the concept of the nacho mountain. A towering pile of chips is structurally unsound and guarantees that the chips in the center will steam themselves into a mushy oblivion. Instead, we are utilizing the “wide and shallow” method.
Take your bare aluminum sheet pan and lay out your tortilla chips in a single, slightly overlapping layer. You want maximum surface area exposure. Every chip should be visible.
Next, apply your freshly grated cheese. You must be generous, but strategic. The cheese needs to cover the surface of the chips, paying special attention to the center of each triangle where the toppings will eventually sit. This is your first forcefield.
Bake this single layer in a 400°F (200°C) oven for about 4 to 5 minutes, just until the cheese is melted and bubbling. Do not walk away; cheese goes from perfectly melted to burnt and bitter in a matter of seconds.
The Double-Decker Strategy
If you are hosting a crowd and a single layer simply will not yield enough food, you can create a double-decker nacho tray, but you must do it in stages.
Build your first layer of chips and cheese, and bake it until melted. Pull the pan out of the oven, add your hot proteins (like seasoned ground beef, pulled pork, or shredded chicken), and then add a second layer of chips directly on top. Cover this new layer with another generous helping of grated cheese, and return the pan to the oven for another 4 minutes.
By melting the cheese on the first layer before adding the second layer, you ensure that the bottom chips are fully sealed in their hydrophobic fat barrier. They are now protected from the steam of the meat and the weight of the top layer.
Ingredient Staging for a Mindful Nacho Bar
We have established the crispy, cheesy base. But if you dump cold sour cream and wet salsa all over this beautiful creation, you are still going to end up with a soggy mess within fifteen minutes.
If you want to master the art of effortless hosting, you need to stop assembling the final dish yourself. Instead, you are going to host a Mindful Nacho Bar. This interactive, deconstructed approach takes the stress off you as the host, allows your guests to customize their plates (perfect for picky eaters or dietary restrictions), and—most importantly—keeps the wet ingredients off the chips until the exact moment of consumption.
The Hot Zone vs. The Cold Zone
A successful nacho bar requires strict segregation of temperatures and moisture levels. You will set up your serving area in two distinct zones: The Hot Zone and The Cold Zone.
The Hot Zone:
This area contains your foundational ingredients that must remain warm.
- The sheet pan of cheese-covered, baked chips (served directly from the pan to retain heat).
- Warm proteins (fajita chicken, carnitas, or black beans) held in a slow cooker or a cast iron skillet over a low warming element.
- A bowl of liquid queso dip (if you are going the extra mile with a sodium citrate cheese sauce, which we will discuss shortly).
The Cold Zone:
This is where the dangerous, high-moisture ingredients live. By keeping these off the main tray, your chips remain perfectly crisp.
- Pico de gallo and salsas.
- Sour cream or Mexican crema.
- Guacamole or diced avocados.
- Pickled jalapeños and red onions.
- Fresh cilantro and lime wedges.
When guests build their own plates, the chips only come into contact with the wet ingredients for a few seconds before being eaten, completely neutralizing the threat of moisture migration.
Prepping the Toppings: Weekday Hacks for Weekend Glory
When I talk about weekend cooking, I always emphasize that “time is money.” Just because you are hosting a beautiful weekend gathering does not mean you should spend four hours chained to your cutting board. We are going to apply ruthless weekday efficiency to our weekend prep.
Draining the Danger
The biggest mistake home cooks make with their cold toppings is failing to manage the liquid. If you are using canned black beans as a topping, do not just open the can and dump them in a bowl. The starchy, murky liquid in the can is unappetizing and will destroy your chips. Invest in a high-quality smooth-edge can opener to safely remove the lid, pour the beans into a fine-mesh strainer, and rinse them thoroughly under cold water until the water runs clear. Let them drain completely before serving.
The same rule applies to fresh salsas. Tomatoes are essentially water balloons. When you make pico de gallo, dice your tomatoes, toss them with a generous pinch of kosher salt, and let them sit in a strainer over a bowl for fifteen minutes. The salt will draw out the excess water (a process called osmosis), leaving you with deeply flavored, concentrated tomatoes that won’t flood your guests’ plates.
The Avocado Preservation Trick
Avocados are the diva of the produce aisle. They are perfect for exactly twelve minutes, and then they turn into brown mush. This enzymatic browning occurs when the flesh is exposed to oxygen.
If you are making guacamole ahead of time, you need a barrier. While lime juice helps, it is not enough for a party setting. If you find that your guacamole turns brown before your guests even arrive, use the water shield method. Pack your guacamole tightly into a storage container, smoothing the top with the back of a spoon to remove any air pockets. Gently pour a half-inch of lukewarm water directly over the top of the guacamole. Because guacamole is primarily fat, the water will not mix into it; it will simply sit on top, creating an impenetrable, airtight seal. When it is time to serve, just pour the water off and give it a quick stir. Perfect, bright green guacamole every time.
Herb Management
Fresh cilantro is non-negotiable for a nacho bar, but it wilts incredibly fast. If you are tired of opening your fridge to find that your fresh herbs turn to slime, you need to treat them like cut flowers. Snip the bottom stems of the cilantro, place the bunch in a glass with an inch of water, and loosely cover the top with a plastic bag before putting it in the fridge. When you are ready to prep, wash them, dry them aggressively (a salad spinner is your best friend here), and chop them right before serving.
Temperature Control and Holding Strategies
You have engineered the perfect chips, you have staged your ingredients, and your prep is done. The final hurdle is execution. Keeping the hot food hot and the cold food cold is the hallmark of a seasoned host.
The Science of Liquid Queso
If you want to offer a liquid cheese dip alongside your baked chips, you need to understand the magic of sodium citrate. As we discussed earlier, melting block cheese can lead to a greasy, separated mess. But food science has given us a cheat code.
Sodium citrate is a type of salt derived from citric acid. When added to a cheese sauce, it acts as a powerful emulsifier. It replaces the calcium atoms in the cheese’s protein matrix with sodium atoms, which prevents the proteins from tangling up and squeezing out the fat.
You can take a block of sharp cheddar—which normally melts terribly—shred it, and whisk it into a simmering pot of water or beer containing a teaspoon of sodium citrate. Within minutes, you will have a velvety, glossy, perfectly smooth queso that flows like liquid gold and will never separate, even as it cools. It is the exact texture of stadium nacho cheese, but made with real, high-quality dairy.
Managing the Mess
Let us be brutally honest: nacho bars are messy. Your guests are going to drop cheese, salsa, and beans all over your counter. Do not let this stress you out.
To make cleanup a breeze, lay out a large, aesthetic cutting board or a piece of butcher paper under your hot and cold zones. When the party is over, you will inevitably need a bench scraper to quickly scoop up the hardened cheese and stray jalapeños stuck to your counters. A good stainless steel bench scraper will cut your cleanup time in half, allowing you to get back to your guests and your glass of wine.
The Ultimate Weekender Triumph
Hosting a gathering should never feel like a stressful restaurant service. You are not a short-order cook; you are a culinary hobbyist sharing your love of food with your friends. By understanding the simple physics of moisture migration, utilizing the hydrophobic power of a proper cheese melt, and smartly staging your ingredients into hot and cold zones, you have completely eliminated the risk of the soggy nacho.
You have bypassed the toxic, warping pans of the amateur kitchen and embraced the reliability of heavy-gauge aluminum and cast iron. You have ditched the cellulose-coated, pre-shredded cheese bags for the pure, unadulterated melt of a freshly grated block.
The Mindful Nacho Bar is more than just a meal; it is a foolproof system designed to maximize flavor, retain perfect texture, and give you the freedom to actually enjoy your own party. So, pour yourself a drink, set out the bowls, and watch your friends marvel at the fact that, for the first time in their lives, the very last chip on the tray is just as aggressively crispy as the first. Now, get into the kitchen and show those tortillas the respect they deserve.






