
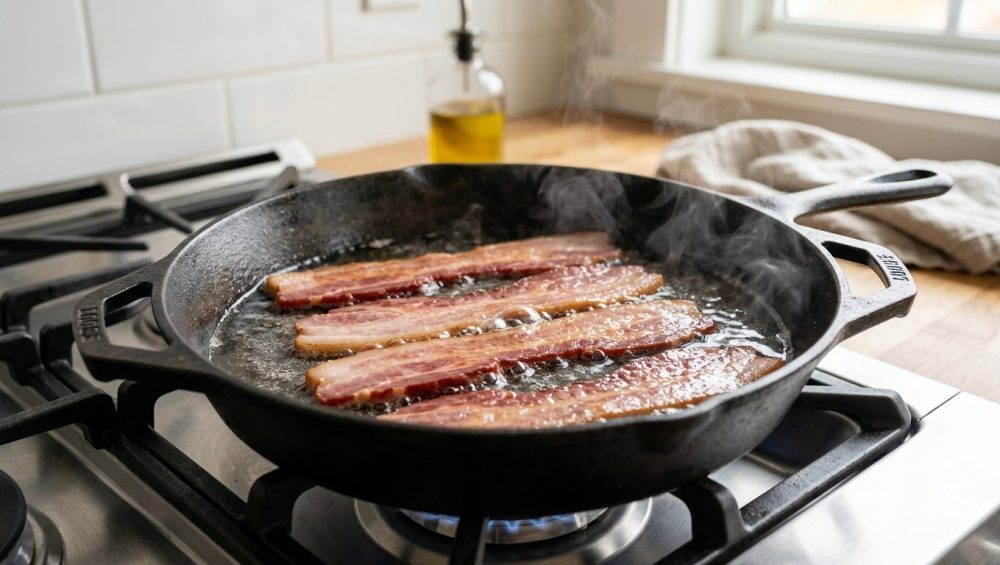
We’ve all been there. It’s Saturday morning, you’re craving a diner-style breakfast, and you throw a beautiful, expensive pack of thick-cut bacon into a hot skillet. Five minutes later, your kitchen looks like a grease grenade went off, your smoke alarm is screaming the song of its people, and that glorious bacon has violently curled into shriveled, burnt little commas. You’re left wondering if you’re actually ruining your dinners and breakfasts alike because you lack some mystical culinary gene.
Look, I love you, but you are doing it wrong. And it’s not your fault. We’ve been conditioned by generations of impatient cooks to just slap raw pork into a dry, scorching hot pan and hope for the best. But here is the brutal truth: dry heat is the enemy of perfectly rendered bacon. If you want evenly crispy, flat, shatteringly delicious bacon without the third-degree grease burns, you need to rethink your entire approach. You need a splash of water.
Yes, you heard me correctly. Water.
I know it sounds completely counterintuitive. You’ve probably been told that oil and water don’t mix, and adding liquid to a frying pan sounds like a recipe for a soggy disaster. But we aren’t boiling the bacon to death; we are using a fundamental principle of thermodynamics to control the rendering process. Today, we are going to dive deep into the food science behind this game-changing technique. I will explain exactly why your bacon shrinks, how temperature differentials cause those violent splatters, and how a meager half-cup of tap water can transform your weekend breakfast from a chaotic chore into a stress-free masterpiece. Grab your favorite skillet, put away the pretentious chef-speak, and let’s get to work.
The Anatomy of a Strip of Bacon
To understand why the water method works, we first need to look at what bacon actually is under the microscope. Bacon is not a uniform piece of meat. It is a highly complex matrix of different tissues, primarily composed of three things: muscle (the pink meat), fat (the white streaks), and a significant amount of water.
When you purchase a standard pack of bacon, you are buying cured pork belly. During the curing process, the meat is treated with salt, sugar, and often sodium nitrite. This draws out some moisture and concentrates the flavor, but the muscle fibers still retain a substantial amount of water. More importantly, the muscle and the fat have completely different cellular structures and, crucially, drastically different cooking requirements.
Let’s break down the thermal dynamics. Animal fat, specifically the saturated fat found in pork belly, begins to render (melt and liquefy) at a relatively low temperature, usually between 130°F and 140°F (55°C to 60°C). This is a slow, gradual process. If you want the fat to melt beautifully so it becomes crispy rather than chewy, it needs time. It needs to hang out in that gentle temperature zone for a while.
On the other hand, the muscle fibers are packed with proteins and sugars. For these proteins to brown and develop that complex, savory flavor we all crave, they need to undergo the Maillard reaction. The Maillard reaction is a chemical reaction between amino acids and reducing sugars that gives browned food its distinctive flavor. But here is the catch: the Maillard reaction doesn’t even begin to kick into high gear until the surface temperature reaches at least 300°F (150°C), typically thriving around 320°F to 356°F (160°C to 180°C).
Do you see the problem here? You have fat that needs low, slow heat to melt, and muscle that needs high, aggressive heat to brown. When you throw cold bacon into a hot, dry skillet, you are forcing these two entirely different tissues into a thermal battle royale.
The Flawed Tradition: Why Dry-Frying Fails
Let’s examine the traditional dry-frying method and why it inevitably leads to shrunken, deformed strips of meat.
When you place raw bacon into a hot pan, the temperature of the meat rapidly spikes. The muscle fibers, which contain moisture, suddenly contract as the water inside them rapidly heats up and evaporates. Because the muscle fibers contract much faster and tighter than the fat, the entire strip of bacon begins to buckle and curl. This curling lifts parts of the bacon off the surface of the pan, meaning some sections are cooking in the hot rendered fat while other sections are suspended in the air, remaining pale and flabby.
Furthermore, because the pan is so hot, the outer edges of the muscle fibers reach that 300°F+ Maillard zone almost immediately. They start browning and eventually burning before the fat has had any time to properly render at its preferred 130°F. This leaves you with bacon that is charred on the outside but still contains unrendered, chewy, rubbery fat on the inside.
And then there is the splattering. Oh, the violent, terrifying splattering. When the water inside the muscle fibers is rapidly expelled into a pool of 350°F liquid bacon grease, it flashes into steam instantly. This rapid expansion of steam causes the grease to pop and explode all over your stovetop, your walls, and your forearms. It is a messy, painful kitchen hazard. If you are struggling with a kitchen survival guide just to make breakfast, you are working too hard.
The Thermodynamics of the Water Method
This is where our magical splash of water comes in to save the day. By starting your bacon in a pan with just enough water to coat the bottom, you are completely changing the thermodynamic environment of the skillet.
Water has a boiling point of 212°F (100°C) at sea level. No matter how high you turn up the heat on your stove, liquid water will not exceed 212°F. When you place your bacon in the pan and add water, you are essentially capping the maximum temperature of the pan at 212°F for as long as the water is present.
Why is this brilliant? Because 212°F is the absolute perfect sweet spot for rendering fat without seizing the muscle fibers. It is well above the 130°F needed to melt the fat, allowing the rendering process to begin immediately. But it is well below the 300°F required for the Maillard reaction, meaning the muscle fibers won’t brown, contract, or curl.
As the water gently simmers, it creates a highly controlled, humid environment. The bacon plumps up slightly as it cooks gently. The fat slowly and evenly melts out into the water. Because the temperature is strictly regulated by the boiling water, the muscle fibers do not go into thermal shock. They relax. They stay flat.
Eventually, as the cooking process continues, the water evaporates entirely. But by the time the water is gone, the bacon has already released a generous pool of its own liquid fat into the pan. Now, the temperature of the pan is free to rise above 212°F. The rendered bacon fat heats up to that crucial 300°F to 350°F range, and the bacon begins to fry in its own grease.
Because the muscle fibers have already been gently cooked and the fat has already been rendered, the bacon doesn’t curl when it finally hits the high heat. It lays perfectly flat in the pan, ensuring even contact with the cooking surface. The Maillard reaction occurs uniformly across the entire strip, giving you a perfectly browned, shatteringly crisp piece of bacon from edge to edge. And because the water was already gently evaporated out of the muscle fibers during the simmering phase, there is no violent water-meets-hot-oil explosion. The splattering is reduced by at least 90%. It is elegant, it is scientific, and it is foolproof.
The Sassy Sous-Chef’s Masterclass: Step-by-Step
Alright, enough theory. Let’s get into the practical application. I want you to treat this like a serious culinary endeavor, because mastering the basics is how you take simple steps to culinary artistry in your own home. You do not need a culinary degree to make mind-blowing food, but you do need to follow instructions.
Step 1: The Selection
Not all bacon is created equal. If you are buying the paper-thin, water-logged stuff from the bottom shelf of the supermarket, you are already setting yourself up for failure. Look for thick-cut, dry-cured bacon. Dry-cured bacon has less excess moisture injected into it during the manufacturing process, which means it will yield a better texture and a more concentrated flavor. If you can get it fresh from a local butcher, even better.
Step 2: The Pan Choice
Put away the cheap, peeling Teflon pan. I have zero patience for toxic kitchen gear, and neither should you. You need a pan that retains heat evenly and provides a solid surface for browning. A heavy-bottomed cast iron skillet is the classic choice. It holds heat beautifully and only gets better with every batch of bacon you fry in it. If you prefer something slightly more responsive, a high-quality carbon steel pan is phenomenal. Understanding the thermodynamics of carbon steel will change your life; it heats up quickly, sears like a dream, and develops a natural non-stick patina. A heavy-clad stainless steel skillet also works wonderfully, provided you know how to manage your heat to prevent sticking.
Step 3: The Cold Start
Do not preheat the pan. I repeat, do not preheat the pan. Lay your strips of bacon flat in the cold skillet. It is perfectly fine if they overlap slightly; they will shrink just a tiny bit as they cook down, making room for themselves. Starting cold allows the temperature to rise gradually, which is critical for that slow fat rendering process.
Step 4: The Splash of Water
Pour just enough cold tap water into the pan to coat the bottom. You do not want to submerge the bacon completely—you aren’t making bacon soup. You just want a shallow layer of water, about a quarter of an inch deep, just enough to cover the bottom of the skillet and surround the meat.
Step 5: The Simmer
Place the skillet on the stove and turn the heat to medium-high. Watch as the water comes to a boil. Once it starts bubbling vigorously, reduce the heat to medium. Now, you wait. Do not poke it, do not prod it, and for the love of all things holy, do not flip it yet. Let the water do its job. The water will boil, steam, and slowly evaporate. During this time, the bacon will look a bit sad and grey. Do not panic. Trust the science.
Step 6: The Crisp
Once the water has completely evaporated, you will hear a distinct change in the sound coming from the pan. The gentle, rolling bubble of boiling water will be replaced by the sharp, aggressive sizzle of frying fat. The temperature in the pan is now rising. Turn the heat down to medium-low. This is the crucial moment. The bacon is now frying in its own rendered fat.
Now you can flip it. Use a pair of tongs to turn the strips over. You will notice that they are laying perfectly flat, with no curling or buckling. Let them fry in the fat until they reach your desired level of crispiness. Because the fat is already fully rendered, this browning phase will happen relatively quickly, usually in just 2 to 4 minutes per side.
Step 7: The Drain
When the bacon is deeply browned and crispy, immediately remove it from the pan. Do not just throw it on a cold plate. Transfer the strips to a wire cooling rack set over a baking sheet, or a plate lined with paper towels. This allows the excess surface grease to drain away, ensuring the bacon shatters when you bite into it rather than tasting heavy and oily.
Equipment Matters: Ditching the Toxic Gear
I need to take a brief detour here because it is a hill I am willing to die on. The equipment you use to cook your food matters just as much as the ingredients. If you are still using scratched-up, synthetic non-stick pans to fry your bacon, you need to throw them in the trash immediately.
When synthetic non-stick coatings are heated to high temperatures—which easily happens once the water evaporates and the bacon fat starts frying—they can break down and release toxic fumes. Not to mention, those coatings inevitably flake off into your food. No one wants mystery chemicals in their breakfast. If you are serious about banishing toxic kitchen gear, start with your skillets.
Cast iron and carbon steel are the undisputed kings of the bacon-frying world. They are durable, naturally non-stick once properly seasoned, and completely safe at high temperatures. They also hold thermal mass incredibly well, meaning the temperature of the pan won’t plummet when you add a cold strip of meat.
If you prefer stainless steel, that is also an excellent, non-toxic option. Many home cooks are terrified of cooking meat in stainless steel because they think it will stick like glue. But if you understand the science of heat management, it is a non-issue. Using a simple trick like the water drop test to gauge your pan’s temperature before searing other meats will save you hours of scrubbing. However, for the water-bacon method, since we are starting cold with liquid, sticking is rarely a problem. The gentle boiling process naturally releases the proteins from the metal, preventing protein adhesion right from the start.
And while we are on the topic of gear, please stop using cheap, dull knives and terrible cutting boards to prep your kitchen ingredients. If you are wondering why your prep work takes forever, it is probably because you are using gear that actively fights against you. For example, using the wrong surface is a surefire way of ruining your knives before you even get a chance to use them properly. Invest in good, solid wood or high-quality synthetic rubber boards, and keep your blades sharp. A well-equipped kitchen is a stress-free kitchen.
Troubleshooting Common Bacon Disasters
Even with the foolproof water method, there are a few variables that can trip up an eager home cook. Let’s troubleshoot some of the most common issues.
The Sugar-Cured Trap
If you are using maple-cured or brown sugar-coated bacon, you need to be extremely vigilant during the final crisping stage. Sugar burns very quickly at high temperatures. The water method is actually fantastic for sugary bacon because it gently cooks the meat before the sugar has a chance to scorch. However, once that water evaporates, the residual sugar in the pan will caramelize and blacken rapidly. You must keep the heat strictly on medium-low or even low once the frying stage begins, and pull the bacon a few seconds before you think it’s perfectly done, as the residual heat will carry it over the finish line.
Turkey Bacon and Alternatives
Can you use the water method for turkey bacon or plant-based bacon? The short answer is: sort of, but it’s not as effective. The water method relies heavily on the fact that pork belly contains a massive amount of dense, solid animal fat that needs to be rendered. Turkey bacon is highly processed, very lean, and contains minimal fat. If you boil it in water, you might just end up with soggy, gray strips of poultry. For lean alternatives, a traditional pan-fry with a little bit of added oil is usually the better route.
The “Is it Done Yet?” Panic
Because the water method changes the visual cues of cooking bacon (it looks gray and boiled for the first 10 minutes), many cooks panic and crank up the heat, or pull it too early. Patience is your greatest tool here. Do not rely on a thermometer for thin strips of meat; your meat thermometer is lying to you if you try to probe a 1/8-inch slice of pork belly. Rely on your senses. Listen for the shift from a bubbling boil to a crackling fry. Look for the deep, mahogany brown color of the Maillard reaction.
The Non-Stick Nightmare
If you ignored my advice and used a cheap non-stick pan, and now your bacon is somehow burning and sticking simultaneously, congratulations, you have ruined the coating. You are officially ruining your nonstick pans by exposing them to high, dry heat after the water evaporates. Throw the pan away, buy cast iron, and start over.
The Aftermath: Harvesting and Storing Liquid Gold
One of the most beautiful, unsung benefits of the water method is what is left in the pan after the bacon is gone. When you dry-fry bacon, the high heat often scorches the rendered fat, leaving you with a dark, bitter, burnt-tasting grease filled with black, carbonized specks.
Because the water method regulates the temperature so perfectly, the fat that renders out is pristine. It is clear, clean, and profoundly flavorful without any acrid, burnt notes. This rendered bacon fat is culinary liquid gold, and throwing it away is a crime against gastronomy.
Once you have removed your bacon from the skillet, take the pan off the heat and let the fat cool for about five to ten minutes. You want it to be safe to handle, but still completely liquid. Set a fine-mesh strainer over a heat-proof glass jar or a dedicated ceramic grease keeper. If you want it exceptionally pure, line the strainer with a coffee filter or a piece of cheesecloth.
Carefully pour the warm bacon grease through the strainer. The strainer will catch any stray bits of meat or fond, leaving you with pure, clarified bacon fat. Seal the jar and store it in your refrigerator. It will solidify into a beautiful, creamy white compound.
How do you use this liquid gold? The options are endless. Use it instead of butter to fry your eggs. Toss your roasted Brussels sprouts or potatoes in it before they go into the oven. Use it as the fat base for a roux when making a smoky macaroni and cheese. Substitute half the butter in your savory pie crusts or biscuits with cold bacon fat for an incredibly flaky, savory pastry. It is a zero-waste approach to cooking that elevates your weekday meals with zero extra effort.
Alternative Methods Debunked
Before we wrap up this masterclass, I want to address the elephant in the room: oven-baked bacon.
If you are cooking for a crowd of twelve hungry people, baking bacon on a wire rack set over a rimmed baking sheet in a 400°F oven is absolutely the way to go. It is hands-off, it frees up stovetop space, and it produces very good, flat bacon.
However, if you are cooking for just yourself or a small family (say, 4 to 6 strips), turning on your massive oven, waiting 20 minutes for it to preheat, and then baking the bacon for another 20 minutes is a colossal waste of time and energy. The stovetop water method is faster, requires less cleanup (one pan vs. a rack and a baking sheet), and, in my professional opinion, produces a superior texture. The water method yields bacon that is shatteringly crisp on the edges but still retains a microscopic chew in the center, whereas oven-baked bacon can sometimes dry out entirely, turning into a brittle pork cracker.
As for microwaving bacon between sheets of paper towels? Don’t even speak to me about it. It is an absolute travesty that robs the meat of its dignity and you of the glorious rendered fat. We are home cooks, not college freshmen in a dorm room. Have some self-respect.
Conclusion
Cooking should not be a source of stress, and making a simple weekend breakfast should not require a hazmat suit to protect you from flying grease. By understanding the basic food science of what is happening in your skillet, you can manipulate the environment to work for you, rather than against you.
The magic of a little water is not a trendy internet hack; it is a scientifically sound culinary technique grounded in the laws of thermodynamics. It honors the ingredient by giving the fat the gentle heat it needs to render, while perfectly timing the Maillard reaction to give the muscle fibers the crisp, browned finish they deserve.
So the next time you bring home a beautiful package of thick-cut bacon, resist the urge to throw it into a scorching dry pan. Start cold. Add a splash of water. Be patient. Let the science do the heavy lifting. I promise you, once you experience the joy of perfectly flat, evenly cooked, splatter-free bacon, you will never go back to your old ways. Now go forth, fire up that cast iron, and cook like the expert you are.






