
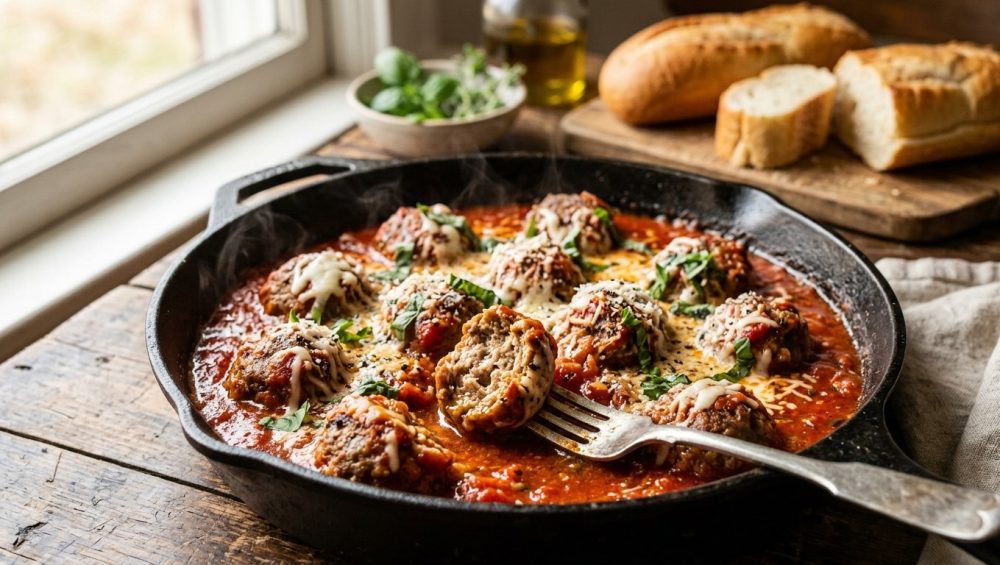
Listen up, folks. We need to have a serious heart-to-heart about those weaponized golf balls you are currently passing off as meatballs. You know exactly what I am talking about. You invite your friends over for a casual weekend dinner, promising them a glorious, comforting, rustic Italian-American feast. You spend hours meticulously rolling ground meat, simmering a rich tomato sauce, and setting the table. But the moment your guests bite into the main event, their jaws have to work overtime. The texture is dense, rubbery, and dry enough to absorb all the moisture in their mouths. You smile politely, but deep down, you know the truth: you’ve served them culinary hockey pucks.
But don’t panic. Put down the takeout menu and take a deep breath. You do not need a culinary degree from a prestigious academy in Florence to fix this. You just need a little bit of food science, a couple of basic techniques, and the willingness to unlearn the terrible habits passed down by well-meaning but misguided home cooks.
We are currently living in a golden age of comfort food. According to recent market analysis for 2025 and 2026, the global meatball market is absolutely exploding, projected to reach a staggering $14.5 billion this year. High-protein diets and a craving for nostalgic, hearty meals have driven meat consumption back up. People are obsessed with meatballs, from traditional Italian polpette to Swedish köttbullar and Asian-fusion lion’s head varieties. Yet, despite this global obsession, the average home cook is still struggling to master the basic physics of ground meat.
Today, we are going to tear down everything you thought you knew about making meatballs. We are going to explore the microscopic chemistry of muscle fibers, the absolute magic of a proper panade, and the thermodynamic realities of your frying pan. By the time we are done, you will understand exactly why your meatballs are tough, and you will have the exact blueprint to host a completely stress-free, interactive gathering.
The Anatomy of a Disappointment: Why Your Meatballs Bounce
To solve the problem, we first have to understand the crime scene. Why do meatballs turn tough in the first place? It comes down to three primary culprits: myosin extraction, a lack of fat, and overworking the proteins.
Let’s start with the science of myosin. Myosin is a structural protein found in muscle tissue. When meat is ground, these proteins are exposed. If you keep the meat cold, the myosin behaves itself. But the moment your ground meat warms up above 40°F (4.4°C), the myosin begins to leak out of the muscle fibers. As you vigorously mix the meat with your warm hands, you are essentially churning that myosin into a sticky, biological glue. When this glue hits the heat of your pan or oven, the proteins tightly cross-link and contract, squeezing out all the moisture and leaving you with a dense, bouncy texture.
This is the exact same chemical process we use to make sausages. In sausage making, you want that tight, snappy, springy texture. You actively knead the meat to develop the myosin. But a meatball is not a sausage. A meatball should be a delicate, tender cloud of savory joy that yields effortlessly to a fork. If you are kneading your meatball mixture like a loaf of bread, you are committing culinary sabotage.
The second culprit is the fat ratio. In a desperate bid to be “healthy,” many weekend culinary hobbyists reach for 90% or even 95% lean ground beef. Let me be brutally honest: lean ground beef has absolutely no business being in a meatball. Fat is not just a flavor carrier; it is a vital structural component. When you use ultra-lean meat, there is nothing to lubricate the muscle fibers. According to culinary food labs, the ideal meat-to-fat ratio for a perfect meatball is 70/30, or at the absolute minimum, 75/25. As the meatball cooks, the fat melts and coats the proteins, preventing them from binding too tightly and ensuring a juicy mouthfeel. If you use turkey or chicken breast, you are practically begging for a dry meatball unless you actively introduce supplemental fat, like ground pork belly.
The Culinary Miracle of the Panade
Now that we know what ruins a meatball, let’s talk about the ultimate savior. If you want to stop making dry meatballs, you need to embrace the panade.
A panade (pronounced pah-NAHD) is a paste made by soaking a starchy ingredient—usually bread or breadcrumbs—in a liquid, such as milk, buttermilk, or broth. Many rookie cooks assume that bread is just a cheap filler used by grandmothers to stretch a pound of meat during hard times. This is a tragic misunderstanding of food chemistry.
A panade is a highly engineered starch-protein hydration matrix. When you mix wet bread into your ground meat, the starch molecules physically insert themselves between the meat proteins. As the meatball cooks and its internal temperature reaches the critical window of 140°F to 167°F (60°C to 75°C), the starches in the panade undergo gelatinization. They swell up, absorbing the juices and melted fat that would otherwise leak out into the pan.
More importantly, this swollen starch gel acts as a physical roadblock. It physically prevents the myosin proteins from cross-linking into a dense, tough network. The result? A meatball that holds its shape but melts in your mouth.
How to Build the Perfect Panade
Not all panades are created equal. While you can use dry, store-bought breadcrumbs in a pinch, they do not offer the same structural benefits as fresh, day-old bread. Dry breadcrumbs are often too fine and can make the mixture dense if not properly hydrated.
The gold standard is day-old sourdough, rustic Italian bread, or a high-quality white sandwich bread with the crusts removed. You want a bread that has a good crumb structure. Tear the bread into small pieces and soak it in whole milk. Why milk? The dairy proteins and natural sugars in the milk add a subtle richness and aid in browning, while the fat provides extra insurance against dryness.
For every pound (450g) of ground meat, you should aim for about 1/2 cup of loosely packed torn bread soaked in 1/3 cup of whole milk. Let it sit for 5 to 10 minutes until the bread has completely absorbed the liquid, then mash it with a fork until it forms a uniform, porridge-like paste. If you skip the mashing step, you will end up with weird, unappetizing pockets of soggy bread in your cooked meatballs.
The Holy Trinity of Meat: Selecting Your Blend
You can have the best panade in the world, but if you start with subpar meat, your results will be mediocre. While a 100% beef meatball is classic and perfectly fine, it lacks complexity. The secret to a truly mind-blowing, professional-level meatball is the classic blend of beef, pork, and veal.
- Beef: Provides the robust, savory, beefy backbone. Look for ground chuck with an 80/20 ratio.
- Pork: Ground pork is naturally high in fat (often hovering around 30% fat). It brings sweetness, moisture, and essential lubrication to the mixture.
- Veal: Veal is prized for its high natural gelatin content. As the meatballs cook, this gelatin melts, providing an incredibly luxurious, lip-smacking mouthfeel that you simply cannot get from beef or pork alone.
If you cannot find veal, or prefer not to use it, a 50/50 split of 80/20 ground beef and fatty ground pork will work beautifully. Just remember the golden rule: keep it cold. Keep your meat in the refrigerator right up until the exact moment you are ready to mix.
The Danger Zones: Mixing and Forming
This is where most home cooks ruin their dinner. You have your beautiful, ice-cold meat blend and your perfectly mashed panade. Now, you must combine them.
Do not dump everything into a bowl and squeeze it together with your fists like you are working a lump of clay. Remember the myosin! We want to minimize mechanical agitation.
Instead, use the “claw method.” Spread the cold ground meat out in a wide, shallow bowl. Distribute your panade, your beaten eggs, your grated Parmigiano-Reggiano, your minced garlic, and your herbs evenly over the top of the meat. Then, spread your fingers wide like a claw and gently toss and fold the mixture together. You want to lift from the bottom and fold over, just until the ingredients are uniformly dispersed. The moment it looks cohesive, stop. Step away from the bowl.
When it comes to forming the balls, handle them as if they are fragile little eggs. Oil your hands lightly with olive oil or cold water to prevent sticking, and gently roll the mixture into balls. Do not pack them tightly.
The Secret Step You Are Skipping
Once your meatballs are formed, do not put them straight into the pan. Remember how we talked about fat melting too quickly? If you cook room-temperature meatballs, the fat will instantly render out into the pan, leaving the interior dry.
Place your formed meatballs on a parchment-lined baking sheet and put them in the refrigerator for at least 30 minutes. Chilling drops the temperature of the fat back down to around 38°F (3°C), ensuring that it remains solid and trapped within the protein matrix during the initial stages of cooking. This single step reduces structural failure by over 90% and keeps the juices locked inside.
The Thermodynamics of Cooking: Searing vs. Braising
Now we arrive at the cooking phase. You have a few options: pan-searing, baking, or dropping them raw directly into simmering sauce.
Let me be incredibly clear about my stance on kitchen gear. I have zero patience for cheap, toxic kitchenware. If you are still using a scratched, peeling Teflon non-stick pan that you bought at a discount store five years ago, throw it in the garbage immediately. We do not serve forever chemicals in this kitchen. You need a heavy-bottomed, multi-clad stainless steel skillet, a well-seasoned cast iron pan, or a carbon steel skillet. These materials provide the superior thermal mass required for proper browning.
If you are terrified of your food sticking to stainless steel, you just need to learn the water drop test. Heat your pan over medium heat until a drop of water dances and glides across the surface like a mercury bead (the Leidenfrost effect). Once the pan is properly heated, add your oil. This creates a surface that is actually non-stick without the toxic coatings. Furthermore, ruining your nonstick pans with aerosol cooking sprays is a rookie mistake; the soy lecithin in those sprays polymerizes onto the pan, creating a sticky, impossible-to-clean residue. Use real, high-quality olive oil or avocado oil.
The Searing Method
Searing your meatballs creates a beautiful, caramelized crust via the Maillard reaction. This crust adds incredible depth of flavor to your final dish. Place your chilled meatballs into the hot oil, leaving plenty of space between them. If you crowd the pan, the temperature will plummet, and the meat simply steams instead of browning. Let them sear undisturbed for 2-3 minutes per side until a deep brown crust forms. Do not worry about cooking them all the way through; they will finish cooking in the sauce.
The Braising Method
Once seared, transfer the meatballs into a pot of simmering marinara sauce. Let them braise gently on low heat for 30 to 45 minutes. The gentle, moist heat of the braise ensures they cook through evenly without drying out, while the panade works its magic to keep the interior tender. The meatballs will absorb the acidity and sweetness of the tomatoes, while simultaneously releasing their rich, savory pan drippings into the sauce, elevating the entire pot.
Hosting the Ultimate Mindful Meatball Bar
Now that you possess the sacred knowledge of the perfect meatball, it is time to put it to use. Stop trying to plate individual, fussy portions for a dinner party. It is stressful, it creates a bottleneck in the kitchen, and it traps you at the stove while your friends are drinking all your good wine in the living room.
Instead, you are going to host a mindful meatball bar.
This is a casual, highly interactive, modular dining experience where your guests build their own ultimate meatball subs or bowls. It is incredibly budget-friendly, scales effortlessly for large crowds, and most importantly, 90% of the work is done before anyone even rings the doorbell.
The Prep-Ahead Timeline
The beauty of meatballs is that they love to be made ahead of time. You can mix, form, sear, and braise your meatballs in the sauce a full 24 to 48 hours in advance. In fact, they taste better the next day, as the flavors have time to mature and meld in the refrigerator. On the day of the party, all you have to do is gently reheat the pot of meatballs and sauce on the stove.
The Sub Station
The foundation of a great meatball sub is the bread. Do not buy those squishy, sugary hot dog buns. You need a sturdy, crusty Italian roll or a seeded semolina hero that can stand up to the moisture of the sauce without disintegrating into mush.
Set up a toasting station. Slice the rolls, brush them lightly with garlic butter, and let your guests toast them in the oven or under the broiler for a few minutes. A toasted barrier is essential for structural integrity.
The Sauce Station
While your meatballs are swimming in a classic red marinara, it is brilliant to offer a secondary sauce for contrast. A vibrant, herbaceous pesto is a fantastic option. Just remember, if you are serving a side of pasta with this, always save some reserved pasta water. A splash of that starchy, salty liquid is the secret to emulsifying your sauces so they cling beautifully to the noodles rather than pooling sadly at the bottom of the bowl.
The Cheese and Toppings Station
This is where the magic happens. Provide a variety of cheeses for melting. Fresh mozzarella, sharp provolone, and a high-quality block of Parmigiano-Reggiano are non-negotiable. Please, for the love of all things culinary, grate your own cheese. Bags of pre-shredded cheese are coated in cellulose and anti-caking agents (like potato starch or natamycin) that prevent them from clumping in the bag, but also prevent them from melting into a smooth, gooey pull. They will turn your beautiful sub into a grainy, oily mess. Take the extra sixty seconds to run a block of provolone over a box grater.
For toppings, offer:
- Something spicy: Pickled jalapeños, hot cherry peppers, or Calabrian chili paste.
- Something green: Fresh basil leaves and wild arugula. (Pro-tip: Keep your basil stems in a glass of water at room temperature. If you throw them in the fridge, your fresh herbs get slimy and turn black due to cold damage).
- Something crunchy: A bowl of toasted pine nuts or crispy fried shallots adds a phenomenal textural contrast to the soft, tender meatballs.
Set all of these components out in beautiful, shallow ceramic bowls across your kitchen island or dining table. Provide plenty of serving spoons, tongs, and stacks of heavy-duty napkins. Your guests will have a blast customizing their perfect sandwich, debating cheese choices, and interacting with the food. You, meanwhile, will be calmly sipping a glass of Chianti, looking like an absolute hosting genius.
Troubleshooting and Storage
Let’s talk about leftovers, assuming you actually have any. Meatballs are one of the most freezer-friendly foods on the planet, provided you handle them correctly.
If you want to freeze them, it is best to freeze them after they have been cooked in the sauce. The sauce acts as a protective barrier against freezer burn and temperature fluctuations. Let the meatballs and sauce cool completely to room temperature, then transfer them to airtight glass or heavy-duty silicone containers. They will keep beautifully in the freezer for up to three months.
When it comes time to reheat, do not just blast them in the microwave on high for five minutes. The aggressive, uneven microwaves will boil the moisture right out of the meat, returning you to the rubbery golf ball stage. Instead, thaw them overnight in the refrigerator, and reheat them gently in a saucepan over medium-low heat until they are warmed through. Patience is the key to preserving that delicate panade structure.
If your sauce has thickened up too much in the fridge, simply whisk in a splash of chicken broth or water to loosen it back to a silky consistency.
The Final Word
Cooking is not about innate talent or possessing a kitchen full of expensive gadgets. It is about understanding the basic rules of engagement. When you know how proteins react to heat, why fat is necessary for texture, and how starches can manipulate moisture, you are no longer blindly following a recipe—you are commanding your kitchen.
You now have the exact scientific framework to guarantee melt-in-your-mouth tenderness every single time. You know how to avoid the pitfalls of overworked myosin, lean meat tragedies, and toxic non-stick pans. More importantly, you have a foolproof, stress-free strategy for feeding a crowd with style and ease.
So, this weekend, ditch the complicated, multi-course dinner party plans. Head to the butcher, get a proper 70/30 blend of beef, pork, and veal, tear up some good sourdough, and build a panade. Invite your friends over, set up the ultimate meatball sub station, and watch their eyes roll back in their heads when they take that first bite. You’ve got this. Now go wash your hands and get cooking.






