Listen to me closely, because we need to have a serious conversation about what you are doing to your soup. If I walk into your kitchen and see you dropping a cold, dense lump of delicate, fermented miso paste directly into a pot of violently boiling water, I might actually scream. Treating miso like a cheap bouillon cube is a culinary crime that completely obliterates its complex flavor profile and destroys every single health benefit it has to offer.
You do not need a culinary degree to make mind-blowing food, but you do need to understand the basic science of what you are cooking. Miso is a living, breathing ingredient. It is a masterpiece of fermentation that requires respect, gentle handling, and precise temperature control. When you boil it, you are committing a massacre against beneficial probiotics and vaporizing the delicate volatile compounds that give the paste its signature umami depth.
Today, we are putting an end to this madness. I am going to teach you the exact science of thermal sensitivity in fermented foods, how to properly stage your broth, and how to transform this newfound knowledge into the ultimate weekend project: a cozy, interactive, build-your-own DIY Miso Soup Bar. This is the definitive blueprint for hosting a completely stress-free communal meal that will make your friends think you secretly attended culinary school. Let us fix those disastrous beginner cooking mistakes and elevate your weekend gathering game to professional heights.
The Biological Crime of Boiling Miso
To understand why boiling miso is the ultimate sin, you have to understand what miso actually is. It is not just a salty flavor paste; it is the result of a highly complex, labor-intensive, two-step fermentation process that relies on a microscopic ecosystem. Mastering the art of the kitchen means understanding the biology behind your ingredients.
The Magic of Aspergillus Oryzae and Double Fermentation
The magic of miso begins with a filamentous fungus called Aspergillus oryzae, affectionately known in Japan as koji. Unlike fruiting mushrooms, koji is a mold that grows a network of thread-like filaments called mycelium. In the first stage of fermentation, this mold is inoculated onto steamed rice or barley. As the mold grows, it acts like an external digestive system, secreting massive amounts of two highly specific enzymes: amylase and protease. The amylase breaks down the complex starches in the grains into simple, sweet sugars, while the protease breaks down proteins into their constituent amino acids—specifically glutamic acid, the very building block of umami flavor,.
Once the koji is mature, the second fermentation begins. The enzyme-rich koji is mixed with cooked soybeans, salt, and water, and packed into vats to age. This is where the real party starts. The simple sugars and amino acids created by the koji become an all-you-can-eat buffet for a host of beneficial microbes, including lactic acid bacteria (like Pediococcus halophilus and Lactobacillus delbrueckii) and various wild yeasts,. These microorganisms feast on the sugars, producing organic acids that give miso its tangy complexity, and alcohols that contribute to its intoxicating aroma. This process can take anywhere from a few weeks for a sweet, mild white miso (shiro miso) to several years for a dark, pungent, intensely savory red miso (aka miso).
The Probiotic Massacre: The 140°F to 150°F Sweet Spot
Because miso is a raw, unpasteurized, living food (assuming you are buying the good stuff from the refrigerated section and not the shelf-stable, dead paste in the center aisles), it is absolutely teeming with beneficial probiotics. These lactic acid bacteria are incredible for your gut microbiome, aiding in digestion and immune support.
However, these bacteria are incredibly sensitive to heat. While some hardy strains can survive up to 130°F, the vast majority of the beneficial microbes in miso will face rapid thermal death once temperatures exceed 115°F, and they are completely obliterated by the time water reaches a rolling boil at 212°F. If you want to preserve the nutritional integrity of your soup, you must practice patience. The golden rule is to completely remove your broth from the heat source and allow the temperature to drop to a gentle, holding window of 140°F to 150°F before you even think about introducing the miso paste. This temperature is hot enough to be deeply comforting and safe to eat, but gentle enough to keep the microscopic ecosystem alive.
Obliterating Volatile Flavor Compounds
Even if you do not care about gut health, you should care about flavor. And boiling miso destroys that, too. The flavor profile of miso is not a single note; it is a symphony of over 200 distinct volatile flavor compounds. Gas chromatography-mass spectrometry studies have identified a massive array of esters (which provide sweet, fruity notes), alcohols like 1-octen-3-ol (which provide fresh, earthy aromas), and pyrazines (which deliver that deep, roasted, savory backbone).
These volatile compounds are exactly that: volatile. They evaporate rapidly when exposed to high heat. Research shows that when miso is subjected to boiling temperatures, critical odorants like 1-octen-3-one and trans-4,5-epoxy-(E)-2-decenal disappear almost entirely. Simultaneously, the heat triggers the formation of a compound called methional, which fundamentally alters the aroma, making the soup taste flat, cooked, and aggressively salty rather than nuanced and complex. When you boil miso, you are literally evaporating the culinary magic into the air, leaving behind a dull, lifeless bowl of brown water.
The Gear Matrix: Banishing Toxic Junk from Your Kitchen
As a home cook, your food is only as good as the tools you use to prepare it. I have a strict, non-negotiable “no-go” rule when it comes to cheap, toxic kitchenware. If you are still simmering acidic broths in scratched, peeling non-stick pots or flimsy mystery metals, we need an intervention. Banishing toxic kitchen gear is the very first step to taking your weekend culinary projects seriously. You cannot build a complex, delicate broth in a pot that is actively leaching synthetic chemicals into your food.
The Ideal Broth Vessels
When hosting a DIY Miso Soup Bar, thermal mass is your best friend. You need a vessel that can hold a steady, gentle heat without hot spots that might accidentally scorch your delicate ingredients.
- Enameled Cast Iron: A high-quality enameled cast iron Dutch oven (like a Le Creuset or Staub) is an absolute powerhouse. The cast iron core retains heat beautifully, keeping your broth warm for second and third helpings, while the non-reactive glass enamel interior ensures that the delicate flavors of your dashi remain pure and untainted.
- Multi-Clad Stainless Steel: A heavy-bottomed, fully clad stainless steel stockpot is the workhorse of a beautifully organized dream kitchen. It offers incredible temperature control, meaning when you turn the heat off, the temperature of the liquid will drop predictably, allowing you to hit that perfect 140°F to 150°F window with precision.
- The Traditional Donabe: If you want to elevate your hosting aesthetics, invest in a Japanese donabe. These traditional earthenware clay pots are designed specifically for communal dining. The porous clay absorbs heat slowly and releases it evenly, keeping your soup at the perfect serving temperature right in the center of the dining table.
Precision Temperature Control
Guessing is for amateurs. If you want professional results, you need professional data. Do not rely on the “stick your finger in the broth” method to determine if your soup has cooled down enough for the miso. Invest in a high-quality, fast-reading digital thermometer. It is the cheapest, most effective way to guarantee you are not murdering your probiotics.
Crafting the Perfect Dashi Foundation
Miso soup is only 10% miso paste and 90% dashi (Japanese soup stock). If your foundation is weak, your soup will be weak. Dashi is the liquid embodiment of umami, and unlike Western bone broths that take 12 to 24 hours to simmer, a traditional dashi can be made in under 20 minutes.
The Traditional Awase Dashi
The gold standard for miso soup is Awase Dashi, a beautiful marriage of two ingredients: kombu (dried kelp) and katsuobushi (dried, fermented, and smoked skipjack tuna flakes). This pairing is not an accident; it is a masterpiece of culinary chemistry. Kombu is packed with glutamic acid, while katsuobushi is loaded with inosinic acid. When these two amino acids hit your palate at the same time, they create a synergistic umami multiplier effect, making the broth taste up to eight times more savory than either ingredient on its own.
To make it, gently wipe a piece of kombu with a damp cloth (do not wash off the white powdery crystals; that is pure umami). Soak it in cold water for 30 minutes, then place it over medium heat. Right before the water reaches a boil—when you see little bubbles forming at the edges—remove the kombu. If you boil kombu, it releases alginic acid, which makes the broth bitter and slimy. Next, bring the liquid to a rapid simmer, turn off the heat, and add a generous handful of katsuobushi. Let it steep for 5 minutes, then strain it through a fine-mesh sieve. You now have liquid gold.
Plant-Based Powerhouses: Vegan Dashi
If you are hosting a plant-based gathering, you can easily swap the katsuobushi for dried shiitake mushrooms. Shiitakes are rich in guanylic acid, which provides a deep, earthy umami that pairs perfectly with the glutamates in the kombu. For the absolute best results, do a cold-brew dashi: place the kombu and dried shiitake in a pitcher of water and leave it in the fridge overnight. The slow extraction pulls out all the complex flavors without extracting any harsh, bitter tannins.
Time is Money: Weekday Cheats vs. Weekend Perfection
I am a realist. While I demand perfection on the weekends, I know that during the week, time is money. If you want to make simple weeknight dinners, you can absolutely use a shortcut. High-quality, MSG-free dashi packets (essentially tea bags filled with ground kombu, bonito, and flying fish) are a brilliant, authentic pantry staple that will help you survive the kitchen on a busy Tuesday. Simply steep the packet in simmering water for five minutes, and you have a phenomenal base. However, for a weekend DIY Miso Soup Bar, I highly encourage you to make your dashi from scratch. The ritual of it sets the tone for the entire evening.
The Art of the Miso Slurry
This is the make-or-break moment. You have a beautiful, steaming pot of dashi, and you have your high-quality, probiotic-rich miso paste. How you combine them dictates the success of the entire dish.
The Mechanics of the Slurry
Miso paste is dense, oily, and highly concentrated. If you drop a spoonful directly into a pot of broth, it will immediately sink to the bottom and form stubborn, salty clumps that refuse to dissolve. Your guests will end up with a bowl of bland broth, only to swallow a massive, overpowering chunk of raw miso at the very end.
To prevent this, you must create a slurry. There are two acceptable methods:
- The Miso Koshi Method: A miso koshi is a small, deep, fine-mesh strainer with a long handle, accompanied by a miniature whisk. You lower the strainer into the hot dashi so it fills with liquid, place your miso paste inside the strainer, and whisk it directly into the broth,. This guarantees a perfectly smooth, lump-free soup while keeping delicate ingredients (like tofu) safe from aggressive stirring.
- The Ladle/Bowl Method: If you do not have a miso koshi, ladle about a cup of the warm dashi into a small mixing bowl. Add your miso paste to the bowl and use a fork or a small whisk to vigorously blend the paste and the liquid until it forms a perfectly smooth, velvety slurry. Only then do you pour this concentrated mixture back into the main pot.
The Off-Heat Integration Technique
Let us walk through the exact timeline of events to ensure thermal perfection.
- Bring your dashi to a gentle simmer.
- Add your “hard” ingredients that require cooking (like daikon radish, carrots, or cubed potatoes) and let them simmer until tender.
- TURN OFF THE HEAT. Completely remove the pot from the burner,.
- Use your digital thermometer to monitor the broth. Wait until the temperature drops into the safe zone of 140°F to 150°F.
- Once the broth has cooled to the sweet spot, introduce your perfectly smooth miso slurry, stirring gently to incorporate.
- Serve immediately. The ideal serving temperature for miso soup is around 167°F (75°C) in Japan, but by keeping the holding temp slightly lower during integration, you guarantee the survival of the probiotics and volatile aromas,.
Architecting the Cozy DIY Miso Soup Bar
Now that you understand the rigorous science of the broth, it is time to have some fun. A DIY Miso Soup Bar is the absolute pinnacle of the art of effortless hosting. Instead of sweating over a hot stove while your guests mingle in the living room, you do all the prep work in advance. When it is time to eat, the meal becomes an interactive, communal experience where everyone gets to play chef and customize their own perfect bowl.
The Philosophy of Communal Staging
The secret to hosting mindful gatherings is eliminating bottlenecks. By staging your ingredients in an intuitive, linear flow, you allow your guests to move seamlessly from the broth station down the line of toppings. It forces people to slow down, engage with their food, and talk to each other about their flavor combinations.
The Component Matrix
To build a truly spectacular soup bar, you need to offer a variety of textures and flavor profiles. Arrange your kitchen island or dining table into four distinct zones:
Zone 1: The Base (Broth & Paste)
- A large, heavy-bottomed enameled cast iron pot or Donabe filled with your perfectly crafted, warm dashi.
- A ladle and a stack of deep, ceramic soup bowls.
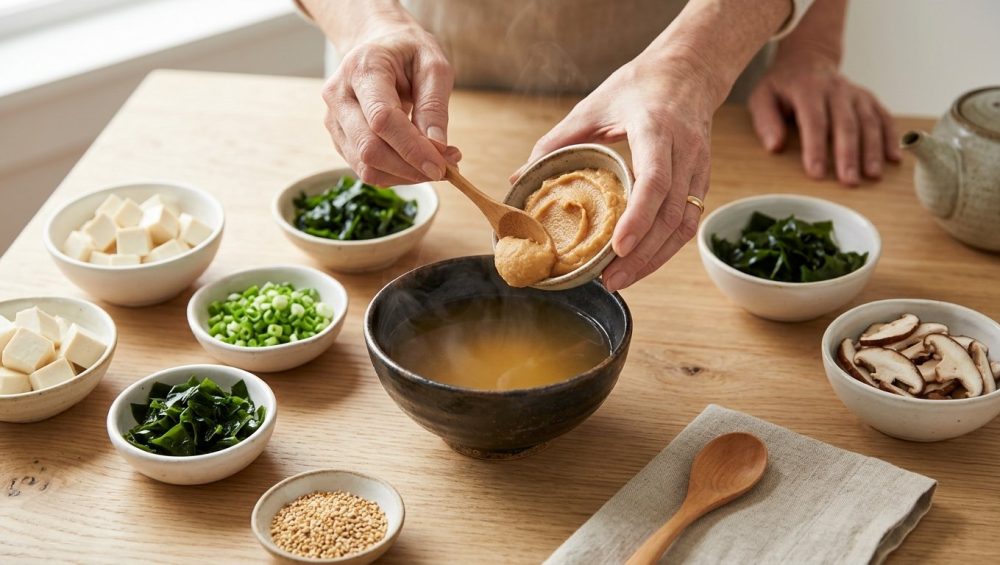
- Small, beautiful ramekins holding three different types of miso paste: a sweet, mild Shiro (white) miso; a rich, earthy Aka (red) miso; and an Awase (mixed) miso. Provide small spoons and mini whisks so guests can create their own custom slurry right in their individual bowls.
Zone 2: The Earth & Sea (Vegetables & Seaweed)
- Wakame: Dried wakame seaweed that has been rehydrated in cold water for 10 minutes, drained, and roughly chopped,.
- Mushrooms: Sautéed shiitake slices, raw enoki bundles, and lightly steamed shimeji mushrooms.
- Greens: Blanched spinach, baby bok choy, or thinly sliced snap peas for a pop of vibrant color and fresh crunch.
- Root Veggies: Paper-thin slices of raw radish or pre-simmered daikon cubes.
Zone 3: The Proteins (Substance)
- Tofu Two Ways: Offer both delicate cubes of silken tofu (which melt in the mouth) and lightly pan-fried cubes of firm tofu (which offer a satisfying chew).
- Seafood: Small, cooked cocktail shrimp or tender chunks of poached white fish.
- Poultry/Meat: Shredded rotisserie chicken or very thinly sliced, quick-seared pork belly (for a Tonjiru-style vibe).
- Aburaage: Thinly sliced strips of deep-fried tofu pouches, which act like little sponges, soaking up the savory broth.
Zone 4: The Aromatics & Crunch (The Finishers)
- Negi: Mountains of finely sliced scallions or Japanese long green onions.
- Sesame: Toasted white and black sesame seeds.
- Spice: Shichimi togarashi (Japanese seven-spice blend) and a jar of high-quality chili crisp or rayu (chili oil).
- Citrus: Wedges of fresh yuzu or lemon to add a bright, acidic lift that cuts through the rich umami.
Prep Strategies for the Smart Host
The beauty of this setup is that 95% of the work is done before anyone rings the doorbell. You can chop your scallions, rehydrate your wakame, cube your tofu, and arrange your topping platters hours in advance. Keep the perishable components covered in the refrigerator until 15 minutes before serving.
When your guests arrive, your only job is to manage the broth. Utilize smart food holding strategies by keeping your dashi on the absolute lowest setting of your stove, or utilizing the residual thermal holding power of your cast iron pot off the heat. By the time your guests ladle the warm dashi over their chosen ingredients and whisk in their miso paste, the temperature will naturally stabilize at that perfect, comforting, probiotic-safe 140°F to 150°F range.
Troubleshooting Your Miso Masterpiece
Even with the best preparation, questions will arise. Here is exactly how to handle the most common miso soup concerns without breaking a sweat.
Why Your Soup Separated (And Why That is Actually a Good Thing)
If you let a bowl of freshly made miso soup sit on the table for five minutes, you will notice something alarming: the soup will appear to “break” or separate. A cloudy, curd-like substance will settle at the bottom of the bowl, leaving a clear, yellowish liquid at the top.
Do not panic. You did not ruin the soup. This phenomenon is called flocculation, and it is the hallmark of an authentic, high-quality miso soup. Miso is not completely soluble; it is composed of thousands of microscopic, insoluble particles of fermented soybeans and rice. When the soup is agitated, these particles are suspended in the broth. When it sits still, gravity takes over, and the heavier particles sink. If your soup doesn’t separate, it means you are likely using a highly processed, artificial paste loaded with chemical emulsifiers. To fix the separation, simply do what the Japanese do: use your chopsticks to give the soup a quick, gentle stir right before you take a sip.
Rescuing a Bland Broth
If your guests whisk in their miso and complain that the soup tastes a bit flat or watery, do not immediately reach for the salt shaker. Miso soup relies on a delicate balance of salinity and umami.
- If it lacks depth: The issue is the dashi. You can rescue it by adding a tiny splash of high-quality soy sauce or a few extra drops of liquid dashi concentrate to boost the glutamates without overwhelming the bowl with sodium.
- If it lacks punch: The issue is the miso ratio. The standard baseline is about 1 tablespoon (15 grams) of miso paste per 1 cup (200 ml) of dashi,. Encourage your guests to whisk in just a half-teaspoon more of the Aka (red) miso, which has a deeper, more pungent flavor profile that cuts through blandness instantly.
Fixing the Dreaded Clumps
If a guest gets over-eager and drops a solid spoonful of miso directly into their bowl of broth without making a slurry first, they are going to end up with clumps. To rescue their bowl, do not let them aggressively mash the paste against the side of the bowl—this will just destroy their delicate silken tofu. Instead, hand them a small, separate ramekin. Have them fish the clump of miso out of their soup, place it in the ramekin with a tiny splash of warm water, and use a mini whisk to create a proper slurry off to the side. Once it is smooth, they can pour it back into their bowl. Problem solved, crisis averted.
The Final Ladle
Cooking is not about rigidly following a list of ingredients; it is about understanding the why behind the how. By respecting the delicate, living nature of miso paste and protecting it from the violent heat of a rolling boil, you are not just making a better bowl of soup—you are preserving centuries of fermentation artistry, maximizing your nutritional benefits, and unlocking a depth of flavor that most home cooks completely miss.
A DIY Miso Soup Bar is more than just a meal; it is an invitation to slow down. It turns the act of eating into a mindful, creative, and highly personalized experience. So, this weekend, put away the complicated recipe books, ditch the stressful, multi-course dinner party plans, and embrace the elegant simplicity of a perfectly staged soup bar. Keep your dashi warm, keep your miso raw, and let your guests do the rest. You’ve got this.


