
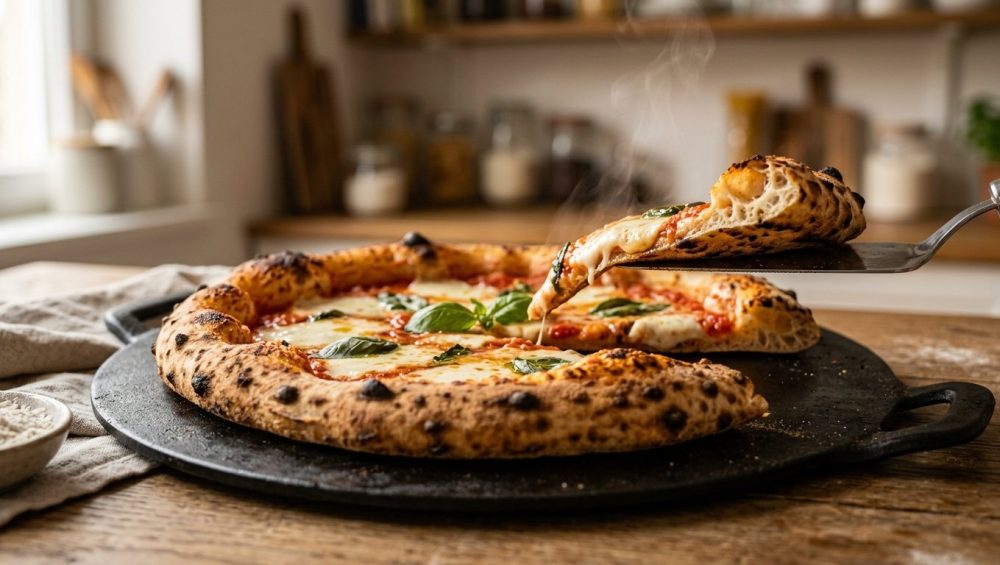
The Heartbreak of the Limp Slice
Let me paint a picture that is entirely too familiar for the weekend culinary hobbyist. You have done everything right. You spent forty-eight hours cold-fermenting a meticulously hydrated dough. You sourced imported San Marzano tomatoes that cost more than your first car. You carefully arranged your toppings like you were painting the Sistine Chapel. You slide your masterpiece into the oven, wait anxiously, and pull it out to slice it.
You pick up a piece, and the tip immediately sags toward the floor, dumping your artisanal, expensive ingredients straight onto your plate—or worse, your shoes. The undercarriage is pale, blonde, and has the structural integrity of a wet paper towel.
I have zero patience for pretentious chef-speak, but I have even less patience for a pizza crust that cannot hold up its own toppings. The good news? The problem is not you. It is not your recipe, your kneading technique, or your lack of a culinary degree. And it certainly is not your lack of a ten-thousand-dollar imported Italian wood-fired oven in your backyard.
You can absolutely achieve blistered, charred, brick-oven perfection in a standard home kitchen. To do it, we just need to stop romanticizing traditional methods and start looking at the cold, hard thermodynamics of your oven. Grab a glass of wine, pull up a stool, and let’s talk about exactly why your current setup is sabotaging your Friday night pizza ritual, and how upgrading to a carbon baking steel is the ultimate genius move.
The Thermodynamics of a Soggy Bottom
Before we fix the problem, we have to understand the science of why a crust goes soggy in the first place. Baking pizza is not just about heating up bread; it is a violent, rapid phase transition driven by massive energy transfer.
Water Activity and Moisture Migration
Every ingredient you place on top of your raw dough—tomato sauce, fresh cheese, mushrooms, pepperoni—contains water. In culinary science, we look at “water activity,” which is a measure of how readily water is available to move or react within a food system. Raw vegetables and fresh cheeses have incredibly high water activity.
When these ingredients are subjected to the heat of an oven, that water begins to release and pool. Thermodynamics dictates that moisture will always migrate from areas of high water activity to areas of low water activity. If the bottom of your pizza crust does not instantly sear, set, and form a dehydrated barrier the exact millisecond it hits the oven, all that moisture from your toppings will migrate downward. It turns the center of your raw dough into a gummy, impenetrable sponge.
The Illusion of Oven Temperature
Commercial deck ovens and wood-fired brick ovens operate at ambient temperatures between 700°F and 900°F (370°C to 480°C). At these extreme temperatures, the moisture released by the toppings is vaporized almost instantly.
Your standard residential home oven, on the other hand, is a glorified easy-bake oven that taps out at 500°F or 550°F (260°C to 290°C). Because the ambient air simply is not hot enough to flash-evaporate the moisture, you have to rely entirely on the surface you are baking on to do the heavy lifting. If your baking surface is weak, your crust will be wet. It really is that simple.
Why Your Current Equipment Is Sabotaging Your Friday Night
Most home cooks try to solve the soggy pizza problem by throwing the wrong equipment at it. Let’s brutally dissect the tools that are currently failing you.
The Flimsy Aluminum Sheet Pan Delusion
Aluminum sheet pans are fantastic for baking chocolate chip cookies or roasting a quick batch of asparagus on a Tuesday night. They are absolute garbage for making pizza.
While aluminum is a decent conductor of heat, standard baking pans are incredibly thin and lack “thermal mass”—the ability to store and hold onto heat energy. When you drop a fourteen-ounce ball of room-temperature, moisture-heavy dough onto a preheated aluminum pan, the dough acts like a thermal vampire. It instantly sucks all the heat out of the metal. The pan’s temperature plummets, and it takes several minutes for the oven’s ambient air to heat it back up. During those minutes, your dough is steaming in its own juices rather than searing. Furthermore, the moment you crank your oven to its maximum temperature, those thin baking sheets keep warping with a violent pop, leaving you with an uneven surface that pools oil and moisture in the corners.
The Ceramic Pizza Stone: A Fragile Relic
In the 1990s, the cordierite ceramic pizza stone became the gateway drug for home pizza enthusiasts. Conceptually, they make sense. They mimic the floor of a brick oven, they absorb a tiny bit of ambient moisture, and they hold onto heat much better than a sheet pan.
But they have a fatal flaw: they are terrible conductors of heat. Cordierite ceramic has a thermal conductivity rating of roughly 1.5 W/m·K (watts per meter-kelvin). This means that while the stone holds a lot of heat, it is incredibly stingy about giving that heat up. When your dough hits the stone, the heat transfers slowly and lazily.
Worse yet, ceramic stones are highly susceptible to thermal shock. If you have ever had a glass baking dish shattered into a thousand dangerous pieces because of a sudden temperature shift, you already understand the inherent risks. Launching a slightly too-cold dough ball or spilling a drop of cold tomato sauce on a 500°F ceramic stone can cause it to crack straight down the middle, ruining your dinner and your night.
The “No-Go” Rule: The Absolute Menace of Toxic Pizza Pans
Before we talk about the ultimate solution, I need to address a strict rule in my kitchen. I have a zero-tolerance policy when it comes to banishing toxic kitchen gear from my home, and cheap non-stick pizza pans are public enemy number one.
You have seen them in big-box stores: flimsy, dark metal pans, often with perforated holes in the bottom, coated in a mystery non-stick layer. These pans are usually coated with PTFE (Teflon) or other PFAS forever chemicals. Here is the brutally honest truth: PTFE coatings begin to degrade and break down at temperatures above 500°F (260°C), releasing invisible, toxic fumes that can literally cause a condition known as “polymer fume fever.”
Since making good pizza requires you to push your oven to its absolute maximum limit—often 500°F to 550°F—using a cheap non-stick pan is not just a culinary mistake; it is an active health hazard. We do not use peeling, toxic, disposable kitchenware. We invest in safe, high-quality, durable equipment that performs beautifully and outlives us.
Enter the Baking Steel: A Masterclass in Heavy Metal Physics
If sheet pans are too thin and ceramic stones are too slow, what is the solution? The answer comes from a brilliant crossover between metallurgy and culinary science: the Baking Steel.
Usually crafted from highly durable A36 or 1018 carbon steel, a baking steel is simply a massive, heavy, solid slab of metal that sits on your oven rack. It completely changes the thermodynamic profile of your standard residential oven, bridging the gap between a home kitchen and a commercial pizzeria. Here is the science of why it works so flawlessly.
Thermal Conductivity: The 18x Multiplier
Remember how cordierite stone has a thermal conductivity of 1.5 W/m·K? Carbon steel boasts a thermal conductivity of roughly 54 W/m·K. In plain English, steel conducts heat between eighteen and thirty-six times faster than a ceramic pizza stone.
When your raw pizza dough hits a preheated steel, the metal does not just gently warm the dough. It forcefully and violently dumps a massive payload of heat into the bottom of the crust in milliseconds. This aggressive heat transfer instantly vaporizes the moisture at the boundary layer, creating a dry, blistered, perfectly seared undercarriage before the water from your toppings even has a chance to migrate downward.
Volumetric Heat Capacity: The Thermal Freight Train
Conductivity is how fast heat moves, but “volumetric heat capacity” is how much heat a material can store. Carbon steel is incredibly dense. It stores approximately 3.1 megajoules of energy per cubic meter-kelvin (MJ/m³·K), compared to a ceramic stone’s 1.9 MJ/m³·K.
This means the steel holds a staggering 63% more heat energy per unit of volume. When the cold dough hits the steel, the steel does not drop in temperature the way an aluminum pan does. It acts like a thermal freight train, pushing through the temperature drop and continuously pumping heat into the crust. This sustained blast of energy creates explosive “oven spring”—the rapid expansion of carbon dioxide and ethanol gases inside the dough before the gluten matrix has time to set. The result is a crust that is incredibly airy and light on the inside, yet shatteringly crisp on the outside.
Emissivity: The Dark Surface Advantage
Thermodynamics is not just about direct contact (conduction); it is also about radiant heat (emissivity). Carbon steel is dark and possesses high emissivity, meaning it radiates heat outward highly efficiently. A hot baking steel not only sears the bottom of your pizza but also radiates intense heat upward, helping to cook the cheese and toppings faster and more evenly than a pale ceramic stone.
Choosing Your Weapon: Thickness and Metallurgy
If you are ready to upgrade, you will quickly notice that baking steels come in different thicknesses. Because time is money, especially when you are trying to feed your family on a busy Wednesday night, choosing the right thickness is crucial for balancing performance and convenience.
The 1/4-Inch Steel: The Weekday Warrior
A 1/4-inch thick carbon steel is the sweet spot for most weekend culinary hobbyists. It weighs around 15 pounds, making it relatively easy to move in and out of the oven. More importantly, it preheats in about 45 to 60 minutes. It holds more than enough thermal mass to cook one or two pizzas perfectly back-to-back, making it the ultimate tool for efficient, high-quality weeknight meals.
The 3/8-Inch Steel: The Gold Standard
If you regularly host dinner parties and need to crank out three or four pizzas in rapid succession, a 3/8-inch steel is your best bet. It takes slightly longer to preheat (about 75 minutes) and weighs a hefty 22 pounds, but the recovery time between pizzas is practically zero.
The 1/2-Inch Steel: The Commercial Heavyweight
At over 30 pounds, a 1/2-inch steel is an absolute beast. While its thermal mass is unrivaled, it can take up to two full hours to properly preheat. For the average home cook, this crosses the line from “fun weekend project” to “unnecessary chore.” Stick to the 1/4-inch or 3/8-inch models unless you are running a neighborhood pop-up pizzeria out of your kitchen.
Dough Discipline: Hydration, Temperature, and Handling
You can own the thickest, most expensive piece of carbon steel on the market, but if you treat your dough poorly, you will still end up with a mediocre dinner. The steel is a tool, but your technique is the engine.
The Cold Dough Catastrophe
One of the biggest rookie mistakes in homemade pizza is failing to let the dough come to room temperature. When you try to stretch a cold ball of dough straight from the refrigerator, the pizza dough keeps shrinking because the gluten network is entirely too tense and restricted by the cold temperatures.
If you attempt to force it into a 14-inch circle, you will inevitably thin out the center until it is translucent, while the outer edges remain bulky and dense. You will end up tearing the center to shreds as the dough keeps snapping back like a stubborn rubber band. Always pull your dough out of the fridge at least two hours before you plan to bake. A relaxed dough stretches effortlessly, allowing you to create an even, consistent base that bakes beautifully on the steel.
The Art of the Gentle Transfer
When shaping your dough, you must preserve the precious air bubbles created by the yeast during fermentation. Do not take a rolling pin to your dough unless you want a dense, cracker-like crust. To lift and transfer your proofed dough balls without aggressively degassing them, you absolutely need a bench scraper to cleanly release them from the counter. Gently press the air outward from the center to the rim using your fingertips to form the crust.
The Moisture Trap: Topping Your Pizza Like a Professional
We have established that moisture is the enemy of a crispy crust. Even with a blazing hot baking steel, you must exercise intense discipline when topping your pizza. Less is always more.
The Cheese Conundrum
Fresh mozzarella is a glorious, delicious ingredient, but it is effectively a water balloon waiting to burst in your oven. If you refuse to press and drain your cheese beforehand, you absolutely must stop using fresh mozzarella for your weeknight bakes and switch to a low-moisture, whole-milk block.
If you insist on the fresh stuff for a weekend Margherita project, you must slice it, lay it out on paper towels, and gently press the excess moisture out at least an hour before baking. Otherwise, the cheese will weep a puddle of white, milky water all over your beautiful crust, completely neutralizing the searing power of the steel.
The Sauce Ratio
Home cooks have a terrible habit of treating pizza sauce like pasta sauce. You are not making a bowl of spaghetti. You only need two to three tablespoons of sauce for a 12-inch pizza. It should be spread so thin that you can still see the dough peeking through in certain spots. Heavy, wet pools of crushed tomatoes will insulate the top of the dough, preventing it from cooking through and leaving you with a raw, gummy layer just beneath the cheese.
The Perfect Launch: Oven Setup and Execution
To extract the maximum thermodynamic potential from your baking steel, you have to set your oven up for success.
The 60-Minute Preheat Rule
When you set your oven to 500°F, it will likely beep after 15 or 20 minutes to announce that it has reached the target temperature. Your oven’s digital display is lying to you, which is precisely why you simple oven thermometer to verify the actual ambient temperature.
More importantly, while the air in the oven might be 500°F, your 15-pound slab of carbon steel is barely warm. It takes a tremendous amount of time for that much dense metal to fully saturate with heat. You must preheat your baking steel for a minimum of 45 to 60 minutes at your oven’s highest setting. Do not rush this step. If you launch a pizza onto a partially heated steel, you completely defeat the purpose of owning one.
Rack Placement and the Broiler Hack
For the ultimate New York-style or Neapolitan-ish pizza, place your baking steel on the second-highest rack in your oven, roughly six to eight inches below the top broiler element.
Let the steel preheat for an hour at 500°F or 550°F. When you launch the pizza onto the steel, the massive conduction from the bottom will instantly sear the crust. After about four minutes, switch your oven from “Bake” to “Broil.” The intense, direct radiant heat from the broiler will mimic the rolling flames of a wood-fired oven, blistering the cheese and charring the top crust in about 60 to 90 seconds. Keep a close eye on it—the line between “beautifully charred” and “completely incinerated” is about fifteen seconds.
The Semolina Slide
To get the pizza from your counter to the hot steel, you need a wooden pizza peel. Dust the peel lightly with equal parts regular flour and semolina flour. Semolina acts like tiny ball bearings, preventing the wet dough from sticking to the wood. Give the peel a gentle shimmy before you open the oven door to ensure the pizza moves freely. If it is stuck, gently lift the edge and blow a puff of air underneath to release it. Slide it onto the steel with a confident, swift pull.
Beyond the Slice: The Unrivaled Versatility of Carbon Steel
While the baking steel is a masterclass in pizza engineering, it is also one of the most versatile tools you can keep in your kitchen. Because it is a solid slab of conductive metal, it effectively operates as a massive, high-performance griddle.
The Ultimate Searing Surface
If you want a steakhouse-quality crust on a ribeye, place your steel over two burners on your gas or induction stovetop. The massive thermal capacity allows you to achieve an edge-to-edge Maillard reaction that a standard frying pan struggles to match. Whether you are searing a ribeye or looking for a blistered char on your broccoli, preheating the pan changes everything about the final texture. You can use it to smash burgers, sear scallops, or make an entire batch of diner-style pancakes on a Sunday morning.
The Permanent Thermal Regulator
Many professional bakers leave their steel in the oven permanently, stored on the very bottom rack. Because the steel holds so much thermal energy, it acts as a temperature regulator for your oven. When you open the oven door to check on a roast or a batch of cookies, standard ovens lose a massive amount of hot air, causing temperature fluctuations. The stored heat in the steel radiates outward, helping the oven recover its ambient temperature almost instantly, resulting in more even, consistent baking for everything from delicate pastries to weeknight casseroles.
Steel Maintenance: Polymerization and Rust Prevention
Carbon steel is practically indestructible, but it does require a tiny bit of maintenance to prevent rust and maintain its naturally non-stick surface. Unlike toxic Teflon, carbon steel relies on “polymerization”—a chemical process where liquid fats are heated past their smoke point, transforming into a hard, slick, bonded plastic-like layer on the metal.
The Initial Seasoning Process
Most baking steels arrive pre-seasoned, but if yours needs a touch-up, the process is simple. Wash the steel with hot water, dry it completely, and wipe a microscopic layer of high-smoke-point oil (like grapeseed, canola, or flaxseed oil) over the entire surface. When I say microscopic, I mean wipe it on, and then use a clean paper towel to try and aggressively wipe it all off. If the oil is too thick, it will turn into a sticky, gummy mess.
Bake the oiled steel at 400°F for an hour, let it cool, and repeat the process once or twice. When it comes to maintaining a pristine polymerized seasoning layer on your carbon steel, cooking spray is the enemy due to the chemical propellants that bake into a sticky, impossible-to-remove residue. Stick to pure, liquid oils.
Daily Cleaning and Care
Never put a baking steel in the dishwasher, and never leave it soaking in the sink. After baking a pizza, let the steel cool down entirely. Use your trusty metal bench scraper to scrape off any burnt cheese or charred semolina flour. If it needs a wash, use hot water, a stiff brush, and a tiny drop of mild dish soap, then dry it immediately and thoroughly with a towel. A well-maintained steel will gradually turn pitch black over time, becoming slicker, more radiant, and more effective with every single use.
Conclusion: Reclaiming Your Kitchen
Cooking should not be a stressful chore, and making a phenomenal pizza at home should not require a commercial kitchen build-out. By understanding the simple thermodynamics of moisture migration, thermal conductivity, and volumetric heat capacity, you can completely eliminate the heartbreak of a soggy, limp crust.
Ditch the flimsy aluminum pans. Throw out the fragile ceramic stones. Banish the toxic, peeling non-stick garbage. Invest in a solid slab of carbon baking steel, respect the 60-minute preheat rule, and practice strict discipline with your dough and toppings. You have the power to create mind-blowing, pizzeria-quality food right in your own home. Now preheat that oven, pour that wine, and go make a pizza that actually commands respect.






