
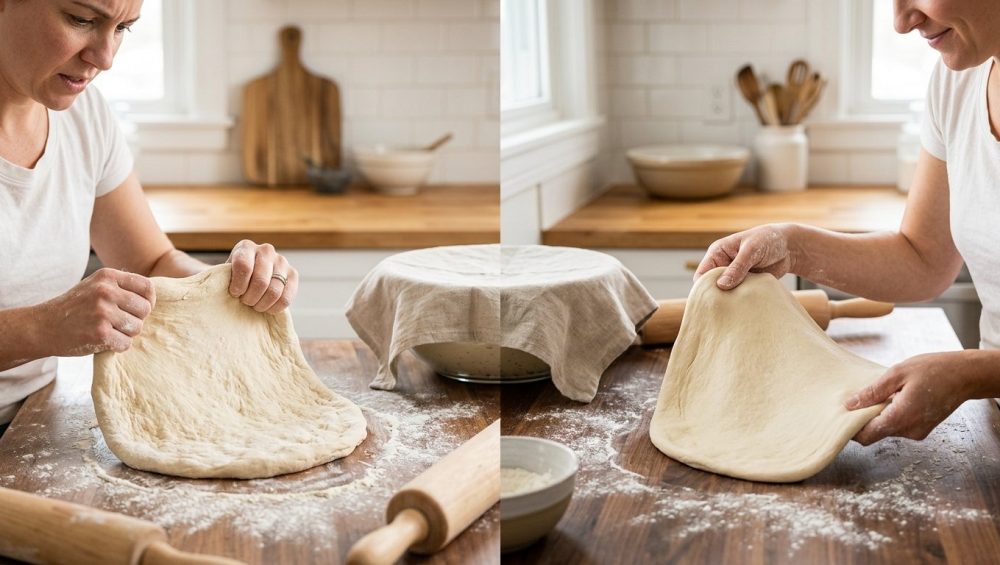
The Friday Night Rubber Band Match
Let us set the scene, shall we? It is a Friday evening. You have spent all week surviving on hastily assembled salads and sheer willpower, and you have finally decided to treat yourself to a glorious, restaurant-quality homemade pizza. You have your San Marzano tomatoes crushed, your fresh mozzarella sliced, and your oven preheated to the temperature of a small sun. You confidently step up to your kitchen counter, grab your beautifully fermented ball of dough, and begin to stretch it out.
You pull the edges, expecting a beautiful, translucent, twelve-inch canvas for your culinary masterpiece. Instead, the moment you let go, the dough aggressively snaps right back into a thick, stubborn, six-inch puck. You pull it again. It shrinks again. You start fighting with it, pulling and tearing, until you are sweating, swearing, and staring at a misshapen, lumpy map of a fictional continent that is absolutely going to bake into a dense, doughy disaster.
Listen to me, weekend warriors: it is not your fault, and you are not alone. As of mid-2026, the global home pizza oven market has exploded, projected to hit a staggering $2.81 billion this year alone [1]. Everyone and their mother is suddenly trying to become a backyard pizzaiolo. But despite the fancy outdoor ovens and the imported Italian ingredients, the single biggest bottleneck for the everyday home cook remains the dough. It is a universally acknowledged truth that there is nothing more infuriating than when your pizza dough keeps shrinking back while you are trying to shape it.
I have zero patience for pretentious chef-speak, but we do need to get a little nerdy for a minute. You do not need a culinary degree to fix this, but you do need to understand the basic physics and chemistry of what is happening on your countertop. We are going to break down exactly why your dough is fighting you, how to use time and temperature to your advantage, and how to permanently eliminate the dreaded snap-back from your kitchen repertoire.
The Science of the Snap-Back: A Masterclass in Gluten
To defeat your enemy, you must first understand your enemy. And in this case, the enemy—and your best friend—is gluten.
Gluten has gotten a terrible reputation in modern diet culture, but in the world of bread and pizza baking, it is the invisible architectural framework that makes everything possible. A common misconception among beginner bakers is that flour contains gluten. It does not. Your bag of flour contains two distinct, naturally occurring proteins: gliadin and glutenin. Gluten does not actually exist until those proteins are hydrated with water and mechanically worked through mixing or kneading [2].
Gliadin vs. Glutenin: The Tug of War
When water hits your flour, gliadin and glutenin bind together to form the complex protein network we call gluten. But these two proteins have completely different jobs, and understanding their relationship is the absolute key to fixing your shaping nightmare.
Gliadin is responsible for the dough’s extensibility. Extensibility is the property that allows the dough to be stretched outwards without tearing. Think of gliadin as the fluid, relaxed, accommodating side of the dough’s personality. It wants to spread out. It wants to relax.
Glutenin, on the other hand, is responsible for the dough’s elasticity. Elasticity is the property that allows the dough to snap back into its original shape after being stretched. Think of glutenin as a tightly coiled, highly caffeinated spring. You absolutely need elasticity in your dough; without it, your pizza crust wouldn’t be able to trap the carbon dioxide gas produced by the yeast, and your crust would bake up as flat and dense as a cracker.
When you have a perfectly balanced dough, the extensibility allows you to stretch it into a wide, thin circle, while the elasticity gives the crust enough structural integrity to puff up beautifully in the oven. But when your dough is stubbornly snapping back, it means the glutenin is winning the tug-of-war. The elastic tension is far too high, and the extensible relaxation is far too low.
The Four Horsemen of Stubborn Dough
If your dough is acting like a bungee cord, one of four specific environmental or mechanical factors is to blame. Let us systematically diagnose the problem so we can apply the correct, science-backed solution.
1. The Cold Shoulder (Temperature Issues)
This is the number one rookie mistake I see in home kitchens. You make your dough in advance, you let it cold-ferment in the refrigerator for a couple of days to build that incredible, complex flavor (which we love, by the way), and then you pull it out of the fridge and immediately try to stretch it.
Absolutely not. Stop doing this.
Cold temperatures cause the gluten network to contract and tighten. The molecular structure of the proteins becomes rigid, and the gases trapped inside the dough by the yeast become completely dormant. Trying to stretch a ball of cold dough is like trying to stretch a cold rubber band; it is going to fight you, and if you force it, it is going to tear. Temperature is the invisible hand that dictates how your ingredients behave.
2. The Eager Beaver (Lack of Bench Rest)
Let us say your dough is at room temperature, but it is still fighting you. The next culprit is a lack of resting time after mechanical manipulation.
Whenever you touch, knead, fold, or shape your dough, you are actively aligning and tightening those gluten strands. When you divide a large batch of dough and roll it into tight, individual little balls for your pizzas, you are creating an immense amount of surface tension. You are winding the spring as tightly as it will go.
If you try to take a freshly shaped dough ball and immediately stretch it into a flat pizza, you are going to lose that battle every single time. The gluten network is fully agitated. It needs time to relax. Overworking any dough is a cardinal sin in the baking world. It is the exact same mechanical error that results in making tough pie crust when you should be aiming for delicate, flaky layers.
3. The Protein Overdose (Using the Wrong Flour)
Not all flours are created equal. The protein content of your flour directly dictates how much gluten can potentially be formed.
Standard supermarket All-Purpose (AP) flour usually sits around 10% to 11.5% protein. Bread flour jumps up to 12% to 14%. Authentic Italian Tipo 00 flour, which is milled incredibly fine specifically for high-heat pizza ovens, usually hovers around 12.5%.
If you are using a very high-protein bread flour, you are introducing a massive amount of glutenin into the mix. This creates a remarkably strong, chewy crust, but it also creates a dough that is highly prone to snapping back if it is not handled with the utmost patience. Furthermore, if you are measuring your flour incorrectly, you are compounding the problem. If you are still jamming a plastic measuring cup into a compacted bag of flour, you are adding way too much dry mass to your recipe. You must stop scooping your flour and invest in a digital kitchen scale immediately. Baking is a science, and volume measurements are the enemy of consistency.
4. The Hydration Deficit (Dough That is Too Dry)
In baker’s percentages, “hydration” refers to the ratio of water to flour by weight. If you have 1,000 grams of flour and you use 650 grams of water, you have a 65% hydration dough.
Water is the ultimate dough relaxer. Higher hydration doughs (70% and above) are incredibly soft, extensible, and easy to stretch. Lower hydration doughs (55% to 60%) are much stiffer, tighter, and more elastic. If your dough feels like a dense, heavy cannonball and refuses to stretch, there is a very high probability that your hydration level is simply too low for the specific type of flour you are using.
The “No-Knead” to Panic: Step-by-Step Fixes for Stubborn Dough
Now that we know exactly why the dough is acting like a petulant child, we can apply the proper disciplinary measures. And by disciplinary measures, I mean doing absolutely nothing.
I am a firm believer that time is money during the busy workweek. I am the first person to advocate for clever shortcuts on a Tuesday night. But pizza dough is a weekend project, and on the weekend, time is a crucial, non-negotiable ingredient. You cannot rush physics.
The Magic of the Bench Rest
When your pizza dough shrinks upon being stretched, it is literally screaming at you for a timeout. The absolute best way to eliminate snap-back is to utilize proper resting phases throughout the dough-making process.
Phase 1: The Autolyse
Before you even add your yeast or your salt, mix your flour and your water together until it forms a shaggy mass, and then cover it and walk away for 30 to 60 minutes. This process is called the autolyse. It allows the flour to fully hydrate and the gluten network to begin forming passively, without the mechanical stress of kneading. It dramatically improves the extensibility of the final dough.
Phase 2: The Final Proof (The Crucial Step)
After you have bulk-fermented your dough and divided it into individual pizza balls, you must let them rest. This is not optional. If you are baking the same day, those dough balls need to sit covered at room temperature for at least 2 to 4 hours before you attempt to stretch them. This gives the agitated gluten strands enough time to completely relax and unwind.
The Room Temperature Rule
If you are utilizing a cold fermentation method (which you should be, because leaving the dough in the fridge for 48 to 72 hours creates an unbelievable depth of flavor), you must respect the warm-up period.
Take your dough balls out of the refrigerator a minimum of 2 to 3 hours before you plan to bake. Keep them covered in an airtight container so they do not develop a dry, hard skin on the outside. As the dough slowly comes up to room temperature (ideally around 70°F to 72°F), the gluten network will soften, the yeast will wake up and produce a final burst of carbon dioxide, and the dough will transform from a rigid rock into a soft, pillowy cloud that practically stretches itself.
Put Down the Rolling Pin
If I catch you using a wooden rolling pin to flatten out a Neapolitan or New York style pizza dough, I am personally coming over to your house to confiscate your wine.
Rolling pins are for pie crusts and sugar cookies. When you use a rolling pin on pizza dough, you are violently crushing all of the delicate gas bubbles that the yeast worked so hard to create during fermentation. You will end up with a flat, dense, lifeless crust. Furthermore, the aggressive mechanical force of the rolling pin actually triggers the gluten to fight back, increasing the elasticity and the snap-back.
Instead, use your hands and let gravity do the work.
- The Dimple: Place your relaxed dough ball on a surface dusted with semolina flour. Use your fingertips to gently press down in the center, leaving a one-inch border untouched around the edge. This protects the gas in the crust (the cornicione).
- The Steering Wheel: Pick the dough up and hold it vertically by the edges, letting gravity gently pull the bottom of the dough downward. Slowly rotate the dough through your hands like a steering wheel, letting gravity stretch it naturally.
- The Knuckle Drape: For a wider stretch, drape the dough over your floured knuckles, keeping your hands in loose fists. Gently pull your hands apart, rotating the dough until it reaches the desired diameter.
If the dough is properly rested and at the correct temperature, this entire process will take less than thirty seconds, and the dough will not shrink back a single millimeter.
Ditch the Toxic Trash: Essential Pizza Gear for the Home Cook
We need to have a serious conversation about the equipment you are using. I have a very strict “No-Go” rule when it comes to cheap, toxic kitchenware, and the pizza category is absolutely flooded with garbage.
I despise cheap, non-stick aluminum pizza pans. Do you know what happens to cheap non-stick chemical coatings when you blast them in a 500°F (260°C) oven? They degrade, they off-gas toxic fumes, and they eventually peel and flake directly into your food. We are making dinner, not conducting a chemical warfare experiment. Throw them in the garbage immediately. You need safe, high-quality, durable equipment that actually works.
The Baking Steel vs. The Pizza Stone
For decades, the standard advice for home pizza makers was to buy a ceramic or cordierite pizza stone. And while a stone is infinitely better than a flimsy metal baking sheet, it is no longer the gold standard. Enter the Baking Steel.
Let us talk thermodynamics. In a commercial pizzeria, pizzas are baked in wood-fired or highly specialized deck ovens that reach temperatures of 800°F to 900°F. Your standard home oven maxes out at around 500°F to 550°F. To compensate for this lack of ambient heat, you need a baking surface that can transfer heat into the bottom of the dough with extreme, violent efficiency.
A standard cordierite pizza stone has a thermal conductivity rating of roughly 3 W/m·K. Carbon steel, on the other hand, boasts a thermal conductivity of roughly 50 W/m·K [2]. This means that a baking steel transfers heat into your dough approximately fifteen to eighteen times faster than a ceramic stone.
If your homemade pizza is floppy when you pull it out of the oven, it is because your baking surface failed to transfer heat fast enough to create instant “oven spring” (the rapid expansion of gas inside the dough before the crust hardens). Furthermore, if the center of your homemade pizza is soggy, a highly conductive carbon steel slab will completely eradicate that problem by flash-boiling the moisture in the dough the second it makes contact.
A heavy, quarter-inch or half-inch thick slab of carbon steel will literally transform your home oven into a commercial pizza deck. Yes, they are heavy. Yes, they are an investment. But they are virtually indestructible, they will last for generations, and they are completely non-toxic. Do not even think about baking a pizza on a flimsy aluminum tray. That extreme temperature gradient is exactly why your baking sheets keep warping and sounding like a gunshot in the middle of the night.
The Mighty Bench Scraper
If you are going to get serious about making dough from scratch, you need the right prep tools. When you are dividing a high-hydration, sticky dough into individual portions, you absolutely need a bench scraper to confidently slice through the gluten network without tearing it.
Do not use your expensive chef’s knife to chop dough on your countertop. Always cut your pizza on a solid wooden cutting board rather than directly on the steel or a glass surface, which is a prime reason why your kitchen knives get dull so incredibly fast. A stainless steel bench scraper is a cheap, blunt, incredibly effective tool that will make handling sticky dough an absolute breeze.
The Wooden Pizza Peel
You need a way to transport your perfectly stretched, raw dough into the screaming hot oven. A wooden pizza peel is the traditional and most effective tool for the job. Wood is naturally porous, which means it absorbs a tiny amount of moisture from the bottom of the raw dough, preventing it from sticking.
Always dust your wooden peel with a 50/50 mixture of regular flour and semolina flour before laying your stretched dough on top. The coarse semolina acts like thousands of tiny ball bearings, allowing the pizza to slide effortlessly off the peel and onto the hot baking steel.
Leveling Up: Advanced Fermentation and Dough Relaxers
If you have mastered the basics of time and temperature and you want to take your dough extensibility to the absolute professional level, we need to talk about biological dough relaxers.
In commercial, mass-produced pizza factories, manufacturers often add chemical dough relaxers like L-cysteine to force the gluten to break down quickly so they can rush the dough through an automated assembly line. We do not do that in a home kitchen. We use biology.
The Power of Cold Fermentation
When you mix your dough, pop it in an airtight container, and let it sit in the back of your refrigerator for 48 to 72 hours, incredible things happen. The yeast slows down, producing carbon dioxide at a creeping pace. But more importantly, the enzymes in the flour (specifically protease enzymes) continue to work.
Protease enzymes are the biological scissors of the baking world. Over the course of two to three days in the fridge, these enzymes slowly snip away at the long, tight gluten strands, intentionally degrading the network just a little bit. This enzymatic breakdown naturally relaxes the dough, dramatically increasing its extensibility while simultaneously unlocking complex, tangy, incredible flavor profiles that you simply cannot get from a same-day dough.
The Oil Slick
While authentic Neapolitan pizza dough is strictly flour, water, salt, and yeast, many home cooks prefer a New York style dough. Adding a small amount of fat—specifically a high-quality extra virgin olive oil—to your dough acts as a physical lubricant.
The lipids in the oil coat the gluten strands, shortening them (which is why fat in baking is often referred to as “shortening”) and preventing them from binding together too tightly. A dough with 2% to 3% olive oil will be significantly softer, more supple, and far less likely to snap back during shaping than a completely lean dough.
Emergency Protocols: What to Do When It’s Happening Right Now
Okay, let us bring it back to reality. You have read the science. You know the rules. But it is Friday night, you are standing at the counter, your guests are drinking your wine, and the dough is currently snapping back and refusing to stretch. What is the emergency protocol?
The 15-Minute Timeout
Do not force it. If you keep pulling and tearing at a tense dough, you will rip a hole right through the center of it, and your toppings will leak through and fuse to your baking steel, creating a smoke show that will clear out your kitchen in minutes.
If the dough is fighting you, stop. Lay it down on the floured counter. Take a large mixing bowl, invert it, and place it directly over the dough to prevent the air from drying it out.
Now, walk away. Go pour yourself a glass of wine. Go talk to your friends. Wait exactly 15 to 20 minutes.
This short, uninterrupted resting period allows the glutenin strands to release their tension. When you return and lift the bowl, you will find that the dough has magically surrendered. It will be soft, pliable, and ready to be gently coaxed into a perfect circle. Just remember to leave the dough on the counter for this timeout, not on the peel. If you panic and leave the dough sitting on the wooden peel for too long, your diy pizza sticks to the wood, and launching it into the oven becomes a catastrophic mess.
The Final Slice
Making incredible, mind-blowing pizza in a standard home kitchen is entirely within your reach. You do not need a commercial wood-fired oven, and you certainly do not need a culinary degree. You just need a little bit of patience, a basic understanding of how gluten behaves, and the willingness to let time do the heavy lifting for you.
Stop wrestling with cold dough. Stop rushing the resting process. Invest in a heavy piece of carbon steel, throw away your toxic non-stick pans, and remember that when the dough fights back, the best possible reaction is to simply step away and let it breathe.
Now go preheat that oven, dust your peel with semolina, and show that dough exactly who is the boss of this kitchen. You’ve got this.






