
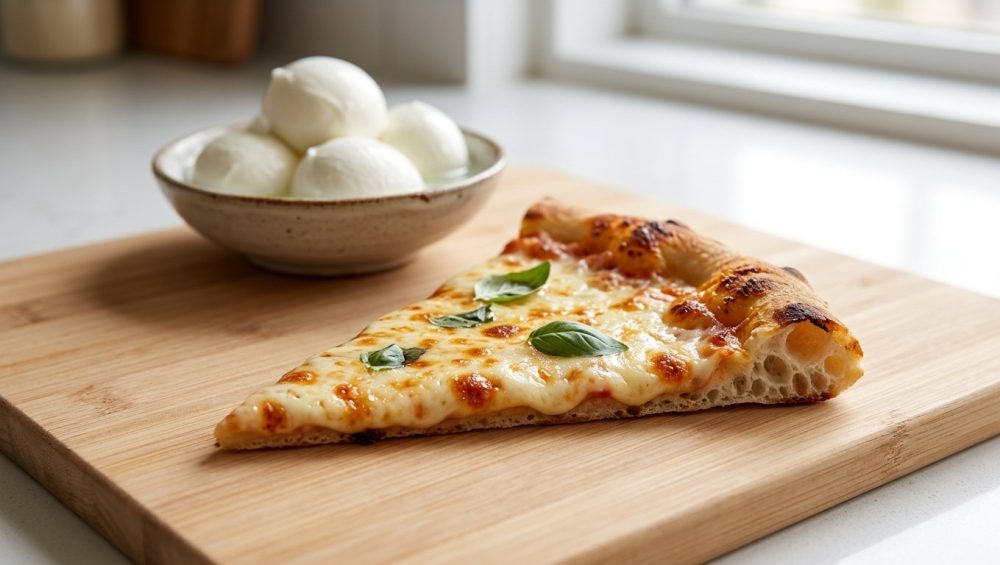
Welcome to my kitchen, where we do not sugarcoat the culinary truth. Picture this highly relatable Friday night scenario: You have spent the entire week looking forward to homemade pizza night. You did everything right. You mixed the dough, let it undergo a slow, cold fermentation in the refrigerator for three days, and splurged on an expensive, artisanal ball of fresh, water-packed mozzarella from the fancy cheese counter. You carefully stretched your dough, assembled your masterpiece, and slid it into your preheated home oven with the pride of a seasoned Italian pizzaiolo.
But ten minutes later, when you proudly pull your creation out of the oven, disaster strikes. You have not baked a pizza; you have baked a bread bowl full of hot soup. The center of the crust is a gummy, translucent paste. Your expensive mozzarella has turned into a rubbery island floating in a horrifying, pinkish-white puddle of whey and tomato water. When you try to pick up a slice, the tip immediately collapses, dumping a watery cascade of cheese and toppings directly onto your plate.
If this sounds like your weekend culinary reality, take a deep breath and pour yourself a glass of wine. You are not a bad cook, and you do not need to drop thousands of dollars on a professional wood-fired pizza oven to fix this. You just need a crash course in basic dairy science and oven thermodynamics. The harsh reality of home pizza making is that your beloved fresh mozzarella is actively sabotaging your crust. Today, we are going to leave absolutely no stone unturned as we dive into the physics of water activity, the limitations of standard home ovens, and why switching to low-moisture block mozzarella is the single most important upgrade you can make for a structurally sound, bakery-crisp pizza.
The Anatomy of a Pizza Disaster: Understanding the “Pizza Puddle”
To understand why your pizza is turning into a swamp, we first have to understand what exactly is happening on top of your dough when it enters the oven. The dreaded “pizza puddle”—sometimes affectionately referred to in the culinary world as “pink slop”—is not grease, and it is not olive oil. It is water. Specifically, it is liquid whey that has been violently expelled from your cheese during the baking process.
When you place wet ingredients on top of raw pizza dough, you are initiating a race against time and temperature. For a pizza crust to become crisp, airy, and structurally sound, the surface of the dough must exceed the boiling point of water (212°F or 100°C) so that the Maillard reaction—the chemical process responsible for browning and flavor development—can occur. However, if there is a literal puddle of liquid sitting on top of the dough, the temperature of the dough directly underneath that puddle can never exceed 212°F until every last drop of that water has evaporated. In a standard home oven, that evaporation process takes entirely too long, leaving you with a raw, gummy dough line that ruins the entire eating experience.
The Dairy Science: Fresh Mozzarella vs. Low-Moisture Mozzarella
Not all mozzarella is created equal, and treating all mozzarella as interchangeable is the primary reason home cooks fail at pizza night. Mozzarella is a pasta filata (spun paste) cheese. During its production, the cheese curds are heated in warm water or whey and then stretched and kneaded until they form a smooth, elastic texture. But the journey of the cheese diverges wildly after this stretching phase, resulting in two completely different products with entirely different culinary applications.
The Spongy Trap of Fresh Mozzarella
Fresh mozzarella—whether it is fior di latte (made from cow’s milk) or mozzarella di bufala (made from water buffalo milk)—is designed to be eaten almost immediately. It is prized for its soft, pillowy texture and delicate, milky flavor. To maintain this texture, it is typically sold submerged in a plastic tub of water or whey.
According to dairy science data, fresh mozzarella boasts a staggering moisture content ranging from 52% to 62%,. Furthermore, laboratory analyses of fresh mozzarella show that its water activity (aw) hovers around 0.91 to 0.92. In food science terms, water activity measures how tightly water is bound to the structural matrix of the food. An aw of 0.92 means that the water inside fresh mozzarella is highly mobile and incredibly loosely bound. When you expose this cheese to the intense heat of an oven, the casein protein matrix rapidly contracts. Just like a human hand squeezing a wet sponge, the contracting proteins wring out all of that loosely bound water directly onto your pizza.
The Structural Superiority of Low-Moisture Mozzarella
On the opposite end of the spectrum, we have low-moisture mozzarella, which is the unsung, scientifically superior hero of the home kitchen. Often sold in firm blocks in the standard dairy aisle, this cheese undergoes a slightly longer souring and aging process, and it is carefully dried out before packaging.
Low-moisture mozzarella sits at a much more manageable moisture content of 45% to 52%. Because it has been aged and dried, the water that remains is much more tightly bound within the protein and fat matrix. When low-moisture mozzarella is subjected to oven heat, it does not violently expel whey. Instead, it melts beautifully, creating that iconic, cohesive, stretchy blanket of cheese that browns perfectly and holds your toppings in place without weeping liquid into your dough.
The Great Oven Divide: Thermodynamics and Heat Transfer
At this point, you might be aggressively waving your hands and shouting, “But the authentic Neapolitan pizzeria down the street uses fresh mozzarella, and their pizza isn’t soggy!” You are absolutely correct. But the difference between their pizza and your pizza has nothing to do with the cheese itself, and everything to do with the thermodynamic capabilities of the oven.
The Wood-Fired Beast
An authentic Neapolitan wood-fired pizza oven operates at blistering temperatures, typically ranging from 800°F to 900°F (430°C to 500°C). At these extreme temperatures, the physics of heat transfer operate on a completely different level. When a pizza is launched into a 900°F oven, it bakes completely in just 60 to 90 seconds.
Because the ambient heat is so intense, the moisture that is expelled from the fresh mozzarella is instantly flash-evaporated into steam before it ever has a chance to pool on the dough. The crust cooks so incredibly fast that the cheese barely has time to fully break down. The result is a perfectly charred crust with beautiful, distinct molten pools of white cheese that have not compromised the structural integrity of the base.
The Harsh Reality of the Home Oven
Now, let us look at your standard residential home oven. Even if you preheat it for an hour, you are likely maxing out at 500°F to 550°F (260°C to 280°C). Because your oven is hundreds of degrees cooler than a commercial wood-fired oven, your pizza takes significantly longer to bake—usually anywhere from 10 to 15 minutes.
This extended baking time is the death knell for fresh mozzarella. As the cheese slowly comes up to temperature over the course of ten minutes, the proteins contract and squeeze out the whey. But because your oven is not hot enough to instantly flash off that moisture, the liquid simply pools on top of the pizza. It sits there, boiling gently, effectively steaming the top of your dough for ten straight minutes. This is why you end up with a soggy, undercooked center. You simply do not have the thermal horsepower required to handle that much raw moisture.
The “No-Go” Rule: Banish Toxic Non-Stick Pizza Pans
Before we move on to the exact steps for fixing your pizza, we need to have a very serious, brutally honest conversation about your kitchen equipment. I have zero patience for cheap, toxic kitchenware, and if you are currently attempting to bake your homemade pizza on a flimsy, dark metal, non-stick pizza pan from the discount aisle, I need you to walk into your kitchen and throw it in the recycling bin immediately. I am not being dramatic; I am looking out for your health and your food.
Pizza requires high-heat baking. To get any semblance of a crispy crust in a home oven, you must push your appliance to its absolute maximum temperature, which is usually 500°F or higher. The problem is that the vast majority of cheap non-stick bakeware is coated with polytetrafluoroethylene (PTFE), commonly known by the brand name Teflon. PTFE belongs to a massive class of synthetic chemicals known as PFAS (per- and polyfluoroalkyl substances), notoriously dubbed “forever chemicals” because they do not break down in the environment or the human body.
A comprehensive and alarming 2020 study conducted by the Ecology Center revealed that a shocking 79% of non-stick cooking pans and 20% of non-stick baking pans tested were coated with PTFE. While PTFE is generally stable at low temperatures, it becomes highly dangerous when exposed to the high heat required for pizza making. When a non-stick pan is heated to 500°F (260°C) and beyond, the chemical coating begins to rapidly degrade and off-gas, releasing toxic, invisible fumes into your kitchen. Inhaling these fumes can cause a very real medical condition known as polymer fume fever, which presents with severe flu-like symptoms, breathing difficulties, and a sore throat.
The health risks associated with these forever chemicals are so severe that lawmakers are finally taking action. For instance, Minnesota has already led the legislative charge by implementing a strict, comprehensive ban on PFAS in cookware that officially took effect in January 2025. There is simply no excuse to subject yourself or your family to toxic fumes just to bake a pizza. It is time to start taking your equipment seriously and focus on banishing toxic kitchen gear from your home permanently.
What to Use Instead: The Power of Thermal Mass
To achieve a bakery-quality, structurally sound crust without poisoning the air in your home, you need to bake your pizza on a surface that provides massive thermal mass and rapid heat conductivity.
The Baking Steel: This is, without a doubt, the greatest investment a home pizza maker can make. A heavy slab of highly conductive steel absorbs the heat of your oven and transfers it into the bottom of your pizza dough exponentially faster than a ceramic stone. It essentially mimics the intense floor heat of a commercial pizza oven, ensuring a blistered, crispy bottom crust every single time. Once you experience the magic of a baking steel, you will never look at a flimsy aluminum pan the same way again.
The Cordierite Pizza Stone: If a heavy steel is out of your budget, a thick cordierite pizza stone is a fantastic, safe alternative. It takes longer to preheat—usually a full hour at 500°F—but it absorbs moisture from the dough and provides a beautifully even bake without any chemical coatings.
The Heavy Cast Iron Skillet: If you are making a pan pizza, ditch the non-stick cake pans and reach for a well-seasoned cast iron skillet. Cast iron can handle 500°F heat effortlessly, and when properly oiled, it provides a naturally non-stick surface that fries the bottom of the dough to a golden crunch. Just be sure to maintain your seasoning properly so you don’t run into issues where your pan leaves black specks all over your beautiful crust.
The Blueprint for the Perfect Home Pizza
Now that we have established the science of moisture and the necessity of safe, high-heat equipment, it is time to build a structurally sound pizza.
Step 1: Embrace the Block (and Grate It Yourself)
For standard home baking, you must pivot to low-moisture block mozzarella. When shopping, always look for the “Whole Milk” variety rather than “Part-Skim.” Whole milk low-moisture mozzarella contains a higher percentage of butterfat, which coats the proteins as they melt, preventing the cheese from turning rubbery or breaking under high heat. It provides that luxurious, rich, stretchy cheese pull that everyone craves.
However, there is a massive caveat: you must buy it in block form and grate it yourself. Do not, under any circumstances, buy the bags of pre-shredded cheese. Pre-shredded cheeses are heavily coated in anti-caking agents—usually cellulose powder or potato starch—to prevent the shreds from clumping together in the bag. When you bake these coated shreds, the powdery additives absorb moisture and prevent the cheese from melting into a cohesive layer. Instead of a smooth blanket of cheese, you get a gritty, oily, separated mess that will completely ruin a perfect melt on your pizza. Take the extra sixty seconds to run the block of cheese over a box grater. Your palate will thank you.
Step 2: Sauce Management
The cheese is not the only source of excess moisture on a pizza; your sauce is equally guilty. Many beginners make the mistake of opening a can of watery, crushed tomatoes, spooning it directly onto the raw dough, and hoping for the best. This is a surefire recipe for a soggy crust.
Your pizza sauce needs to be thick, robust, and relatively low in water content. If you are using canned tomatoes, strain them through a fine-mesh sieve to remove the excess tomato water before blending them. If you prefer a richer, cooked sauce, simmer it on the stove until it reduces and thickens significantly. If you rely on tomato paste to quickly thicken up a watery sauce, do not just dump it in raw. You have to cook it down in a pan with a little olive oil to caramelize the sugars and remove that raw, tinny flavor, utilizing the secret to browning it first for maximum depth of flavor.
When applying the sauce to the dough, practice restraint. A Neapolitan or New York-style pizza only requires a thin, almost translucent layer of sauce. If you cannot see the dough through the sauce, you have applied too much.
Step 3: Dough Stretching and Architecture
The physical architecture of your dough plays a massive role in whether your pizza turns out soggy or crisp. When stretching your dough, you must aim for an even thickness across the entire base, leaving a slightly thicker rim for the crust (the cornicione).
A common rookie mistake is aggressively pulling the dough from the center, resulting in a paper-thin middle that is virtually transparent. A center that thin has absolutely zero structural integrity; the moment you add sauce and cheese, it will collapse, tear, and turn into a soggy mess during baking. If you find that your dough is fighting you, snapping back like a rubber band, and forcing you to stretch it too thin in the middle, you are dealing with tense gluten. You need to understand why your pizza dough keeps shrinking back so you can let it rest, relax the gluten network, and stretch it evenly without compromising the base.
Step 4: Pre-Cooking Watery Vegetable Toppings
If you love loading your pizza up with vegetables, you have to treat them with the same moisture-management respect as your cheese. Mushrooms, bell peppers, onions, and zucchini are essentially little sponges filled with water. If you put them on your pizza raw, they will steam in the oven and release all of their internal moisture directly into your cheese and dough.
To prevent this, you must extract their moisture before they ever see the pizza dough. Slice your vegetables and sauté them over medium-high heat until they have released their water and begun to brown. If you are worried about them sticking to the pan during this process, just make sure you preheat your cookware properly so your stainless steel pan actually non-stick performs exactly as it should. By pre-cooking your veggies, you concentrate their flavor and eliminate the threat of a soggy pizza.
If You Absolutely Insist on Fresh Mozzarella (The Compromise)
I know my audience. I know that despite everything I have just explained about water activity, oven thermodynamics, and the superiority of low-moisture block cheese, some of you are stubborn weekend perfectionists who absolutely refuse to give up your dreams of using fresh mozzarella. If you insist on using it in a standard home oven, you cannot just slice it and throw it on the dough. You must meticulously manage the moisture through a process of draining and strategic timing.
The Tear and Drain Method
Do not slice your fresh mozzarella into thick, heavy slabs. Instead, tear the cheese into small, bite-sized pieces. Tearing the cheese exposes more surface area, breaking the internal structure and allowing the trapped whey to escape more easily.
Once torn, place the pieces of cheese into a fine-mesh sieve or colander set over a bowl. Let the cheese sit at room temperature for an absolute minimum of 30 to 60 minutes. You will be horrified and amazed by the massive puddle of cloudy liquid that collects in the bowl below—liquid that would have otherwise ruined your pizza.
After the cheese has drained in the sieve, take the pieces and place them on a double layer of heavy-duty paper towels. Gently press another paper towel on top to blot away the remaining surface moisture.
The Post-Bake Application
Even after meticulously draining the fresh mozzarella, leaving it in a 500°F home oven for 15 minutes is still risky. The absolute best way to utilize fresh mozzarella at home without ruining the crust is to alter your baking timeline.
Stretch your dough, apply a thin layer of sauce, and bake the pizza completely bare (just dough and sauce) until the crust is deeply browned, blistered, and fully cooked. The moment you pull the blazing hot pizza out of the oven, immediately scatter your drained, torn pieces of fresh mozzarella over the top. The intense residual heat from the boiling sauce and the baked crust will gently melt and soften the fresh mozzarella perfectly. You get the beautiful, delicate, milky flavor and soft texture of the fresh cheese without exposing it to the prolonged oven heat that causes it to separate and weep whey.
The Synergy of the Perfect Pizza
Baking a spectacular pizza at home is not about blindly following a recipe; it is about understanding how ingredients interact with heat, time, and each other. It is an exercise in balance. Just like you wouldn’t blindly dump raw flour into a pan sauce hoping it thickens, or forget the secret power of starchy water when trying to emulsify a beautiful pasta dish, you cannot ignore the moisture balance of your pizza toppings.
You must view your pizza as a complete architectural system. The heavy baking steel provides the rapid foundational heat. The evenly stretched dough provides the structural support. The reduced, thick tomato sauce provides the acidic baseline without flooding the system. And the freshly grated, whole-milk, low-moisture mozzarella provides the fatty, stretchy, perfectly browned canopy that holds it all together.
When you respect these individual elements, you eliminate the variables that lead to failure. You no longer have to cross your fingers and pray that your pizza doesn’t turn out soggy. You are in complete control of the chemistry.
Final Thoughts from the Sassy Sous-Chef
Cooking should never be a source of stress, and you certainly do not need a culinary degree or a ridiculously expensive outdoor pizza oven to make mind-blowing food on a Friday night. The secret to elevating your home cooking is simply learning to work with the equipment you have, rather than fighting against it.
Leave the fresh, water-packed mozzarella for your beautiful summer Caprese salads, where its delicate, milky texture can truly shine without being subjected to the harsh, moisture-wringing heat of an oven. For your pizza, embrace the reliable, melt-friendly perfection of low-moisture block mozzarella.
Stop buying cheap, toxic cookware that poisons your air, and absolutely never use aerosol cooking sprays that leave a sticky, polymerized residue that ruins nonstick pans over time. Invest in a solid baking steel, grate your own cheese, reduce your sauce, and watch as your homemade pizza transforms from a soggy, frustrating mess into a structurally sound, bakery-crisp masterpiece.
Now, get into the kitchen, preheat that oven to its absolute limit, and show that dough who is boss. You’ve got this.






