
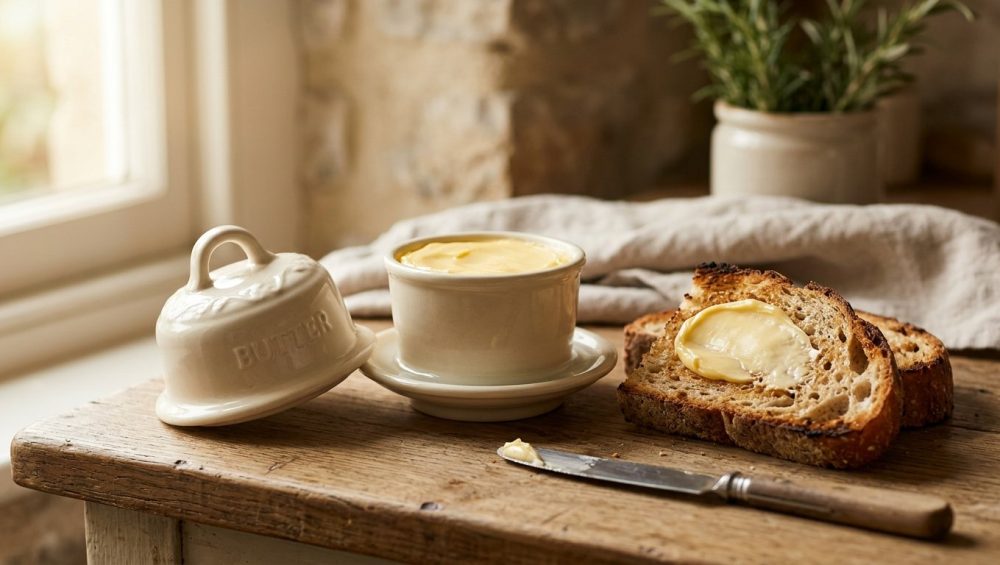
It is a Tuesday morning. You have exactly four minutes to feed yourself and consume enough caffeine to survive a 9:00 AM Zoom meeting that absolutely should have been an email. You grab a gorgeous, thick slice of artisanal sourdough, toast it to a flawless golden-brown crisp, and pull a rock-hard stick of butter out of the refrigerator. You take your knife, carve off a rigid, yellow slab of dairy, and attempt to spread it across the delicate crumb of your toast.
What happens next is a culinary tragedy. You utterly decimate the bread. You tear a massive hole straight through the center of your beautiful sourdough, leaving you with a mangled, crushed sponge of disappointment topped with cold, unyielding clumps of butter.
I have absolutely zero patience for this kind of weekday morning nonsense. Time is money, and I refuse to spend my precious minutes attempting microscopic surgical maneuvers just to butter my breakfast. You do not need a culinary degree to know that cold butter and fragile bread are natural enemies. Yet, millions of home cooks accept this daily frustration as an unavoidable fact of life. It isn’t. The solution already exists, and it has been around for hundreds of years.
Enter the French butter bell. It is not a useless kitchen gimmick; it is a centuries-old scientific marvel wrapped in an elegant, food-safe ceramic package. Today, we are going to dive deep into the mechanics, the microbiology, and the sheer everyday magic of this unsung kitchen hero. We are leaving no stone unturned, because you deserve perfectly soft, spreadable butter on demand, twenty-four hours a day.
The Anatomy of a Kitchen Miracle: What Exactly Is a French Butter Bell?
A butter bell—also known as a butter crock, or a beurrier if you want to sound mildly pretentious at your next dinner party—is a remarkably simple, two-piece ceramic vessel designed to store butter safely at room temperature. It requires no electricity, no batteries, and no complex moving parts.
The device consists of two components: a sturdy, jar-shaped base (the crock) and an inverted lid that is shaped like a bell. The premise is beautifully straightforward. You pack the bell-shaped lid tightly with softened butter. You pour a small amount of cold water into the base of the crock. When you place the lid upside down into the base, the butter is submerged in—or suspended just above—the water, creating a perfect, airtight seal.
A Quick Trip to 16th-Century France
Before the luxury of modern refrigeration, preserving fats without them going rancid was a serious logistical nightmare. In the late 16th century, the French—who understandably treat butter with the reverence most people reserve for religious deities—devised the ceramic beurrier. Brittany and Normandy, the historical epicenters of high-quality French dairy production, are widely credited as the birthplaces of this brilliant piece of earthenware.
Prior to this invention, preserving fats meant wrapping them tightly in animal skins or submerging them in massive vats of salt water. The ceramic butter bell was a massive technological leap forward. By utilizing high-fired earthenware, early French cooks realized they could prevent bacterial buildup while simultaneously allowing for evaporative cooling. It was a triumph of early food science, and frankly, it puts our modern habit of wrapping butter in flimsy, disposable plastic to shame.
The Hard Science of Soft Butter: How the Water Seal Actually Works
This isn’t just quaint European folklore; the butter bell operates on hardcore physics and applied colloid science. When you leave a stick of butter sitting on a plate on your counter, you are exposing it to two massive enemies of flavor: oxygen and light. This exposure leads to rapid lipid oxidation, which is a highly technical way of saying your butter goes rancid and ends up tasting like a wet cardboard box.
When you use a butter bell, you are actively leveraging three interdependent scientific principles to halt this degradation: anaerobic storage, hydrostatic sealing, and microbial exclusion.
Anaerobic Storage and Hydrostatic Sealing
Let’s talk about that water seal, because the water in the base of the crock isn’t just sitting there for aesthetic purposes. It functions as a highly effective liquid gasket. When you invert the butter-packed bell into the base, the water rises to fill the annular gap between the rim of the bell and the inner wall of the crock.
Because water has a naturally high surface tension—approximately 72.8 mN/m at 68°F (20°C)—it forms a continuous, self-renewing barrier that physically blocks air exchange. You are essentially creating a localized anaerobic (oxygen-free) environment right on your kitchen counter. This water seal reduces the headspace oxygen concentration around the butter to less than 0.5%, which slows down peroxide formation by over 92%. Without a steady supply of oxygen, the airborne microbes that typically cause food spoilage—such as Penicillium and Aspergillus—simply cannot survive.
Thermal Mass Buffering and Evaporative Cooling
But the science doesn’t stop at the water seal. The thick ceramic material of the crock acts as a powerful insulator, providing necessary thermal mass buffering. It protects your precious butter from the rapid temperature fluctuations that happen in a busy home kitchen when you turn on the oven or boil pasta water.
Furthermore, as the water in the base of the crock slowly evaporates, it creates a slight, continuous cooling effect. Water and oil do not mix, so the water cools the butter without diluting it or making it soggy. This evaporative cooling helps keep the butter at the absolute optimal temperature for spreadability—soft enough to glide effortlessly onto your morning toast, but not so warm that the emulsion breaks and the milk solids separate from the fat.
Is Room-Temperature Butter Actually Safe? Let’s Talk to the FDA
I know exactly what some of you are thinking right now. “But Sassy Sous-Chef, won’t I get a horrific case of food poisoning if I leave dairy sitting out on the counter?” I hear this constantly from panicked, well-meaning home cooks who treat their kitchens like sterile operating rooms. Let’s look at the actual, rigorously tested data, because I refuse to operate on kitchen myths.
The Great Butter Debate: TCS Foods and Pasteurization
In the highly regulated world of food safety, there is a specific category known as TCS (Time/Temperature Control for Safety) foods. Milk, heavy cream, and soft cheeses are all classified as TCS foods. If you leave a glass of milk on the counter for a day, it will quickly become a dangerous bacterial breeding ground.
However, commercially produced, pasteurized butter is generally not considered a TCS food. Why? Because of its unique physical composition. Butter is an emulsion of water suspended in oil. By definition, standard butter consists of roughly 80% to 82% butterfat, 16% to 17.5% water, and a tiny fraction of milk solids.
Bacteria desperately need water to grow and multiply. While butter does technically contain water, the vigorous churning process surrounds those microscopic water droplets with dense fat molecules. This creates an environment with incredibly low water activity, making it highly hostile to microbial growth. Additionally, the pasteurization of the cream prior to churning destroys any dangerous pathogens before the butter is even formed.
The FDA, The PMO, and The 21-Day Rule
If the science is so clear, why does every package of butter in the supermarket strictly instruct you to “Keep Refrigerated”? You can thank the 1924 Grade “A” Pasteurized Milk Ordinance (PMO), a regulatory standard that forces all packages containing milk or milk products to bear that specific warning label, regardless of the product’s actual water activity or fat content. This archaic labeling rule causes massive consumer confusion.
To settle the debate, independent ISO-17025 accredited food safety laboratories have conducted extensive shelf-life studies on butter stored at ambient room temperatures (68°F to 78°F). They tested various brands of store-bought butter for yeast, mold, coliforms, and general bacteria over a 21-day period. They also tested for thiobarbituric acid (TBA) to monitor oxidation and rancidity.
The results were definitive. The microbiological tests showed non-detectable levels of spoilage organisms, and the butter maintained “good microbial quality” for the entire three-week study. The FDA’s own Bacteriological Analytical Manual (BAM) confirms that the primary spoilage factor for room-temperature butter isn’t dangerous pathogens; it is simply oxidative rancidity, which affects the flavor, not the safety. And since the butter bell’s water seal actively prevents oxidation, you are effectively neutralizing the only real threat to your butter’s shelf life.
Why Salt Matters (But Isn’t Strictly Mandatory)
It is worth noting that salted butter is even safer to leave out than unsalted sweet cream butter. Salt is one of humanity’s oldest natural preservatives; it further suppresses the water activity and creates an even more hostile environment for bacteria. If you are using salted butter in a butter bell, it can easily last for up to a month at room temperature, assuming your kitchen isn’t a sweltering sauna.
If you strongly prefer unsalted butter for your toast, you can absolutely still use a butter bell, but you should expect its optimal shelf life to be slightly shorter—typically around two weeks. (Here is a pro-tip from my kitchen to yours: if you use unsalted butter, add a tiny pinch of salt to the water in the base of the crock. It won’t make your butter salty, but it will help inhibit any potential bacterial growth in the water itself).
The Sassy Sous-Chef’s Guide to Using a Butter Bell Without Messing It Up
Using a butter bell is not complicated, but if you arrogantly skip steps, you will end up with a soggy lump of ruined dairy swimming in a puddle of cloudy water. Here is the foolproof, no-nonsense method for getting it right the very first time.
Step 1: Soften the Butter (Just This Once)
You cannot pack a rock-hard, freezing cold stick of butter into a ceramic bell. It will not mold to the curved shape of the lid, it will not adhere to the sides, and it will immediately fall out. You must let the butter soften to room temperature on the counter first. I promise, this is the very last time you will ever have to wait for butter to soften.
Step 2: The Art of the Pack
Take your perfectly softened butter and press it firmly into the bell-shaped lid. Do not just gently scrape it in there. You need to use the back of a sturdy spoon to pack it in tightly, aggressively eliminating any hidden air pockets. If you leave air pockets, the butter will lack the structural integrity required to stay wedged in the bell when inverted, and you will end up with a butter submarine.
Step 3: The Water Level Sweet Spot
Fill the base of the crock with fresh, cold tap water. How much? Usually about a third of a cup, or just enough so that when you insert the lid, the water rises to barely cover the exposed surface of the butter. If you live in a particularly warm climate, throw a single ice cube into the water to keep the temperature down.
Step 4: Maintenance (Don’t Be Nasty)
You absolutely must change the water in the base every three to five days. If you don’t, the water will stagnate, and you will completely defeat the entire purpose of the antimicrobial water seal. It takes exactly five seconds. Dump the old water down the sink, rinse the base, and add fresh cold water. Done. Just like air drying your cast iron is a guaranteed recipe for a rusted, ruined pan, neglecting to change your butter bell’s water is a guaranteed recipe for a funky, foul-smelling kitchen science experiment.
Why I Absolutely Despise Plastic Butter Dishes (The Toxic Gear Rant)
You all know my strict, uncompromising “No-Go” rule on toxic kitchen gear. I have zero tolerance for cheap, mass-produced garbage that leaches mystery chemicals into our food. If you are currently storing your butter in a flimsy, scratched-up plastic container from a big-box store, we need to have a serious intervention.
The Microplastics Problem
Fats are highly effective organic solvents. They are exceptionally good at absorbing the plasticizers, phthalates, and endocrine disruptors found in cheap plastic storage containers. When you let butter sit pressed against plastic at room temperature day after day, you are actively inviting those industrial chemicals to migrate right into your morning breakfast.
Not to mention, plastic is highly porous. It absorbs and holds onto the ambient odors of your kitchen. It is exactly why your stay greasy and smell vaguely like last week’s garlic chicken, no matter how many times you run them through the heavy-duty cycle on your dishwasher. You do not want your premium European butter tasting like old dish soap and leftover onions.
Why High-Fired Ceramic and Stoneware Reign Supreme
This is exactly why I only review and recommend high-fired ceramic, porcelain, or stoneware butter bells. These traditional materials are completely inert, non-toxic, and naturally insulating. They do not leach chemicals, they do not absorb lingering odors, and they have the necessary thermal mass required to keep your butter at a highly stable temperature.
Just make sure you are buying from a reputable brand that explicitly uses lead-free, food-safe glazes. Mystery metals and cheap, peeling non-stick coatings have absolutely no place in a serious home cook’s kitchen, and neither does mystery-glaze pottery from a discount bin.
Troubleshooting Your Butter Bell: When Good Butter Goes Bad
Even with the best, most expensive tools, user error happens. If you are struggling with your new butter bell, do not panic. Here are the most common beginner mistakes and exactly how to fix them.
Why Is My Butter Falling Into the Water?
If your butter is taking a dive into the deep end of the crock, one of three things is happening:
- You didn’t pack it tightly enough. Air pockets are the ultimate enemy of adhesion. Pack it harder next time.
- Your kitchen is too hot. If your ambient room temperature creeps above 78°F (25°C), the physical structure of the butterfat will begin to break down, and it will lose its grip on the ceramic walls.
- You placed it next to a heat source. Do not keep your butter bell next to the stovetop, directly above the dishwasher, on top of the toaster oven, or in direct, glaring sunlight. Find a cool, shaded corner of your countertop.
Why Does My Butter Taste Like a Wet Cardboard Box?
If your butter tastes flat, metallic, or stale, it has likely oxidized. This means your all-important water seal was compromised. Either you didn’t put enough water in the base to begin with, or you carelessly let the water evaporate without refilling it. Remember, light and oxygen are the mortal enemies of fresh fats. Just like keeping it in a clear glass bottle next to the stove is ruining your olive oil, exposing your butter to the open air will rapidly destroy its delicate, creamy flavor profile.
Dealing with Brutal Summer Heatwaves
During the absolute peak of summer, if you do not have central air conditioning, a butter bell might legitimately struggle. When indoor temperatures soar into the mid-80s, the butter will turn into a useless liquid puddle. During a severe heatwave, you might have to temporarily retreat and put the bell in the refrigerator. It hurts my soul to say it, but melted, separated butter is entirely useless for spreading on toast.
The Economics of Butter: Why This Gadget Saves You Money
Let’s talk about the financial aspect of this tool, because time is money, and wasting expensive, high-quality ingredients is a literal crime against your grocery budget. High-quality, grass-fed, European-style butter is not cheap. When you try to spread rock-hard, cold butter, you invariably use way too much of it because it chunks off in thick, uneven slabs instead of spreading in a thin, elegant layer.
Stop Wasting the Good Stuff
When your butter is perfectly soft and temperature-controlled, you can achieve a beautifully even, translucent layer of rich flavor across your bread. You actually end up using less butter, but you get significantly more flavor in every single bite. Plus, you are no longer throwing away half a stick of butter that got left out on a random plate, turned dark yellow, and went rancid.
And speaking of smart kitchen economics, investing in a durable, high-quality ceramic butter bell prevents the endless, wasteful cycle of buying and throwing away cheap plastic junk. It is the exact same logic I apply to all essential kitchen gear. Why do your baking sheets keep warping in the oven? Because you bought cheap, thin, inferior metal. Why do your knives get dull so rapidly? Because you are stubbornly using bamboo cutting boards that actively destroy the delicate edge of your blade. Buy quality gear once, treat it well, and you will never have to cry over replacing it.
Elevating Your Weekend Toast Game
Weekdays are for survival, efficiency, and getting out the door on time. Weekends, however, are for absolute perfectionism and culinary artistry. Once you have mastered the basic mechanics of the butter bell, it is time to level up your weekend brunch game.
Compound Butters in the Bell
You can absolutely store homemade compound butters in your butter bell, provided you follow one strict rule: they cannot contain highly perishable, high-moisture ingredients. Adding fresh, raw garlic or large pieces of wet, fresh herbs will introduce too much water into the emulsion and completely throw off the bacterial balance, leading to rapid spoilage.
Instead, use dry, low-moisture additions. Whip your softened butter with dried herbs, a touch of raw honey, smoked sea salt, or freshly grated citrus zest. Imagine waking up on a lazy Sunday morning to perfectly soft, spreadable honey-cinnamon butter for your homemade waffles, or a smoked paprika and flaky sea salt butter for your eggs.
By the way, if your butter always splatters violently when you try to fry an egg, it is because of the natural water content in the butter rapidly boiling off when it hits the hot pan. Using clarified butter (ghee) solves that frying problem entirely, but for spreading on fresh toast, you absolutely want that creamy, water-in-oil emulsion kept fully intact inside your butter bell.
The Perfect Pairing: Respecting Your Bread
A butter bell is ultimately only as good as the bread you are spreading it on. If you are taking the time to buy beautiful, artisanal sourdough from a local bakery, please treat it with the respect it deserves. For the love of all things holy, stop putting bread in the fridge. Refrigeration rapidly accelerates the retrogradation of the starch molecules, meaning your expensive bread will go stale, hard, and crumbly up to six times faster than it would if left on the counter. Keep your bread in a proper bread box, and keep your butter in a proper butter bell.
A Note on Kitchen Aesthetics and Sensory Cooking
Cooking should never be a stressful, irritating chore; it should be an enjoyable, sensory experience. There is something deeply, inherently satisfying about the heavy, cool weight of a ceramic butter bell in your hand. It connects you to a lineage of smart, resourceful home cooks stretching back centuries to the damp, dairy-rich coastlines of France.
When you eliminate the small, irritating frictions of the kitchen—like angrily tearing your toast, or realizing your silicone spatulas taste like soap because they absorbed cheap dishwasher detergent, or panicking because your cheese sauce breaks right before your dinner guests arrive—you free up valuable mental bandwidth. You buy yourself the time and the patience to actually enjoy the beautiful, tactile process of cooking.
The French butter bell is the ultimate embodiment of this philosophy. It is an inexpensive, gorgeous, scientifically sound tool that solves a daily annoyance with absolute grace. So do yourself, your sanity, and your sourdough a massive favor: ditch the cold, hard sticks of butter, banish the toxic plastic tubs from your life, and embrace the simple brilliance of the water seal. Your morning toast will never be the same.






