
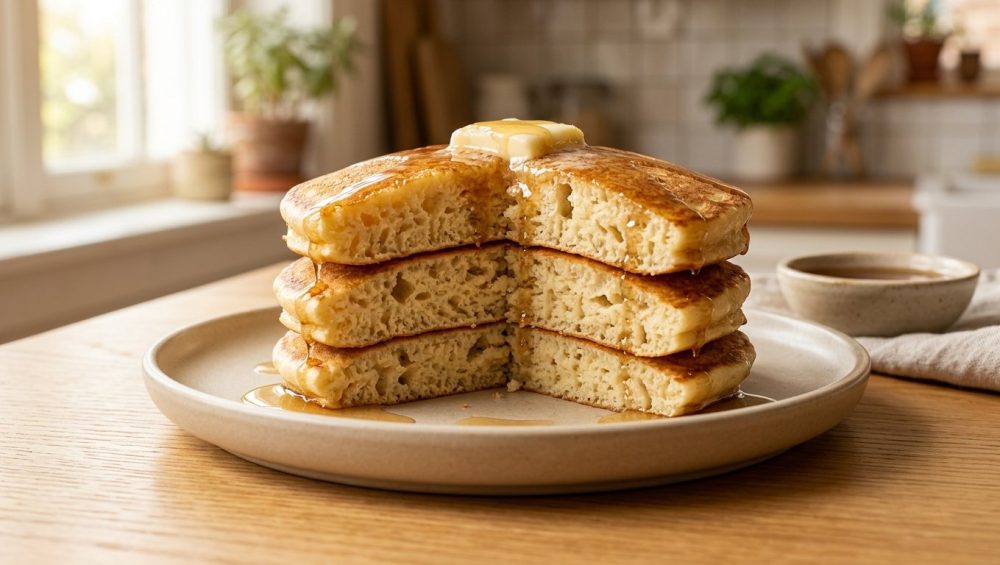
Listen up, weekend warriors. We need to have a serious, brutally honest conversation about your Sunday morning breakfast routine. You wake up, pour yourself a strong mug of coffee, put on your favorite apron, and decide to treat yourself and your family to a towering stack of homemade pancakes. You meticulously measure your flour, crack your eggs with precision, and whisk the batter until it is as perfectly smooth and homogenous as a jar of store-bought mayonnaise. You pour it onto the griddle, wait for the flip, and serve up a stack of… dense, chewy, rubbery frisbees. They look like pancakes, they smell like pancakes, but they chew like a memory foam mattress.
If you’ve ever wondered why your pancakes are rubbery, the answer is sitting right there in your mixing bowl. It is your relentless, overzealous, perfectionist whisking.
As a home cook who learned the hard way and has set off the smoke detector more times than I care to admit, I completely understand the psychological urge to intervene. We are conditioned from birth to believe that lumps in our food are the ultimate enemy. Lumps in your Thanksgiving gravy? An absolute culinary tragedy. Lumps in your creamy mashed potatoes? A texture misdemeanor. But lumps in your pancake batter? That, my friends, is the closely guarded secret to diner-style, melt-in-your-mouth perfection.
Today, we are going to dive incredibly deep into the science of gluten development, flour hydration, and the thermodynamics of your griddle. I have absolutely zero patience for pretentious chef-speak, so we are going to break this down into practical, no-nonsense terms. You do not need a culinary degree to make mind-blowing food in your own kitchen; you just need to understand what happens on a molecular level when flour meets water, and more importantly, when to step away and let the chemistry do the heavy lifting.
The Anatomy of a Pancake Disaster: Why Your Breakfast is Bouncing
To fix the problem, we first have to understand the crime scene. When you look down into your mixing bowl and see a stubborn lump of dry flour floating in your wet ingredients, every instinct in your body screams at you to grab a wire whisk and beat it into submission. You want a beautifully smooth, pouring consistency. You want it to look exactly like the heavily stylized pictures on the back of the commercial pancake mix box.
But the moment you start aggressively stirring, you are setting off a microscopic chain reaction that is actively ruining your breakfast.
Pancakes belong to a specific category of baked goods known in the culinary world as “quick breads.” Unlike traditional yeast breads, which rely on biological leavening (living yeast eating sugars and slowly expelling carbon dioxide gas over several hours), quick breads rely on chemical leaveners—like baking powder or baking soda—to provide immediate, rapid lift. Because they are designed to be fast and efficient, their structural integrity is incredibly delicate. When you treat a delicate quick bread batter like a sturdy pizza dough, you get pizza dough results.
If you overmix, you are not just blending ingredients together; you are fundamentally altering the protein structure of the wheat. You are violently popping the delicate air bubbles created by your chemical leaveners. You are practically guaranteeing that your pancakes fall flat and lifeless the moment they hit the heat.
The Science of Gluten: Wheat Proteins and Your Whisk
Gliadin and Glutenin: The Frenemies in Your Flour
Let’s get a little nerdy for a second, but I promise to keep it highly relevant to your breakfast plate. Wheat flour is primarily composed of starch, but it also contains two extremely crucial proteins: gliadin and glutenin. In their dry, powdery state, these proteins are completely inactive. They are just sitting there in your flour bag, minding their own business, posing no threat to your weekend brunch.
However, the exact moment you introduce a liquid—whether that is whole milk, tangy buttermilk, or even just water—these two proteins wake up, seek each other out, link arms, and form a highly elastic, complex network known as gluten. Gluten is a miracle of nature. It is the structural backbone of baking. It’s what gives a rustic, artisan sourdough loaf its beautiful, chewy crumb, and it is what allows a New York-style bagel to survive being boiled in water and baked at high heat while remaining delightfully dense.
But here is the absolute, unbreakable rule of the home kitchen: what is spectacular for a bagel is catastrophic for a pancake.
Hydration and Mechanical Action: A Recipe for Rubber
Gluten formation requires two specific catalysts to develop: hydration (the liquid) and mechanical kinetic energy (your mixing). The liquid allows the proteins to bond, but the mechanical action of your whisk is what physically stretches, aligns, and strengthens those bonds into a tight, web-like matrix.
Think of gluten strands like microscopic rubber bands. The more you stir, fold, and beat the batter, the more rubber bands you create, and the tighter and more resilient they get. When you finally pour that overworked, highly elastic batter onto a hot griddle, the intense heat causes the proteins to instantly set in their tightly wound state. Instead of a tender, delicate crumb that yields effortlessly to your fork, you end up with a structural matrix that fights back when you chew it.
To achieve that light, airy, cloud-like texture that soaks up maple syrup like a sponge, you must minimize gluten development at all costs. You have to accept visual imperfection. When faced with a bowl of shaggy, uneven dough, you must resist the urge to stir out the lumps. You have to trust that those ugly little flour pockets are actually your greatest allies.
The Magic of a Lumpy Batter: Why Imperfection is Flawless
Steam Pockets: The Unsung Heroes of Fluffiness
This is where the real magic happens, and it is a fascinating scientific phenomenon that most home cooks completely misunderstand. Those lumps of dry, unmixed flour in your batter aren’t just harmless; they are actively working behind the scenes to make your pancakes exponentially fluffier.
According to food physics and thermodynamic studies (yes, scientists study pancake batter, and we love them for it), a lumpy batter contains hundreds of micro-pockets of unhydrated starch granules. When you ladle that thick, lumpy batter onto a hot 375°F (190°C) griddle, the intense, immediate heat causes the moisture in the surrounding wet batter to rapidly reach its boiling point and turn into steam.
Water expands to roughly 1,600 times its original volume when it converts to steam. Those dry pockets of flour act as tiny internal sponges, rapidly absorbing the surrounding steam and expanding outward. They swell up and burst, creating localized steam jets that physically lift the batter upward from the inside out. This internal steam expansion is exactly what creates the signature “crown” or lofty rise at the center of a professional diner-style pancake. If you whisk your batter until it is perfectly smooth and homogenous, you completely eliminate these micro-pockets. No dry starch means no steam jets, and no steam jets means absolutely no lift.
Protecting the Chemical Leaveners
Beyond the miraculous physics of steam pockets, leaving your batter lumpy serves a second, equally important purpose: it protects your chemical leaveners. Most modern pancake recipes rely on double-acting baking powder to provide a chemical rise. The very moment baking powder touches the wet ingredients, it begins its first chemical reaction, releasing thousands of tiny carbon dioxide gas bubbles into the batter.
Every single time you drag a whisk through the bowl, you are violently popping those delicate carbon dioxide bubbles. You are literally stirring the air right out of your breakfast. By leaving the batter lumpy and strictly minimizing your mixing time, you trap those vital gas bubbles inside the thick, viscous batter, ensuring they survive long enough to expand on the hot griddle.
Step Away from the Whisk: The Definitive “Dump and Fold” Technique
So, how do we actually mix a batter without overmixing it? We employ the culinary “dump and fold” method. It requires a bit of restraint and goes against all your type-A kitchen instincts, but I promise it will change your weekend mornings forever.
The Dry Ingredients (And Why Precision Matters)
First, you need to measure your ingredients accurately. Baking is chemistry, and chemistry requires precision. Scooping your measuring cup directly into a compacted, dense bag of all-purpose flour is a rookie mistake that can easily add up to 25% more flour than the recipe intended, guaranteeing a dry, heavy result. I rigorously advocate for weighing your ingredients in grams. If you want consistently perfect results without the guesswork, I highly recommend using a digital kitchen scale for measuring dry ingredients. It is the single most important, time-saving tool for any home baker.
Whisk your dry ingredients—flour, sugar, salt, and baking powder—thoroughly in a large mixing bowl. This is the only time you are allowed to whisk aggressively. You want the leavening agents and salt perfectly and evenly distributed throughout the flour before any liquid is introduced.
The Wet Ingredients (Temperature is Everything)
In a separate bowl, combine your wet ingredients: milk (or buttermilk), eggs, and melted butter. Here is a crucial, time-saving hack that applies to almost all baking: make sure your wet ingredients are at room temperature. If you pour freezing cold milk and straight-from-the-fridge eggs into warm melted butter, the butter will instantly seize and solidify into tiny, greasy pebbles. You want a smooth, emulsified liquid base to ensure even fat distribution, which coats the flour proteins and actively helps inhibit gluten formation.
The Marriage: Folding Like You Don’t Care
Pour the wet ingredients into the dry ingredients all at once. Now, put down the balloon whisk. Seriously, throw it in the sink. You are going to use a silicone spatula or, my absolute personal favorite, a Danish dough whisk. The rigid, open-looped design of a dough whisk cuts through the heavy batter without overworking the gluten, making it the ultimate tool for quick breads and thick batters.
Gently fold the wet and dry ingredients together using a “J-fold” motion. Scrape down the side of the bowl, drag across the bottom, lift, and fold the batter over itself. You should only execute about 10 to 12 folds maximum. The batter should look shaggy, messy, and distinctly lumpy. There should still be visible, powdery streaks of flour. The moment the major pools of dry flour have been moistened, you stop. Drop the spatula. Walk away. Your work here is done.
The Resting Phase: The Lazy Cook’s Secret Weapon
Starch Hydration Explained
Now comes the hardest part for the impatient, hungry cook: doing absolutely nothing. There is a deeply scientific, non-negotiable reason why your batter needs to rest on the counter for at least 10 to 15 minutes before you even think about turning on the stove.
During this resting period, the magic of passive hydration occurs. The starches in the flour slowly absorb the liquid without the need for any mechanical kinetic energy. Those terrifying lumps of dry flour you left behind? They are quietly soaking up milk and softening on their own. The gluten strands that were agitated during your brief folding session are given time to relax, ensuring a tender, delicate crumb.
Baking Powder Activation (Double-Acting Magic)
Furthermore, the resting phase allows the double-acting baking powder to work its chemical magic. Double-acting baking powder contains two different acids. The first acid (usually monocalcium phosphate) reacts immediately when it touches the wet milk, creating thousands of microscopic CO2 bubbles at room temperature. As the batter sits and hydrates, it thickens significantly, trapping these bubbles in a highly viscous, sturdy matrix.
When the batter finally hits the heat of the pan, the second acid (usually sodium aluminum sulfate) activates at around 140°F (60°C). This secondary heat activation causes those trapped bubbles to expand violently, giving you that towering, diner-style lift. If you skip the rest period, the batter hasn’t thickened enough to trap the initial gas, the starches haven’t hydrated, and you get flat, dense discs.
The Heat is On: Cooking Your Lumpy Masterpiece
Ditching Toxic Non-Stick for Proper Thermal Mass
Before we talk about temperature control, we desperately need to talk about your kitchen equipment. As your resident sassy culinary blogger, I have a strict, uncompromising “no-go” rule on toxic kitchen gear. I absolutely despise cheap, thin, mystery-metal non-stick pans with peeling Teflon coatings. Cooking on a degraded PTFE (polytetrafluoroethylene) pan at high heat is a fantastic way to off-gas toxic forever chemicals (PFAS) into your lungs and flake synthetic polymers directly into your breakfast. It is entirely unacceptable for a home cook who cares about their health.
If you want a professional-level sear, a perfectly even cook, and a gorgeous golden-brown crust, you need cookware with serious thermal mass. A well-seasoned cast-iron skillet, a heavy carbon steel griddle, or a high-quality, thick-bottomed clad stainless steel pan are your best friends. They hold heat beautifully and won’t drastically drop in temperature the moment you pour cold batter onto them.
And please, for the love of all things culinary, stop using those pressurized chemical cooking sprays. They contain chemical propellants and emulsifiers like soy lecithin that bake onto the surface of your cookware under high heat, polymerizing into a sticky, impossible-to-remove residue. This invisible buildup is exactly why you find your pans losing their slip after just a few short months of use. Instead, use real butter, clarified butter (ghee), or a neutral oil applied with a simple paper towel. Never use aerosol cooking sprays if you value your long-term health and the lifespan of your expensive cookware.
The Ideal Temperature: The 375-Degree Rule
Temperature control is exactly where most amateur cooks completely ruin perfectly good batter. The ideal surface temperature for cooking pancakes is 375°F (190°C). This is generally achieved over medium heat, but every stovetop is different.
Why exactly 375°F? Thermodynamics and the Maillard reaction. You need the griddle hot enough to instantly trigger the Maillard reaction—the complex chemical browning of amino acids and reducing sugars that creates that irresistible, deeply flavorful golden crust. You also need it hot enough to force those internal steam pockets to erupt. If the heat is too low (say, 325°F), the batter will spread out across the pan like a sad puddle, the steam won’t generate quickly enough to provide vertical lift, and the pancakes will be thin, blonde, and rubbery.
Conversely, if your griddle is smoking hot, the sugars in the batter will caramelize and scorch instantly. The flapjacks will burn on the outside before the internal structure has a chance to cook through and set. Finding that medium-heat sweet spot is crucial. Test the surface by flicking a few drops of water onto it; they should dance and sizzle aggressively before evaporating.
The Flip: When and How
Patience is a virtue, especially when it comes to flipping. Do not poke, prod, or press down on your pancakes with a spatula while they cook. Pressing down literally squeezes the trapped air and steam right out of them, completely undoing all the careful science we just discussed.
Watch the surface of the batter closely. As the underside cooks, the heat transfers upward, pushing the chemical bubbles to the top. At first, the bubbles will pop and immediately fill back in with wet batter. You are not ready to flip. You must wait until the bubbles pop and stay open, leaving little permanent craters on the surface, and the outside edges of the pancake begin to look dry and matte.
If you get impatient and flip them while the edges are still glossy and wet, the batter will splatter everywhere, you’ll lose your rise, and the pancake will stay raw in the middle. Slide a thin, flexible metal spatula underneath, commit fully to the motion, and flip it with confidence. Cook the second side for about half the time of the first side, just until golden brown.
Troubleshooting Your Lumpy Batter (FAQ for the Anxious Cook)
“But what if I bite into a pocket of raw flour?”
This is the number one fear I hear from anxious home cooks, and it’s completely unfounded. If you followed the mandatory 15-minute resting rule, those lumps are no longer dry, powdery flour. They have hydrated into tiny, concentrated pockets of thick dough. When exposed to the 375°F heat of the griddle, they cook through entirely, transforming into the expanding steam pockets we discussed earlier. You will never crunch into a pocket of raw powder.
“Can I use a blender to mix my batter to save time?”
Absolutely not. Do I need to come over and confiscate your kitchen appliances? Putting pancake batter in a high-speed blender is a severe culinary crime. A blender spins at thousands of revolutions per minute, subjecting the flour proteins to extreme, violent kinetic energy. You will instantly develop a massive, unbreakable gluten network. You will not get pancakes; you will get a chewy, rubbery, flat gluten smoothie that cooks up like a neoprene mousepad. Step away from the blender.
“Why did my first batch turn out terrible, but the second batch was perfect?”
Ah, the classic “first pancake” syndrome. This frustrating phenomenon usually happens for two distinct reasons. First, your pan wasn’t evenly preheated. Heavy materials like cast iron and carbon steel take several minutes to distribute heat evenly from the center out to the edges. Second, your pan likely had too much fat on it, causing the first pancake to effectively deep-fry and absorb oil rather than sear cleanly. Wipe the pan with a lightly oiled paper towel—you want a microscopic layer of fat, not a swimming pool.
“What if I want to use buttermilk instead of regular milk?”
Buttermilk is fantastic for pancakes because its acidity tenderizes the gluten and provides a complex, tangy flavor. However, because it is highly acidic, you must introduce baking soda (a base) to neutralize the acid. Baking soda reacts instantly with buttermilk to create massive amounts of carbon dioxide. This makes the “do not overmix” rule even more critical. Fold gently, leave the lumps, and get it resting immediately so you don’t lose that precious gas.
The Final Verdict: Embrace the Kitchen Chaos
Cooking at home is not about achieving sterile, manufactured, factory-level perfection. It’s about understanding your raw ingredients, knowing the science behind how they interact, and knowing when to get out of the way and let them do their own thing.
The next time you whip up a batch of weekend pancakes, I want you to actively embrace the chaos. Leave the lumps. Let the batter sit there on the counter and look messy and unrefined. Pour yourself a mimosa, wipe down the counters, and trust the science of hydration and thermodynamics.
By minimizing your whisking, allowing the starches to hydrate passively, and utilizing the brilliant physics of steam pockets, you are guaranteeing a towering, fluffy, melt-in-your-mouth breakfast. You don’t need a culinary degree, you don’t need toxic non-stick pans, and you certainly don’t need to stress over a few streaks of flour in a mixing bowl. Step away from the whisk, respect your ingredients, and get ready to eat the absolute best pancakes of your life.






