
Listen, we need to have a serious talk about what happens in your kitchen after the cooking is done. You’ve just seared a gorgeous, thick-cut ribeye. You’ve successfully fed your family on a busy Tuesday night. You’re exhausted, staring down a sink full of dishes, and you just want to pour a glass of wine and melt into the couch. So, you wash your trusty cast iron skillet, give it a quick, half-hearted wipe with a dish towel, and leave it on the drying rack to air dry.
Fast forward to the next morning. You walk into the kitchen to make some eggs, grab your skillet, and gasp. Your beautiful, jet-black pan is covered in a horrifying, powdery layer of bright orange rust.
If this sounds familiar, take a deep breath. You are not alone, and you do not need a culinary degree to fix this. As someone who has set off the smoke detector more times than I care to admit, I completely understand the desire to cut corners on a weeknight. Time is money, and nobody wants to spend their evening babying a piece of metal. But air drying your cast iron is the ultimate rookie mistake. It is the single fastest way to destroy your pan’s non-stick seasoning and invite corrosion into your kitchen.
Today, we are going to completely permanently solve your rust problem. We are going to dive deep into the fascinating metallurgy of your cookware, the microscopic traps hiding on its surface, and the absolute magic of the stovetop heat-drying method. Grab your coffee (or your wine—I don’t judge), and let’s get into it.
The “No-Go” Rule: Why We Suffer for Cast Iron in the First Place
Before we get into the nitty-gritty science of rust prevention, we have to address the elephant in the room. Why do we even bother? Why do we put up with heavy, high-maintenance cast iron when we could just buy a cheap, lightweight, non-stick pan from the big box store?
If you’ve been reading my blog for any amount of time, you already know my strict, unapologetic “no-go” rule: I absolutely despise cheap, toxic kitchenware. I am a massive advocate for banishing toxic kitchen gear from your home entirely.
The vast majority of conventional non-stick pans are coated in polytetrafluoroethylene (PTFE), commonly known by brand names like Teflon. While these pans offer a frictionless surface that makes flipping pancakes a breeze, they harbor a dark, chemical reality. When PTFE-coated cookware is heated to temperatures above 260°C (500°F), the chemical structure of the coating actually begins to break down and decompose. This thermal degradation releases toxic gaseous compounds into the air, which can cause a temporary but severe flu-like illness in humans known as “polymer fume fever” (often dubbed the “Teflon flu”).
Worse still, the manufacturing of these coatings historically relied on perfluorooctanoic acid (PFOA), a synthetic compound belonging to a notorious class of chemicals called per- and polyfluoroalkyl substances (PFAS). These are the infamous “forever chemicals.” They do not break down in the environment, and they accumulate in the human body over time. While major manufacturers have largely phased out PFOA, they have frequently replaced it with alternative PFAS chemicals (like GenX) that are increasingly suspected of carrying similar toxicological risks, including endocrine disruption and potential links to certain cancers.
Furthermore, the moment you accidentally scratch a PTFE pan with a metal spatula, that protective coating is compromised. Scratched non-stick pans can release thousands of microscopic plastic particles and chemical compounds directly into your food.
This is exactly why we rely on cast iron. It is a natural, durable, and completely safe cooking surface that can literally last for generations. Yes, it requires a specific maintenance routine. Yes, it demands a few extra minutes of your time. But those few minutes are an investment in your health, your food’s flavor, and your peace of mind.
The Metallurgy of Cast Iron: A Microscopic Mountain Range
To understand why your skillet rusts when you air dry it, you have to understand what cast iron actually is. We tend to think of metal as a solid, impenetrable, perfectly smooth material. But that is a massive illusion.
Cast iron is an alloy composed primarily of iron and a relatively high percentage of carbon—typically between 2% and 4%. When molten iron is poured into a sand mold at the foundry, it cools and hardens into the heavy skillet you know and love. However, this casting process, combined with the high carbon content, results in a surface that is anything but smooth.
If you were to look at the surface of a raw cast iron skillet under a high-powered microscope, it wouldn’t look like a sheet of glass. It would look like a jagged, chaotic mountain range. The surface is completely covered in microscopic craters, deep fissures, pores, and jagged peaks.
This porous, textured landscape is actually a double-edged sword. On one hand, it is the exact reason why cast iron can become non-stick. Those microscopic craters act as anchor points, giving polymerized oils a place to grip and bond to the metal. On the other hand, this exact same topography is a treacherous trap for water molecules. Unlike the magic of the water drop test used to gauge temperature on a smooth stainless steel pan, cast iron actively absorbs moisture into its microscopic valleys.
The Capillary Action Trap: Why Towels Lie to You
Here is the exact scenario that plays out in millions of kitchens every single night: You wash your pan, you grab a clean cotton dish towel, and you thoroughly pat the skillet dry. You run your hand over the metal. It feels completely bone dry. You put it away.
You have just fallen victim to the towel-dry illusion.
When you drag a cloth towel across the surface of your cast iron, the fabric is only making contact with the microscopic peaks of the metal’s topography. It is physically impossible for the fibers of your dish towel to reach down into the microscopic pores and fissures of the iron.
Because water possesses a high surface tension, it is subject to a phenomenon known as capillary action. Capillary action is the ability of a liquid to flow into narrow spaces without the assistance of, or even in opposition to, external forces like gravity. The microscopic craters in your cast iron act like tiny capillary tubes, aggressively drawing in and holding onto microscopic droplets of water.
Your towel wipes away the surface moisture, but the microscopic valleys remain entirely flooded. When you place that “dry” pan on your counter to air dry, that hidden moisture sits in direct contact with the reactive iron for hours.
The Science of Flash Oxidation: The Silent Killer
So, what happens to that microscopic trapped water? It initiates a chemical reaction so rapid and aggressive that metallurgists refer to it as “flash oxidation.”
Rust, scientifically known as iron oxide, requires three ingredients to form: iron, water, and oxygen. When bare, active iron is exposed to moisture and the oxygen in the air, the iron atoms undergo an electrochemical reaction. They lose electrons to the oxygen atoms, and the water acts as a crucial catalyst and electrolyte that facilitates this transfer.
In industrial metalworking and degreasing processes, engineers know that the moment protective oils are stripped away from high-carbon steel or cast iron, the highly “active” metal surface is vulnerable to instant flash oxidation. Rust can literally begin forming within seconds or minutes.
When you leave microscopic water trapped in the pores of your skillet, this oxidation process begins immediately. Even if your pan has a decent layer of seasoning, micro-fissures in that seasoning can allow water to reach the bare iron underneath. The rust forms underneath the protective oil layer, bubbling up and causing the seasoning to flake off. If your pan ever leaves black specks behind in your scrambled eggs, it is often because hidden flash oxidation has compromised the bond between the metal and the polymerized oil.
Air drying gives flash oxidation hours to wreak havoc. The only way to stop it is to forcefully evict the water from the microscopic pores before the chemical reaction can take hold. And the only way to do that is with thermal energy.
The Ultimate Solution: The Stovetop Heat-Drying Method
We are going to permanently banish rust from your kitchen right now. The secret to a pristine, rust-free cast iron skillet is not a fancy cleaning solution or a magical towel. It is heat. By briefly heating the wet pan on the stovetop, we force the trapped moisture to rapidly evaporate, leaving the microscopic pores completely dry.
Here is my definitive, no-nonsense, step-by-step masterclass on how to clean and heat-dry your cast iron cookware.
Step 1: The Wash (And Yes, You Can Use Soap)
Let’s get this out of the way: you can use soap on your cast iron. The old myth that soap will strip your seasoning dates back to a time when household soap was made with harsh lye, which actually would eat through polymerized fat. Modern dish soaps are gentle detergents that break down loose grease, not bonded plastics.
Wash your pan with warm water, a few drops of mild dish soap, and a standard sponge. If you have serious crusty bits stuck to the bottom, you might need a chainmail scrubber to gently knock them loose. Alternatively, I highly recommend turning burnt bits into sauce by deglazing the pan with a little broth or wine while you’re still cooking—it saves you cleaning time later!
Step 2: The Preliminary Towel Pat-Down
Once the pan is clean, do not skip the towel entirely. You want to remove the bulk of the standing water. Give the pan a firm, thorough wipe-down with a lint-free kitchen towel or a paper towel. Get the top, the bottom, and the handle. The pan will look dry, but as we’ve established, it is secretly harboring moisture.
Step 3: The Stovetop Bake
Place the visually “dry” pan on your stovetop burner. Turn the heat to medium-low. Do not blast it with high heat; cast iron is prone to thermal shock, and heating it too rapidly can cause the metal to warp or even crack.
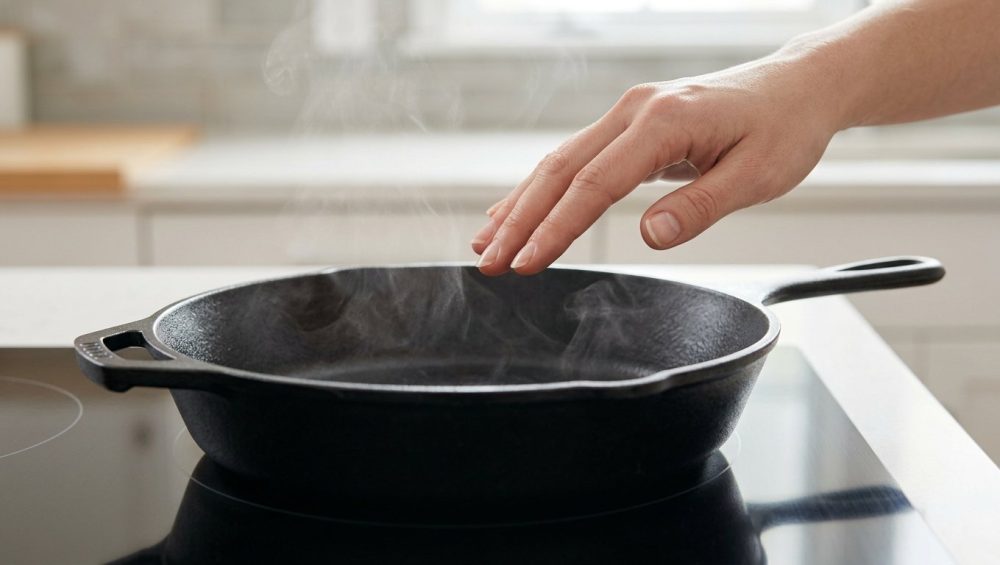
As the pan gently heats up, watch the surface closely. Within a minute or two, you will actually see the hidden moisture begin to sweat out of the pores and evaporate into steam. The surface of the pan will transition from a slightly glossy, damp appearance to a flat, bone-dry matte finish.
Leave the pan on the heat for about 3 to 5 minutes total. You want the iron to get hot enough to evaporate every single microscopic molecule of water, but not so hot that it begins to smoke or burn off your existing seasoning.
Step 4: The Oil Touch-Up (The Protective Seal)
Once the water is completely gone, your pan is dry, but it is also vulnerable. The heat has opened up the microscopic pores, and the washing process has removed any loose, protective surface oils. If you put the pan away now, atmospheric humidity can still cause rust. We need to seal the fortress.
While the pan is still hot (but the burner is now turned off or turned down to low), add a microscopic amount of cooking oil to the pan. I am talking about a quarter of a teaspoon. Take a folded paper towel and aggressively rub the oil all over the interior of the pan.
Now, take a clean paper towel and try to wipe all of that oil back out. You want to wipe it until the pan looks completely dry again. The biggest mistake rookies make is leaving a thick, pooling layer of oil in the pan, which will turn into a sticky, rancid, gummy mess in your cupboard. You only want a molecule-thin layer of oil remaining.
Step 5: The Final Heat (Optional but Recommended)
If you want to keep your pan in absolute flawless condition, turn the burner back up to medium. Let the pan heat up until that micro-layer of oil just barely begins to wisp with smoke. The moment you see a wisp of smoke, turn off the heat completely and leave the pan on the stove to cool down naturally.
The Chemistry of the Oil Touch-Up: Reinforcing the Polymer
Why do we heat the oil until it smokes in Step 5? Because we are not just greasing a pan; we are performing organic chemistry. We are actively utilizing the science of polymerization in seasoning to build a natural non-stick surface.
When a liquid fat is heated past a certain thermal threshold (approaching its smoke point), it undergoes a radical transformation. The heat causes the fat molecules to break down and release free radicals. These free radicals then cross-link with one another, bonding together to form a massive, rigid, interconnected molecular network.
The oil literally transforms from a liquid fat into a hard, slick, hydrophobic bio-polymer—essentially, a natural plastic. This bio-polymer bonds directly to the iron, filling in those microscopic craters and creating the smooth, black, non-stick surface we covet.
However, not all oils are created equal for this process. You need a “drying oil”—an oil with a high concentration of polyunsaturated fats. The double bonds in polyunsaturated fats are what allow the cross-linking to occur.
Flaxseed oil, grapeseed oil, and canola oil are excellent choices for seasoning because they polymerize readily. Olive oil and butter, which are high in saturated and monounsaturated fats, do not polymerize well and will simply burn or turn sticky.
By applying that micro-layer of drying oil to your hot, freshly dried pan, you are laying down a fresh microscopic coat of polymer, reinforcing the seasoning, and ensuring that water and oxygen can never touch the bare iron.
Busting the Biggest Cast Iron Maintenance Myths
The culinary world is full of pretentious gatekeepers who want to make cast iron cooking sound like a mystical, unattainable art form. I have zero patience for it. Let’s bust a few more myths so you can cook with confidence.
Myth 1: You can’t use metal utensils.
False. You absolutely should use a flat-edged metal spatula. While you shouldn’t gouge the pan with the sharp corner of a knife, scraping the flat edge of a metal spatula across the surface while cooking actually helps level out the seasoning over time, knocking down high spots and creating a smoother surface.
Myth 2: Aerosol cooking sprays are great for a quick seasoning.
Absolutely not. I’ve said it before: cooking spray is the enemy of good cookware. Most commercial aerosol sprays contain an emulsifier called soy lecithin. When exposed to the high heat of a cast iron skillet, soy lecithin burns and creates a stubborn, sticky, brown residue that refuses to polymerize properly. Stick to pure, liquid oils.
Myth 3: You can soak a cast iron pan if food is really stuck.
Never, ever leave a cast iron pan submerged in the sink. Soaking provides a massive, continuous supply of water and oxygen to the iron. Flash oxidation will bypass your seasoning in minutes, and you will wake up to a rusted disaster. If food is stuck, boil a little water in the pan on the stove for two minutes to loosen the debris, then dump it and wash immediately.
The Weekday Warrior vs. The Weekend Perfectionist
I know what you’re thinking. “Sassy Sous-Chef, I am exhausted. You want me to wash, towel dry, bake, oil, and smoke my pan on a Tuesday night?”
Yes, I do. Because here is the brutal truth: this entire stovetop drying routine takes exactly five minutes. You can literally do it while you are wiping down the countertops or loading the rest of the dishes into the dishwasher.
This five-minute routine helps you survive without ordering takeout because it guarantees that your pan is always ready to go. If you skip this step and air dry your pan, you will eventually have to spend your precious Saturday afternoon scrubbing rust off with steel wool, doing a deep chemical strip, and running your oven at 500 degrees for hours to re-season the bare metal from scratch.
Five minutes on a weekday saves you three hours on a weekend. Time is money, my friends.
Furthermore, once you get this routine down, your cast iron will perform better than any pan in your kitchen. Instead of replacing cheap pans that are constantly losing their slip after six months of use, you will have an heirloom piece of cookware that only gets better with age. And if everything sticks to your stainless steel skillet because you haven’t quite mastered temperature control yet, your well-seasoned cast iron will be your reliable, non-stick savior for eggs, fish, and delicate proteins.
The Final Word on Cast Iron Care
Cast iron cookware is not a fragile artifact that needs to be babied, but it is a piece of raw chemistry sitting right there on your stovetop. It demands a basic understanding of how metal, water, and heat interact.
Air drying is a fundamental misunderstanding of that chemistry. It ignores the microscopic topography of the iron, underestimates the aggressive nature of capillary action, and practically invites flash oxidation to ruin your hard work.
By adopting the stovetop heat-drying method, you are taking control of the environment. You are using thermal energy to eradicate hidden moisture, and you are using organic chemistry to build an impenetrable shield of polymerized oil.
You don’t need to be a professional chef to achieve professional-level results in your home kitchen. You just need to be a little smarter than your cookware. Stop leaving your skillet on the drying rack, turn on the burner, and give your cast iron the heat it deserves. Your morning eggs—and your sanity—will thank you. Now, if you’ll excuse me, I have a ribeye to sear and a glass of wine to finish. Happy cooking!






