
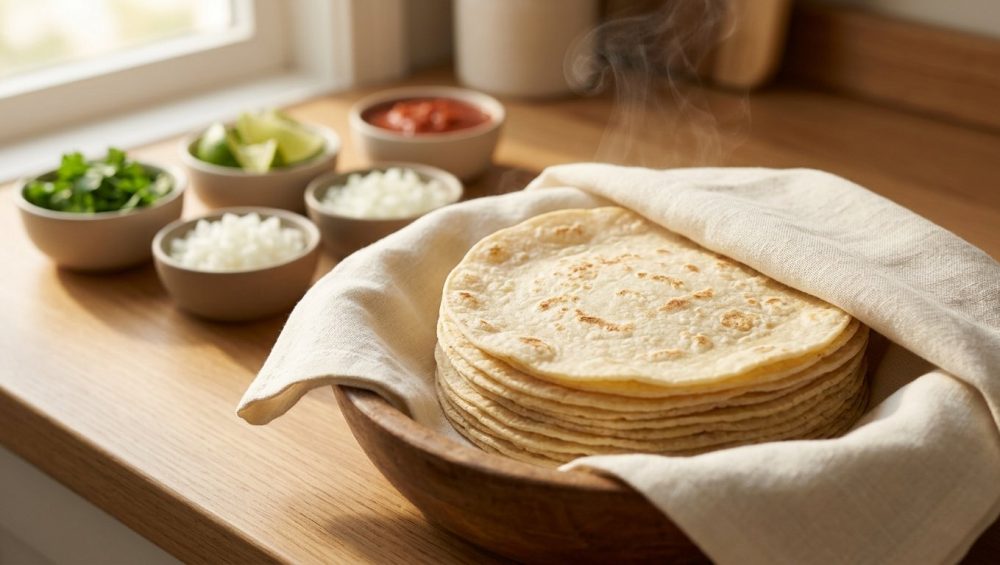
Picture this: It is a beautiful Friday evening. You have spent the last six hours meticulously slow-roasting a heavily spiced pork shoulder for carnitas. You have chopped fresh cilantro, diced white onions with surgical precision, and squeezed enough limes by hand to give yourself a mild case of carpal tunnel. Your kitchen smells like a Oaxacan dream. You confidently pull a stack of corn tortillas out of a crinkly plastic bag, slap a generous portion of that gorgeous meat right in the center, and fold it in half.
Crack.
The tortilla instantly shatters down the middle. Your beautiful, painstakingly crafted carnitas tumble through the newly formed fault line, cascading onto your plate in a sad, messy pile of disappointment. You are no longer eating a taco; you are eating a tragic, deconstructed pork salad.
If this culinary heartbreak has happened to you, take a deep breath. You are not alone. As of 2026, the global tortilla market has exploded to a staggering $47.1 billion valuation, and it is projected to skyrocket to over $68.2 billion by 2036, growing at a steady 3.8% CAGR. We are eating more tacos, fajitas, and wraps than ever before in human history. Retail sales dominate the market at 62%, with corn tortillas taking the crown at a 58% market share. Yet, despite this massive global consumption, the average weekend culinary hobbyist is still committing absolute treason against these beautiful discs of dough.
Let me be brutally honest with you: serving cold, brittle tortillas is the absolute fastest way to ruin a dinner party. It does not matter if your fillings are Michelin-star quality. If the foundation crumbles, the entire house comes down.
Today, we are going to fix this permanently. We are going to dive deep into the food science of why tortillas tear, how to properly heat them, and how to hold them for a crowd so you can host a stress-free, mindful taco bar. Grab a glass of wine, ditch the pretentious chef jargon, and let’s get to work.
The Anatomy of a Taco Tragedy: Why Your Tortillas Keep Failing You
Before we can implement a solution, we need to understand the enemy. Tortillas are not just edible plates; they are complex carbohydrate structures that require a baseline level of culinary respect. When a tortilla tears, it is not being stubborn—it is crying out for moisture and heat. Just as you must regularly oil your butcher blocks to stop wooden boards from cracking under the stress of daily prep, you must properly hydrate and heat your masa to keep it intact under the weight of your fillings.
Corn vs. Flour: Two Completely Different Beasts
While both corn and flour tortillas suffer from staling, they are fundamentally different on a molecular level, and treating them the same is a rookie mistake.
Flour tortillas are the forgiving, stretchy cousins of the taco world. They rely on a well-developed gluten network, fat (usually lard, shortening, or oil), and hydration to stay soft and pliable. When you fold a warm flour tortilla, the relaxed gluten proteins stretch easily to accommodate the movement. They are durable, which is why they are the go-to choice for massive, overstuffed burritos.
Corn tortillas, on the other hand, contain absolutely zero gluten. Their entire structural integrity relies on an ancient, brilliant process called nixtamalization. In this process, dried field corn kernels are soaked and gently cooked in an alkaline solution (traditionally water mixed with wood ash or calcium hydroxide, known as cal). This alkaline bath dissolves the tough hemicellulose in the corn’s hull, releases bound niacin (Vitamin B3) making it nutritionally available, and alters the pectin structure. The treated corn (now called nixtamal) is then stone-ground into a dough known as masa.
Because they lack the stretchy, rubber-band elasticity of gluten, corn tortillas are far more delicate. They rely entirely on a fragile matrix of hydrated starches to hold themselves together. When that matrix dries out or cools down, disaster strikes.
The Food Science of Starch Retrogradation (Or, Why Cold Tortillas Are Basically Cardboard)
I promised you no pretentious chef-speak, but we need to get a little nerdy for a second to truly master this. If you want to stop your tacos from falling apart, you need to understand the concept of starch retrogradation. When you understand the underlying science of the kitchen, everything changes. It is the exact same reason you need to know how to stop ground beef from steaming—temperature control dictates texture.
The Gelatinization Process
Let’s look at what happens when a tortilla is born. Raw starch granules are tightly packed with two types of molecules: amylose (which is linear) and amylopectin (which is highly branched). When a fresh ball of masa is pressed flat and cooked on a screaming hot griddle, the heat and moisture cause those starch granules to swell, absorb water, and melt into a flexible, soft gel. This process is called gelatinization. It is the exact scientific mechanism that makes a fresh-off-the-press tortilla feel like a warm, pliable, comforting hug.
Reversing the Starch Matrix: The Science of Staling
The very second that tortilla comes off the heat, a ticking countdown clock begins. As the tortilla cools down to room temperature, those swollen starch molecules begin to aggressively realign and recrystallize into a rigid, ordered structure. As they tighten up, they literally squeeze the water out of the gel matrix.
This is starch retrogradation, and it is a thermodynamically driven process that begins within just two hours of cooling. The amylose molecules rapidly align into double helices, while the amylopectin side chains slowly reorganize over the next 12 to 48 hours. The result? The glass transition temperature of the tortilla shifts, and its modulus of elasticity shoots up by an astonishing 300%. In plain English: the tortilla loses all of its flexibility, becomes highly brittle, and is mathematically guaranteed to snap under the stress of being folded.
Moisture migration makes this structural failure even worse. The water being squeezed out of the starches does not just sit there; it moves from the wetter interior of the tortilla to the drier surface, where it evaporates into the surrounding air.
This brings us to the most crucial, unbreakable rule of tortilla club: Never, ever put your tortillas in the refrigerator. Cold temperatures (specifically around 4°C or 40°F) drastically speed up starch recrystallization. Refrigerating your tortillas is essentially hitting the fast-forward button on the staling process, which is why a refrigerated corn tortilla feels like a rubbery, inedible disc within 24 hours. Store your store-bought tortillas at room temperature, tightly sealed to prevent moisture loss.
Masterclass: Foolproof Techniques for Warming Tortillas (Without Ruining Them)
So, how do we reverse this staling process and save our taco night? We have to forcefully introduce heat and moisture to make the starches re-gelatinize. Do not just throw them on a cold plate and hope for the best. Here are the definitive, Sassy Sous-Chef approved methods you should be using.
The Cast Iron Comal Method (For the Purists)
If you have the time and want to do things the authentic way, this is the gold standard. You need a heavy-duty cast iron skillet, a carbon steel pan, or a traditional Mexican comal. A heavy, heat-retaining griddle is undeniably one of those essential kitchen tools for beginners.
Heat your pan over medium-high heat until it is ripping hot. Do not add any oil. Drop your tortilla directly onto the dry metal. Let it sit undisturbed for about 30 to 45 seconds until you see light brown, toasted spots forming, then flip it for another 30 to 45 seconds. If you are executing this correctly, the residual moisture trapped inside the tortilla will rapidly turn to steam, and the tortilla will puff up like a beautiful little balloon.
The Lifesaver Hack: If your corn tortillas are a few days old, dried out, and feeling stiff, run them very quickly under the kitchen faucet for a literal second before throwing them on the hot pan. A quick 3.5-second cold water dip aggressively rehydrates the starch matrix and creates the explosive steam needed to soften them back up from the inside out.
The Steam Method (For the Weeknight Rush)
I get it. Time is money. It is a chaotic Tuesday night, you have hungry kids screaming in the background, and you simply do not have the luxury of standing over a stove to individually toast twenty tortillas on a skillet.
Take a stack of 10 to 12 tortillas. Dampen a clean paper towel or a thin, lint-free cotton kitchen towel (wring it out completely so it is damp, not dripping wet). Wrap the stack tightly in the towel, place it on a microwave-safe plate, and microwave on high for 30 to 45 seconds. The damp towel creates a miniature steam room in your microwave, forcing moisture back into the starch matrix and making them incredibly pliable. This works beautifully for flour tortillas and is highly acceptable for corn tortillas in a pinch.
The Open Flame Char (For the Show-Offs)
If you have a gas stove and want to add some serious depth of flavor, you can heat your tortillas directly over the open flame. Turn the gas burner to medium-low. Using long metal tongs, place the tortilla directly on the grates. Let it sit for 15 to 20 seconds until the edges get slightly charred and blistered, then flip. This imparts a fantastic, smoky, street-taco aesthetic. Just do not walk away to check your phone, or you will be dealing with a kitchen fire instead of dinner.
The Oven Batch Method (For the Caterer)
If you are hosting a large dinner party and need to heat a massive amount of tortillas at once, the oven is your best friend. Preheat your oven to 350°F (175°C). Take stacks of five to six tortillas, wrap them completely in aluminum foil, and place the packets in the oven for 15 to 20 minutes. The moisture inside the tortillas will steam them perfectly within the foil packets. Just be sure to avoid the trap of aluminum foil condensation by not leaving them in the oven for too long, otherwise, they will steam into a gummy, unappetizing paste.
What NOT to Do (A Cautionary Tale of Toxic Cookware)
Let me make one thing abundantly clear: I absolutely despise cheap, toxic kitchenware. If you are heating your tortillas in a scratched, peeling, mystery-metal non-stick pan you bought from a discount bin five years ago, throw it in the garbage immediately. You do not want forever chemicals flaking off into your family’s dinner.
Furthermore, never spray your pans with canned cooking spray to heat tortillas. We already know that aerosol cooking sprays ruin pans by leaving a sticky, polymerized residue that is nearly impossible to scrub off. Stick to dry, high-quality cast iron, carbon steel, or safe ceramics. If you are using a stainless steel skillet and are worried about sticking, simply preheat the pan properly; once you master temperature control, you will never have to battle food sticking to stainless steel ever again.
Thermodynamic Holding Strategies: Keeping Tortillas Pliable for a Crowd
Heating the tortillas is only half the battle. If you pull a beautifully puffed, steaming hot tortilla off the comal and toss it onto a cold ceramic dinner plate, it will immediately lose its heat. The starches will slam shut, recrystallize, and the tortilla will turn into a brittle frisbee before your guests even sit down. You must trap the heat and the moisture simultaneously.
The Damp Towel and Terra Cotta Trick
The traditional, and arguably most effective, way to hold tortillas for a standard family dinner is using an insulated tortillero (a tortilla warmer). If you are using a traditional ceramic or terra cotta warmer, you need to preheat it to utilize its thermal mass. You can rinse it with scalding hot water and dry it out, or pop it in a warm oven for a few minutes.
Take your freshly heated tortillas and immediately wrap them in a clean, slightly damp cotton kitchen towel. Place the wrapped bundle inside the preheated warmer and slap the lid on. The cotton towel absorbs excess condensation so the bottom tortillas do not turn to mush, while the heavy thermal mass of the ceramic radiates heat back into the stack, keeping them perfect for up to an hour.
Insulated Tortilleros and Modern Materials
If you do not own a heavy ceramic warmer, modern double-walled insulated fabric warmers are fantastic investments. These thick, fabric pouches trap just enough steam and heat to slow the cooling process, keeping tortillas soft, warm, and pliable for 30 to 60 minutes under normal room conditions. Always line them with a piece of parchment paper or a thin towel to absorb excess moisture.
The Cooler Hack for Massive Crowds
If you are hosting a massive backyard bash, a graduation party, or a neighborhood block party, a standard tortillero is not going to cut it. You need catering-level thermodynamics. Enter the cooler hack.
Take a standard, hard-sided insulated drink cooler. Fill the bottom with a few inches of boiling hot tap water and close the lid for five minutes. This preheats the interior plastic walls, turning the cooler into a giant thermal battery. Dump the water out and wipe the inside completely dry. Line the bottom with a thick bath towel. As you heat your tortillas in batches on the stove, wrap them tightly in foil packets (about 10 to 15 tortillas per packet) and stack them inside the preheated cooler. Close the lid tightly after every addition. The thick polyurethane insulation of the cooler will keep those tortillas steaming hot and perfectly pliable for well over two hours.
Architecting the Ultimate, Stress-Free DIY Taco Bar
Now that we have definitively solved the tortilla tearing crisis, let’s talk about the actual gathering. A DIY taco bar is the ultimate weekend dinner party hack. It requires very little active cooking during the actual party, allows your guests to customize their own plates to accommodate dietary restrictions, and inherently creates a relaxed, communal atmosphere. But if you do not stage it correctly, it quickly devolves into a chaotic, messy bottleneck.
Staging and Flow: Preventing the Dreaded Taco Bottleneck
A mindful taco bar requires a logical, linear physical flow. Think of it like a highly efficient culinary assembly line. Do not force your guests to crisscross the kitchen to build their plates.
- The Foundation: Start the line with the plates, napkins, and the warm tortillas (safely housed in their insulated warmer).
- The Heavy Lifters: Next, place your hot proteins (carnitas, grilled chicken, barbacoa) and your warm bases (black beans, pinto beans, Mexican rice).
- The Toppings: Followed by the cold, crunchy elements—diced white onions, shredded cabbage, sliced radishes, and fresh jalapeños. To make your prep a breeze, you should invest in a bench scraper to effortlessly scoop and transfer your mountains of chopped veggies from the cutting board to the serving bowls in one clean swoop.
- The Finishers: End the line with the wet, messy ingredients: salsas, guacamole, sour cream, cotija cheese, and a massive bowl of fresh lime wedges.
Temperature Control for Fillings
Your tortillas are warm, but your fillings need to match that exact energy. Cold meat on a warm tortilla is a culinary sin that I will not tolerate.
Keep your proteins piping hot using small chafing dishes, slow cookers set to the “warm” setting, or heavy enameled cast iron Dutch ovens that retain heat beautifully when placed on the table. If you are serving a hot queso dip as a starter, make sure you maintain a steady, low heat so you don’t have to scramble to fix grainy cheese sauce at the last minute because the emulsion broke from thermal shock.
The Moisture Barrier: Building the Perfect Taco
Even if your tortilla is perfectly warmed, scientifically gelatinized, and held in a thermal-mass tortillero, it will still tear if you build your taco incorrectly. Moisture is the ultimate enemy of structural integrity.
Teach your guests the art of the moisture barrier. If you are serving particularly juicy, braised meats like barbacoa or birria, lay down a small bed of shredded cheese or dry cabbage on the tortilla first, before adding the meat. This creates a lipid or physical barrier that stops the hot meat juices from immediately soaking into the starch matrix of the tortilla and turning the bottom into a blowout waiting to happen.
Curating the Condiments
When it comes to flavor, do not let your condiments let you down. The salsas and toppings are what elevate a taco from good to mind-blowing. If you’ve ever wondered why your spices taste flat in your homemade salsa, it is likely because you are using pre-ground, stale cumin instead of toasting and grinding whole seeds yourself. The effort is minimal, but the flavor payoff is astronomical.
Furthermore, nobody wants to eat oxidized, brown avocado mash. To prevent guacamole from turning brown before the party is even over, press a thin layer of water or lime juice flat against the surface of the dip to block oxygen exposure until the exact moment it is time to serve. Just pour the liquid off right before your guests dig in.
The Sassy Sous-Chef’s Final Word on Mindful Entertaining
Let’s wrap this up, weekend warriors. Making incredible, mind-blowing food at home does not require a culinary degree, a massive kitchen, or thousands of dollars in pretentious equipment. It simply requires a basic understanding of how ingredients behave on a molecular level and a stubborn refusal to settle for mediocre results.
Tortillas tear because we treat them as an afterthought. We pull them out of the fridge, slap them on a cold plate, and expect them to perform structural miracles. By respecting the science of starch retrogradation, applying proper thermodynamic heating techniques, and utilizing smart holding strategies, you can elevate a simple weeknight meal into an absolute masterclass of flavor, texture, and presentation.
So the next time you decide to host a taco night, give your tortillas the respect they deserve. Heat them properly, hold them warmly, and watch as your guests marvel at the fact that they can finally eat a taco without wearing half of it on their shirts. Now get out of my kitchen, go preheat your comal, and start cooking like the expert you are.






