
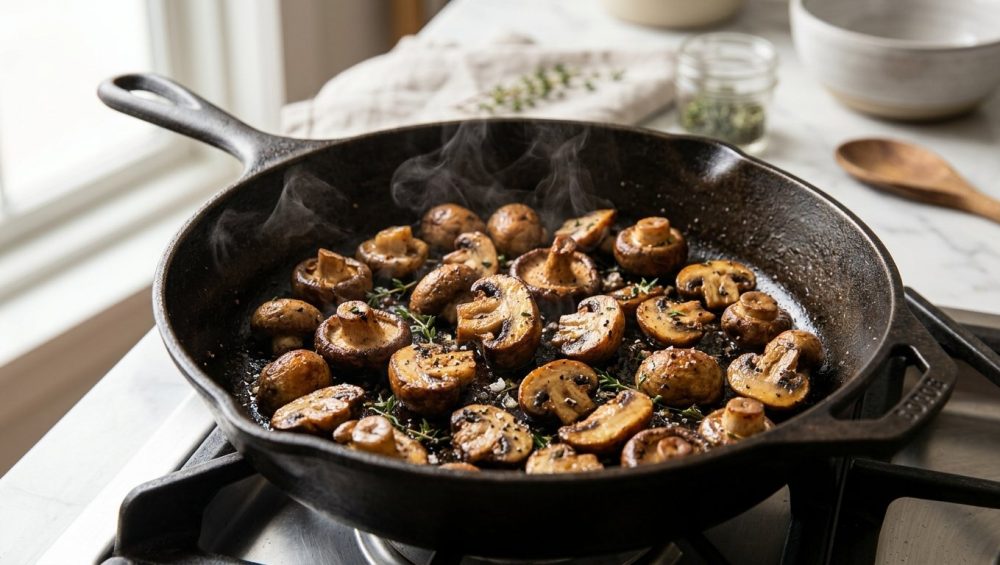
We need to have a serious, sit-down conversation about what is happening in your skillet.
If you are like the vast majority of weekend culinary hobbyists, you have likely experienced the profound, soul-crushing disappointment of ruining a perfectly good batch of mushrooms. You buy a beautiful, pristine punnet of creminis. You slice them up, get your pan nice and hot, drizzle in your expensive extra-virgin olive oil, and toss them in.
And then, tragedy strikes.
Instantly, the mushrooms act like microscopic kitchen sponges, greedily drinking up every single drop of fat in the pan. The skillet goes bone-dry. You panic and pour in more oil. The mushrooms drink that, too. Then, just when you think they might finally start to brown, they collapse and release a torrential flood of murky, gray liquid. Suddenly, you aren’t sautéing anymore; you are boiling your mushrooms in a depressing, oily mushroom-tea. You eventually scoop them out, only to be left with a pile of rubbery, squeaky, greasy little erasers that look like they belong on the bottom of a cheap shoe rather than next to a beautifully seared ribeye.
I see this happen all the time, and frankly, it breaks my heart. But here is the good news: it is not your fault. You were simply taught the wrong way to cook them. The traditional culinary wisdom of throwing fungi straight into hot fat is fundamentally flawed. If you want deeply caramelized, incredibly meaty, restaurant-quality results, you have to break the rules. You have to boil them first.
Yes, you read that correctly. Water is the secret ingredient to the perfect sear. It sounds completely counterintuitive, border-line sacrilegious, and entirely backward. But cooking is just edible chemistry, and when you understand the physical anatomy of a mushroom, this bizarre little trick makes perfect, undeniable sense. Grab a glass of wine, pull up a stool, and let’s dive into the fascinating, slightly weird science of why your mushrooms refuse to brown, and how a splash of tap water is going to change your weeknight dinners forever.
The Biological Bizarreness of the Mushroom
To understand why mushrooms misbehave in a hot skillet, we first have to understand what they actually are. Mushrooms are not vegetables. They are not plants. They belong to their own entirely separate biological kingdom: Fungi. And because they are fungi, their cellular structure is wildly different from the broccoli, carrots, or zucchini you are used to cooking.
First and foremost, mushrooms are remarkably wet. The standard white button mushroom (Agaricus bisporus) is composed of approximately 92 percent water by weight. Let that sink in. When you buy a pound of mushrooms, you are essentially buying a few ounces of solid matter holding together nearly a whole pint of water.
But it is not just the water content that causes problems; it is how that water is stored. Microscopically, a mushroom is essentially a dense, biological sponge. It is packed with thousands of tiny, microscopic air pockets. When you throw a raw, spongy mushroom into a hot pan with oil, capillary action takes over. Those empty air pockets act like vacuums, immediately sucking up the fat. This is exactly why they soak up all the oil within three seconds of hitting the pan.
The Magic of Chitin
Here is where the science gets really interesting. In plants, cell walls are made of cellulose and pectin. When you apply heat to a plant (like a zucchini), that pectin breaks down rapidly, the cell walls collapse, and the vegetable turns to mush. In animals, muscle fibers are made of proteins. When you apply heat to a steak, those proteins tighten, contract, squeeze out moisture, and eventually become tough and leathery if overcooked.
Fungi are different. The cell walls of a mushroom are not made of pectin or protein. They are made of a biopolymer called chitin.
If that word sounds familiar, it is because chitin is the exact same tough, rigid material that makes up the exoskeletons of insects, spiders, and crustaceans like crabs and lobsters. It is an incredibly durable, heat-stable structural polymer. In fact, a 2015 study by Japanese researchers demonstrated that the chitinous cell walls of fungi can withstand temperatures upwards of 380°C (716°F) before they begin to structurally degrade.
This is a culinary superpower. It means that, unlike a piece of beef or a floret of broccoli, it is virtually impossible to truly “overcook” a mushroom from a textural standpoint. You can simmer them for five minutes or roast them for forty-five minutes, and their chitin walls will keep them tender and meaty rather than turning them into mush or leather. However, this tough cellular structure is also exactly why they turn watery when cooked improperly. The heat takes a long time to break down the sponge-like structure, meaning the internal water is released slowly, ruining your chances of a good sear.
The Original Sin: Why Fat First is a Recipe for Disaster
Let’s walk through the anatomy of a kitchen disaster. You place your skillet on the stove, heat up some oil, and toss in your sliced mushrooms.
Phase 1: The Sponge Effect. The mushrooms hit the pan, and those microscopic air pockets immediately absorb the oil. Your pan is now dry. The mushrooms are now heavily lubricated on the inside, but the outside is completely insulated from the conductive heat of the pan.
Phase 2: The Temperature Plummet. Because mushrooms are 92 percent water, dumping a mountain of them into your skillet immediately crashes the temperature of the metal. You are no longer searing; you are gently warming.
Phase 3: The Weeping. As the mushrooms slowly heat up, the chitinous cell walls eventually begin to contract just enough to start squeezing out their massive water reserves. Because the pan’s temperature has dropped, this water does not evaporate on contact. Instead, it pools in the bottom of the skillet.
Phase 4: The Gray Rubber Stage. Your mushrooms are now submerged in a simmering bath of their own extracted juices, mixed with the oil they previously absorbed and are now leaking back out. They are boiling. The Maillard reaction—the chemical reaction between amino acids and reducing sugars that gives browned food its distinctive, complex flavor—cannot occur in the presence of water. Water boils at 212°F (100°C), but the Maillard reaction requires temperatures north of 285°F (140°C). As long as there is liquid in that pan, your mushrooms will remain a sad, pale, gray color.
By the time the water finally boils off, the mushrooms have been simmering for ten minutes, their texture has turned to rubber, and they are coated in a greasy film. It is a culinary tragedy.
The Counterintuitive Miracle of Water
So, how do we fix this? We use science. We fight water with water.
If you want to bypass the greasy sponge phase and get straight to the browning phase, you need to start them in water. Popularized by the food science nerds over at America’s Test Kitchen, the “water sauté” method is the single greatest trick a home cook can learn for handling fungi.
Here is the physics behind the magic: When you put raw mushrooms in a skillet and add about a quarter cup of water, you are intentionally creating a high-heat steam environment. As the water comes to a rapid boil, that intense, enveloping heat penetrates the mushrooms incredibly fast.
This rapid heating does two crucial things. First, it causes the microscopic air pockets inside the mushrooms to immediately collapse. The sponge is effectively crushed. Second, it softens the chitin cell walls just enough to force the mushrooms to rapidly dump their own internal water content into the pan.
Because you started with water, the mushrooms physically cannot absorb any oil (because you haven’t added any yet!). The sponge is already full, and then it is collapsed. As the water in the pan boils vigorously, it evaporates. Once all the water—both the water you added and the water the mushrooms released—has completely boiled away, you are left with fully cooked, collapsed, dense mushrooms in a dry pan.
Now you add your fat.
Because the air pockets are gone and the mushrooms are dense and meaty, they will not absorb the oil. The fat stays exactly where it belongs: on the outside of the mushroom, in direct contact with the hot metal of the skillet. The temperature of the pan skyrockets past the 285°F threshold, the Maillard reaction kicks into high gear, and you achieve a deep, dark, gorgeous, crusty brown sear in a matter of minutes.
It is a foolproof formula. You never add oil first. You collapse the sponge, boil off the enemy, and then you sear.
A Brutally Honest Rant About Your Cookware
Before we get to the step-by-step masterclass, we need to have a very serious talk about the equipment you are using. I do not care how perfectly you execute the water-boil method; if you are trying to sear mushrooms in a scratched, warped, peeling, ten-dollar non-stick pan you bought at a big-box store five years ago, you are entirely wasting your time.
I have zero patience for toxic, disposable kitchen gear. If you are cooking on traditional Teflon (PTFE) that is flaking off into your food, you are essentially seasoning your dinner with forever chemicals. Beyond the health concerns, cheap non-stick pans are terrible at conducting and retaining heat. When the water evaporates and it is time for the mushrooms to sear, a thin aluminum non-stick pan will struggle to get hot enough to trigger a proper Maillard reaction without ruining the chemical coating.
And don’t get me started on the trendy “green” ceramic pans. They look beautiful on Instagram for exactly three weeks, and then the microscopic silicone layer wears off. Suddenly, your expensive ceramic pan lost its non-stick properties entirely, and everything you cook fuses to the surface like superglue.
If you are serious about cooking—and if you are reading a 3,000-word masterclass on mushrooms, I assume you are—you need to invest in real metal. You need heavy-duty stainless steel, cast iron, or my personal favorite for weeknight efficiency, carbon steel pans.
Carbon steel is the unsung hero of the restaurant industry. It is lighter than cast iron, heats up incredibly fast, and when properly seasoned, becomes completely non-stick without any toxic synthetic coatings. More importantly, real metal pans have the thermal mass required to hold onto high heat. When that water evaporates and you drop in your butter or oil, a carbon steel or stainless steel skillet will roar to life, giving you a vicious, aggressive sear that a non-stick pan simply cannot physically produce.
Stop buying pans that you have to throw in the garbage every two years. Commit to banishing toxic kitchen gear from your life. Buy one good, heavy metal skillet, learn how to use it, and it will outlive you. Rant over. Let’s cook.
The Masterclass: The Water-to-Oil Technique Step-by-Step
Alright, let’s put the science into practice. This technique works for almost any standard mushroom you can find at the grocery store: white buttons, creminis (baby bellas), shiitakes, oysters, and sliced portobellos.
Step 1: Prep and the “Washing” Myth
First, let’s debunk one of the most persistent, annoying myths in the culinary world: the idea that you should never wash mushrooms with water, and instead must painstakingly wipe each one with a damp paper towel or a special, pretentious little mushroom brush.
Listen to me carefully: you can wash your mushrooms. In fact, you should wash them. They grow in dirt and manure. The idea that a quick rinse under the faucet is going to “waterlog” a vegetable that is already 92 percent water is mathematically absurd. Yes, they will absorb a tiny fraction of a gram of water on their surface, but since our entire cooking method relies on boiling them in water anyway, it literally does not matter. Toss them in a colander, spray them down to remove the dirt, and pat them dry.
Slice your mushrooms uniformly. I prefer a hearty quarter-inch slice. If you slice them paper-thin, they will shrivel into nothingness.
Step 2: The Cold Water Start
Place your heavy skillet (remember, no cheap non-stick!) on the stove over medium-high heat. Add your sliced mushrooms. Do not add oil. Do not add butter.
Immediately pour in about 1/4 cup of water for every 8 to 10 ounces of mushrooms. You do not need to submerge them; you just need enough water to cover the bottom of the pan and create a vigorous steam engine.
Step 3: The Simmer and Collapse
As the pan heats up, the water will come to a boil. Toss the mushrooms occasionally. You will notice something incredible happening within the first two minutes. Instead of absorbing liquid, the mushrooms will begin to shrink and release their own liquid. The 1/4 cup of water you added might suddenly look like a 1/2 cup of water.
This is the chitin breaking down and the air pockets collapsing. The mushrooms are purging their internal moisture. Let them boil. Do not rush this process. This is the crucial step that guarantees they won’t be rubbery later.
Step 4: The Evaporation Point (Listen to Your Pan)
Cooking is a multi-sensory experience. You cannot just use your eyes; you have to use your ears. As the mushrooms boil, the sound coming from the pan will be a low, wet, rolling, bubbly rumble.
Keep the heat at medium-high. Eventually, the water will begin to disappear. The sound will change. That wet, rolling boil will suddenly transition into a sharp, aggressive, dry crackle. This is the auditory cue that the water has fully evaporated. The pan is now dry, and the mushrooms are fully collapsed.
Step 5: The Fat and the Sear
Now is the time to strike. The moment the water is gone and you hear that dry crackle, add your fat. I highly recommend a combination of a high-smoke-point oil (like avocado or grapeseed) and a knob of unsalted butter for flavor.
Toss the mushrooms to coat them in the fat. Because they are now dense and water-free, the fat will coat the exterior perfectly. Spread them out into a single, even layer in the pan.
And then—this is the hardest part for most home cooks—walk away. Stop touching them. Stop shaking the pan like you are on a televised cooking competition. The secret to a perfect sear is undisturbed, continuous contact with hot metal. Let them sit for two to three full minutes until a deep, mahogany crust forms on the bottom. Give them a toss, sear the other side for another minute, and marvel at the gorgeous color you have achieved.
Step 6: The Seasoning Trap
Notice how we haven’t mentioned salt yet? That is completely intentional.
Salt is a desiccant. It pulls moisture out of cellular structures through osmosis. If you salt your mushrooms while they are trying to sear, you will draw out whatever trace amounts of moisture are left inside them, cooling down the pan and ruining the crust you just worked so hard to build. Salting too early is a rookie mistake that will sabotage your Maillard reaction every single time.
Only add your kosher salt and freshly cracked black pepper at the very end, off the heat, right before serving.
Elevating the Sauté: Advanced Flavor Building
Once you have mastered the basic water-to-oil sear, you have unlocked the ultimate culinary blank canvas. Perfectly browned mushrooms are rich in glutamates, the amino acids responsible for umami (that deep, savory, meaty flavor profile). But we don’t just want good mushrooms; we want mind-blowing, clear-your-plate, fight-your-spouse-for-the-last-bite mushrooms.
Here is how you build a quick, weeknight-friendly pan sauce around your perfectly seared fungi:
The Aromatics:
Once your mushrooms have achieved that deep brown crust, turn the heat down to medium-low. Push the mushrooms to one side of the skillet. In the empty space, add a tiny splash of oil and toss in some finely minced shallots and garlic. Let them sweat for about 45 seconds until fragrant. Do not let the garlic burn, or your entire dish will taste like bitter pennies. Toss the aromatics together with the mushrooms.
The Acid and Deglazing:
As the mushrooms seared, they likely left behind a beautiful, sticky brown residue on the bottom of the pan. The French call this the fond, and it is pure, concentrated flavor. To lift it off the pan, you need a liquid, preferably one with some acidity to cut through the richness of the butter and umami.
Pour in a splash of dry white wine (like a Sauvignon Blanc or Pinot Grigio), a splash of dry sherry, or even just a tablespoon of balsamic vinegar mixed with a little water. As the liquid hits the hot pan, it will hiss and steam. Use a wooden spoon to scrape up all those browned bits from the bottom of the skillet, incorporating them into the liquid.
The Umami Boosters:
If you want to push the savory notes into the stratosphere, add a dash of soy sauce, a few drops of Worcestershire sauce, or a tiny spoonful of white miso paste right as the pan deglazes. These ingredients are also packed with glutamates and will amplify the natural meatiness of the mushrooms tenfold.
The Finish:
Let the liquid reduce until it is thick and syrupy, coating the mushrooms in a glossy glaze. Turn off the heat. Toss in a handful of finely chopped fresh herbs—thyme, parsley, and chives are the holy trinity for fungi. Give it a final taste, adjust your salt and pepper, and serve immediately.
The Weekend Project vs. The Weeknight Shortcut
As a busy professional, I live by the rule that time is money during the week. The beauty of the water-boil method is that it is actually faster and requires less babysitting than the traditional oil method.
When you start with oil, you have to constantly monitor the pan, adjust the heat, add more oil, and wait for the agonizingly slow release of moisture. When you start with water, you can literally dump the mushrooms and water in the pan, turn it on high, and walk away to chop your shallots or pour a glass of wine while the water boils off. The auditory cue of the sizzling pan will tell you exactly when you need to pay attention again. It is efficient, it is foolproof, and it frees up your mental bandwidth for the rest of your meal prep.
And for your elaborate weekend cooking projects? This method scales up perfectly. Whether you are searing portobellos for a vegetarian Wellington, preparing a massive batch of duxelles for a stuffed tenderloin, or building a complex mushroom ragù for homemade pappardelle, starting with water ensures that your foundational ingredient is deeply flavored, perfectly textured, and never, ever greasy.
Final Thoughts from the Sassy Sous-Chef
Cooking does not have to be intimidating, and you do not need a culinary degree to make restaurant-quality food in your own kitchen. What you do need is a basic understanding of the ingredients you are working with, a refusal to settle for toxic, subpar equipment, and the willingness to question outdated kitchen dogma.
The next time you bring home a carton of mushrooms, I want you to remember the science. Remember the chitin, remember the microscopic sponges, and remember that water is your best friend.
Throw them in a hot skillet, drown them in a splash of tap water, and let the physics of evaporation do the heavy lifting for you. Once you experience the deep, meaty, caramelized perfection of a properly water-seared mushroom, you will never look at a bottle of cooking oil the same way again. Now get out of here, go buy some heavy metal pans, and start cooking like you actually mean it.






