
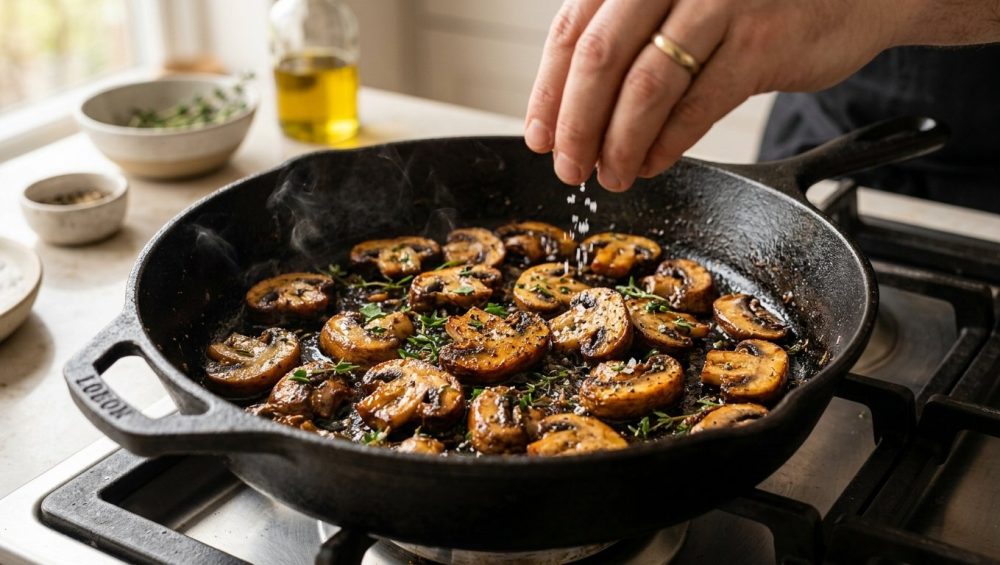
Cooking is not magic; it is applied physics and chemistry. We have all been there. You buy a beautiful, pristine punnet of cremini or button mushrooms. You have grand visions of a rustic, deeply caramelized, restaurant-quality side dish. You slice them up, toss them in a pan, give them a generous sprinkle of salt, and wait for the magic to happen.
But instead of a glorious sizzle, you hear a sad, wet hiss. Within two minutes, your pan is flooded with gray, murky liquid. Your beautiful fungi have shrunk down into depressing, rubbery little erasers. You try to cook off the water, but by the time the pan is dry, the mushrooms are chewy, tough, and completely devoid of that rich, meaty flavor you were craving.
It is a kitchen tragedy of epic proportions. But here is the brutal truth: it is not the mushrooms’ fault. It is yours. More specifically, it is your timing.
Welcome to the masterclass. I am here to tell you that you don’t need a culinary degree from Le Cordon Bleu to make mind-blowing food on a random Tuesday night. You just need to understand a tiny bit of high school chemistry and have a little bit of patience. Today, we are tearing down the biggest, most common mistake home cooks make with fungi: salting too early. We are going to dive deep into the cellular structure of mushrooms, the unforgiving laws of thermodynamics, and the absolute magic of the Maillard reaction. By the time we are done, you will never ruin a batch of mushrooms again.
The Anatomy of a Kitchen Sponge (Except It’s a Mushroom)
To understand why mushrooms behave the way they do in a hot skillet, we first need to understand what they actually are. Biologically speaking, fungi are closer to animals than they are to plants. They don’t photosynthesize. They don’t have cellulose in their cell walls. Instead, their cellular structure is built from a semi-crystalline matrix of chitin—the exact same tough, fibrous polymer that makes up the exoskeletons of crabs, lobsters, and beetles.
But here is the most crucial piece of data: a standard Agaricus bisporus (that’s your everyday white button, cremini, or portobello mushroom) is composed of roughly 90 to 92 percent water. Let that sink in. When you buy a pound of mushrooms, you are essentially buying a few ounces of chitin and flavor compounds holding together nearly a pint of water.
Because of this unique structure, mushrooms act like highly absorbent sponges. Their cellular walls are incredibly porous and sensitive to their environment. When they are exposed to heat, that chitin matrix begins to break down and contract, squeezing all of that intracellular water out like a wrung-out dish towel.
If you don’t manage that water release properly, you are doomed. The water will flood your pan, drop the temperature of your cooking surface, and completely halt any chance of browning. This is why understanding the moisture content of your ingredients is the first step to culinary enlightenment. You aren’t just cooking; you are managing a controlled dehydration process.
The Chemistry of Osmosis: Why Salt is a Moisture Magnet
Now, let’s talk about the real culprit behind your soggy mushroom woes: salt.
Salt (sodium chloride) is a magical ingredient. It is the great flavor amplifier. But it is also a relentless moisture magnet. This brings us to a fundamental biological principle called osmosis.
In simple terms, osmosis is the movement of water across a semi-permeable membrane from an area of low solute concentration to an area of high solute concentration. Nature absolutely despises an imbalance. When you sprinkle salt onto the surface of a raw mushroom, the concentration of salt on the outside of the mushroom is massively higher than the concentration on the inside.
The mushroom’s cell walls act as that semi-permeable membrane. In a frantic attempt to dilute the salt and restore equilibrium, the water inside the mushroom rushes out to the surface.
If you salt your mushrooms the second they hit the pan, you are aggressively forcing them to dump their 90% water payload directly into your hot oil. You are essentially turning your skillet into a shallow boiling pot. This is the hidden trap. You think you are seasoning your food, but chemically, you are just extracting water at the exact wrong moment. If you want to stop serving rubbery little erasers, you have to respect the power of osmosis.
The Maillard Reaction vs. The Sad Steam Bath
Why is this flood of water such a disaster? Because water is the ultimate enemy of the Maillard reaction.
The Maillard reaction is the complex chemical process where amino acids and reducing sugars react under heat to create hundreds of new, highly aromatic flavor compounds. It is the holy grail of cooking. It is what gives a seared steak its crust, what makes toasted bread taste better than raw bread, and what transforms a bland mushroom into a deeply savory, umami-packed delicacy.
But the Maillard reaction has a strict set of rules. It generally does not begin in earnest until the surface temperature of your food reaches at least 285°F (140°C).
Here is the problem: water cannot exceed 212°F (100°C) at sea level. Once water reaches its boiling point, it turns into steam. No matter how high you crank the burner on your stove, liquid water in an open pan will never get hotter than 212°F.
When you salt your mushrooms early and they dump their water into the pan, the temperature of your skillet instantly plummets to 212°F. Your mushrooms are now boiling in their own juices. The Maillard reaction is completely blocked.
Instead of searing, the chitin structure of the mushroom boils and toughens, resulting in that dreaded squeaky, chewy texture. To get back to the browning zone, you have to wait for every single drop of that water to evaporate. By the time the pan is finally dry enough to reach 285°F again, your mushrooms have been overcooked for ten minutes. They are shriveled, tough, and exhausted.
This is why timing is everything. You must allow the mushrooms to sear and brown before you introduce the osmotic pressure of salt.
The “No-Go” Rule on Toxic Gear
Before we get to the step-by-step technique, we need to have a serious talk about your equipment. Because all the scientific knowledge in the world won’t save you if you are cooking on garbage.
I have zero patience for pretentious chef-speak, but I have even less patience for cheap, toxic kitchenware. If you are trying to achieve a high-heat sear on a flimsy, scratched-up Teflon pan you bought at a discount store five years ago, you are setting yourself up for failure—and potentially poisoning your family.
When you are banishing toxic kitchen gear from your house, the first things to go must be those peeling non-stick skillets. Traditional PTFE (Teflon) coatings begin to degrade and release toxic fumes when heated past 500°F (260°C). To get a proper sear on a mushroom, you need a pan that can get screaming hot and hold onto that heat when cold ingredients are added. Flimsy aluminum non-stick pans have terrible thermal mass. The moment the mushrooms hit the pan, the temperature drops, and you are back to steaming. Furthermore, aerosol cooking sprays ruin pans by baking onto the surface and creating a sticky, polymerized mess that degrades the coating even faster.
Instead, you need real, durable metal. A high quality carbon steel skillet is my absolute favorite tool for this job. It heats up quickly, retains heat like a champion, and develops a natural, chemical-free non-stick patina over time. Cast iron is another fantastic option, though it takes longer to preheat. If you prefer stainless steel, that works beautifully too, provided you know how to use it. When dealing with stainless, always rely on the water drop test before adding food to ensure the pan is hot enough to prevent sticking. Mastering proper stainless steel temperature control is essential for achieving that gorgeous golden-brown crust without leaving half your food glued to the bottom of the skillet.
The Sassy Sous-Chef’s Masterclass: Searing Step-by-Step
Alright, enough theory. Let’s get down to business. Here is your foolproof, definitive guide to cooking the perfect mushroom. We are optimizing for time, flavor, and texture.
Step 1: The Prep (To Wash or Not to Wash?)
For decades, pretentious culinary gatekeepers have insisted that you must never, ever wash a mushroom under running water, claiming they will soak it up like a sponge. They told you to meticulously brush the dirt off each individual mushroom with a special little brush.
I don’t know about you, but on a Tuesday night after a long day at the office, I do not have the time or the sanity to give individual spa treatments to a box of fungi.
Science has completely debunked this myth. Yes, mushrooms are sponges, but they are already 90% water! They are fully saturated. Food scientists have weighed mushrooms before and after a quick rinse, and the amount of water they absorb is mathematically negligible (less than 2%). So go ahead, dump them in a colander, give them a quick, vigorous rinse under cold water to get the grit off, and just pat them thoroughly dry with a clean kitchen towel.
Step 2: The Cut
Don’t slice them too thin. Thin slices will cook too fast, release their water instantly, and shrivel into nothingness before they can brown. Cut them into thick, meaty slices, or better yet, quarter them. This preserves their structural integrity and gives you a substantial bite.
Step 3: The Heat and The Fat
Place your heavy-duty carbon steel or cast iron skillet over medium-high heat. Let it get genuinely hot. Add your fat. I prefer a high-smoke-point oil like avocado oil or clarified butter (ghee) for the searing phase. Regular butter has water and milk solids that will burn at the temperatures we need right now; save the butter for finishing.
Step 4: Crowd Control
This is critical. Do not overcrowd the pan. If you dump a mountain of mushrooms into the skillet, they will drop the pan’s temperature drastically. Furthermore, as they inevitably release some of their internal moisture, the mushrooms in the middle of the pile will be trapped in a steam bath. They need breathing room. You want a single, even layer with a little space between each piece. If you have to cook them in two batches, do it. It will actually save you time in the long run because they will brown properly instead of boiling indefinitely.
Step 5: The Waiting Game (Do Not Touch Them!)
Once the mushrooms hit the hot oil, spread them out into that single layer and then step away. Put your hands behind your back if you have to. Do not stir them. Do not toss them like you’re a television chef showing off for the cameras.
They need continuous, uninterrupted contact with the hot metal to trigger the Maillard reaction. Let them sit there for a solid 3 to 4 minutes. You will see some liquid release, but because the pan is hot and not overcrowded, it will evaporate quickly. Once you peek underneath and see a deep, golden-brown crust, give them a flip.
Step 6: The Grand Finale (Now You Salt)
Once the mushrooms are deeply browned on both sides, their cellular structure has collapsed, their moisture has been managed, and their flavor has been exponentially amplified. Now is the exact moment to strike.
Turn the heat down to medium-low. Sprinkle in your kosher salt. Toss in a knob of cold butter for richness, and maybe some minced garlic or fresh thyme. Just like adding minced garlic too early, timing is everything; adding aromatics at the end prevents them from scorching. Toss everything together. The salt will draw out the very last bit of moisture, combining with the melting butter to create a glossy, savory glaze that coats every single mushroom perfectly.
The Ultimate Hack: The “Boil First” Method
Now, because I promised you an incredibly comprehensive masterclass, I am going to share an advanced, slightly counterintuitive technique that completely flips the script. If you want to know how to fix watery sautéed vegetables, sometimes you have to fight water with water.
The brilliant food scientists at America’s Test Kitchen popularized a method that sounds absolutely insane but works flawlessly: the magic of starting them in water.
Here is the science behind it: As we established, mushrooms are full of water and trapped in a rigid chitin matrix. If you start them in a dry pan with oil, they act like little sponges, instantly soaking up all your expensive cooking oil, leaving the pan dry, and then eventually weeping their own water out later. This is exactly why you should never add oil first if you struggle with greasy, spongy results.
Instead, put your chopped mushrooms in a cold skillet and add about a quarter cup of water (just enough to cover the bottom of the pan). Turn the heat to high. Do not add salt yet!
As the water comes to a rapid boil, it acts as a highly efficient heat transfer medium. The boiling water rapidly heats the mushrooms, causing their cellular structure to collapse almost instantly. They shrink down, release their internal water into the pan, and cook all the way through in just a couple of minutes.
Because the structure has already collapsed, the mushrooms lose their sponge-like absorbency. Once all the water in the pan completely boils off and evaporates, you are left with perfectly cooked, dry mushrooms sitting in a hot pan.
Now you add your oil or butter. Because the mushrooms can no longer absorb the fat, the oil stays in the pan and fries the exterior of the mushrooms, creating a spectacular, crispy, golden-brown sear in record time. And, of course, you finish with salt at the very end. It is a brilliant, science-backed shortcut that guarantees perfect texture every single time.
Other Rookie Mushroom Mistakes to Avoid
We’ve covered the salt trap and the water hack, but let’s quickly troubleshoot a few other common kitchen crimes that might be ruining your dinner.
Using the Wrong Knife
Mushrooms are delicate, but they still require a sharp edge. If you use a dull knife, you aren’t slicing; you are crushing. Crushing damages the cell walls prematurely and leads to an uneven cook. Keep your blades sharp.
Drowning Them in Butter Too Early
We touched on this, but it bears repeating. Butter is roughly 15 to 20 percent water, and its milk solids burn at a relatively low temperature (around 350°F / 175°C). If you try to sear mushrooms in butter from the beginning, you are adding unnecessary water to the pan and risking burnt, bitter flavors. Sear in a high-smoke-point neutral oil or clarified butter, and use whole butter purely as a finishing glaze off the heat.
Buying Pre-Sliced Mushrooms
I know I said I am an advocate for time-saving weekday hacks, but pre-sliced mushrooms are a false economy. They oxidize faster, dry out in the fridge, and lose their delicate flavor compounds. Buying whole mushrooms and slicing them yourself takes exactly sixty seconds and results in a vastly superior texture.
Storing Them in Plastic
If you bring your mushrooms home and leave them wrapped tightly in plastic wrap, they will suffocate. The moisture they naturally release will get trapped in the plastic, turning them into a slimy, moldy mess within days. Store them in a brown paper bag in the fridge. The paper absorbs excess moisture while allowing the fungi to breathe.
Conclusion
Your mushrooms were never the problem. The problem was an innocent misunderstanding of osmosis and the Maillard reaction. By simply withholding your salt until the very end of the cooking process, you take control of the moisture in your pan. You allow the heat to do its job, you build complex, savory flavors, and you preserve a meaty, satisfying texture.
Whether you choose the traditional high-heat sear in a carbon steel pan or the genius water-boil method, the golden rule remains the same: patience first, salt last. You don’t need a fancy culinary degree to cook like a pro. You just need to stop sabotaging your own skillet. Now get back in the kitchen, toss out that peeling non-stick pan, and go make some mind-blowing food. You’ve got this.






